Page 83 of 300
WARNING
∙ Your brake system may not be work-ing properly if the warning light is on.
Driving could be dangerous. If you
judge it to be safe, drive carefully to
the nearest service station for repairs.
Otherwise, have your vehicle towed
because driving it could be
dangerous.
∙ Pressing the brake pedal with the en- gine stopped and/or a low brake fluid
level may increase your stopping dis-
tance and braking will require greater
pedal effort as well as pedal travel.
∙ If the brake fluid level is below the MINIMUM or MIN mark on the brake
fluid reservoir, do not drive until the
brake system has been checked. It is
recommended that you visit a NISSAN
dealer for this service.
Page 137 of 300
NOTE:
Do not adjust any of the display settings
of the RearView Monitor while the ve-
hicle is moving. Make sure the parking
brake is firmly applied.
HOW TO TURN ON AND OFF
PREDICTED COURSE LINES (if so
equipped)
To toggle ON and OFF the predicted course
lines while in the P (Park) position:1. Touch the “Settings” key.
2. Touch the “Camera” key.
3. Touch the “Predicted Course Lines” key to turn the feature ON or OFF.
REARVIEW MONITOR SYSTEM
LIMITATIONS
Page 160 of 300

∙ Make sure the area around the vehicle isclear.
∙ Check fluid levels such as engine oil, coolant, brake fluid, and windshield-
washer fluid as frequently as possible,
or at least whenever you refuel.
∙ Check that all windows and lights are clean.
∙ Visually inspect tires for their appear- ance and condition. Also check tires for
proper inflation.
∙ Check that all doors are closed.
∙ Position seat and adjust head restraints/headrests.
∙ Adjust inside and outside mirrors.
∙ Fasten seat belts and ask all passen- gers to do likewise.
∙ Check the operation of warning lights when the ignition switch is placed in the
ON position. For additional information,
refer to “Warning lights, indicator lights
and audible reminders” in the “Instru-
ments and controls” section of this
manual. 1. Apply the parking brake.
2. Move the shif t lever to P (Park) or N
(Neutral). P (Park) is recommended.
The shif t lever cannot be moved out
of P (Park) and into any of the other
gear positions if the ignition switch
is turned to the OFF position or if the
key is removed from the ignition
switch.
The starter is designed not to oper-
ate if the shif t lever is in any of the
driving positions.
3. Crank the engine with your foot off
the accelerator pedal by placing the
ignition switch in the START position.
Release the key when the engine
starts. If the engine starts, but fails to
run, repeat the above procedure.
∙ If the engine is very hard to start in extremely cold weather or when re-
starting, depress the accelerator
pedal a little (approximately 1/3 to the
floor) and hold it and then crank the
engine. Release the key and the ac-
celerator pedal when the engine
starts.
∙ If the engine is very hard to start be- cause it is flooded, depress the accel- erator pedal all the way to the floor
and hold it. Crank the engine for
5–6 seconds. Af ter cranking the en-
gine, release the accelerator pedal.
Crank the engine
with your foot off
the accelerator pedal by turning the
ignition key to the START position. Re-
lease the key when the engine starts.
If the engine starts, but fails to run,
repeat the above procedure.
Page 164 of 300
Shif ting
Af ter starting the engine, fully depress the
brake pedal and move the shif t lever from P
(Park) to any of the desired shif t positions.
Page 169 of 300

To reset at a faster cruising speed,use
one of the following three methods:
∙ Depress the accelerator pedal. When the vehicle attains the desired speed,
push and release the COAST/SET
switch.
∙ Push and hold the ACCEL/RES switch. When the vehicle attains the speed you
desire, release the switch.
∙ Push and release the ACCEL/RES switch. Each time you do this, the set
speed increases by about 1 mph
(1.6 km/h).
To reset at a slower cruising speed, use
one of the following three methods:
∙ Lightly tap the brake pedal. When the vehicle attains the desired speed, push
the COAST/SET switch and release it.
∙ Push and hold the COAST/SET switch. Release the switch when the vehicle
slows to the desired speed.
∙ Push and release the COAST/SET switch. Each time you do this, the set
speed decreases by about 1 mph
(1.6 km/h). To resume the preset speed,
push and
release the ACCEL/RES switch. The vehicle
returns to the last set cruising speed when
the vehicle speed is over 30 mph (48 km/h).
Page 172 of 300

WARNING
∙ Do not stop or park the vehicle overflammable materials such as dry
grass, waste paper or rags. They may
ignite and cause a fire. ∙ Safe parking procedures require that
both the parking brake be set and the
transmission placed into P (Park). Fail-
ure to do so could cause the vehicle to
move unexpectedly or roll away and
result in an accident. Make sure the
shif t lever has been pushed as far for-
ward as it can go and cannot be
moved without depressing the foot
brake pedal.
∙ Never leave the engine running while the vehicle is unattended. ∙ Do not leave children unattended in-
side the vehicle. They could unknow-
ingly activate switches or controls or
make the vehicle move. Unattended
children could become involved in se-
rious accidents.
∙ To help avoid risk of injury or death through unintended operation of the
vehicle and/or its systems, do not
leave children, people who require the
assistance of others or pets unat-
tended in your vehicle. Additionally,
the temperature inside a closed ve-
hicle on a warm day can quickly be-
come high enough to cause a signifi-
cant risk of injury or death to people
and pets.
1. Firmly apply the parking brake.
2. Move the shif t lever to the P (Park) po- sition.
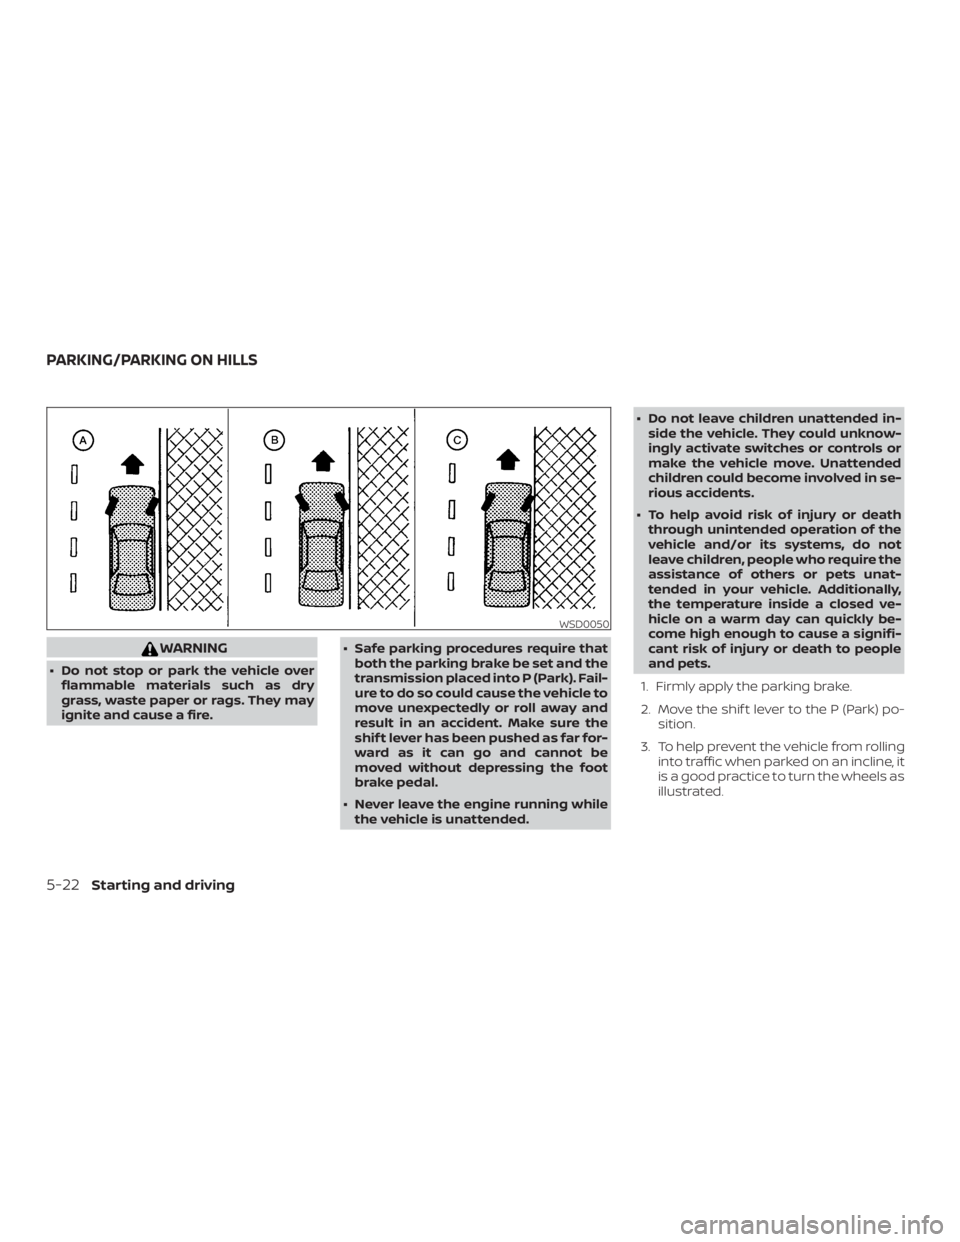
3. To help prevent the vehicle from rolling into traffic when parked on an incline, it
is a good practice to turn the wheels as
illustrated.
Page 174 of 300
The brake system has two separate hy-
draulic circuits. If one circuit malfunctions,
you will still have braking at two wheels.
BRAKE PRECAUTIONS
Vacuum assisted brakes
The brake booster aids braking by using
engine vacuum. If the engine stops, you
can stop the vehicle by depressing the
brake pedal. However, greater foot pres-
sure on the brake pedal will be required to
stop the vehicle and stopping distance will
be longer.
Using the brakes
Avoid resting your foot on the brake pedal
while driving. This will overheat the brakes,
wear out the brake pads faster, and reduce
gas mileage.
To help reduce brake wear and to prevent
the brakes from overheating, reduce speed
and downshif t to a lower gear before going
down a slope or long grade. Overheated
brakes may reduce braking performance
and could result in loss of vehicle control.
Page 175 of 300

– When installing a spare tire, makesure that it is the proper size and
type as specified on the Tire and
Loading Information label. For ad-
ditional information, refer to “Tire
and Loading Information label” in
the “Technical and consumer infor-
mation” section of this manual.
– For additional information, refer to “Wheels and tires” in the “Do-it-
yourself ” section of this manual.
The ABS controls the brakes so the wheels
do not lock during hard braking or when
braking on slippery surfaces. The system
detects the rotation speed at each wheel
and varies the brake fluid pressure to pre-
vent each wheel from locking and sliding.
By preventing each wheel from locking, the
system helps the driver maintain steering
control and helps to minimize swerving
and spinning on slippery surfaces.
Using the system
Depress the brake pedal and hold it down.
Depress the brake pedal with firm steady
pressure, but do not pump the brakes. The
Anti-lock Braking System will operate to
prevent the wheels from locking up. Steer
the vehicle to avoid obstacles.