Page 151 of 518
LED DAYTIME RUNNING LIGHTS
(DRL) SYSTEM
The LED portion of the headlights auto-
matically illuminate at 100% intensity when
the engine is started with the parking
brake released. The LED DRL operate with
the headlight switch in the OFF position or
in the
position. Turn the headlight
switch to theposition for full illumina-
tion when driving at night.
If the parking brake is applied before the
engine is started, the LED DRL do not illumi-
nate. The LED DRL illuminate when the
parking brake is released. The LED DRL will
remain on until the ignition switch is placed
in the OFF position.
WARNING
When the LED DRL system is active, tail
lights on your vehicle are not on. It is
necessary at dusk to turn on your
headlights. Failure to do so could cause
an accident injuring yourself and oth-
ers.
INSTRUMENT BRIGHTNESS
CONTROL
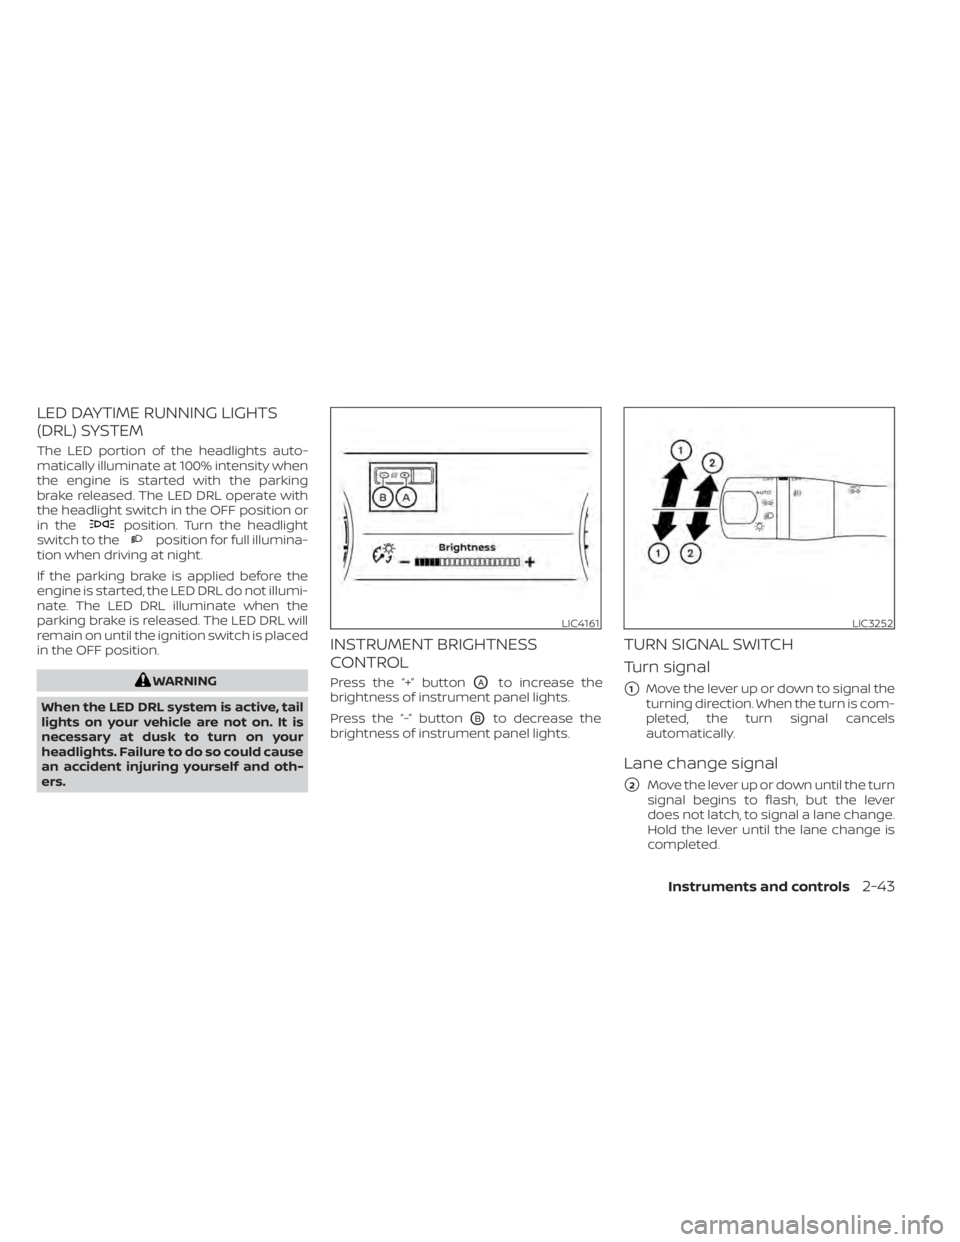
Press the “+” buttonOAto increase the
brightness of instrument panel lights.
Press the “-” button
OBto decrease the
brightness of instrument panel lights.
TURN SIGNAL SWITCH
Turn signal
�1Move the lever up or down to signal the
turning direction. When the turn is com-
pleted, the turn signal cancels
automatically.
Lane change signal
�2Move the lever up or down until the turn
signal begins to flash, but the lever
does not latch, to signal a lane change.
Hold the lever until the lane change is
completed.
LIC4161LIC3252
Instruments and controls2-43
Page 152 of 518
Move the lever up or down until the turn
signal begins to flash, but the lever does
not latch, and release the lever. The turn
signal will automatically flash three times.
Choose the appropriate method to signal
a lane change based on road and traffic
conditions.
NOTE:
The 3 Flash Pass feature may be dis-
abled. For additional information, refer
to “How to use the vehicle information
display ” in this section.
FOG LIGHT SWITCH (if so
equipped)
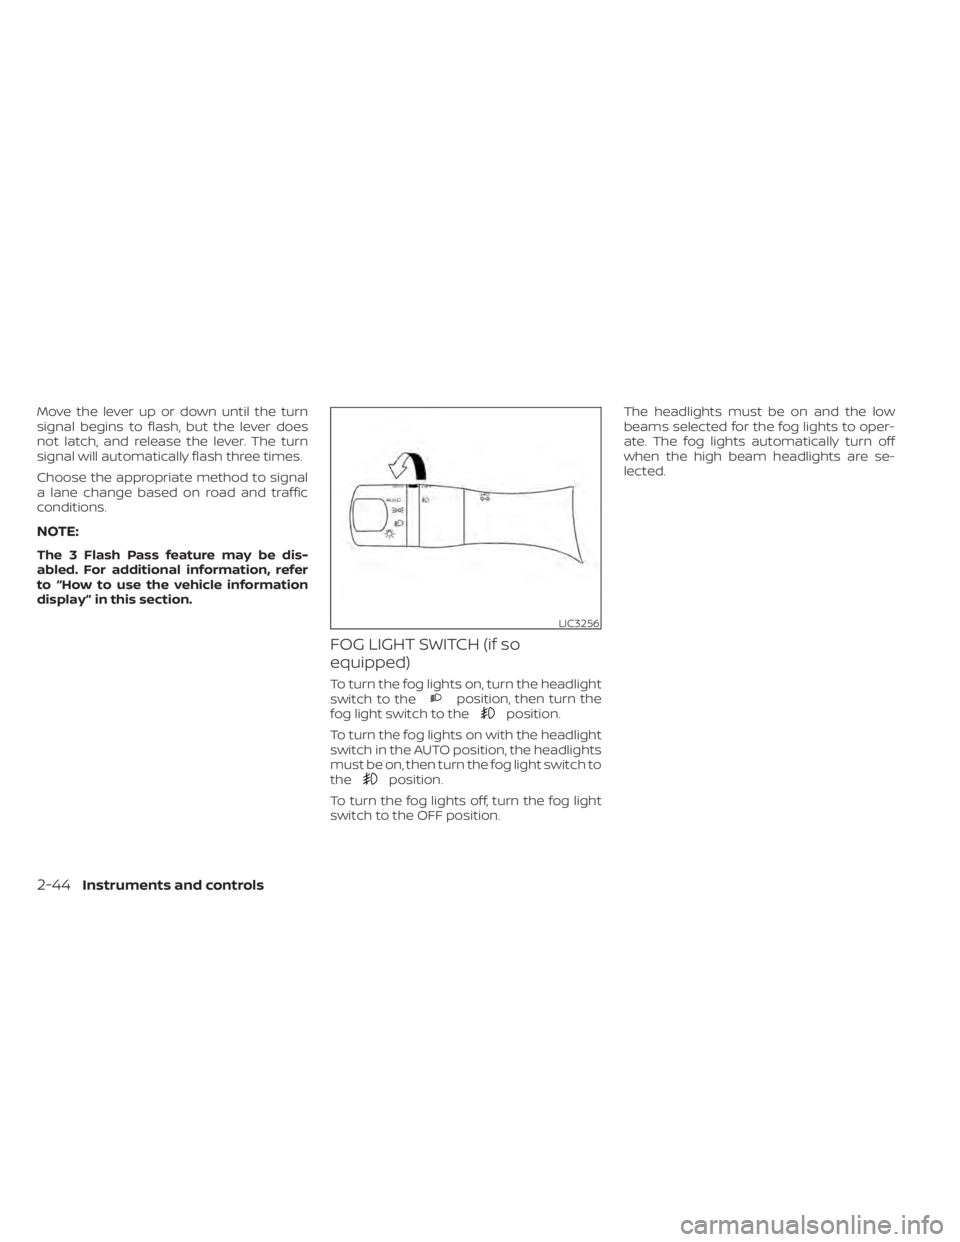
To turn the fog lights on, turn the headlight
switch to theposition, then turn the
fog light switch to theposition.
To turn the fog lights on with the headlight
switch in the AUTO position, the headlights
must be on, then turn the fog light switch to
the
position.
To turn the fog lights off, turn the fog light
switch to the OFF position. The headlights must be on and the low
beams selected for the fog lights to oper-
ate. The fog lights automatically turn off
when the high beam headlights are se-
lected.
LIC3256
2-44Instruments and controls
Page 161 of 518

CAUTION
• The outlet and plug may be hot dur-
ing or immediately af ter use.
• Only certain power outlets are de-
signed for use with a cigarette lighter
unit. Do not use any other power out-
let for an accessory lighter. It is rec-
ommended that you visit a NISSAN
dealer for additional information.
• Do not use with accessories that ex-
ceed a 12 volt, 120W (10A) power draw. •
Do not use double adapters or more
than one electrical accessory.
• Use power outlets with the engine
running to avoid discharging the ve-
hicle battery.
• Avoid using power outlets when the
air conditioner, headlights or rear
window defroster is on.
• Before inserting or disconnecting a
plug, be sure the electrical accessory
being used is turned off.
• Push the plug in as far as it will go. If
good contact is not made, the plug
may overheat or the internal tem-
perature fuse may open.
• When not in use, be sure to close the
cap. Do not allow water or any other
liquid to contact the outlet.
LIC3705
Center Console
LIC3199
Cargo Area
Instruments and controls2-53
Page 175 of 518
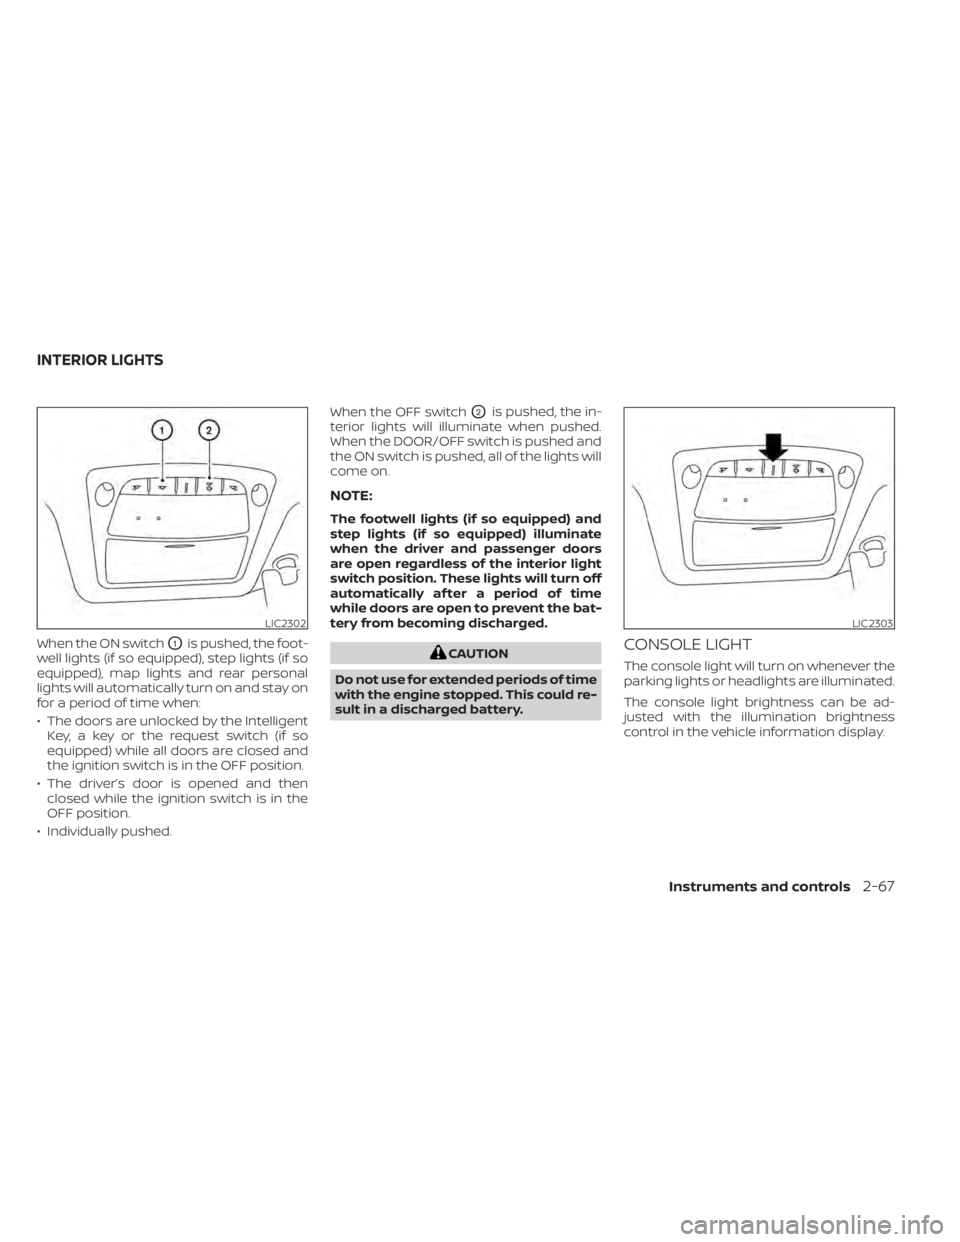
When the ON switchO1is pushed, the foot-
well lights (if so equipped), step lights (if so
equipped), map lights and rear personal
lights will automatically turn on and stay on
for a period of time when:
• The doors are unlocked by the Intelligent Key, a key or the request switch (if so
equipped) while all doors are closed and
the ignition switch is in the OFF position.
• The driver’s door is opened and then closed while the ignition switch is in the
OFF position.
• Individually pushed. When the OFF switch
O2is pushed, the in-
terior lights will illuminate when pushed.
When the DOOR/OFF switch is pushed and
the ON switch is pushed, all of the lights will
come on.
NOTE:
The footwell lights (if so equipped) and
step lights (if so equipped) illuminate
when the driver and passenger doors
are open regardless of the interior light
switch position. These lights will turn off
automatically af ter a period of time
while doors are open to prevent the bat-
tery from becoming discharged.
CAUTION
Do not use for extended periods of time
with the engine stopped. This could re-
sult in a discharged battery.CONSOLE LIGHT
The console light will turn on whenever the
parking lights or headlights are illuminated.
The console light brightness can be ad-
justed with the illumination brightness
control in the vehicle information display.
LIC2302LIC2303
INTERIOR LIGHTS
Instruments and controls2-67
Page 176 of 518
MAP LIGHTS
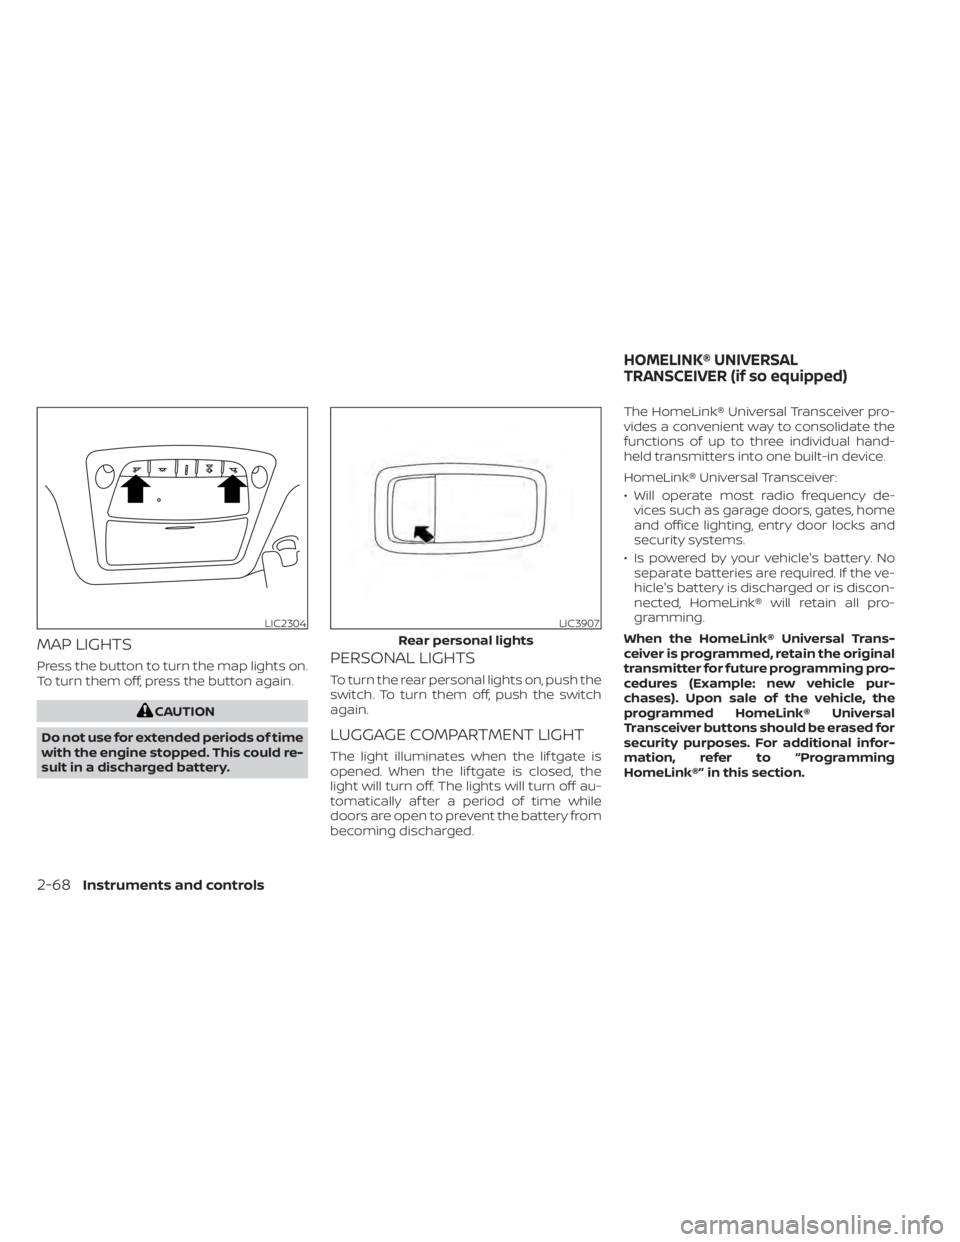
Press the button to turn the map lights on.
To turn them off, press the button again.
CAUTION
Do not use for extended periods of time
with the engine stopped. This could re-
sult in a discharged battery.
PERSONAL LIGHTS
To turn the rear personal lights on, push the
switch. To turn them off, push the switch
again.
LUGGAGE COMPARTMENT LIGHT
The light illuminates when the lif tgate is
opened. When the lif tgate is closed, the
light will turn off. The lights will turn off au-
tomatically af ter a period of time while
doors are open to prevent the battery from
becoming discharged. The HomeLink® Universal Transceiver pro-
vides a convenient way to consolidate the
functions of up to three individual hand-
held transmitters into one built-in device.
HomeLink® Universal Transceiver:
• Will operate most radio frequency de-
vices such as garage doors, gates, home
and office lighting, entry door locks and
security systems.
• Is powered by your vehicle's battery. No separate batteries are required. If the ve-
hicle's battery is discharged or is discon-
nected, HomeLink® will retain all pro-
gramming.
When the HomeLink® Universal Trans-
ceiver is programmed, retain the original
transmitter for future programming pro-
cedures (Example: new vehicle pur-
chases). Upon sale of the vehicle, the
programmed HomeLink® Universal
Transceiver buttons should be erased for
security purposes. For additional infor-
mation, refer to “Programming
HomeLink®” in this section.
LIC2304LIC3907
Rear personal lights
HOMELINK® UNIVERSAL
TRANSCEIVER (if so equipped)
2-68Instruments and controls
Page 192 of 518
NISSAN INTELLIGENT KEY®
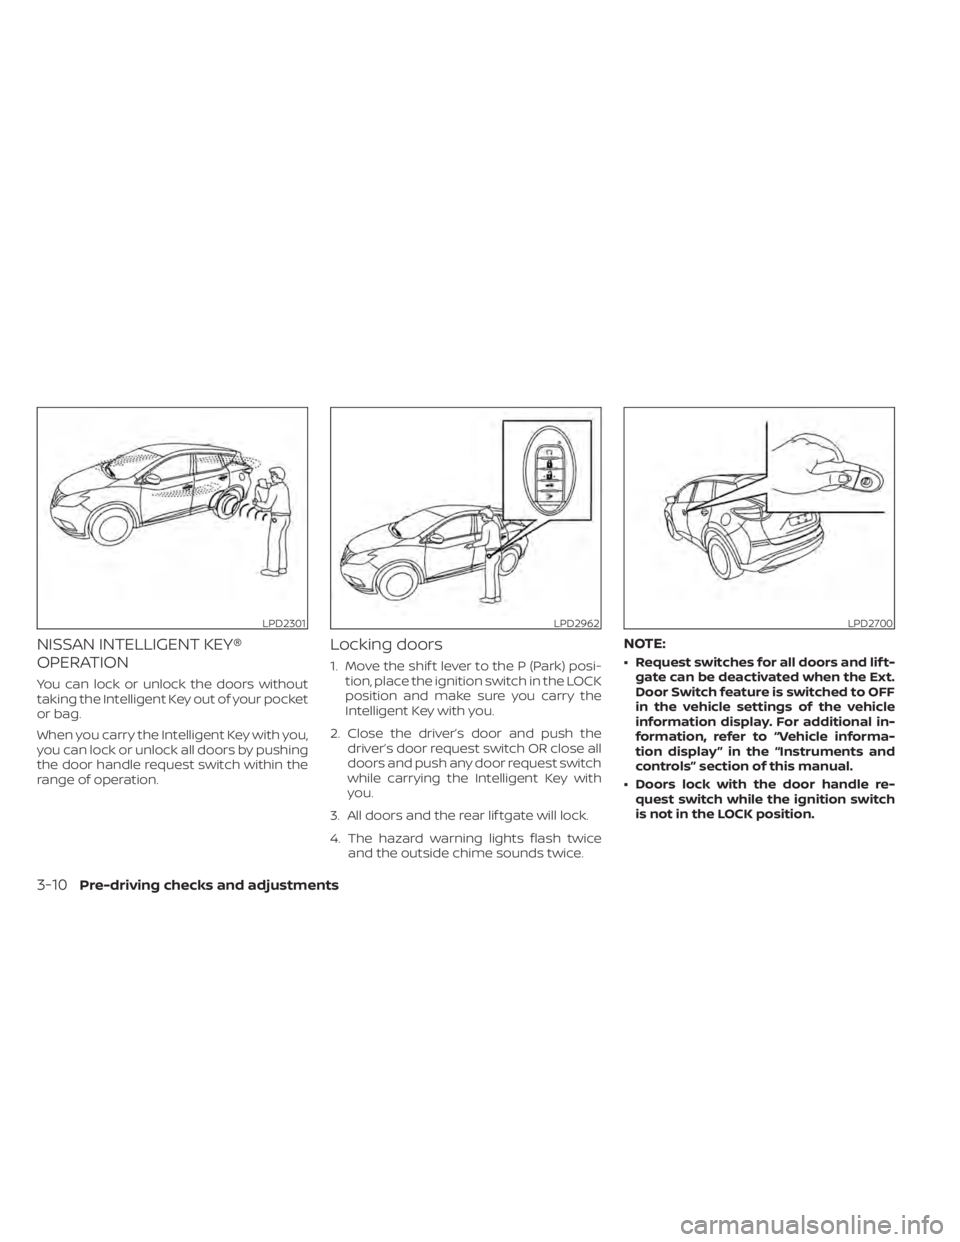
OPERATION
You can lock or unlock the doors without
taking the Intelligent Key out of your pocket
or bag.
When you carry the Intelligent Key with you,
you can lock or unlock all doors by pushing
the door handle request switch within the
range of operation.
Locking doors
1. Move the shif t lever to the P (Park) posi-tion, place the ignition switch in the LOCK
position and make sure you carry the
Intelligent Key with you.
2. Close the driver’s door and push the driver’s door request switch OR close all
doors and push any door request switch
while carrying the Intelligent Key with
you.
3. All doors and the rear lif tgate will lock.
4. The hazard warning lights flash twice and the outside chime sounds twice.
NOTE:
• Request switches for all doors and lif t-gate can be deactivated when the Ext.
Door Switch feature is switched to OFF
in the vehicle settings of the vehicle
information display. For additional in-
formation, refer to “Vehicle informa-
tion display ” in the “Instruments and
controls” section of this manual.
• Doors lock with the door handle re- quest switch while the ignition switch
is not in the LOCK position.
LPD2301LPD2962LPD2700
3-10Pre-driving checks and adjustments
Page 194 of 518
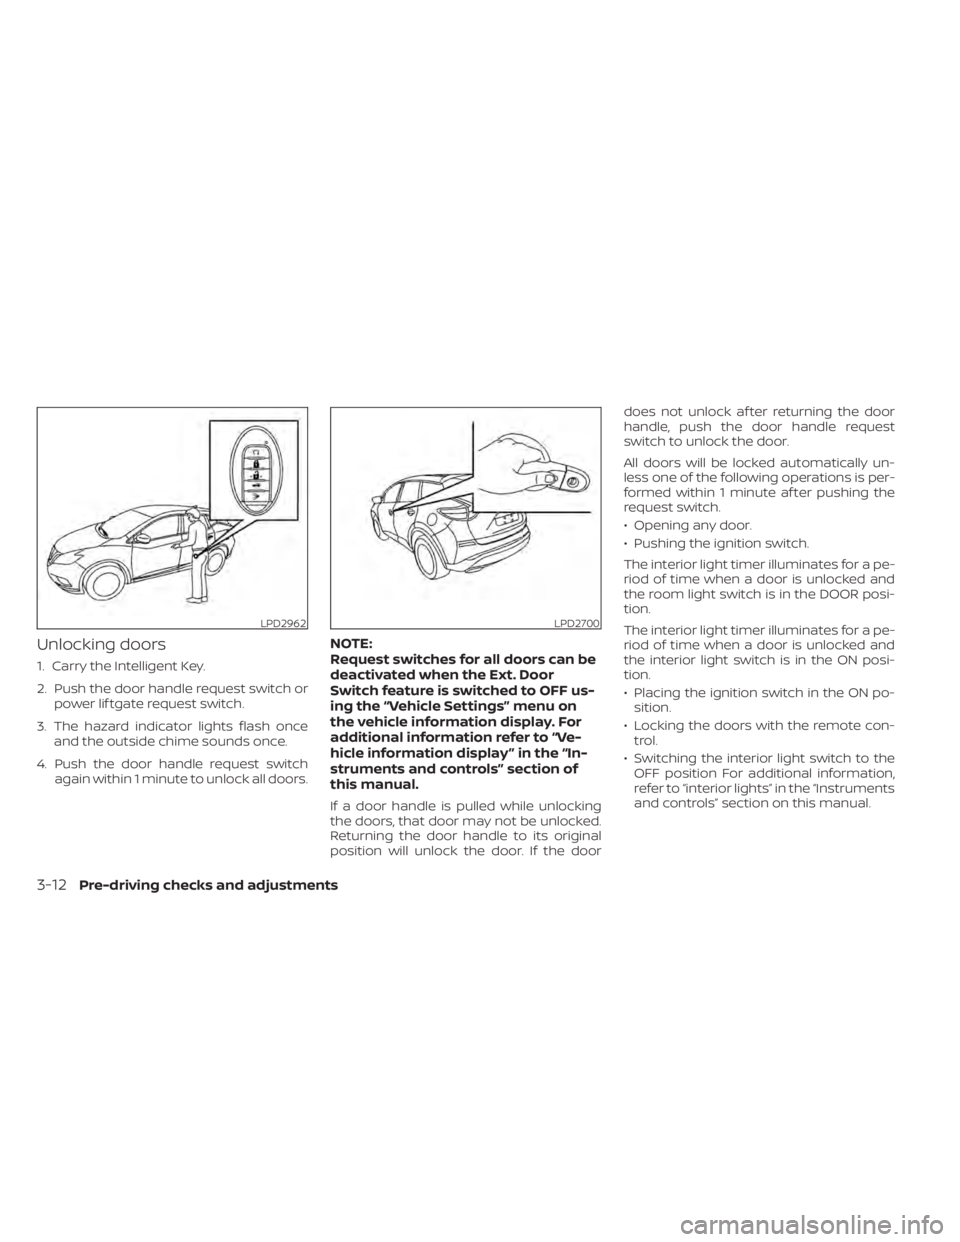
Unlocking doors
1. Carry the Intelligent Key.
2. Push the door handle request switch orpower lif tgate request switch.
3. The hazard indicator lights flash once and the outside chime sounds once.
4. Push the door handle request switch again within 1 minute to unlock all doors.
NOTE:
Request switches for all doors can be
deactivated when the Ext. Door
Switch feature is switched to OFF us-
ing the “Vehicle Settings” menu on
the vehicle information display. For
additional information refer to “Ve-
hicle information display ” in the “In-
struments and controls” section of
this manual.
If a door handle is pulled while unlocking
the doors, that door may not be unlocked.
Returning the door handle to its original
position will unlock the door. If the door does not unlock af ter returning the door
handle, push the door handle request
switch to unlock the door.
All doors will be locked automatically un-
less one of the following operations is per-
formed within 1 minute af ter pushing the
request switch.
• Opening any door.
• Pushing the ignition switch.
The interior light timer illuminates for a pe-
riod of time when a door is unlocked and
the room light switch is in the DOOR posi-
tion.
The interior light timer illuminates for a pe-
riod of time when a door is unlocked and
the interior light switch is in the ON posi-
tion.
• Placing the ignition switch in the ON po-
sition.
• Locking the doors with the remote con- trol.
• Switching the interior light switch to the OFF position For additional information,
refer to “interior lights” in the “Instruments
and controls” section on this manual.
LPD2962LPD2700
3-12Pre-driving checks and adjustments
Page 196 of 518
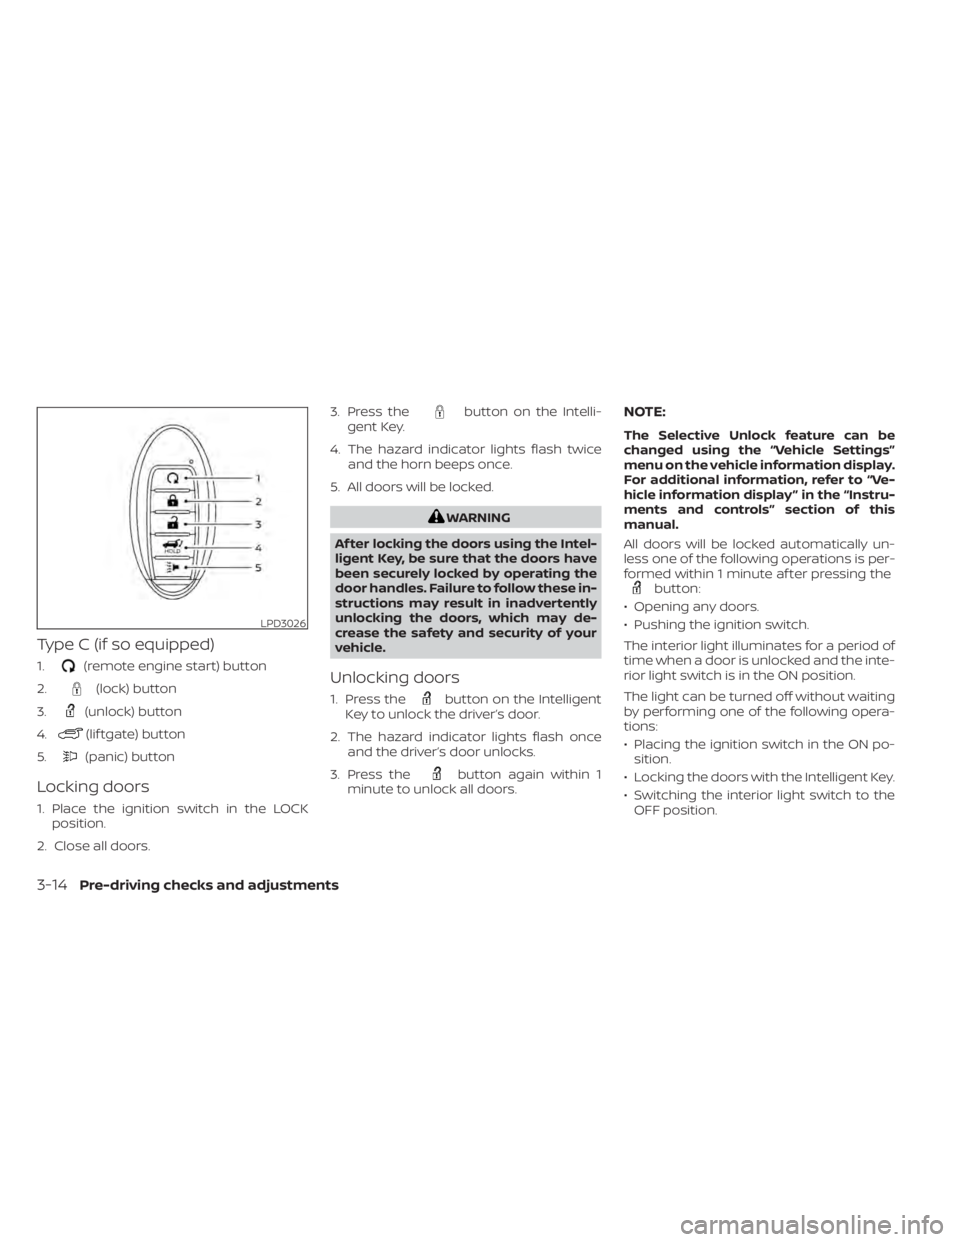
Type C (if so equipped)
1.(remote engine start) button
2.
(lock) button
3.
(unlock) button
4.
(lif tgate) button
5.
(panic) button
Locking doors
1. Place the ignition switch in the LOCK position.
2. Close all doors. 3. Press the
button on the Intelli-
gent Key.
4. The hazard indicator lights flash twice and the horn beeps once.
5. All doors will be locked.
WARNING
Af ter locking the doors using the Intel-
ligent Key, be sure that the doors have
been securely locked by operating the
door handles. Failure to follow these in-
structions may result in inadvertently
unlocking the doors, which may de-
crease the safety and security of your
vehicle.
Unlocking doors
1. Press thebutton on the Intelligent
Key to unlock the driver’s door.
2. The hazard indicator lights flash once and the driver’s door unlocks.
3. Press the
button again within 1
minute to unlock all doors.
NOTE:
The Selective Unlock feature can be
changed using the “Vehicle Settings”
menu on the vehicle information display.
For additional information, refer to “Ve-
hicle information display ” in the “Instru-
ments and controls” section of this
manual.
All doors will be locked automatically un-
less one of the following operations is per-
formed within 1 minute af ter pressing the
button:
• Opening any doors.
• Pushing the ignition switch.
The interior light illuminates for a period of
time when a door is unlocked and the inte-
rior light switch is in the ON position.
The light can be turned off without waiting
by performing one of the following opera-
tions:
• Placing the ignition switch in the ON po- sition.
• Locking the doors with the Intelligent Key.
• Switching the interior light switch to the OFF position.
LPD3026
3-14Pre-driving checks and adjustments