Page 80 of 346
WARNING
Do not use a rear-facing child restraint
on a seat protected by an air bag in
front of it. If the air bag deploys, it may
cause serious injury or death.
SUPPLEMENTAL AIR BAG WARNING
LIGHT
The supplemental air bag warning light,
displaying
Page 86 of 346
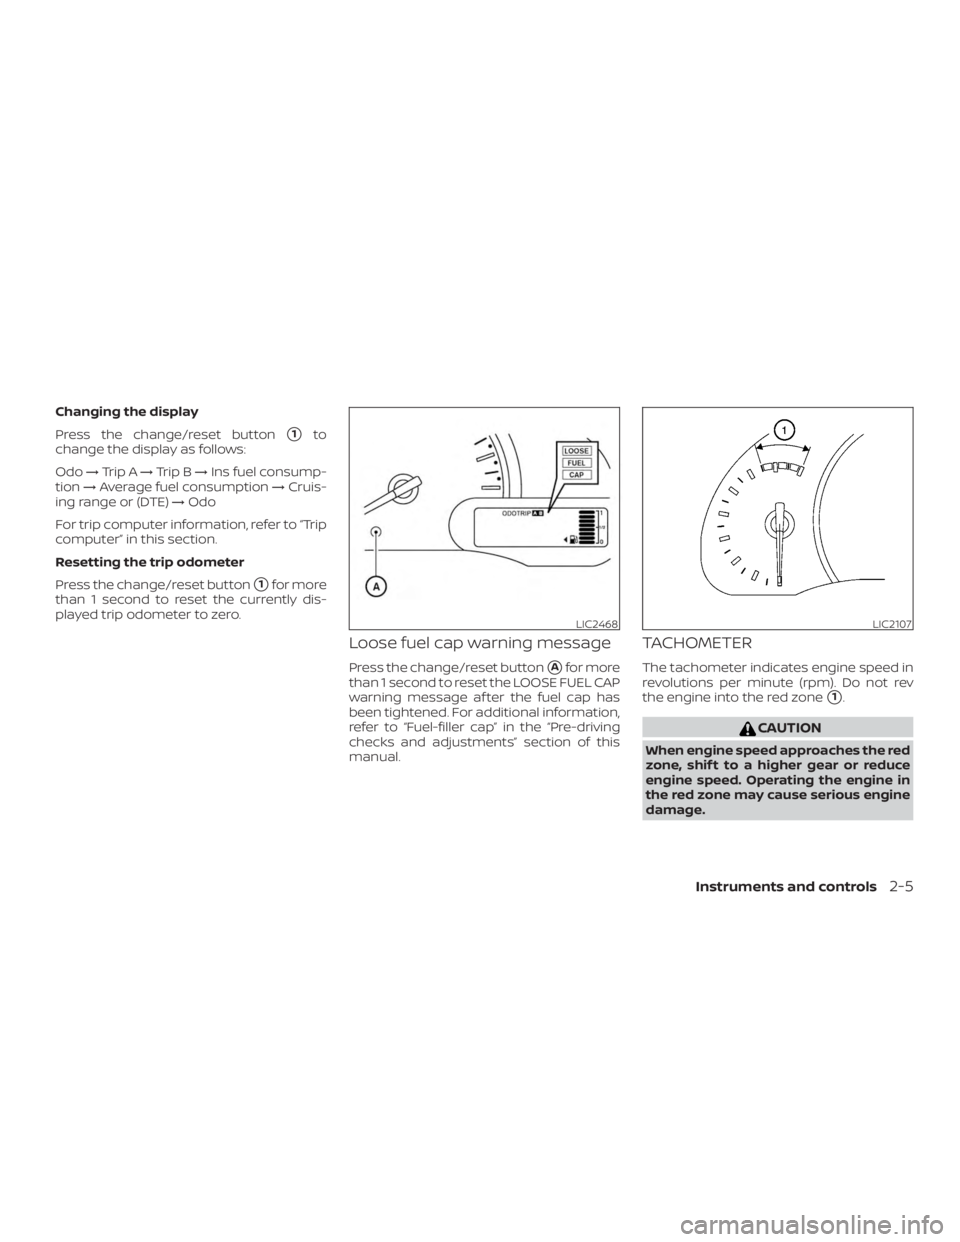
Changing the display
Press the change/reset button
�1to
change the display as follows:
Odo →Trip A →Trip B →Ins fuel consump-
tion →Average fuel consumption →Cruis-
ing range or (DTE) →Odo
For trip computer information, refer to “Trip
computer” in this section.
Resetting the trip odometer
Press the change/reset button
�1for more
than 1 second to reset the currently dis-
played trip odometer to zero.
Loose fuel cap warning message
Press the change/reset button�Afor more
than 1 second to reset the LOOSE FUEL CAP
warning message af ter the fuel cap has
been tightened. For additional information,
refer to “Fuel-filler cap” in the “Pre-driving
checks and adjustments” section of this
manual.
TACHOMETER
The tachometer indicates engine speed in
revolutions per minute (rpm). Do not rev
the engine into the red zone
�1.
Page 124 of 346
LOOSE FUEL CAP warning
message
The LOOSE FUEL CAP warning message
displays in the odometer when the fuel-
filler cap is not tightened correctly af ter the
vehicle has been refueled. It may take a few
driving trips for the message to be dis-
played. To turn off the warning message,
do the following:1. Remove and install the fuel-filler cap as previously described as soon as pos-
sible.
2. Tighten the fuel-filler cap until a single click is heard. 3. Press the loose fuel cap warning reset
button
�Ain the meter for about 1 sec-
ond to turn off the LOOSE FUEL CAP
warning message af ter tightening the
fuel-filler cap.
TILT OPERATION
Pull the lock lever down�1and adjust the
steering wheel up or down
�2to the de-
sired position.
Push the lock lever up
�1to lock the steer-
ing wheel in place.
Page 137 of 346
WARNING
∙ Failure to follow the warnings and in-structions for proper use of the Rear-
View Monitor system could result in
serious injury or death.
∙ RearView Monitor is a convenience feature and is not a substitute for
proper backing. Always turn and look
out the windows and check mirrors to
be sure that it is safe to move before
operating the vehicle. Always back up
slowly.
∙ The system is designed as an aid to the driver in showing large stationary
objects directly behind the vehicle, to
help avoid damaging the vehicle.
∙ The distance guide line and the ve- hicle width line should be used as a
reference only when the vehicle is on a
level paved surface. The distance
viewed on the monitor is for reference
only and may be different than the
actual distance between the vehicle
and displayed objects.
Page 140 of 346
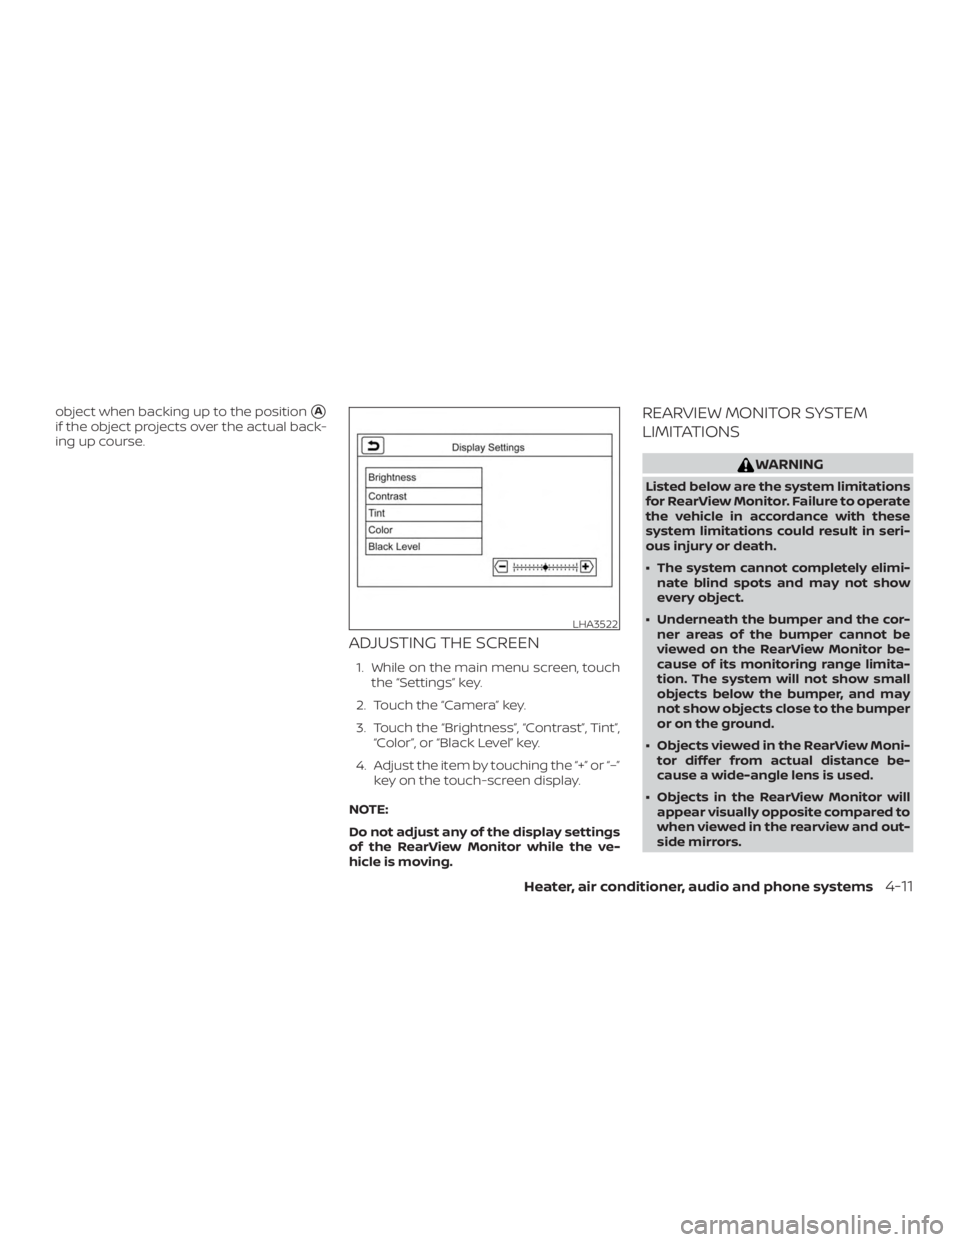
object when backing up to the position�A
if the object projects over the actual back-
ing up course.
ADJUSTING THE SCREEN
1. While on the main menu screen, touchthe “Settings” key.
2. Touch the “Camera” key.
3. Touch the “Brightness”, “Contrast”, Tint”, “Color”, or “Black Level” key.
4. Adjust the item by touching the “+” or “–” key on the touch-screen display.
NOTE:
Do not adjust any of the display settings
of the RearView Monitor while the ve-
hicle is moving.
REARVIEW MONITOR SYSTEM
LIMITATIONS
Page 141 of 346

∙ Use the displayed lines as a reference.The lines are highly affected by the
number of occupants, fuel level, ve-
hicle position, road conditions and
road grade.
∙ Make sure that the rear hatch is se- curely closed when backing up.
∙ Do not put anything on the rearview camera. The rearview camera is in-
stalled above the license plate.
∙ When washing the vehicle with high pressure water, be sure not to spray it
around the camera. Otherwise, water
may enter the camera unit causing
water condensation on the lens, a
malfunction, fire or an electric shock.
∙ Do not strike the camera. It is a preci- sion instrument. Otherwise, it may
malfunction or cause damage result-
ing in a fire or an electric shock.
The following are operating limitations and
do not represent a system malfunction: ∙ When the temperature is extremely high or low, the screen may not clearly
display objects. ∙ When strong light directly shines on the
camera, objects may not be displayed
clearly.
∙ Vertical lines may be seen in objects on the screen. This is due to strong re-
flected light from the bumper.
∙ The screen may flicker under fluores- cent light.
∙ The colors of objects on the RearView Monitor may differ somewhat from the
actual color of objects.
∙ Objects on the monitor may not be clear in a dark environment.
∙ There may be a delay when switching between views.
∙ If dirt, rain or snow accumulate on the camera, RearView Monitor may not dis-
play objects clearly. Clean the camera.
∙ Do not use wax on the camera lens. Wipe off any wax with a clean cloth
dampened with a diluted mild cleaning
agent, then wipe with a dry cloth.
SYSTEM MAINTENANCE
Page 337 of 346
 .....10-14
Car phone or CB radio ............4-51
Childr")
C
Capacities and recommended fuel/
lubricants....................10-2
Cargocover...................2-25
Cargo
(See vehicle loading information) .....10-14
Car phone or CB radio ............4-51
Childrestraints........1-20, 1-21, 1-23, 1-25 LATCH (Lower Anchors and Tethers for
CHildren)System..............1-25
Precautions on child
restraints .........1-23, 1-30, 1-36, 1-41
Top tether strap anchor point
locations.................. .1-28
Child safety rear door lock ..........3-6
Chimes, audible reminders .........2-14
Cleaningexteriorandinterior......7-2,7-4
Clockset.....................4-4
Clutch Clutchfluid.................8-10
C.M.V.S.S. certification label .........10-12
Coldweatherdriving.............5-27
Control panel buttons .............4-2
Brightness/contrast button .......4-6
Controls Audio controls (steering wheel) .....4-47
Heater and air conditioner controls . .4-20
Coolant Capacities and recommended
fuel/lubricants...............10-2
Changing engine coolant .........8-5
Checking engine coolant level ......8-5
Corrosionprotection..............7-7
Cruisecontrol..................5-17 Cupholders...............2-24,2-25
Curtain side-impact and rollover air
bag.......................
.1-60
D
Daytime Running Lights (DRL) system. . .2-19
Defroster switch Rear window and outside mirror
defrosterswitch..............2-18
Dimensions and weights ..........10-10
Dimmer switch for instrument panel . . .2-20
Display controls
(see control panel buttons) ..........4-2
Door locks ..................3-3,3-4
Door open warning light ...........2-10
Drivebelt ....................8-14
Driving Cold weather driving ...........5-27
Driving with automatic transmission . .5-9
Driving with manual
transmission ..............5-7,5-14
Precautions when starting and
driving.....................5-2
Drivingthevehicle ...............5-9
E
Economy - fuel .................5-20
Emission control information label . . . .10-12
Emission control system warranty . . . .10-19
Engine Before starting the engine ........5-8
Blockheater................5-29 Capacities and recommended
fuel/lubricants...............10-2
Changing engine coolant
.........8-5
Changing engine oil ............8-7
Changing engine oil filter .........8-8
Checking engine coolant level ......8-5
Checking engine oil level .........8-6
Engine compartment check
locations...................8-3
Engine cooling system ..........8-4
Engine oil ...................8-6
Engine oil and oil filter
recommendation .............10-7
Engine oil pressure warning light . . . .2-10
Engine oil viscosity .............10-7
Engine serial number ..........10-12
Engine specifications ...........10-9
Starting the engine .............5-8
EventDatarecorders ............10-21
Exhaust gas (Carbon monoxide) .......5-2
Explanation of maintenance items .....9-2
Explanation
of scheduled maintenance
items .......................9-5
Extended storage switch ..........8-20
F
Flashers
(Seehazardwarningflasherswitch)....6-2
Flattire......................6-2
Floormatpositioningaid...........7-6
Fluid Automatic transmission fluid (ATF) . . .8-9
Brakefluid..................8-9
11-2