2020 NISSAN ALTIMA Do it yourself
[x] Cancel search: Do it yourselfPage 175 of 559

∙ When the vehicle is parked near a park-ing meter.
In such cases, correct the operating condi-
tions before using the Intelligent Key func-
tion or use the mechanical key.
Although the life of the battery varies de-
pending on the operating conditions, the
battery’s life is approximately two years. If
the battery is discharged, replace it with a
new one.
When the Intelligent Key battery is low, an
indicator illuminates in the vehicle informa-
tion display. For additional information, re-
fer to “Vehicle information display” in the
“Instruments and controls” section of this
manual.
Since the Intelligent Key is continuously re-
ceiving radio waves, if the key is lef t near
equipment which transmits strong radio
waves, such as signals from a TV and per-
sonal computer, the battery life may be-
come shorter.
For additional information, refer to “Battery
replacement” in the “Do-it-yourself ” section
of this manual. As many as four Intelligent Keys can be
registered and used with one vehicle. For
information about the purchase and use of
additional Intelligent Keys, it is recom-
mended that you visit a NISSAN dealer.
CAUTION
Listed below are conditions or occur-
rences which will damage the Intelli-
gent Key:
∙ Do not allow the Intelligent Key, which
contains electrical components, to
come into contact with water or salt
water. This could affect the system
function.
∙ Do not drop the Intelligent Key.
∙ Do not strike the Intelligent Key sharply against another object.
∙ Do not change or modif y the Intelli- gent Key.
∙ Wetting may damage the Intelligent Key. If the Intelligent Key gets wet, im-
mediately wipe until it is completely
dry.
∙ Do not place the Intelligent Key for an extended period in an area where
temperatures exceed 140°F (60°C). ∙ Do not attach the Intelligent Key with
a key holder that contains a magnet.
∙ Do not place the Intelligent Key near equipment that produces a magnetic
field, such as a TV, audio equipment
and personal computers.
If an Intelligent Key is lost or stolen, NISSAN
recommends erasing the ID code of that
Intelligent Key from the vehicle. This may
prevent the unauthorized use of the Intelli-
gent Key to operate the vehicle. For infor-
mation regarding the erasing procedure, it
is recommended that you visit a NISSAN
dealer.
3-8Pre-driving checks and adjustments
Page 183 of 559
NOTE:
If you change the Answer Back Horn fea-
ture with the Intelligent Key, the vehicle
information display screen will show the
current mode af ter the ignition switch
has been cycled from the OFF to the ON
position. The vehicle information display
screen can also be used to change the
answer back horn mode.
For additional information, refer to “Ve-
hicle settings” in the “Instruments and
controls” section of this manual.
To deactivate:
Press and hold the
andbut-
tons for at least 2 seconds. The hazard
indicator lights will flash three times to con-
firm that the answer back horn feature has
been deactivated.
To activate:
Press and hold the
andbut-
tons for at least 2 seconds once more.
The hazard indicator lights will flash once
and the horn will sound once to confirm
that the horn beep feature has been reac-
tivated.
Deactivating the horn beep feature does
not silence the horn if the alarm is trig-
gered.
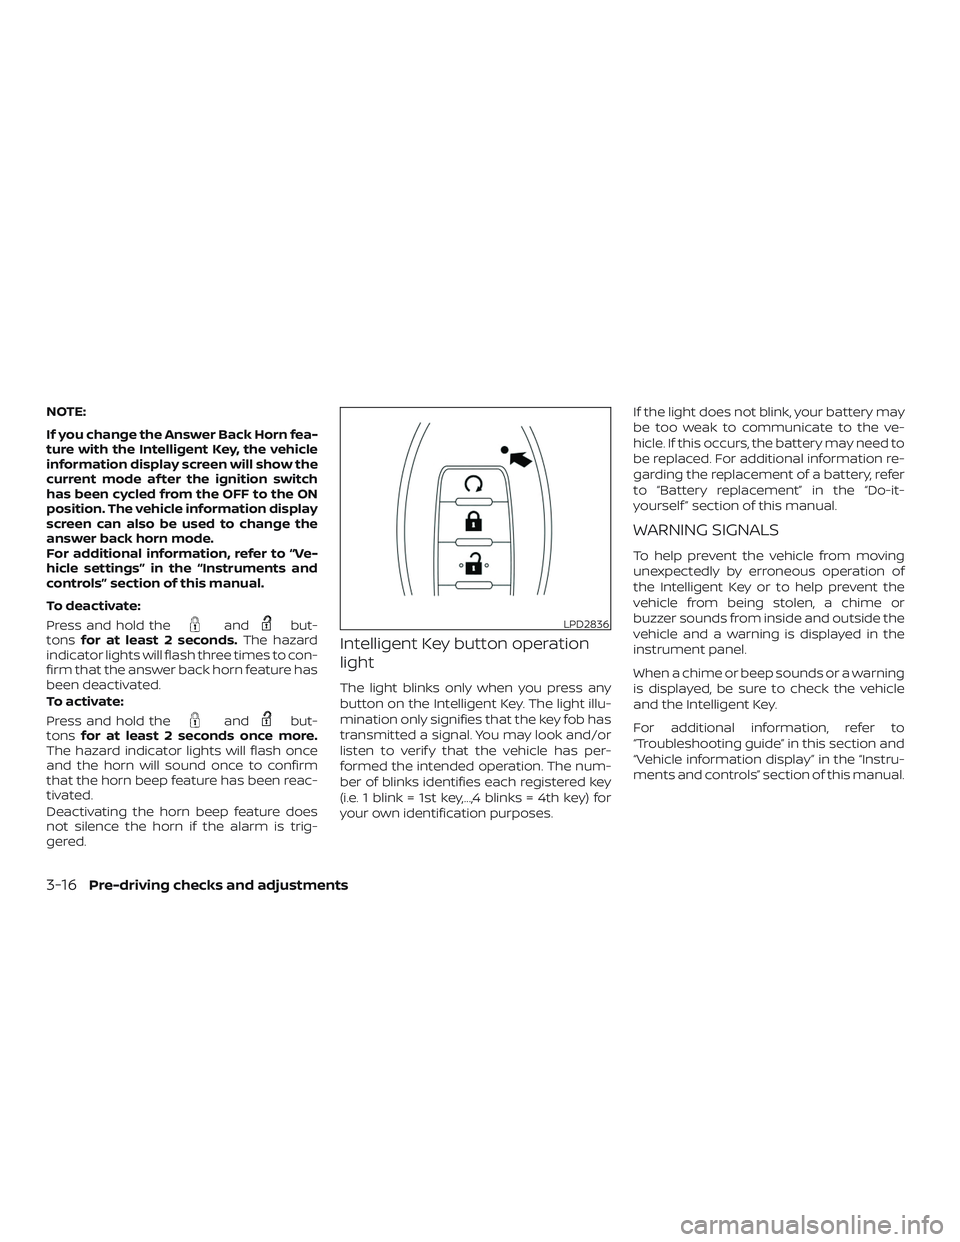
Intelligent Key button operation
light
The light blinks only when you press any
button on the Intelligent Key. The light illu-
mination only signifies that the key fob has
transmitted a signal. You may look and/or
listen to verif y that the vehicle has per-
formed the intended operation. The num-
ber of blinks identifies each registered key
(i.e. 1 blink = 1st key,...,4 blinks = 4th key) for
your own identification purposes. If the light does not blink, your battery may
be too weak to communicate to the ve-
hicle. If this occurs, the battery may need to
be replaced. For additional information re-
garding the replacement of a battery, refer
to “Battery replacement” in the “Do-it-
yourself ” section of this manual.
WARNING SIGNALS
To help prevent the vehicle from moving
unexpectedly by erroneous operation of
the Intelligent Key or to help prevent the
vehicle from being stolen, a chime or
buzzer sounds from inside and outside the
vehicle and a warning is displayed in the
instrument panel.
When a chime or beep sounds or a warning
is displayed, be sure to check the vehicle
and the Intelligent Key.
For additional information, refer to
“Troubleshooting guide” in this section and
“Vehicle information display” in the “Instru-
ments and controls” section of this manual.
LPD2836
3-16Pre-driving checks and adjustments
Page 185 of 559
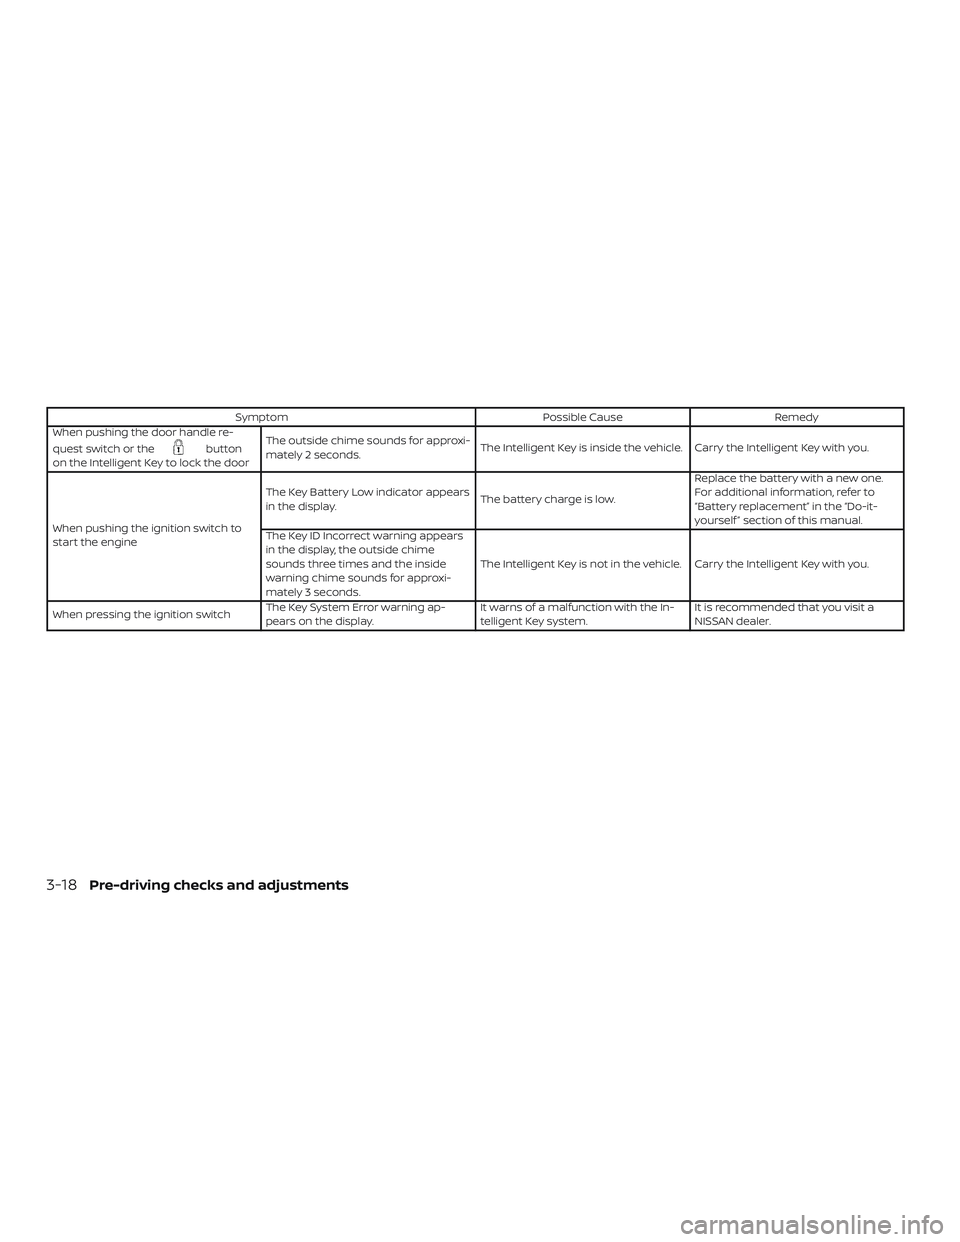
SymptomPossible CauseRemedy
When pushing the door handle re-
quest switch or the
button
on the Intelligent Key to lock the door The outside chime sounds for approxi-
mately 2 seconds.
The Intelligent Key is inside the vehicle. Carry the Intelligent Key with you.
When pushing the ignition switch to
start the engine The Key Battery Low indicator appears
in the display.
The battery charge is low.Replace the battery with a new one.
For additional information, refer to
“Battery replacement” in the “Do-it-
yourself ” section of this manual.
The Key ID Incorrect warning appears
in the display, the outside chime
sounds three times and the inside
warning chime sounds for approxi-
mately 3 seconds. The Intelligent Key is not in the vehicle. Carry the Intelligent Key with you.
When pressing the ignition switch The Key System Error warning ap-
pears on the display. It warns of a malfunction with the In-
telligent Key system.It is recommended that you visit a
NISSAN dealer.
3-18Pre-driving checks and adjustments
Page 253 of 559
Additional information:∙ When replacing a wheel without the TPMS such as the spare tire, the TPMS
does not monitor the tire pressure of
the spare tire.
∙ The TPMS will activate only when the vehicle is driven at speeds above
16 mph (25 km/h). Also, this system may
not detect a sudden drop in tire pres-
sure (for example, a flat tire while driv-
ing).
∙ The low tire pressure warning light does not automatically turn off when the tire
pressure is adjusted on all four tires. Af-
ter all four tires are inflated to the rec-
ommended pressure, the vehicle must
be driven at speeds above 16 mph
(25 km/h) to activate the TPMS and turn
off the low tire pressure warning light.
Use a tire pressure gauge to check the
tire pressure.
∙ The “Tire Pressure Low - Add Air” warn- ing appears in the vehicle information
display when the low tire pressure
warning light is illuminated and low tire
pressure is detected. The “Tire Pressure
Low - Add Air” warning turns off when
the low tire pressure warning light turns
off. ∙ The “Tire Pressure Low - Add Air” warn-
ing appears each time the ignition
switch is placed in the ON position as
long as the low tire pressure warning
light remains illuminated.
∙ The “Tire Pressure Low - Add Air” warn- ing does not appear if the low tire pres-
sure warning light illuminates to indi-
cate a TPMS malfunction.
∙ Tire pressure rises and falls depending on the heat caused by the vehicle’s op-
eration and the outside temperature.
Do not reduce the tire pressure af ter
driving because the tire pressure rises
af ter driving. Low outside temperature
can lower the temperature of the air
inside the tire which can cause a lower
tire inflation pressure. This may cause
the low tire pressure warning light to
illuminate. If the warning light illumi-
nates, check the tire pressure for all four
tires.
∙ The Tire and Loading Information label is located in the driver’s door opening. ∙ You can also check the tire pressure of
all tires (except the spare) on the vehicle
information display screen. The order of
the tire pressure figures displayed on
the screen corresponds with the actual
order of the tire position.
For additional information, refer to “Low tire
pressure warning light” in the “Instruments
and controls” section, “Tire Pressure Moni-
toring System (TPMS)” in the “In case of
emergency” section and “Tire pressure” in
the “Do-it-yourself ” section of this manual.
WARNING
∙ Radio waves could adversely affect electric medical equipment. Those
who use a pacemaker should contact
the electric medical equipment
manufacturer for the possible influ-
ences before use.
5-6Starting and driving
Page 257 of 559
RAPID AIR PRESSURE LOSS
Rapid air pressure loss or a “blow-out” can
occur if the tire is punctured or is damaged
due to hitting a curb or pothole. Rapid air
pressure loss can also be caused by driving
on under-inflated tires.
Rapid air pressure loss can affect the han-
dling and stability of the vehicle, especially
at highway speeds.
Help prevent rapid air pressure loss by
maintaining the correct air pressure and
visually inspecting the tires for wear and
damage. For additional information, refer
to “Wheels and tires” in the “Do-it-yourself ”
section of this manual. If a tire rapidly loses
air pressure or “blows-out” while driving,
maintain control of the vehicle by following
the procedure below. Please note that this
procedure is only a general guide. The ve-
hicle must be driven as appropriate based
on the conditions of the vehicle, road and
traffic.
WARNING
The following actions can increase the
chance of losing control of the vehicle if
there is a sudden loss of tire air pres-
sure. Losing control of the vehicle may
cause a collision and result in personal
injury.
∙ The vehicle generally moves or pullsin the direction of the flat tire.
∙ Do not rapidly apply the brakes.
∙ Do not rapidly release the accelerator pedal.
∙ Do not rapidly turn the steering wheel.
1. Remain calm and do not overreact.
2. Maintain a firm grip on the steering wheel with both hands and try to hold a
straight course.
3. When appropriate, slowly release the accelerator pedal to gradually slow the
vehicle.
4. Gradually steer the vehicle to a safe location off the road and away from
traffic if possible. 5. Lightly apply the brake pedal to gradu-
ally stop the vehicle.
6. Turn on the hazard warning flashers and contact a roadside emergency
service to change the tire. For addi-
tional information, refer to “Changing a
flat tire” in the “In case of emergency”
section of this manual.
DRINKING ALCOHOL/DRUGS AND
DRIVING
WARNING
Never drive under the influence of alco-
hol or drugs. Alcohol in the bloodstream
reduces coordination, delays reaction
time and impairs judgement. Driving
af ter drinking alcohol increases the
likelihood of being involved in an acci-
dent injuring yourself and others. Addi-
tionally, if you are injured in an accident,
alcohol can increase the severity of the
injury.
5-10Starting and driving
Page 263 of 559
NISSAN INTELLIGENT KEY®
BATTERY DISCHARGE
If the battery of the NISSAN Intelligent Key®
is discharged or environmental conditions
interfere with the Intelligent Key operation,
start the engine according to the following
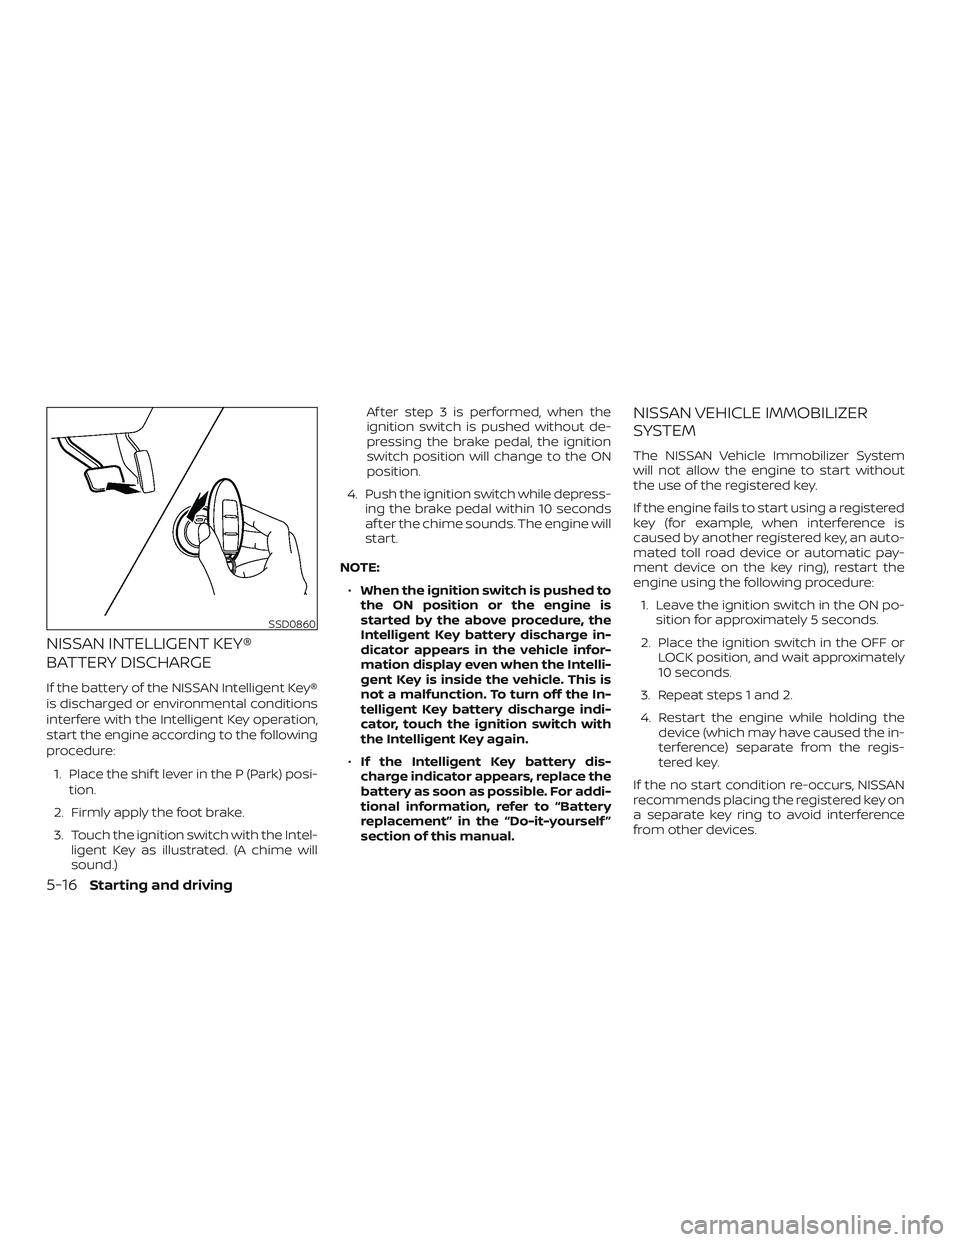
procedure:1. Place the shif t lever in the P (Park) posi- tion.
2. Firmly apply the foot brake.
3. Touch the ignition switch with the Intel- ligent Key as illustrated. (A chime will
sound.) Af ter step 3 is performed, when the
ignition switch is pushed without de-
pressing the brake pedal, the ignition
switch position will change to the ON
position.
4. Push the ignition switch while depress- ing the brake pedal within 10 seconds
af ter the chime sounds. The engine will
start.
NOTE: ∙ When the ignition switch is pushed to
the ON position or the engine is
started by the above procedure, the
Intelligent Key battery discharge in-
dicator appears in the vehicle infor-
mation display even when the Intelli-
gent Key is inside the vehicle. This is
not a malfunction. To turn off the In-
telligent Key battery discharge indi-
cator, touch the ignition switch with
the Intelligent Key again.
∙ If the Intelligent Key battery dis-
charge indicator appears, replace the
battery as soon as possible. For addi-
tional information, refer to “Battery
replacement” in the “Do-it-yourself ”
section of this manual.
NISSAN VEHICLE IMMOBILIZER
SYSTEM
The NISSAN Vehicle Immobilizer System
will not allow the engine to start without
the use of the registered key.
If the engine fails to start using a registered
key (for example, when interference is
caused by another registered key, an auto-
mated toll road device or automatic pay-
ment device on the key ring), restart the
engine using the following procedure:
1. Leave the ignition switch in the ON po- sition for approximately 5 seconds.
2. Place the ignition switch in the OFF or LOCK position, and wait approximately
10 seconds.
3. Repeat steps 1 and 2.
4. Restart the engine while holding the device (which may have caused the in-
terference) separate from the regis-
tered key.
If the no start condition re-occurs, NISSAN
recommends placing the registered key on
a separate key ring to avoid interference
from other devices.
SSD0860
5-16Starting and driving
Page 271 of 559
WARNING
If the shif t lever cannot be moved from
the P (Park) position while the engine is
running and the brake pedal is de-
pressed, the stop lights may not work.
Malfunctioning stop lights could cause
an accident injuring yourself and
others.
Drive sport mode switch
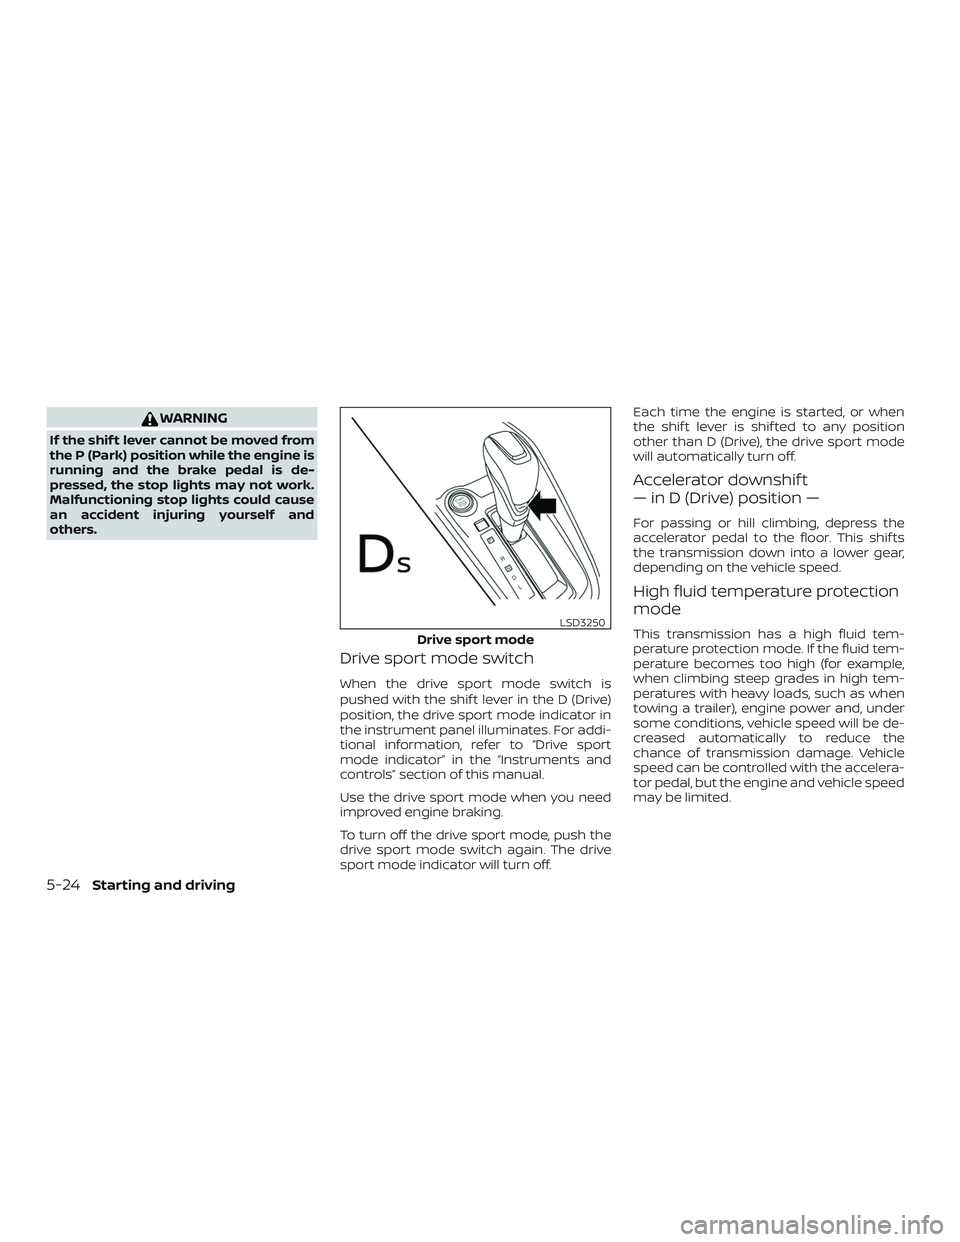
When the drive sport mode switch is
pushed with the shif t lever in the D (Drive)
position, the drive sport mode indicator in
the instrument panel illuminates. For addi-
tional information, refer to “Drive sport
mode indicator” in the “Instruments and
controls” section of this manual.
Use the drive sport mode when you need
improved engine braking.
To turn off the drive sport mode, push the
drive sport mode switch again. The drive
sport mode indicator will turn off.Each time the engine is started, or when
the shif t lever is shif ted to any position
other than D (Drive), the drive sport mode
will automatically turn off.
Accelerator downshif t
— in D (Drive) position —
For passing or hill climbing, depress the
accelerator pedal to the floor. This shif ts
the transmission down into a lower gear,
depending on the vehicle speed.
High fluid temperature protection
mode
This transmission has a high fluid tem-
perature protection mode. If the fluid tem-
perature becomes too high (for example,
when climbing steep grades in high tem-
peratures with heavy loads, such as when
towing a trailer), engine power and, under
some conditions, vehicle speed will be de-
creased automatically to reduce the
chance of transmission damage. Vehicle
speed can be controlled with the accelera-
tor pedal, but the engine and vehicle speed
may be limited.Drive sport mode
LSD3250
5-24Starting and driving
Page 374 of 559
RAB SYSTEM LIMITATIONS
WARNING
Listed below are the system limitations
for the RAB system. Failure to follow the
warnings and instructions for proper
use of the RAB system could result in
serious injury or death.
∙ When the vehicle approaches an ob-stacle while the accelerator or brake
pedal is depressed, the function may
not operate or the start of operation
may be delayed. The RAB system may
not operate or may not perform suffi-
ciently due to vehicle conditions, driv-
ing conditions, the traffic environ-
ment, the weather, road surface
conditions, etc. Do not wait for the
system to operate. Operate the brake
pedal by yourself as soon as
necessary.
∙ If it is necessary to override RAB op- eration, strongly press the accelerator
pedal. ∙ Always check your surroundings and
turn to check what is behind you be-
fore and while backing up. The RAB
system detects stationary objects be-
hind the vehicle. The RAB system does
not detect the following objects:
– Moving objects
– Low objects
– Narrow objects
– Wedge-shaped objects
– Objects close to the bumper (less than approximately 1 f t [30 cm])
– Objects that suddenly appear
– Thin objects such as rope, wire, chain, etc.
∙ The RAB system may not operate for the following obstacles:
– Obstacles located high off the ground
– Obstacles in a position offset from your vehicle
– Obstacles, such as spongy materi- als or snow, that have sof t outer
surfaces and can easily absorb a
sound wave ∙ The RAB system may not operate in
the following conditions:
– There is rain, snow, ice, dirt, etc., at- tached to the sonar sensors.
– A loud sound is heard in the area around the vehicle.
– The surface of the obstacle is di- agonal to the rear of the vehicle.
∙ The RAB system may unintentionally operate in the following conditions:
– There is overgrown grass in the area around the vehicle.
– There is a structure (e.g., a wall, toll gate equipment, a narrow tunnel, a
parking lot gate) near the side of
the vehicle.
– There are bumps, protrusions, or manhole covers on the road
surface.
– The vehicle drives through a draped flag or a curtain.
– There is an accumulation of snow or ice behind the vehicle.
Starting and driving5-127