2020 MITSUBISHI OUTLANDER change wheel
[x] Cancel search: change wheelPage 367 of 443

How to change a tire 8-14 For emergencies
8
N00849801561
1. Loosen the wheel nuts with the wheel nut wrench. Do not remove the wheel nuts yet. 2. Place the jack under one of the jacking points (A) shown in the illustration. Use the jacking point closest to the tire you wish to change.
3. Rotate the jack by hand until the flange portion (B) fits in the groove (C) at the topof the jack. 4. Insert the bar (D) into the wheel nut wrench (E). Then put the end of the bar into the shaft’s jack end, as shown in the illustration. Slowly rotate the wheel nut wrench until the tire is raised slightly off the groundsurface.
To change a tire
WA R N I N G Set the jack only at
the positions shown
here. If the jack is set at a wrong position,it could dent your vehicle or the jackmight fall over and ca
use personal injury.
Do not use the jack on a tilted or soft sur- face. Otherwise, the jack might slip and cause personal injury. Always
use the jack on a
flat, hard surface. Before setting the jack, make sure there are no sand or pebbles under the jack base.NOTE
Put the spare wheel (if so equipped) under the vehicle body near the jack. This makes it safer if the jack slips out of position.
BK0278200US.book 14 ページ 2019年4月10日 水曜日 午前10時59分
Page 368 of 443

How to change a tire
For emergencies 8-15
8
5. Remove the wheel nuts with the wheel nut wrench, then take the wheel off.
6. Clean out any mud, etc. on the hub sur- face (F), hub bolts (G)
or in the installa-
tion holes (H) in the wheel, and then mount the spare tire.
7. Turn the wheel nut clockwise by hand to initially tighten them. Temporarily tighten the wheel nuts byhand until the flange parts of the wheel nuts make light contact with the wheel and the wheel
is not loose.
WA R N I N GStop jacking up the ve
hicle as soon as the
tire is raised off the ground. It is danger-ous to raise the ve
hicle any higher.
Do not get under your vehicle while using the jack. Do not bump the raised
vehicle or leave it
sitting on the jack for a long time. Bothare very dangerous. Do not use a jack except the one that came with your vehicle. The jack should not be used for any pur- pose other than to change a tire. No one should be
in your vehicle when
using the jack. Do not start or run
the engine while your
vehicle is on the jack. Do not turn the raised wheel. The tires that are still on the ground could turn and make your vehicle fall off the jack.CAUTION Handle the wheel carefully when changing the tire, to avoid scratching the wheel sur-face.
WA R N I N G Mount the wheel with the valve stem (I) facing outward. If you cannot see the valve stem (I), you
have installed the
wheel backwards. Operating the vehicle with the spare wheel installed backwards can cause vehicledamage and result
in an ac
cident.
BK0278200US.book 15 ページ 2019年4月10日 水曜日 午前10時59分
Page 369 of 443

How to change a tire 8-16 For emergencies
8
8. Lower the vehicle slowly until the tire touches the ground, by rotating the wheelnut wrench counterclockwise. 9. Tighten the nuts in the order shown in the illustration until each
nut has been tight-
ened to the torque listed here.65 to 80 ft-lb (88 to 108 N•m)
10. Lower the jack all the way and remove it. 11. Check the tire inflation pressure. The rec-
ommended tire pressure for your vehicleis listed on the tire
and loading informa-
tion placard attached to the driver’s door sill as shown in the illustration. Refer to“Tire inflation pressures” on page 9-20.
NOTE
Flange nuts can be te
mporarily used on the
compact spare wheel (if so equipped) asshown in the illustration, but return to theoriginal wheel and tire as soon as possible.CAUTION Never apply oil to either the wheel bolts or the nuts or they will tighten too much.NOTE
If all 4 aluminum wheels are changed to steel wheels, use tapered nuts.
CAUTION Never use your foot or a pipe extension to apply added force to the wheel nut wrenchwhen tightening the wheel nuts. If you do so,you can over-tighten the wheel nuts and damage the wheel, wheel nuts and hub bolts.
BK0278200US.book 16 ページ 2019年4月10日 水曜日 午前10時59分
Page 370 of 443

How to change a tire
For emergencies 8-17
8
N00832300046
1. Place the tire on the center of the tire hanger, with the wheel surface facing upwards.
2. Lift up the tire hanger (A) and hook it on the hook (B).
3. With the wheel nut wrench, firmly tighten the tire hanger mounting bolt by turning itclockwise. 4. Install the cover over the tire hanger mounting bolt.
CAUTION Driving with an imprope
rly inflated tire can
cause an accident. If
you have no choice but
to drive with an under-inflated tire, keepyour speed down and avoid sudden steering or braking, if possible. Inflate the tire to the correct pressure as s
oon as possible. Refer to
“Tire inflation pressures” on page 9-20. After changing the tire
and driving the vehi-
cle about 620 miles (1,000 km), retighten the wheel nuts to make sure
that they have not
come loose. If the steering wheel vibrates when driving after changing the tire, have the tire checkedfor balance at an authorized Mitsubishi Motors dealer or a repair facility of your choice. Do not mix one type of tire with another or use a different size from the one listed. Thiswould cause ea
rly wear and poor handling.
To store the spare tire
(if so
equipped)
CAUTION Storing the tire with the wheel surface facing down may damage the wheel or tire hanger.If you find any damage
on a spare tire, do not
use the tire and contact an authorized Mit- subishi Motors dealer or a repair facility of your choice.CAUTION Make sure you hook the tire hanger in the proper position. If the tire hanger is nothooked properly, the hook could damage the vehicle body or the tire could fall off the vehicle while driving,
causing an accident.
CAUTIONConfirm that the tire ha
nger is firmly secured
after storing the spare
tire. If the tire hanger
is not secured, it could drop out while driv- ing, causing
an accident.
When hooking or unhooking the tire hanger, be sure to hold the tire hanger firmly to pre- vent it from dropping on your foot.
BK0278200US.book 17 ページ 2019年4月10日 水曜日 午前10時59分
Page 393 of 443

Tires 9-20 Vehicle care and maintenance
9
N00939302024
Proper tire inflation pres
sure is essential for
the safe and satisfactory operation of your vehicle. The wrong tire
pressure will cause
problems in three major areas: Safety Too little pressure increases flexing in the tire and can cause tire failure. Too much pressure can cause a tire to lose its ability to cushion shock. Objects on the road andpotholes could then cause tire damage that may result in tire failure. Economy The wrong tire pressure can cause uneven wear patterns in the tire tread. These abnormal wear patterns will reduce thetread life, and the tire will have to be replaced sooner. Too little pressure also makes it harder forthe tire to roll, and this uses up more fuel. Ride comfort and vehicle stability The superior riding
experience built into
your vehicle partly depends on the correct tire pressure. Too mu
ch pressure gives an
uncomfortable and ja
rring ride. Too little
pressure feels as if your vehicle is slow to respond. Unequal tire pressures can make steeringyour vehicle uneven and unpredictable.
The tire pressure for your vehicle under nor- mal driving conditions is listed on the placardattached to the driver’s door sill. (Refer to “Tire and loading information plac- ard” on page 11-3.)The recommended infl
ation pressures under
normal driving conditions should be used for the tires listed below. Tire pressures should be checked, and adjusted if necessary, at least once a month. Pressures should be checked more often whenever weather temperatures changeseverely, becaus
e tire pressures change with
outdoor temperatures. The pressures listed are always “cold inflation pressure”.Cold inflation pressure is measured after the vehicle has been parked
for at least three
hours or is driven less than 1 mile (1.6 km)after having been parked for three hours. Cold inflation pressure must not go above the maximum values molded into the tire side-
wall. After driving seve
ral miles, your tire
inflation pressure may increase 2 to 6 psi (14to 41 kPa) from the cold inflation pressure. Do not let air out of the tires to get back to the specified cold pressure, or your tires will betoo low. Check your tires each time you refuel. If one tire looks lower than the others, check thepressure for all of them. You should also take the following safety pre- cautions: Keep your tires inflated to the recom- mended pressures. (See the tire and load- ing information placard attached to thedriver’s door sill.) Stay within the recommended load limits. Make sure that the weight of any load in your vehicle is evenly distributed. Drive at safe speeds. After filling your tires to the correct pres- sure, check them for damage and air leaks. Be sure to reinstall the caps on the valve stems.
Tire inflation pressures
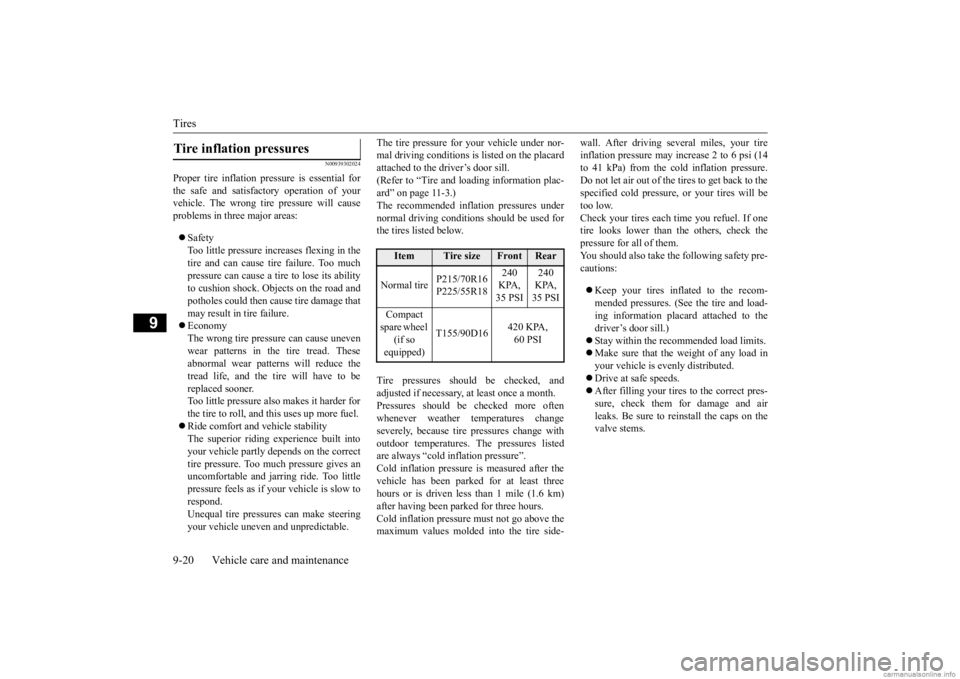
Item
Tire size
Front
Rear
Normal tire
P215/70R16 P225/55R18
240 KPA, 35 PSI
240 KPA, 35 PSI
Compact spare wheel
(if so equipped)
T155/90D16
420 KPA, 60 PSI
BK0278200US.book 20 ページ 2019年4月10日 水曜日 午前10時59分
Page 438 of 443

Alphabetical index
12-5
12
5-60 Wheel lock
............................
5-25
, 5-68
Stop lights
Bulb capacity
.................................
9-34
Storage spaces
..................................
5-231
Sun visors
........................................
5-220
Sunglasses holder
.............................
5-235
Sunroof
..............................................
5-54
Super-all wheel control (S-AWC)
S-AWC drive mode display
.............
5-87
S-AWC drive mode-selector
............
5-87
S-AWC operation display
................
5-88
Supplemental Re
straint System
............
4-35
How the Supplemental Restraint System works
..........................................
4-38
Maintenance service
........................
4-50
T
Tail light
Bulb capacity
.................................
9-34
Tank capacity
.....................................
11-7
Theft-alarm system
.............................
5-49
Ticket holder
....................................
5-221
Timing belt
........................................
9-26
Tire
...................................................
9-16
Inflation pressure
............................
9-20
Maintenance
...................................
9-21
Quality grading
...............................
10-2
Replacing tires and wheels
..............
9-21
Rotation
........................................
9-22
Size (tire and wheel)
.......................
11-7
Snow tires
.....................................
9-22
Tire and loading information placard 11-3Tire chains
.....................................
9-23
To change a tire
..............................
8-11
Tread wear indicator
.......................
9-21
Tire pressure monitoring system
.........
5-140
Tire repair kit
.......................................
8-6
Tools
...................................................
8-6
Storage
............................................
8-5
Towing
..............................................
8-18
Trailer towing
....................................
6-11
Transfer oil
................................
9-13
, 11-7
Turn signal light
Indicators
.....................................
5-195
Lever
...........................................
5-208
U
USB input terminal
............................
5-218
How to connect a USB memory device
....
5-219 How to connect an iPod
.................
5-220
USB port
..........................................
5-222
V
Vanity mirror
....................................
5-220
Vanity mirror lights
Bulb capacity
.................................
9-35
Vehicle care precautions
......................
9-42
Vehicle dimensions
.............................
11-4
Vehicle labeling
..................................
11-2
Vehicle preparation before driving
..........
6-4
Vehicle weights
..................................
11-5
Vents
...................................................
7-2
W
Warning lights
..................................
5-196
Washer
Fluid
.....................................
9-13
, 11-7
Rear window washer
.....................
5-214
Switch
.........................................
5-214
Washing
.............................................
9-44
Waxing
..............................................
9-45
Weights
.............................................
11-5
Wheel
Specification
..................................
11-7
Wiper
Rear window wiper
.......................
5-214
Switch
.........................................
5-210
Wiper blades
..................................
9-24
Wiper deicer switch
..........................
5-215
BK0278200US.book 5 ページ 2019年4月10日 水曜日 午前10時59分