2020 MERCEDES-BENZ SL ROADSTER reset
[x] Cancel search: resetPage 200 of 334
X
To
select apres etlist or stati onlist:
pre ssand brieflyhol dthe 0063 or0064 but-
ton untilthe preset list or sta tionlist inthe
de sired freq uency rang eis sho wn.
X To select astati on:bri eflypre ss0063
or 0064.
SIR IUS XM®
sa tel lite rad ioacts like anorma l
rad io.
For more informa tionon rad ioop era tion,see
"Sa tellite rad io"in the DigitalOpe rator'sMan-
ua l.
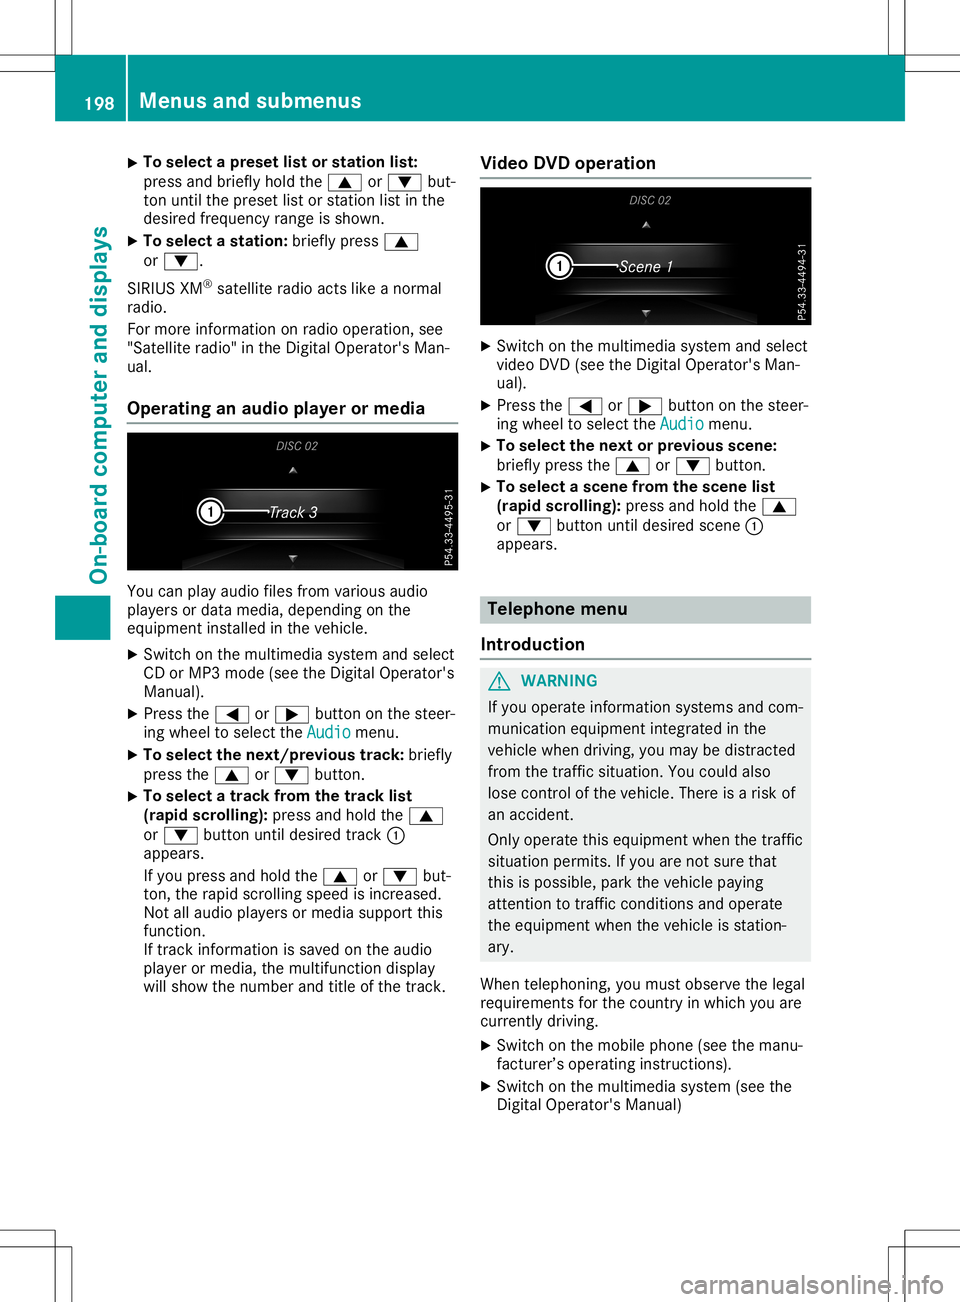
Ope ratin gan audi oplay eror medi a Yo
ucan play audio files from various audio
pl ay ers ordata med ia,de pendi ng on the
eq uipme ntins talled in the vehicle.
X Swi tch onthe multimed iasystem andselect
CD orMP3 mode(se ethe DigitalOpe rator's
Ma nua l).
X Pre ssthe 0059 or0065 button onthe stee r-
ing wheelto sel ect the Audio Aud
iomenu .
X To select the next/ prev ious track :bri efly
pre ssthe 0063 or0064 button.
X To
select atrack fromthetrack list
(rapi dsc rol ling ):pre ssand holdthe 0063
or 0064 button untilde sired trac k0043
ap pe ars .
If yo upre ssand holdthe 0063 or0064 but-
ton, therapidscro lling speedisincre ased .
Not allau dio play ers ormed iasupp ort this
func tion.
If trac kinfo rma tionis sa ved onthe audio
pl ay er or med ia,the multifunc tiondispl ay
wi llsho wthe num berand titleof the trac k. Vide
oDVD operatio n X
Swi tch onthe multimed iasystem andselect
vid eo DVD (seethe DigitalOpe rator'sMan-
ua l).
X Pre ssthe 0059 or0065 button onthe stee r-
ing wheelto sel ect the Audio Aud
iomenu .
X To
select the next or prev ious scen e:
bri eflypre ssthe 0063 or0064 button.
X To
select asc en efrom thescen elist
(rapi dsc rol ling ):pre ssand holdthe 0063
or 0064 button untilde sired scene 0043
ap pe ars . Tel
epho nemen u
In troduc tion G
WAR
NING
If yo uop era teinfo rma tionsy stem sand com-
mu nica tioneq uipme ntinte grated inthe
veh iclewh en driving ,yo uma ybe distra cted
from thetrafficsitua tion.Yo ucou ldalso
lo se contro lof the vehicle. The reisaris kof
an acci dent.
Onl yop era tethiseq uipme ntwh en the traffic
si tua tionpe rmi ts.Ifyo uare not sure tha t
thi sis po ssi ble, pa rk the vehiclepa ying
atte ntionto traf ficcond itions and opera te
the equipme ntwh en the vehicleis sta tion-
ary .
Whe ntel ephoni ng,youmu stob ser vethe lega l
req uirem ents forthe country inwh ich youare
cur rentl ydri ving .
X Swi tch onthe mob ile pho ne(seethe manu -
fac ture r’s op era ting instruc tions).
X Swi tch onthe multimed iasystem (seethe
Dig italOpe rator'sManua l) 19
8 Men
usand submen usOn-bo ard computer anddisplay s
Page 206 of 334
chil
dren–cou ldbeco metrap ped.The reisa
ris kof inju ry.
Whi lethe EASY-ENTR Y/EXITfeature ismak-
ing adjustme nts,make sure that noone has
any bodypa rts inthe swe epofthe seatand
the stee ring wheel.
If some bodybeco mestrapped:
R pre ssone ofthe memo ryfuncti onpos i-
tion buttons, or
R pre ssone ofthe memo ryfuncti onmem-
ory buttons, or
R move theswitch forstee ring wheel
ad justme ntinthe oppositedirecti onto
that inwhi chthe stee ring wheelismovi ng
The adjustme ntpro cess isstop ped.
X Pre ssthe 0059 or0065 button onthe stee r-
ing whe elto sel ect the Sett ings Sett
ings menu .
X Pre ssthe 0064 or0063 button tosel ect the
Conv enience Conv
eniencesubme nu.
X Pre ss0076 toconfi rm.
X Pre ssthe 0064 or0063 button tosel ect the
Easy Entry/Exit Easy
Entry/Exitfuncti on.
If the Easy Entry/Exit Easy
Entry/Exitfuncti onisacti va-
ted, themultifunction displ aysho wsthe
stee ring wheelin ora nge.
X Pre ssthe 0076 button tosav ethe setti ng.
Furth erinfo rma tion onthe easy entry andexit
fea ture (Ypage 103 ).
Sw itchin gthe seat beltadjustmen t
on /o ff
X Pre ssthe 0059 or0065 button onthe stee r-
ing whe elto sel ect the Sett . Sett
.menu .
X Pre ssthe 0064 or0063 button tosel ect the
Conv enience Conv
eniencesubme nu.
X Pre ss0076 toconfi rm.
X Pre ssthe 0064 or0063 button tosel ect the
Belt Adjustme nt Belt
Adjustme ntfuncti on.
Whe nthe Belt Adjustment Belt
Adjustmentfuncti onis
acti vate d,the seatbel tis displ ayed in
ora nge inthe multifunction displ ay.
X Pre ssthe 0076 button tosav ethe setti ng.
For furth erinfo rma tion onbeltad justme nt,
see (Ypage 44). Sw
itchin gthe fold-in mirrors whenlock-
ing feature on/o ff
Thi sfuncti onisonly availab lewhe nthe vehi cle
is equ ipped with the electri calfold-in functi on.
Thi sfuncti onisonly availab lein Ca nad a.
Whe nyo uacti vate theAuto .Mirr orFold ‐ Auto
.Mirr orFold ‐
ing ing
functi on,the exteri ormirr orsare folded in
whe nthe vehi cleislocke d.
If yo uha ve swi tched onthe Auto .Mirr or Auto
.Mirr or
Fold ing Fold
ingfuncti onand youfol din the exteri or
mirr orsusing the button onthe door
(Y page 105 ),they willnot foldou tau toma ti-
cal ly.The exteri ormirr orscan then onlybefol-
ded outus ing the button onthe door.
X Pre ssthe 0059 or0065 button onthe stee r-
ing whe elto sel ect the Sett . Sett
.menu .
X Pre ssthe 0064 or0063 button tosel ect the
Conv enie nce Conv
enie ncesubme nu.
X Pre ss0076 toconfi rm.
X Pre ssthe 0064 or0063 button tosel ect the
Auto .Mirr orFold ing Auto
.Mirr orFold ingfuncti on.
If the Auto .Mirr orFold ing Auto
.Mirr orFold ingfuncti onis
swi tched on,the multifunction displ ay
sho wsthe exteri ormirr orinora nge.
X Pre ssthe 0076 button tosav ethe setti ng.
Res torin gthe facto rysetting s X
Pre ssthe 0059 or0065 button onthe stee r-
ing whe elto sel ect the Sett . Sett
.menu .
X Pre ssthe 0064 or0063 button tosel ect the
Fact orySetting Fact
orySettingsubme nu.
X Pre ss0076 toconfi rm.
The Rese tAll Settings? Rese
tAll Settings?functi on
ap pea rs.
X Pre ssthe 0064 or0063 button tosel ect No No
or Yes Yes.
X Pre ssthe 0076 button toconfi rmthe selec-
tion.
If yo uha ve selected Yes Yes
andconfi rmed ,the
mul tifunction displ aysho wsaconfi rmation
mess age.
For safety reasons, theDayt imeRunning Dayt
imeRunning
Ligh ts Ligh
tsfuncti oninthe Ligh ts Ligh
tssubme nuis
only resetif the vehi cleisstati onar y. 204
Men
usand submenu sOn-board computer anddispl ays
Page 208 of 334
X
Press the0059 or0065 button toselect
Interm. Time Interm.
Time.
X Press 0076toconf irm.
The inter mediate timeappears forfive sec-
onds.
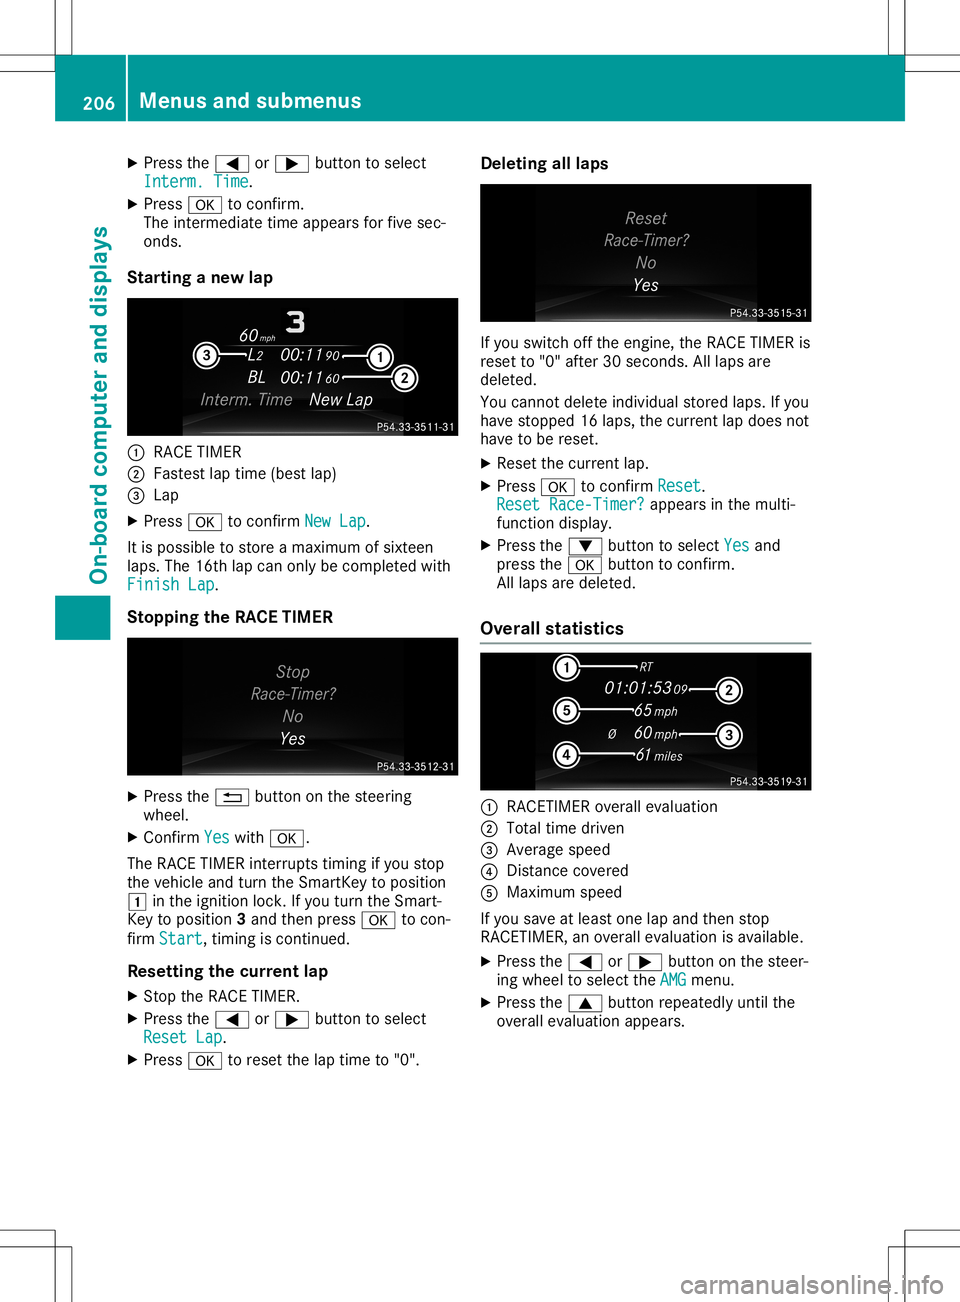
Star ting anew lap 0043
RACE TIMER
0044 Fastest laptime (best lap)
0087 Lap
X Press 0076toconf irmNew Lap New
Lap.
It is possible tostore amaximum ofsixteen
laps. The16thlap can only becompleted with
Finish Lap Finish
Lap.
Stopp ingthe RACE TIMER X
Press the0038 button onthe steerin g
wheel.
X Confirm Yes Yes
with 0076.
The RACE TIMER interrupts timing ifyou stop
the vehicle andturn theSmart Keytoposition
0047 inthe ignition lock.Ifyou turn theSmart -
Key toposition 3and then press 0076tocon-
firm Start Start,
timingiscont inued.
Resetting thecurr entlap
X Stop theRACE TIMER.
X Press the0059 or0065 button toselect
Reset Lap Reset
Lap.
X Press 0076toreset thelaptime to"0". Deleting
alllaps If
you switch offthe engine, theRACE TIMER is
reset to"0" after 30seconds .All laps are
deleted.
You cann otdelete individual storedlaps.Ifyou
have stopped 16laps, thecurren tlap does not
have tobe reset.
X Reset thecurren tlap.
X Press 0076toconf irmReset Reset.
Reset Race-Timer ? Reset
Race-Timer ?appears inthe multi-
funct iondisplay.
X Press the0064 button toselect Yes Yes
and
press the0076 button toconf irm.
All laps aredeleted.
Overall statistics 0043
RACETIME Roverall evaluation
0044 Total timedriven
0087 Average speed
0085 Dist ance covered
0083 Maximum speed
If you save atleast onelapand then stop
RACETIME R,an overall evaluation isavailabl e.
X Press the0059 or0065 button onthe steer-
ing wheel toselect theAMG AMG
menu.
X Press the0063 button repeatedly untilthe
overall evaluation appears. 206
Menus
andsubmenusOn-board computerand display s
Page 275 of 334
Maintaining
thetime-dependent servicesched-
ule:
X Note down theservice duedate display edin
the multifunction displaybeforedisconnec t-
ing the battery.
or X Aft erreconn ectingthebattery, subtract the
battery disconnec tionperiods fromtheser-
vice date shown onthe display . Hiding
service displays
X Press the0076 or0038 button onthe steer-
ing wheel. Showing
servicedisplays
X Switch onthe ignition.
X Press 0059or0065 onthe steering wheel
to select theServ. Serv.
menu.
X Press 0063or0064 toselect theASSYST ASSYST
PLUS PLUS
submenu andconfirm bypressing the
0076 button.
The service duedate appears inthe multi-
funct iondisplay . Informat
ionabout Service
Resetting theASSYST PLUSservice
interval display !
If
the ASS YST PLUS service interval dis-
play hasbeen inadvertent lyreset, thisset-
ting canbecorrect edataqual ified special-
ist workshop.
Have service workcarried outasdescribed
in the Maintenanc eBooklet. Thismay other-
wise leadtoincreased wearanddamage to
the major assemblies orthe vehicle.
A qual ified specialist workshop, e.g.anauthor-
ized Mercedes-Ben zCenter, willreset the
ASS YST PLUS service interval displayafterthe
service workhasbeen carried out.Youcan
also obtain further information onmainte-
nance work,forexample. Special
servicerequirements The
specified maintenanc einterval takesonly
the normal operation ofthe vehicle into
account. Serviceworkwillneed tobe per-
formed moreoften ifthe vehicle isoperated
under arduou scondition sor increased loads.
The ASSYST PLUS service interval displayis
only anaid. Thedriver ofthe vehicle isrespon-
sible forwhether serviceworkwillneed tobe
performed morefrequently thanrequired asa
result ofthe actual operating conditions
and/or loads.
Examples ofarduou soperating conditions:
R regular citydriving withfrequent intermedi-
ate stops
R the vehicle isprimarily usedtotravel short
distances
R frequent useinmountainous terrainoron
poor roadsurfaces
R the engine isoften leftidling forlong peri-
ods
R particularly dustycondition s,or ifair-recir-
culation modeisfrequently used
In these orsimilar operating conditions,have
the interior filter,airfilter, engine oiland oilfil-
ter, forexample, changedmorefrequently.
Under arduou soperating conditions,the tires
must becheck edmore often. Further informa-
tion canbeobtained ataqual ified specialist
workshop.
Driving abroad An
exten siveMercedes-Ben zService network
is also availa bleinother countr ies.You can
obtain further information fromanyauthorized
Mercedes-Ben zService Center. Care
Notes
oncare H
Environmental
note
Dispose ofempty packaging andcleaning
cloths inan environm entallyresponsible
manner.
! When
cleaning yourcar,donot use:
R dry, coarse orhard cloths
R abrasive cleaningagents Care
273Maintenance andcare Z
Page 289 of 334
!
Have
thebattery regularlychecked ata
qual ified speciali stworkshop.
Comply withtheservice intervals inthe
Maintenance Booklet,orcont actaqual ified
speciali stworkshop formore information.
! Alway
shave work onbatteries carriedout
at aqual ified speciali stworkshop.
Should it,inexceptional circumstances, be
absolu telynecessary todisconnect the12-
volt battery yourself,please observe thefol-
lowing:
R Secure thevehicle toprevent itfrom roll-
ing awa y.
R Switch offthe ignition.
R Disconn ectthe negative terminalfirstand
then thepositive terminal.
After thework hasbeen done, install the
battery andreplace thecover ofthe positive
terminal clampfirmly.
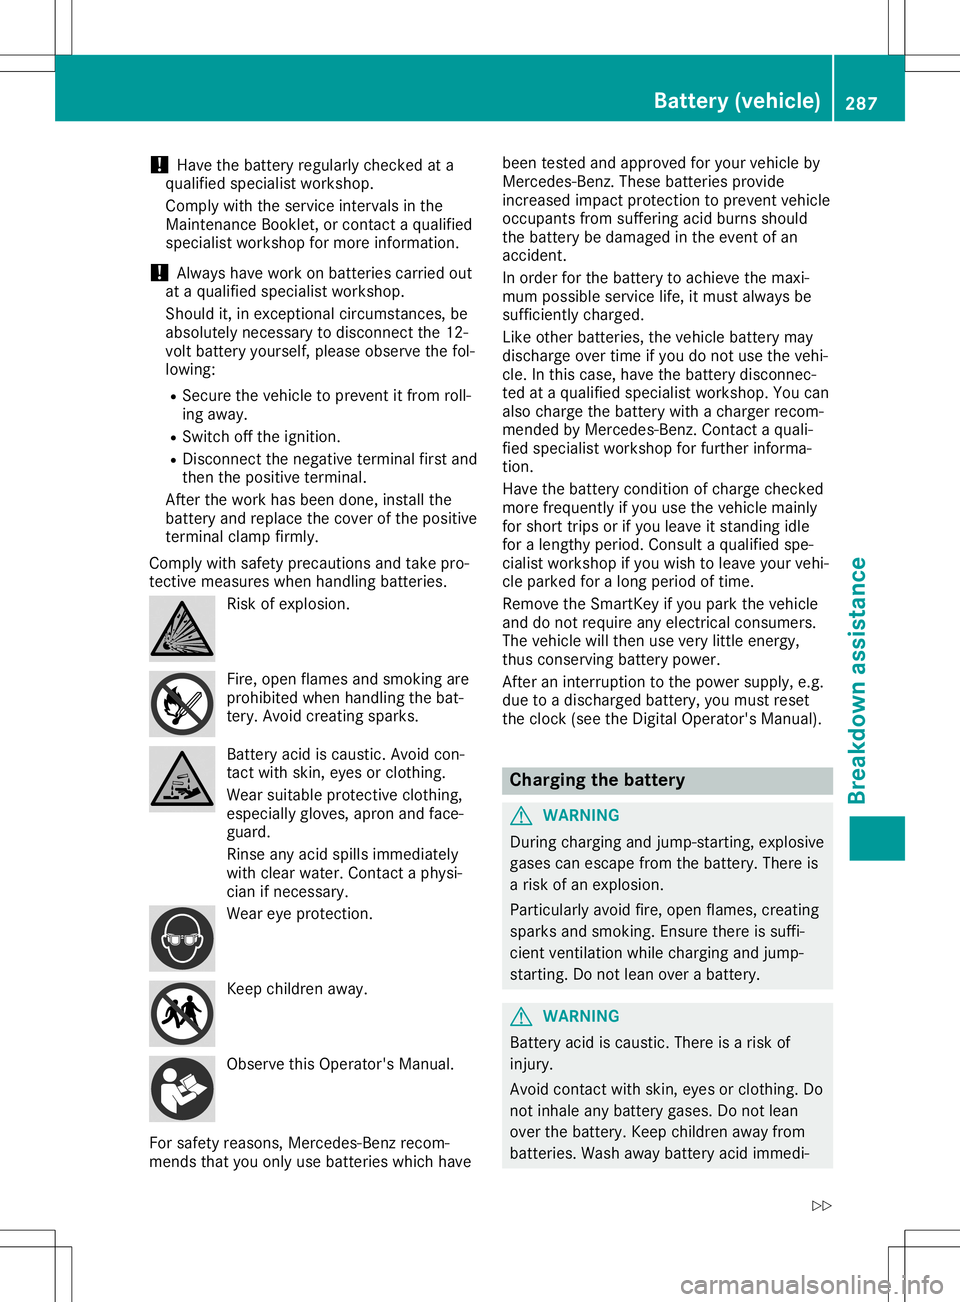
Comply withsafety precautions andtake pro-
tect ivemeasures whenhandling batteries. Risk
ofexplosion. Fire,
open flames andsmoking are
prohibited whenhandling thebat-
tery. Avoid creating sparks. Battery
acidiscaustic. Avoidcon-
tact with skin, eyesorclothing.
Wear suitabl eprotective clothing,
especial lygloves, apronandface-
guard.
Rinse anyacid spills immediately
with clear water. Contact aphysi-
cian ifnecessary. Wear
eyeprotection. Keep
children away. Observe
thisOperator's Manual.
For safety reasons, Mercedes-Benz recom-
mends thatyouonly usebatteries whichhave been
tested andapproved foryour vehicle by
Mercedes-Benz .These batteries provide
increased impactprotection toprevent vehicle
occupants fromsuffering acidburns should
the battery bedamage din the event ofan
accident.
In order forthe battery toachieve themaxi-
mum possible servicelife,itmust alwaysbe
sufficiently charged.
Like other batteries, thevehicle battery may
discharge overtime ifyou donot use thevehi-
cle. Inthis case, havethebattery disconnec-
ted ataqual ified speciali stworkshop. Youcan
also charge thebattery withacharger recom-
mended byMercedes-Benz .Contact aqual i-
fied speciali stworkshop forfurther informa-
tion.
Have thebattery condition ofcharge checked
more frequently ifyou usethevehicle mainly
for short tripsorifyou leave itstanding idle
for alengthy period.Consult aqual ified spe-
cialist workshop ifyou wish toleave yourvehi-
cle parked foralong period oftime.
Remove theSmartKey ifyou park thevehicle
and donot require anyelectrical consumers.
The vehicle willthen usevery little energy,
thus conserving batterypower.
After aninterruption tothe power supply,e.g.
due toadischarged battery,youmust reset
the clock (seetheDigital Operator's Manual). Charging
thebattery G
WARNING
During charging andjump-startin g,explosive
gases canescape fromthebattery. Thereis
a risk ofan explosion.
Particularl yavoid fire,open flames, creating
sparks andsmoking. Ensurethereissuffi-
cient ventilation whilecharging andjump-
starting. Donot lean over abattery. G
WARNING
Battery acidiscaustic. Thereisarisk of
injury.
Avoid contactwith skin, eyesorclothing. Do
not inhale anybattery gases.Donot lean
over thebattery. Keepchildren awayfrom
batteries. Washawaybattery acidimmedi- Bat
tery (vehic le)
287Breakdown assistance
Z
Page 294 of 334
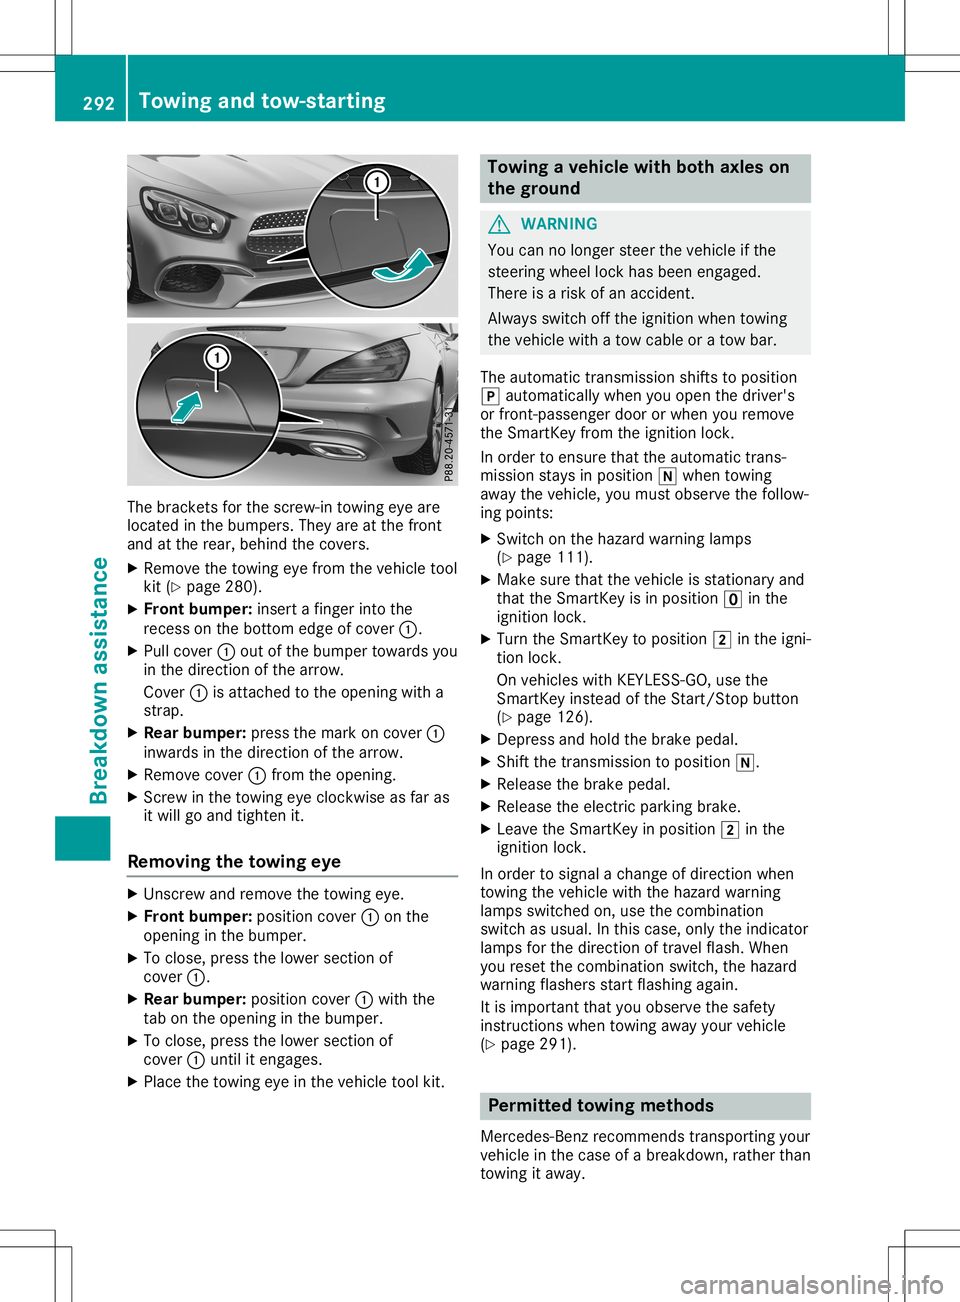
The
bracket sfor the screw-in towingeyeare
located inthe bumpers. Theyareatthe front
and atthe rear, behind thecovers.
X Remove thetowing eyefrom thevehicle tool
kit (Ypage 280).
X Front bumper:insert afinger intothe
recess onthe botto medge ofcover 0043.
X Pull cover 0043out ofthe bumper towards you
in the direction ofthe arrow.
Cover 0043isattached tothe opening witha
strap.
X Rear bump er:press themark oncover 0043
inwards inthe direction ofthe arrow.
X Remove cover0043from theopening.
X Scr ew inthe towing eyeclock wiseasfar as
it will goand tighten it.
Removing thetowing eye X
Unsc rewand remove thetowing eye.
X Front bumper:position cover0043onthe
opening inthe bumper.
X To close, pressthelower section of
cover 0043.
X Rear bump er:position cover0043with the
tab onthe opening inthe bumper.
X To close, pressthelower section of
cover 0043until itengages.
X Place thetowing eyeinthe vehicle toolkit. Towing
avehicle withboth axles on
the ground G
WARNIN
G
You cannolonger steerthevehicle ifthe
steerin gwheel lockhasbeen engaged.
There isarisk ofan accident .
Always switchoffthe ignition whentowing
the vehicle withatow cable oratow bar.
The automatic transmission shiftstoposition
005D automatically whenyouopen thedriver's
or front -passenger doororwhen youremove
the Smart Keyfrom theignition lock.
In order toensure thattheautomatic trans-
mission staysinposition 005Cwhen towing
away thevehicle, youmust observe thefollow-
ing points:
X Switch onthe hazard warning lamps
(Y page 111).
X Make surethatthevehicle isstation aryand
that theSmart Keyisin position 0092inthe
ignition lock.
X Turn theSmart Keytoposition 0048inthe igni-
tion lock.
On vehicles withKEYLE SS-GO, usethe
Smart Keyinstead ofthe Start /Stopbutton
(Y page 126).
X Depress andhold thebrake pedal.
X Shift thetrans mission toposition 005C.
X Release thebrake pedal.
X Release theelectric parking brake.
X Leave theSmart Keyinposition 0048inthe
ignition lock.
In order tosignal achange ofdirection when
towing thevehicle withthehazard warning
lamps switched on,use thecombinat ion
switch asusual. Inthis case, onlytheindicator
lamps forthe direction oftravel flash.When
you reset thecombinat ionswitch, thehazard
warning flashersstartflashing again.
It is important thatyouobserve thesafety
instr uctions whentowing awayyourvehicle
(Y page 291). Permit
tedtowing methods
Mercedes- Benzrecomm endstransportin gyour
vehicle inthe case ofabreakdown, ratherthan
towing itaway . 292
Towing
andtow-sta rtingBr eakdown assistance