2020 MERCEDES-BENZ GLS SUV oil change
[x] Cancel search: oil changePage 198 of 549
#
Alw ays drive on inclines in the line of
fa ll (straight up or down) and do not
turn. &
WARNING Risk offire due toflammable
materials on hot parts of theex haust
sy stem
Flammable material such as lea ves, grass or
twigs may ignite if they come into contact
wi th hot parts of theex haust sy stem. #
When driving on unpa vedro ads or off-
ro ad, regular lych eck theve hicle under‐
side. #
Remo vetrapped plants or other flam‐
mable material, in particular. #
Ifth ere is damage, consult a qualified
specialist workshop immediately. When driving off-road, sand, mud and
water or
wate r mixed with oil may getinto the brakes.
This may lead toare duction in braking ef fect or
tot al brake failure as a result of increased wear.
The braking characteristics will vary depending
on the material that has entered the sy stem. Clean
the brakes af ter driving off-road. If you
th en notice reduced braking ef fect or hear
scraping noises, ha vethe brake sy stem checked
at a qualified specialist workshop. Adapt your
driving style to thech anged braking characteris‐
tics.
* NO
TEDama gecaused bydriving over
obs tacles The
vehicle can be damaged by:
R driving up onto high kerbs or unpa ved
ro ads.
R quickly driving over obs tacles su chas
ke rbs, speed bumps or po tholes.
R heavy objects hitting the underbody or
ch assis components. #
Do not drive over obs tacles that could
damage theve hicle. #
Check theve hicle regular lyfor dama ge
during off-road driving. #
Adjust theve hicle speed tosuit the
ro ad sur face conditions. #
Ifth ere is damage, consult a qualified
specialist workshop immediately. +
ENVIRONMENTAL
NOTEEnvironmental
dama gedue tonon-obser vance of pro‐
hibition signs Environmental pr
otection has priority. Treat
nature with respect. #
Be sure toobser veprohibition signs. Checklist before driving off-road
Check
thefo llowing points before driving off-
ro ad:
R Fuel le vel
R Vehicles with a diesel engine: AdBlue ®
le vel
R Engine oil le vel:fill engine oil tothe maxi‐
mum le velto ensure full gradeability
(/ page 360).
R Tyre-change tool kit and spare wheel
R Tyres and wheels Driving and parking
19 5
Page 361 of 549
fi
ed based on the actual operating conditions
and/or loads.
Examples of arduous operating conditions:
R regular city driving with frequent intermedi‐
ate stops
R mainly short-dis tance driving
R frequent operation in mountainous terrain or
on poor road sur faces
R when the engine is of ten le ftidling for long
periods
R operation in particula rly dusty conditions
and/or if air-recirculation mode is frequently
used
In these or similar operating conditions, ha vethe
interior air filter, engine air cleaner, engine oil
and oil filter etc. changed more frequent ly. The
ty re s must be checked more frequently if the
ve hicle is operated under increased loads. Fur‐
th er information can be obtained at a qualified
specialist workshop. Battery disconnection periods
The ASS
YST PLUS se rvice inter val display
can only calculate the service due da tewhen
th e bat tery is connected. #
Notedown the service due date displa yed on
th e instrument display before disconnecting
th e battery (/ page 357). Engine compartment
Opening and closing
the bonnet &
WARNING Risk of accident due todriv‐
ing with the bonn etunlo cked
The bonn etmay open and block your vie w. #
Neverre lease the bonn etwhen driving. #
Before every trip, ensure that the
engine bonn etis loc ked. &
WARNING Risk of accident and inju ry
when opening and closing the bonn et
The bonnet may suddenly drop into the end
position.
There is a risk of injury for an yone in the bon‐
net's range of mo vement. #
Open or close the bonn etonly when
th ere is nobody in the bonn et's range of
mo vement. &
WARNING Danger of bu rns when open‐
ing the bonn et
If yo u open the engine bonn etwhen the
engine has overheated or during a fire inthe
engine compartment, you could come into
contact with hot gases or other escaping
operating fluids. #
Before opening the bonn et, allow the
engine tocool down. #
Intheeve nt of a fire inthe engine com‐
partment, keep the engine bonn et
closed and call thefire service. 358
Maintenance and care
Page 364 of 549
#
Drain off any excess engine oil that has been
added. Todo so, consult a qualified specialist
wo rkshop.
R For engine oil level turn on ignition #
Switch on the ignition tocheck the engine oil
le ve l.
R Engine oil level System inoperative : The oil
le ve l sensor is defective or not connec ted. #
Consult a qualified specialist workshop.
R Engine oil level System currently unavail. #
Close the bonn et.
To pping up engine oil &
WARNING Risk of bu rns from hot com‐
ponent parts in the engine compartment
Cer tain component parts in the engine com‐
partment can be very hot, e.g. the engine,
th e cooler and parts of theex haust sy stem. #
Allow the engine tocool down and only
to uch co mponent parts described in
th efo llowing. &
WARNING Risk offire and injury from
engine oil
If engine oil comes into con tact wi thhot
component parts in the engine compart‐
ment, it may ignite. #
Make sure that no engine oil is spilled
next tothefiller opening. #
Allow the engine tocool off and thor‐
oughly clean the engine oil from compo‐
nent parts before starting theve hicle. *
NO
TEEngine dama gecaused byan
incor rect oil filter, incor rect oil or addi‐
tives #
Do not use engine oils or oil filters
which do not cor respond tothe specifi‐
cations explicitly prescribed forthe
service inter vals. #
Follow the instructions on the service
inter val display forch anging the engine
oil and obser vethe prescribed change
inter vals. #
Do not use additives. *
NO
TEDama gecaused bytopping up too
much engine oil To
o much engine oil can damage the engine
or the catalytic con verter. #
Have excess engine oil remo ved at a
qu alified specialist workshop. %
Depending on driving style, theve hicle con‐
sumes up to0.8 lof oil per 1000 km. The oil
consum ption may be higher than this when
th eve hicle is new or if you frequently drive
at high engine speeds.
% Depending on the engine, the cap may be
ins talled in the engine compartment in dif‐
fe re nt locations. Maintenance and care
361
Page 404 of 549
R
rear wheels wear more in the cent reofthe
tyre
Do not drive wi thtyres that ha vetoo little tread
dep th. This significantly reduces traction on wet
ro ads (aquaplaning).
On vehicles with the same front and rear wheel
size, you can inter change the wheels every
5000 to10,000 km, depending on thewe ar.
Ensure the direction of rotation is maintained for
th e wheels.
Obser vethe instructions and saf ety no tes on
"Changing a wheel" when doing so
(/ page 402). Note
s onstoring wheels When
storing wheels, obser vethefo llowing
no tes:
R Afterre moving wheels, store them in a cool,
dry and preferably dark place.
R Protect the tyres from conta ct withoil,
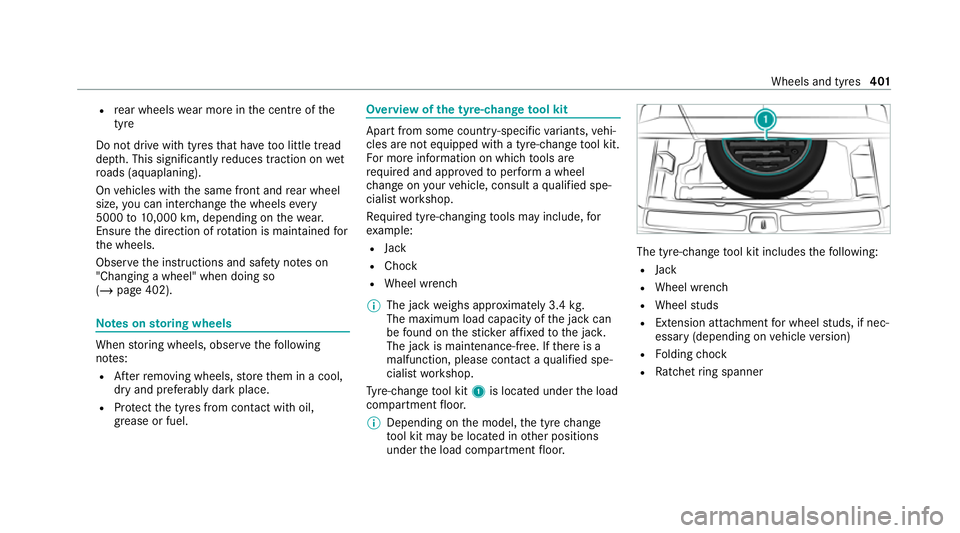
grease or fuel. Overview of
the ty re-change tool kit Apart from some countr
y-specific variants, vehi‐
cles are not equipped with a tyre-change tool kit.
Fo r more information on which tools are
re qu ired and appr ovedto per form a wheel
ch ange on your vehicle, consult a qualified spe‐
cialist workshop.
Re quired tyre-changing tools may include, for
ex ample:
R Jack
R Chock
R Wheel wrench
% The jack weighs appr oximately 3.4 kg.
The maximum load capacity of the jack can
be found on thest icke r af fixe dto the jac k.
The jack is maintenance-free. If there is a
malfunction, please conta ct aqualified spe‐
cialist workshop.
Ty re-change tool kit 1is located under the load
compartment floor.
% Depending on the model, the tyre change
to ol kit may be located in other positions
under the load compartment floor. The tyre-change
tool kit includes thefo llowing:
R Jack
R Wheel wrench
R Wheel studs
R Extension attachment for wheel studs, if nec‐
essary (depending on vehicle version)
R Folding chock
R Ratchet ring spanner Wheels and tyres
401
Page 409 of 549
*
NO
TEDama getothre ading from dirt on
wheel bolts #
Do not place wheel bolts in sand or on
a dirty sur face. #
Comp lete ly unscr ewthe wheel bolts. #
Remo vethe wheel. Fi
tting a new wheel Re
quirements:
R The wheel is remo ved (/ page 405).
* NO
TEMercedes-AMG vehicles #
Obser vethe no tes in the Supplement.
Yo u could otherwise failto recognise
dangers. &
WARNING Risk of accident from losing a
wheel
Oiled or greased wheel bolts can cause the
wheel bolts tocome loose, as too can dam‐
aged wheel bolts or wheel hub thre ads. #
Never oil or grease theth re ads. #
Intheeve nt of dama getotheth re ads,
con tact a qualified specialist workshop
immediatel y. #
Have the damaged wheel bolts or dam‐
aged hub thre ads replaced. #
Do not continue driving. #
Obser vethe information on thech oice of
tyres (/ page 397).
Fo r tyres with a specified direction of rotation,
an ar row on the side wall of the tyre indicates
th e cor rect di rection of rotation. Obse rvethe
direction of rotation when fitting. &
WARNING Risk of inju ryfrom tightening
wheel bolts and nuts
If yo u tighten the wheel bolts or wheel nuts
when theve hicle is raised, the jack could tip. #
Only tighten wheel bolts or wheel nuts
when theve hicle is on the ground. #
Obser vethe instructions and saf ety no tes on
"Changing a wheel" (/ page 397). #
For saf etyre asons, on lyuse wheel bolts
which ha vebeen appr ovedby Mercedes-
Benz and forth e wheel in question. #
Tighten the wheel bolts evenly in a diagonal
pattern in the order indicated until they are
fi nger-tight. #
Ifth e collapsible emer gency spa rewheel has
been fitted, infla tethe collapsible emer gency
spa rewheel (/ page411). #
Lowe rth eve hicle (/ page 406). Lo
weri ngtheve hicle af ter a wheel change Re
quirements:
R The new wheel has been fitted
(/ page 406).
Obse rveth e information on tyre pressure
(/ page 394). #
Place thera tchet ring spanner onto the he xa‐
gon nut of the jack so that the lettering "AB"
is visible. 406
Wheels and tyres
Page 426 of 549
*
NO
TEEngine dama gecaused byan
incor rect oil filter, incor rect oil or addi‐
tives #
Do not use engine oils or oil filters
which do not cor respond tothe specifi‐
cations explicitly prescribed forthe
service inter vals. #
Do not alter the engine oil or oil filter in
order toachie velonger change inter vals
th an presc ribed. #
Do not use additives. #
Have the engine oil rene we d at regular
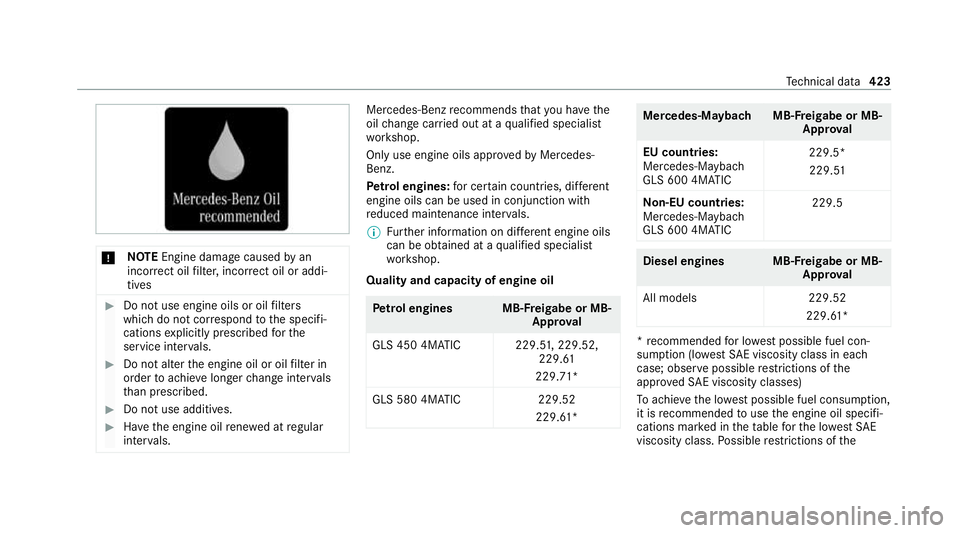
inter vals. Mercedes-Benz
recommends that you ha vethe
oil change car ried out at a qualified specialist
wo rkshop.
Only use engine oils appr oved byMercedes-
Benz.
Pe trol engines: for cer tain countries, dif fere nt
engine oils can be used in conjunction wi th
re duced maintenance inter vals.
% Further information on dif fere nt engine oils
can be ob tained at a qualified specialist
wo rkshop.
Quality and capacity of engine oil Pe
trol engine sM B-Freigabe or MB-
Appr oval
GLS 450 4MATIC 229.5 1,229.52,
229.61
229.71*
GLS 580 4MATIC 229.52
229.61* Mercedes‑Maybac
hMB-Freigabe or MB-
Appr oval
EU countries:
Mercedes-Mayba ch
GLS 600 4MATIC 229.5*
229. 51
No n-EU countries:
Mercedes-Maybach
GLS 600 4MATIC 229.5 Diesel engines MB-Fr
eigabe or MB-
App roval
All model s2 29.52
229.61* *
re commended for lo west possible fuel con‐
sum ption (lo westSA E viscosity class in ea ch
case; obser vepossible restrictions of the
appr ovedSA E viscosity classes)
To achie vethe lo west possible fuel consum ption,
it is recommended touse the engine oil specifi‐
cations mar ked in theta ble forth e lo west SAE
viscosity class. Possible restrictions of the Te
ch nical da ta423
Page 427 of 549
appr
ovedSA E viscosity classes mu stbe
obser ved.
Mercedes-Maybach GLS 600 4MATIC: only
use SAE 0W-40 or SAE 5W-40 engine oils.
% Ifth e engine oils lis ted in theta ble are not
av ailable, you may add a maximum of
1. 0 litr e ofthefo llowing engine oils once
onl y.
Engine oils for one-time filling only in exceptional
cases:
R petrol engines:
- GLS 450 4MATIC: MB-Freigabe or MB-
Appr oval 229. 31orAC EA C3
- GLS 580 4MATIC: MB-Freigabe or MB-
Appr oval 229. 51orAC EA C3
- Mercedes-Mayba chGLS 600 4MATIC:
MB-F reigabe or MB-Appr oval 229.3 or
AC EA A3/B4
R diesel engines: MB-Freigabe or MB-Appr oval
229. 51orAC EA C3
The following values referto an oil change,
including the oil filter. Model
Capacity
GLS 580 4MATIC 9.5 litres
All other models 8.5 litres Mercedes‑Maybac
hCapacity
Mercedes-Mayba ch
GLS 600 4MATIC 9.5 lit
res Note
s on brake fluid Obser
vethe no tes on operating fluids
(/ page 417). &
WARNING Risk of an accident due to
va pour poc kets form ing in the brake sys‐
tem
The brake fluid cons tantly absorbs moi sture
from the air. This lo wersthe boiling point of
th e brake fluid. If the boiling point is too lo w,
va pour poc kets may form inthe brake sys‐
te m when the brakes are applied hard.
This impairs the braking ef fect. #
Have the brake fluid rene we d at the
specified inter vals. Ha
ve the brake fluid regularly replaced at a
qu alified specialist workshop.
Only use a brake fluid appr ovedby Mercedes-
Benz according toMB-F reigabe or MB-Appr oval
33 1.0. Coolant
Note
s on coolant
Obser vethe no tes on operating fluids
(/ page 417). &
WARNING Risk offire ‑ and inju ryfrom
antifreeze
If antifreeze comes into contact with hot
component parts in the engine compart‐
ment, it may ignite. #
Allow the engine tocool down before
yo uto p up the antif reeze. #
Make sure that no antifreeze spills out
next tothefiller opening. 424
Tech nical da ta
Page 452 of 549
Display messages
Possible causes/consequences and M
MSolutions #
Use the electric parking brake tosecure theve hicle against rolling away. #
Consult a qualified specialist workshop.
LOW RANGE Stop Apply
parking brake *T
he transfer case is malfunctioning. #
Stop theve hicle in accordance with the tra ffic conditions. #
Apply the electric parking brake. #
Where necessar y,also secure theve hicle against rolling away. #
Engage pa rkposition j.
LOW RANGE Max. speed
10 km/h *T
he maximum speed of 10km/h forth ege ar change has been exceeded. #
Drive more slowly. #
Repeat thege ar change.
LOW RANGE Max. speed
40 km/h *T
he maximum speed of 40 km/h forth ege ar change has been exceeded. #
Drive more slowl y. #
Todeactivate thege ar change, press theLOW RANGE button again. #
Repeat thege ar change.
Gearbox protection Limit
30 km/h Switch off LOW
RANGE *T
he oil temp erature in the transfer case is too high. #
Inthe on-ro ad position, shift toHIGH RANGE. Display messages and
warning/indicator lamps 449