2020 MERCEDES-BENZ GLA clock
[x] Cancel search: clockPage 202 of 346

X
Press 0076toconf irm.
X Press the0064 or0063 button toselect the
Automatic DoorLock Automatic
DoorLockfunction.
If the Automatic DoorLock Automatic
DoorLockfunctionis
switched on,the multifunc tiondisplay
shows thedoors inorange.
X Press the0076 button tosave thesetting.
If you activat ethe Automatic DoorLock Automatic
DoorLock
funct ion,thevehicle iscent rally locked above
a speed ofaround 9mph (15km/ h).
For furth erinfor mationonthe automa ticlock-
ing feature ,see (Ypage 76).
Ac tivati ng/deac tivati ngthe acoustic
lo cki ng veri ficatio nsig nal
If yo uswi tch onthe Acou stic Lock Acou
stic Lockfuncti on,
an acou sticsignal sounds whenyo ulock the
vehi cle.
X Pres sthe 0059 or0065 button onthe steer -
ing whe elto sel ect the Sett . Sett
.menu .
X Pres sthe 0064 or0063 button tosel ect the
Vehi cle Vehi
clesubmenu .
X Pres s0076 toconfir m.
X Pres sthe 0064 or0063 button tosel ect the
Acou stic Lock Acou
stic Lockfuncti on.
If the Acou stic Lock Acou
stic Lockfuncti onisacti vate d,
the multifunction displa yshow sthe 0037
sy mbol inora nge.
X Pres sthe 0076 button tosav ethe setting .
Co mfort Sw
itchin gthe fold-in mirrors whenlock-
ing feature on/o ff
Thi sfuncti onisonly availab lein Ca nada .
Thi sfuncti onisonly availab lewhe nthe vehi cle
is equ ipped with the electrica lfol d-in functi on.
Whe nyo uacti vate theAuto .Mirr orFold ‐ Auto
.Mirr orFold ‐
ing ing
functi on,the exteri ormirro rsare folded in
whe nthe vehi cleislocke d.Ifyo uunl ock the
vehi cleand then openthe driver's orfront-
pa sseng erdoo r,the exteri ormirro rsfoldou t
ag ain.
If yo uhav eswi tched onthe Auto .Mirr or Auto
.Mirr or
Fold ing Fold
ingfuncti onand youfol din the exteri or
mirro rsusi ng the button onthe door
(Y page 99), they willnot foldou tau toma ti-
cal ly.The exteri ormirro rscan then onlybefol-
ded outusi ng the button onthe door. X
Pres sthe 0059 or0065 button onthe steer -
ing whe elto sel ect the Sett . Sett
.menu .
X Pres sthe 0064 or0063 button tosel ect the
Conv enience Conv
eniencesubmenu .
X Pres s0076 toconfir m.
X Pres sthe 0064 or0063 button tosel ect the
Auto .Mirr orFold ing Auto
.Mirr orFold ingfuncti on.
If the Auto .Mirr orFold ing Auto
.Mirr orFold ingfuncti onis
swi tched on,the multifunction displa y
show sthe exteri ormirro rin ora nge.
X Pres sthe 0076 button tosav ethe setting .
Ac tivati ng/deac tivati ngthe EASY-
ENTRY /EXIT feature G
WARNI
NG
Whe nthe EASY-ENTR Y/EXITfeature adjusts
the steer ingwhe eland thedriver's seat,yo u
and other vehicleoccup ants–pa rticu larly
chil dren–cou ldbeco metrap ped.The reisa
risk ofinjur y.
Whi lethe EASY-ENTR Y/EXITfeature ismak-
ing adjustme nts,make surethat noone has
any bodypa rts inthe swe epofthe seatand
the steer ingwhe el.
If some bodybeco mestrapped:
R pre ssone ofthe memo ryfuncti onpos i-
tion buttons, or
R pre ssone ofthe memo ryfuncti onmem-
ory buttons, or
R move theswitch forsteer ingwhe el
ad justme ntinthe oppositedir ectio nto
that inwhi chthe steer ingwhe elismovi ng
The adjustme ntproce ssisstopp ed.
X Pres sthe 0059 or0065 button onthe steer -
ing whe elto sel ect the Sett ings Sett
ings menu .
X Pres sthe 0064 or0063 button tosel ect the
Conv enie nce Conv
enie ncesubmenu .
X Pres s0076 toconfir m.
X Pres sthe 0064 or0063 button tosel ect the
Easy Entry/Exit Easy
Entry/Exitfuncti on.
If the Easy Entry/Exit Easy
Entry/Exitfuncti onisacti va-
ted, themultifunction displa yshow sthe
steer ingwhe elin ora nge.
X Pres sthe 0076 button tosav ethe setting .
i Ple
ase note: the setting selected forthe
acou sticlocki ngveri fication signal mus t 200
Men
usand subme nusOn-board computer anddispl ays
Page 297 of 346

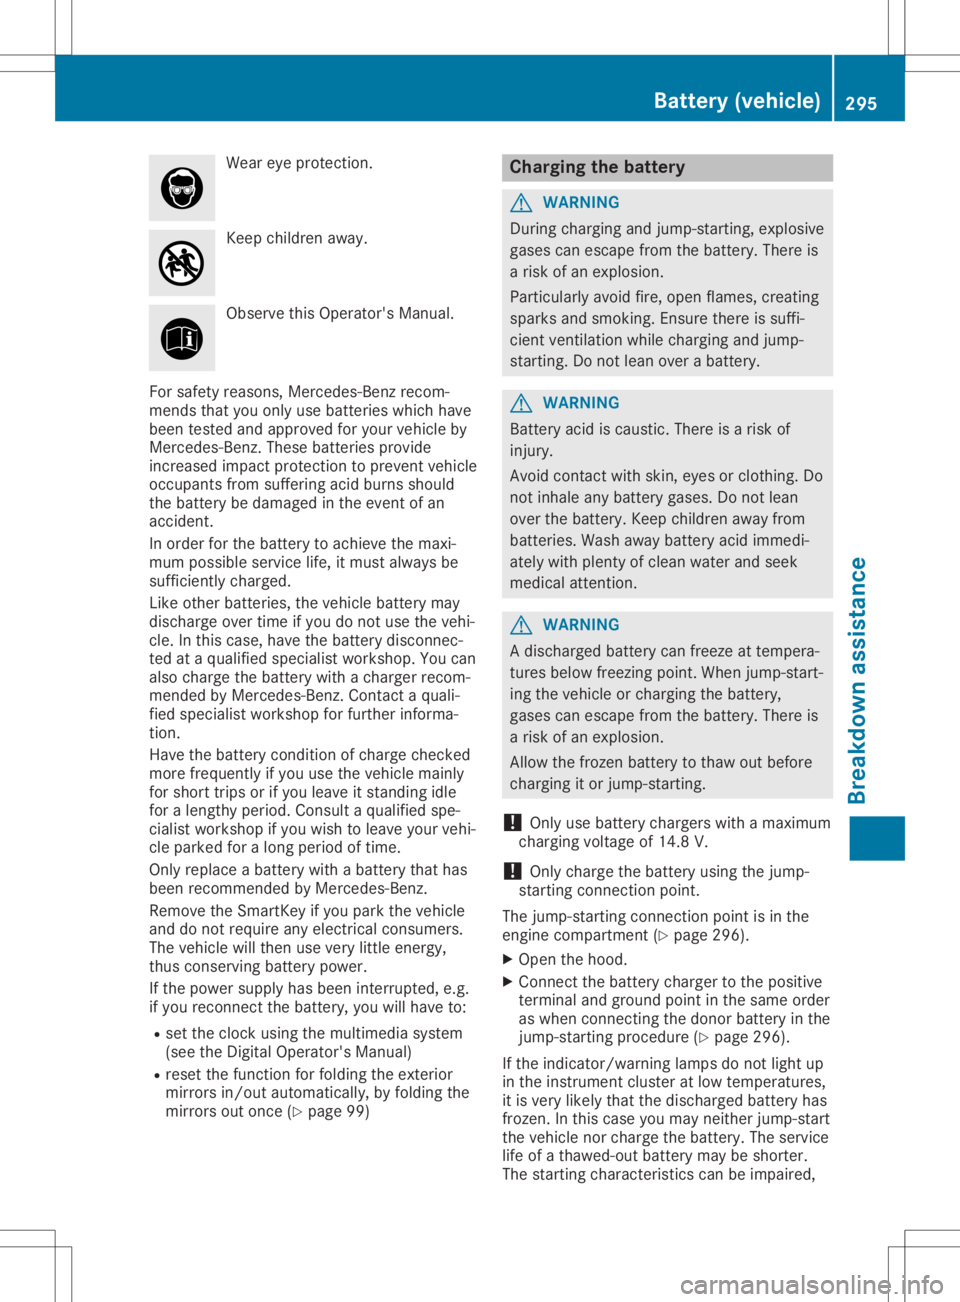
Wear
eyeprotec tion. Keep
children away. Observe
thisOperator' sManual.
For safety reasons, Mercedes- Benzrecom-
mends thatyouonly usebatter ieswhich have
been testedand approved foryour vehicle by
Mercedes- Benz.These batteriesprovide
incr eased impact protectiontoprevent vehicle
occupant sfrom sufferin gacid burns should
the batter ybe damaged inthe event ofan
accident .
In order forthe batter yto achieve themaxi-
mum possible servicelife,itmust alway sbe
sufficien tlycharged.
Like other batter ies,thevehicle batterymay
discharge overtime ifyou donot use thevehi-
cle. Inthis case, havethebatter ydisconn ec-
ted ataqualified specialist workshop. Youcan
also charge thebatter ywith acharger recom-
mended byMercedes- Benz.Contac ta quali-
fied specialist workshop forfurther informa-
tion.
Have thebatter ycondit ionofcharge checked
more frequent lyifyou usethevehicle mainly
for short tripsorifyou leave itstandin gidle
for alength yperiod. Consult aqualified spe-
cialist workshop ifyou wish toleave yourvehi-
cle parked foralong period oftime.
Only replace abatter ywith abatter ythat has
been recomm endedbyMercedes- Benz.
Remove theSmart Keyifyou park thevehicle
and donot require anyelectr icalcons umers.
The vehicle willthen usevery little energy,
thus conserving batterypower.
If the power supply hasbeen interrupted, e.g.
if you recon nectthebatter y,you willhave to:
R set the clock using themultimedia system
(see theDigital Operator' sManual)
R reset thefunct ionforfolding theexterior
mirrors in/outautomatically, byfolding the
mirrors outonce (Ypage 99) Charging
thebatt ery G
WARNIN
G
During charging andjump- starting,explosive
gases canescape fromthebatter y.There is
a risk ofan explosion.
Particularly avoidfire,open flames, creating
sparks andsmokin g.En sure there issuffi-
cient ventilation whilecharging andjump-
start ing.Donot lean over abatter y. G
WARNIN
G
Batt eryacid iscaustic. Thereisarisk of
injury.
Avoid contactwith skin,eyes orclothin g.Do
not inhale anybatter ygases. Donot lean
over thebatter y.Keep children awayfrom
batter ies.Wash awaybatter yacid immedi-
ately withplenty ofclean water andseek
medical attention. G
WARNIN
G
A discharged batterycan freez eat temper a-
tures below freezingpoint. Whenjump-start-
ing the vehicle orcharging thebatter y,
gases canescape fromthebatter y.There is
a risk ofan explosion.
Allow thefrozenbatter yto thaw outbefore
charging itor jump- starting.
! Only
usebatter ychargers withamaximum
charging voltageof14. 8V.
! Only
charge thebatter yusing thejump-
start ingconn ection point.
The jump- startingconn ection pointisin the
engine compart ment(Ypage 296).
X Open thehood.
X Connec tthe batter ycharger tothe positive
term inaland ground pointinthe same order
as when connectin gthe donor batteryin the
jump- startingprocedure (Ypage 296).
If the indicator /warninglamps donot light up
in the instrument clusteratlow temper atures,
it is very likely thatthedischarged batteryhas
froz en.Inthis case youmay neith erjump- start
the vehicle norcharge thebatter y.The service
life ofathawed-out batterymay beshort er.
The start ingcharact eristicscan beimpaired, Bat
tery(vehicle )
295Breakdown assistance Z
Page 302 of 346

The
battery mustbeconn ected andcharged.
Otherwise, you:
R cann otturn theSmart Keytoposition 0048in
the ignition lock.
R cann otrelease theelectric parking brake.
R cann otshift thetrans mission toposition 005C.
The funct ionofthe electric parking brakeand
the parking lockisdependent onthe on-board
voltage.
If the on-board voltageislow orifthere isa
system malfunct ion:
R the electric parking brakemaynotbe
applied incert aincircumst ances,or
R itmay nolonger bepossible toshift the
trans mission toposition 005D
Switch offnon- essent ialconsumer s,e.g. the
radio.
Deact ivatetheautomatic lockingfeature
before thevehicle istowed (Ypage 199). You
could otherwise belocked outwhen pushing
or towing thevehicle. <002C0051005600570044004F004F004C0051004A001200550048005000520059
004C0051004A>
thetowing eye
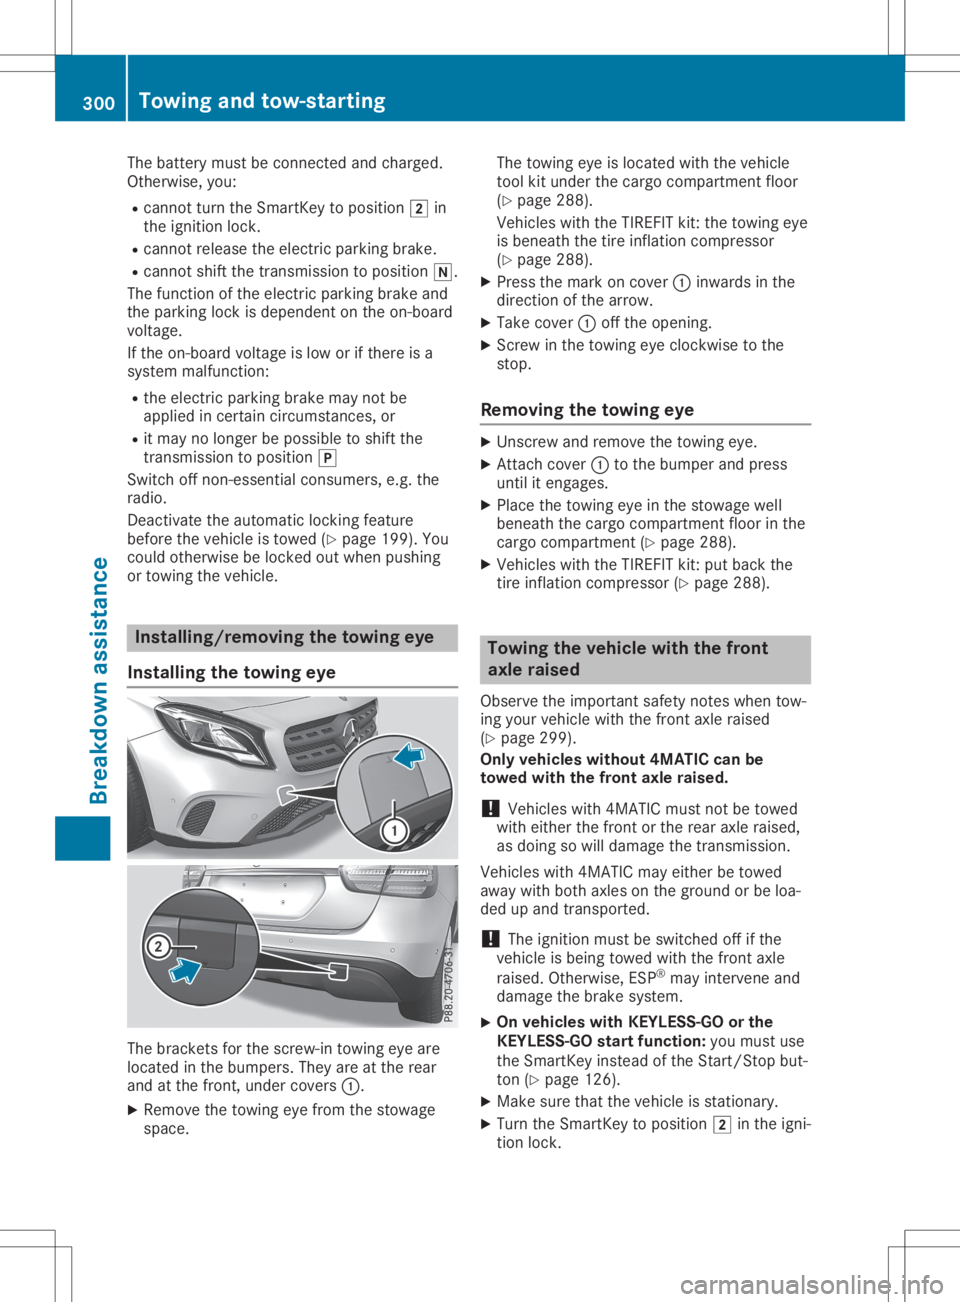
Installing thetowing eye The
bracket sfor the screw-in towingeyeare
located inthe bumpers. Theyareatthe rear
and atthe front ,under covers 0043.
X Remove thetowing eyefrom thestowage
space. The
towing eyeislocated withthevehicle
tool kitunder thecargo compart mentfloor
(Y page 288).
Vehicles withtheTIREFIT kit:the towing eye
is beneath thetire inflation compressor
(Y page 288).
X Press themark oncover 0043inwards inthe
direction ofthe arrow.
X Take cover 0043offthe opening.
X Scr ew inthe towing eyeclock wisetothe
stop.
Removing thetowing eye X
Unsc rewand remove thetowing eye.
X Attach cover 0043tothe bumper andpress
until itengages.
X Place thetowing eyeinthe stowage well
beneath thecargo compart mentfloorinthe
cargo compart ment(Ypage 288).
X Vehicles withtheTIREFIT kit:put back the
tire inflation compressor (Ypage 288). Towing
thevehicle withthefront
axle raised
Observe theimportant safetynoteswhen tow-
ing your vehicle withthefront axleraised
(Y page 299).
Only vehicles without4MATICcanbe
towed withthefront axleraised.
! Vehicles
with4MATI Cmust notbetowed
with either thefront orthe rear axle raised,
as doing sowill damage thetrans mission.
Vehicles with4MATI Cmay either betowed
away withboth axles onthe ground orbe loa-
ded upand trans ported.
! The
ignition mustbeswitched offifthe
vehicle isbeing towed withthefront axle
raised. Otherwise, ESP®
may intervene and
damage thebrake system.
X On
vehicles withKEYL ESS-GO orthe
KEYL ESS-GO startfunction: youmust use
the Smart Keyinstead ofthe Start /Stopbut-
ton (Ypage 126).
X Make surethatthevehicle isstation ary.
X Turn theSmart Keytoposition 0048inthe igni-
tion lock. 300
Towing
andtow-sta rtingBr eakdown assistance