2020 MERCEDES-BENZ E-CLASS ESTATE roof rack
[x] Cancel search: roof rackPage 23 of 489
Pr
otection of the environment
* NO
TEPlug-in hybrid #
Obser vethe no tes in the Supplement.
Yo u could otherwise failto recognise
dangers. +
ENVI
RONMENTAL NOTEEnvironmental
dama gedue tooperating conditions and
personal driving style The pollutant emission of
theve hicle is
directly related tothewa yyo u operate the
ve hicle.
Operate your vehicle in an environmentally
re sponsible manner tohelp pr otect the envi‐
ro nment. Please obser vethefo llowing rec‐
ommendations on ope rating conditions and
pe rsonal driving style.
Operating conditions: #
Make sure that the tyre pressure is cor‐
re ct. #
Do not car ryany unnecessary weight
(e.g. roof luggage rack s once you no
lon ger need them). #
Adhere tothe service inter vals.
A regularly serviced vehicle will contri b‐
ute toenvironmen tal pr otection. #
Alw ays ha vemaintenance workcar ried
out at a qualified specialist workshop.
Pe rsonal driving style: #
Do not depress the accelera tor pedal
when starting the engine. #
Do not warm upthe engine while the
ve hicle is stationar y. #
Drive carefully and maintain a suitable
di st ance from theve hicle in front. #
Avoid frequent, sudden acceleration
and braking. #
Change gear in good time and use each
ge ar on lyup toÔ of its maximum
engine speed. #
Switch off the engine in stationary traf‐
fi c, e.g. byusing the ECO start/ stop
function. #
Drive fuel-ef ficiently. Obser vethe ECO
display for a fuel-ef ficient driving style. Ta
ke -back of end-of-life vehicles
EU countries onl y:
Mercedes-Benz will take back your end-of-life
ve hicle for environment-friendly disposal in
accordance with the European Union(EU) End-
of-Life Vehicles Directive.
A network of vehicle take -ba ckpoints and dis‐
mantlers has been es tablished foryo uto return
yo ur vehicle. You can lea veit at any of these
points free of charge . This makes an impor tant
contribution toclosing there cycling circle and
conse rving resources.
Fo r fur ther information about there cycling and
disposal of end-of-li fevehicles, and theta ke-
back conditions, please visit the national
Mercedes-Benz website foryo ur count ry. 20
General no tes
Page 92 of 489
#
Never lea vechildren unat tended in the
ve hicle. #
When leaving theve hicle, alw aysta ke
th eke y with you and lock theve hicle. &
WARNING Risk of becoming trapped
when thero ller sunblind is being opened
and closed
Body parts may become trapped between
th ero ller sunblind and frame or sliding roof. #
When opening or closing, make sure
that no body parts are in thero ller sun‐
blind's range of mo vement. #
Release the button immediately if
somebody becomes trapped.
or #
Brief lypress the button in any direction
during automatic operation.
The opening or closing process will be
st opped. *
NO
TEMalfunction due tosnow and ice Snow and ice may cause
the sliding sunroof
to malfunction. #
Open the sliding sunroof only if it is free
of snow and ice. *
NO
TEDama gecaused byprotru ding
objects Objects
that pr otru de from the sliding sun‐
ro of may damage the sealing strips. #
Do not allow anything toprotru de from
th e sliding sunroof. *
NO
TEImpo rtant points toremember
when a roof luggage rack isfitted When a
roof luggage rack isfitted, raising or
opening the sliding sunroof may be limited. #
Check whe ther the sliding sunroof can
be raised or opened when a roof lug‐
ga ge rack isfitted. #
If in doubt, do not raise or open the
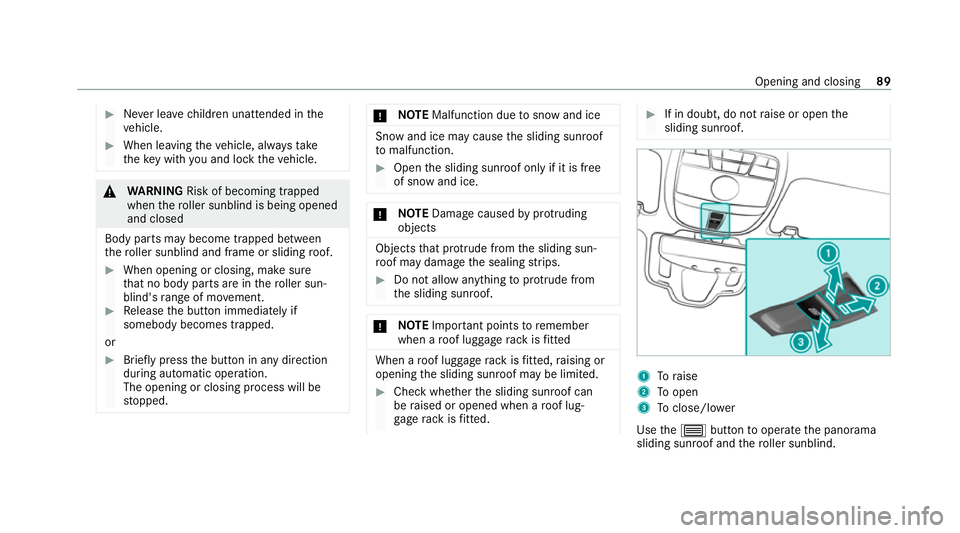
sliding sunroof. 1
Toraise
2 Toopen
3 Toclose/l ower
Use the3 button tooperate the panorama
sliding sunroof and thero ller sunblind. Opening and closing
89
Page 93 of 489
The panorama sliding sunroof can be operated
only when
thero ller sunblind is open. #
Check whe ther the sliding sunroof can be
ra ised or opened when a roof luggage rack is
fi tted. #
Tostart automatic operation: pressthe
3 button be yond the point of resis tance
or pull and release it. #
Tointer rupt automatic operation: briefly
press the3 button in any direction.
The opening/closing process will be stop‐
ped.
Au tomatic reve rsing function of the sliding
sunroof
If an obs tacle is obstructing the sliding sunroof
during the closing process, the sliding sunroof
will open again automaticall y.The automatic
re ve rsing function is only an aid and is not a sub‐
st itute foryo ur attentiveness. #
During the closing process, make sure that
no body parts are in the closing area. &
WARNING Risk of becoming trapped
despi tethere ve rsing function being
active
In particular, there ve rsing function does not
re act:
R tosoft, light and thin objects, e.g. fingers.
R towa rdsth e end of the closing procedure.
R during resetting. #
During the closing process, make sure
th at no body parts are in the closing
area. #
Release the button immediately if
somebody becomes trapped.
or #
Brief lypress the button in any direction
during automatic operation.
The closing process will be stopped. Au
tomatic reve rsing function of thero ller
sunblind
If an obs tacle is obstructing thero ller sunblind
during the closing process, thero ller sunblind
will open again automaticall y.The automatic re
ve rsing function is only an aid and is not a sub‐
st itute foryo ur attentiveness. #
When closing thero ller sunblind, make sure
th at no body parts are in thera nge of mo ve‐
ment. &
WARNING Risk of becoming trapped
despi tereve rsing function
In particular, there ve rsing function does not
re act tosoft, light and thin objects, e.g. fin‐
ge rs. #
When closing thero ller sunblind, make
sure that no body parts are in thera nge
of mo vement. #
Release the button immediately if
somebody becomes trapped.
or #
Brief lypress the button in any direction
during the automatic closing process.
The closing process will be stopped. 90
Opening and closing
Page 131 of 489
#
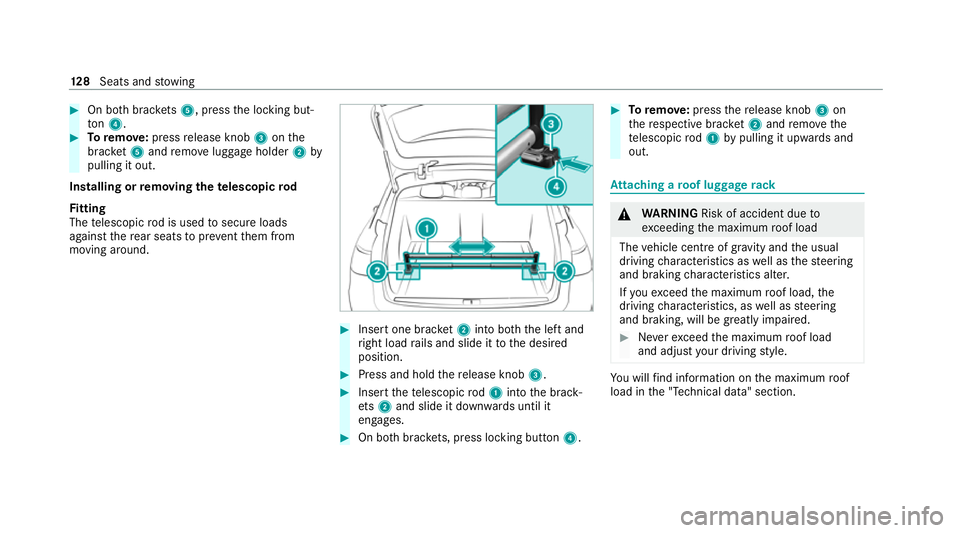
On bo thbrac kets 5, press the locking but‐
to n4. #
Toremo ve:press release knob 3onthe
brac ket5 and remo veluggage holder 2by
pulling it out.
Installing or removing the telescopic rod
Fi tting
The telescopic rod is used tosecure loads
against there ar seats topreve ntthem from
moving around. #
Insert one brac ket2 into bo th the left and
ri ght load rails and slide it tothe desired
position. #
Press and hold there lease knob 3. #
Insert thete lescopic rod1 into the brack‐
et s2 and slide it down wards until it
engages. #
On bo thbrac kets, press lo cking button 4. #
Toremo ve: press there lease knob 3on
th ere spective brac ket2 and remo vethe
te lescopic rod1 bypulling it upwards and
out. At
taching a roof luggage rack &
WARNING Risk of accident due to
exc eeding the maximum roof load
The vehicle centre of gravity and the usual
driving characteristics as well as thesteering
and braking characteristics alter.
If yo uexc eed the maximum roof load, the
driving characteristics, as well as steering
and braking, will be greatly impaired. #
Neverexc eed the maximum roof load
and adjust your driving style. Yo
u will find information on the maximum roof
load in the "Technical data" section. 12 8
Seats and stowing
Page 132 of 489
*
NO
TEVehicle damage from non-
appr ovedro of luggage racks The
vehicle could be damaged byroof lug‐
ga ge rack sth at ha venot been tested and
appr ovedfo r Mercedes-Benz. #
Use only roof luggage rack ste sted and
appr ovedfo r Mercedes-Benz. #
Depending on theve hicle equipment,
ensure that the sliding sunroof can be
fully raised when thero of luggage rack
is fitted. #
Depending on theve hicle equipment,
ensure that theta ilgate can be fully
opened when thero of luggage rack is
fi tted. #
Position the load on thero of luggage
ra ck in such a wayth at theve hicle will
not sus tain damage even when it is in
motion. *
NO
TEDama getothe panorama sliding
sunroof due tonon-app rove dro of lug‐
ga ge racks The panorama sliding sunroof may be dam‐
aged bythero of luggage rack ifyo u attem pt
to open it when using a roof luggage rack not
te sted and appr ovedfo r Mercedes-Benz. #
When a roof luggage rack isfitted, open
th e panorama sliding sunroof only if this
has been tested and appr oved for
Mercedes-Benz.
The panorama sliding sunroof may be raised
to allow ventilation of theve hicle interior. #
Secure thero of luggage rack tothero of rail‐
ing. #
Obser vethe manufacturer's ins tallation
instructions. Soc
kets Using the
12V so cket Re
quirements: R
Only connect devices up toa maximum of
18 0 W (15 A).
Depending on theve hicle equipment, theve hicle
has thefo llowing 12V soc kets:
R Inthestow age compartment in the front
cent reconsole
R Inthestow age compartment in the cent re
console of there ar passenger compartment
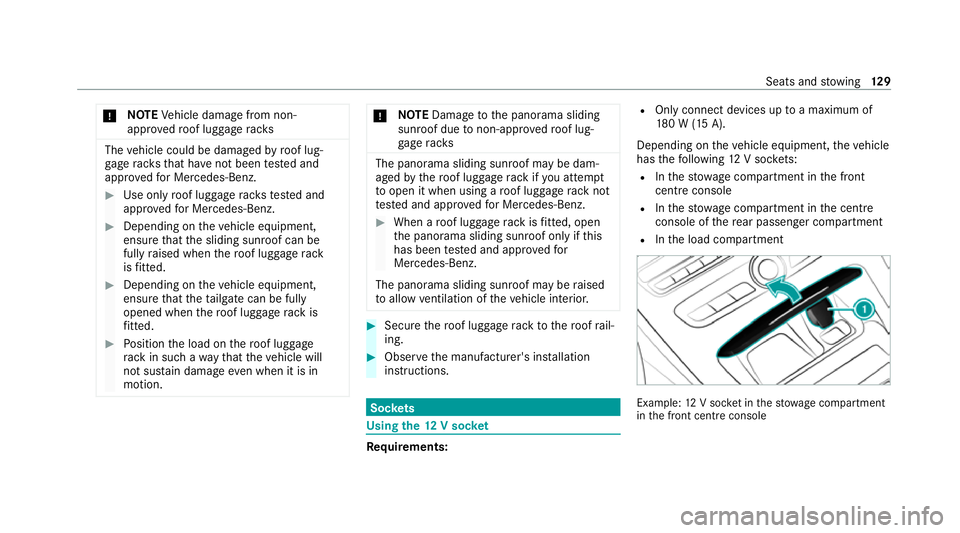
R Inthe load compartment Example:
12V soc ket in thestow age compartment
in the front cent reconsole Seats and
stowing 12 9
Page 479 of 489
Switching au
tomatic operation
on/off (360° Camera) ......................... 234
Rims (care) ............................................... 319
Ro llaw ay protection
see HOLD function
Ro ller sunblind .......................................... 92
Pa norama sliding sunroof ...................... 88
Re ar wind ow.......................................... 93
Side windo ws........................................ 92
Ro of lining (care) .................................... .321
Ro of load .................................................. 377
Ro of luggage rack
Loading ................................................ 12 8
Secu ring .............................................. 12 8
Ro ute ........................................................ 281
Calculating .......................................... .281
Selecting options ................................. 281
Ro ute guidance with augmented real‐
ity
Activating ............................................ 281
Displ aying stre et names and house
numbe rs.............................................. 281 Ro
ute-based speed adaptation
Fu nction ............................................... 214
Setting ................................................. 215
Ru n-flat characteristics
MOExtended tyres ............................... 325
Ru nning-in no tes .....................................1 66 S
Saf ety sy stems
see Driving saf ety sy stem
Saf etyve st ............................................... 323
Sear chlight
Swit ching on/off with hand mo ve‐
ments .................................................. 271
Seat ............................................... 97, 98, 11 8
4-w aylumbar support .......................... 101
Ad justing (electrically) ......................... 101
Ad justing (me chanically and electri‐
cally) ...................................................... 98
Ad justing (Seat Comfort) ..................... 100
Ad justing the seat backrest angle
(rear) ....................................................1 21
Au tomatic seat adju stment ................. 104
Backrest (rear) locking ........................ 12 0Con
figuring the settings ......................1 04
Cor rect driver's seat position ................ 97
Fo lding the backrest (rear) back ..........1 19
Fo lding the backrest (rear) forw ards .... 11 8
Massage programme overview ............ 105
Operating the memory function ........... 11 5
Pa nel heating ....................................... 107
Re setting the settings .......................... 106
Setting options ...................................... 14
Wo rkout programme overview ............ .105
Seat see Folding bench seat
Seat belt .............................................. .37, 40
Ac tivating/deactivating seat belt
adjustment ............................................ 40
Ad justing the height .............................. 39
Care ..................................................... 321
Fa stening ............................................... 39
Pr otection ..............................................37
Re ar seat belt status display .................. 41
Re duced pr otection ...............................38
Re leasing .............................................. .40
Seat belt adjustment (function) ............. 40
Wa rning lamp ........................................ 40 476
Index