2020 MERCEDES-BENZ CLS COUPE air condition
[x] Cancel search: air conditionPage 142 of 469
Setting climate control
toautomatic mode In auto
matic mode, the set temp erature is con‐
trolled and maintained at a const ant levelby the
air suppl y. #
Press the à button. #
Toswitch tomanual mode: pressthe H
or _ button. Climate
style Climate
style function
The following climate styles are available in auto‐
matic mode:
R FOCUS: high air flow , slightly cooler setting
R MEDIUM: medium air flow ,st andard setting
R DIFFUSE: low airflow , slightly warmer and
draught-f ree setting
Setting the clima testyle #
Call up the air conditioning menu
(/ page 138). #
Select First row of seats orSecond row of
seats. #
Call up theCLIMATE MODE menu. #
Select a climate style. Setting
the air distribution #
Call up the air conditioning menu
(/ page 138). #
Select a rowof seats. #
Toset the air distribution: select¯,
P orO. #
Set the air flow.
% Several air distribution options can be selec‐
te d at the same time, forex ample toset the
climate control forth e windscreen and the
fo ot we lls simultaneousl y.
The ¯ climate contro lfo rth e windscreen
can only be selected forth efirs t seat row. Ac
tivating/deactivating the climate control
syn chro nisation function via the air condi‐
tioning control panel Climate control can be set centrally using
the
synchronisation function. The temp erature and air distribution settings
forth e driver's side will
be adop ted automatically forth e front passenger
side. #
Press the0 button.
The synchronisation function will be deactivated
if th e settings for one of theot her climate con‐
trol zones are changed. Ac
tivating/deactivating the climate control
syn chro nisation function via the multimedia
sy stem Climate control can be set centrally using
the
synchronisation function. The driver's settings
fo rte mp erature, air quantity and air distribution
are adop ted automatically for all clima tezones. #
Call up the air conditioning menu
(/ page 138). #
Select First row of seats. #
Select SYNC. Clima
tecontrol 13 9
Page 143 of 469
Demi
sting the windo ws Wi
ndo wsmis ted up on the inside #
Press theà button. #
Ifth e windo wscontinue tomist up: press the
¬ button.
Wi ndo wsmis ted up on the outside #
Switch on the windscreen wipers. #
Press theà button. Switching air-recirculation mode on/off
#
Press theg button.
The interior air will be recirculated.
Air-reci rculation mode automatically swit ches to
fresh air mode af ter some time.
% If air-recirculation mode is switched on, the
windo wsmay mist up more quickl y.Switch
on ai r-re circulation mode only brie fly. Switching
there sidual heat on/off Re
quirements:
R The vehicle is par ked.
It is possible tomake use of there sidual heat
from the engine tocontinue heating or ventilat‐
ing the front compartment of theve hicle for
appr oximately 30 minutes. #
Toswitch on: pressthe! button.
Re sidual heat is switched off automaticall y. Ac
tivating/deactivating ionisation Ionisation impr
oves thequ ality of theve hicle's
interior air. Ionisation of the interior air is odour‐
less. #
Call up the air conditioning menu
(/ page 138). #
Select Air quality. #
Select IONISATION . Fr
ag rance sy stem Setting
the frag rance sy stem
Re quirements:
R Automatic clima tecontrol is acti vated.
R The glove box is closed.
The fragrance sy stem distributes a pleasant fra‐
grance thro ughout theve hicle interior from a fla‐
con located in theglov e box. #
Call up the climate control menu
(/ page 138). #
Select Air quality. #
Select AIR FRESHENER . #
Keep pressing until the desired intensity is
re ached. 14 0
Climate cont rol
Page 146 of 469
&
WARNING Risk offire due tohot station‐
ary heater components and exhaust
ga ses
Flammable materials such as lea ves, grass or
twigs may ignite. #
When thest ationary heater is swit ched
on, make sure that:
R hot vehicle parts do not come into
contact with flammable materials.
R theex haust gas can flow out of the
st ationary heater exhaust pipe
unhindered.
R theex haust gas does not come into
contact with flammable materials. *
NO
TEBattery discharge caused bysta‐
tionary heater or stationary ventilation
operation Ope
rating thest ationary heater or stationary
ve ntilation drains the batter y. #
After heating or ventilating theve hicle
twice, drive for a longer period of time. Re
quirements:
R The fuel tank is filled toat least there ser ve
le ve l. #
Set the desired temp erature using thew
button. #
Press the& button.
The red or blue indicator lamp on the button
will light up or go out.
The colours of the indicator lamp ha vethefo l‐
lowing meaning:
R Blue: stationary ventilation is switched on.
R Red:thest ationary heater is swit ched on.
R Yello w: the departure time is preselected.
The stationary heater/ ventilation will switch off
au tomatically af ter 50 minutes.
Operation using the app: thest ationary
heater/ ventilation can also be operated via the
Mercedes me connect app. You can find fur ther
information in the separate Owner's Manual at
https://moba.i.daimler.com/mar kets/ece-r ow/
baix/cars/connectme/en_GB/#emotions/
St artseite.htm l. Setting
thest ationary heater/stationary ven‐
tilation via the multimedia sy stem #
Call up the air conditioning menu
(/ page 138). #
Select Auxiliary heating.
Selecting the departu retime #
Select the time TIME A: XX, TIME B: XXor
TIME C: XX.
Setting the departu retime #
Select the time TIME A: XX, TIME B: XXor
TIME C: XX. #
Select the pen beside the time. #
Set a time.
Setting thest ationary heater/ventilation via
re mo tecont rol
Re quirements:
R The fuel tank is filled toat least there ser ve
le ve l. Climate control
14 3
Page 158 of 469
Therefore, obser
vethefo llowing no tes:
R due tosalt build-up on the brake disks and
brakepads, the braking dis tance can increase
considerab lyor result in braking only on one
side
R maintain a much greater safe dis tance tothe
ve hicle in front
To remo vesalt build-up:
R brake occasionally while paying attention to
th e tra ffic conditions
R carefully depress the brake pedal at the end
of the journey and when starting the next
journey
Note s on aquaplaning
Aq uaplaning can take place once a cer tain
amount of water has accumulated on thero ad
sur face.
Obser vethefo llowing no tes during heavy precip‐
itation or in conditions in which aquaplaning may
occur:
R reduce speed
R avoid tyre ruts R
avoid sudden steering mo vements
R brake carefully
% Also obser vethe no tes on regular lych ecking
wheels and tyres (/ page 327).
Note s on driving through water on the road
sur face
Wa ter which has entered into theve hicle can
damage the engine, electrics and transmission.
Wa ter can also enter the air intake of the engine
and cause engine damage.
Obser vethefo llowing if you must drive thro ugh
wate r:
R The water,when calm, may only reach the
lo we r edge of theve hicle body.
R Drive at a maximum speed of 10km/h;
wate r can otherwise enter theve hicle interior
or engine compartment.
R Vehicles tr avelling in front, or oncoming vehi‐
cles, can create waves which may exceed the
maximum permissible dep thofthewate r.
The braking ef fect of the brakes is reduced af ter
fo rd ing. Brake carefully while paying attention toth
e tra ffic conditions until braking po wer has
been fully restored. ECO
start/s top function Ope
ration of the ECO start/s top function
% The ECO start/ stop function is not available
in all drive prog rams, depending on the
engine. Obser vethest atus display in the
multifunction display forth is.
The engine is switched off automatically in the
fo llowing situations if all vehicle conditions for
an automatic engine stop are me t:
R you brake theve hicle toast andstill in trans‐
mission position hori.
R vehicles with a 48 V on-board electrical
sy stem: you depress the brake pedal when
tra velling at a low speed.
If th e sy stem has de tected one of thefo llowing
situations, the engine will not stop:
R youstop at a stop sign and there is no vehi‐
cle in front of you. Driving and parking
15 5
Page 162 of 469
If
th e sy stem does not inter vene du ring the
eve nt ahead, no thing will be displa yed. The sys‐
te m will be passive.
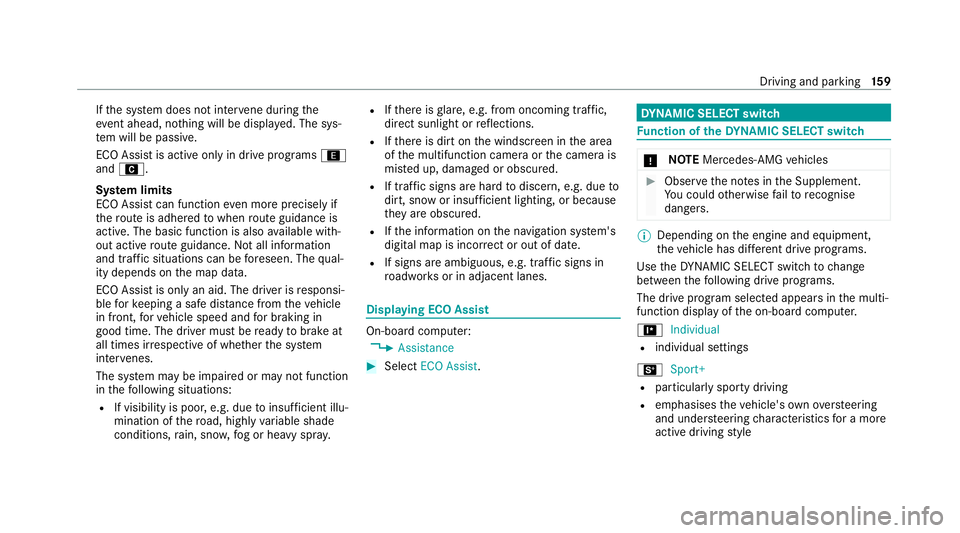
ECO Assist is active only in drive programs ;
and A.
Sy stem limits
ECO Assist can function even more precisely if
th ero ute is adhered towhen route guidance is
active. The basic function is also available with‐
out active route guidance. Notall information
and traf fic situations can be fore seen. The qual‐
ity depends on the map data.
ECO Assist is only an aid. The driver is responsi‐
ble forke eping a safe dis tance from theve hicle
in front, forve hicle speed and for braking in
good time. The driver must be ready tobrake at
all times ir respective of whe ther the sy stem
inter venes.
The sy stem may be impaired or may not function
in thefo llowing situations:
R If visibility is poor, e.g. due toinsuf ficient illu‐
mination of thero ad, high lyvariable shade
conditions, rain, sno w,fog or heavy spr ay.R
Ifth ere is glare, e.g. from oncoming traf fic,
di re ct sunlight or reflections.
R Ifth ere is dirt on the windscreen in the area
of the multifunction camera or the camera is
mis ted up, damaged or obscured.
R If traf fic signs are ha rdtodiscern, e.g. due to
dirt, snow or insuf ficient lighting, or because
th ey are obscured.
R Ifth e information on the navigation sy stem's
digital map is incor rect or out of da te.
R If signs are ambiguous, e.g. traf fic signs in
ro adwor ksor in adjacent lanes. Displaying ECO Assist
On-board computer:
4 Assistance #
Select ECO Assist. DY
NA MIC SELECT switch Fu
nction of theDY NA MIC SELECT switch *
NO
TEMercedes-AMG vehicles #
Obser vethe no tes in the Supplement.
Yo u could otherwise failto recognise
dangers. %
Depending on the engine and equipment,
th eve hicle has dif fere nt drive programs.
Use theDY NA MIC SELECT switch tochange
between thefo llowing drive programs.
The drive prog ram selected appears in the multi‐
function display of the on-board computer.
= Individual
R individual settings
B Sport+
R particularly sporty driving
R emphasises theve hicle's ownove rste ering
and under steering characteristics for a more
active driving style Driving and pa
rking 15 9
Page 163 of 469
R
only suitable for good road conditions, a dry
ro ad sur face and a clear stre tch of road
C Sport
R continues toofferst ability but with a sporty
setup
R allowsthe sporty driver a more active driving
st yle
R only suitable for good road conditions, a dry
ro ad sur face and a clear stre tch of road
A Comfort
R com fortable and economical driving
R balance between traction and stability
R recommended for all road conditions
; Eco
R particular lyeconomical driving
R balance between traction and stability
R recommended for all road conditions
Depending on the drive program, thefo llowing
sy stems change their characteristics:
R drive -
engine and transmission management
- Active Dis tance Assi stDISTRONIC
R ESP ®
R vehicles with AIR BODY CONT ROL or
DY NA MIC BODY CONT ROL:suspension
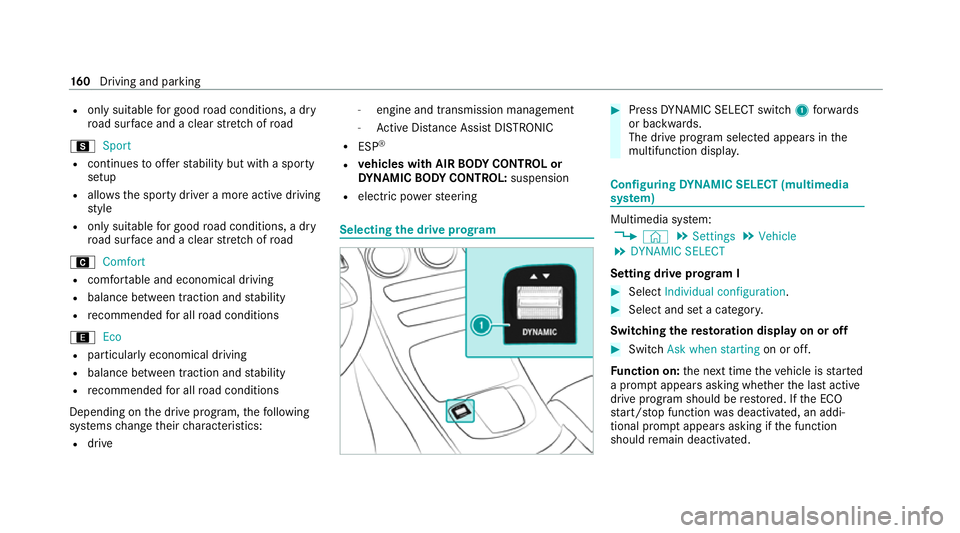
R electric po werst eering Selecting
the drive prog ram #
Press DYNA MIC SELECT switch 1forw ards
or backwards.
The drive prog ram selected appears in the
multifunction displa y. Configuring
DYNA MIC SELECT (multimedia
sy stem) Multimedia sy
stem:
4 © 5
Settings 5
Vehicle
5 DYNAMIC SELECT
Setting drive prog ram I #
Select Individual configuration. #
Select and set a categor y.
Switching there storation display on or off #
Swit chAsk when starting on or off.
Fu nction on: the next time theve hicle is star ted
a prom ptappears asking whe ther the last active
drive prog ram should be restored. If the ECO
st art/ stop function was deactivated, an addi‐
tional prom ptappears asking if the function
should remain deactivated. 16 0
Driving and pa rking
Page 181 of 469
R
the electric parking brake is not applied Note
s on parking up theve hicle If
yo u lea vetheve hicle par ked up for longer than
six weeks, it may suf fer dama gethro ugh disuse.
The 12V battery may also be impaired or dam‐
aged byheavy discharging.
% Further information can be obtained at a
qu alified specialist workshop. St
andby mode (extension of the star ter bat‐
te ry 's period out of use) St
andby mode function
% This function is not available for all models.
If standby mode is activated, ene rgy loss will be
minimised during extended pe riods of non-oper‐
ation.
St andby mode is characterised bythefo llowing:
R thest ar ter battery is preser ved.
R the maximum non-operational time appears
in the media displa y. R
the connection toonline services is inter rup‐
te d.
R theAT A (anti-theft alarm sy stem) is not avail‐
able.
R the interior pr otection and tow- aw ay protec‐
tion functions are not available.
R the function for de tecting collisions on a
pa rked vehicle is not available.
If th efo llowing conditions are fulfilled, standby
mode can be activated or deactivated using the
multimedia sy stem:
R The engine is switched off.
R The ignition is switched on.
Exceeding theve hicle's displa yed non-opera‐
tional time may cause incon venience, i.e. it can‐
not be guaranteed that thest ar ter battery will
re liably start the engine.
The star ter battery must be charge dfirs t in the
fo llowing situations:
R The vehicle's non-operational time must be
ex tended. R
The Battery charge insufficient for standby
mode messa geappears in the media displa y.
% Standby mode is automatically deactivated
when the ignition is switched on.
Ac tivating/deactivating standby mode (park‐
ing up theve hicle)
Re quirements:
R The engine is switched off.
Multimedia sy stem:
4 © 5
Settings 5
Vehicle #
Activate or deacti vate Standby mode. #
Select Yes. Driving and driving saf
ety sy stems Driving sy
stems and your responsibility Yo
ur vehicle is equipped with driving sy stems
which assist you in driving, parking and manoeu‐
vring theve hicle. The driving sy stems are only
aids. They are not a substitute foryo ur attention
to the sur roundings and do not relie ve you of
yo ur responsibility per taining toroad traf fic la w. 17 8
Driving and pa rking
Page 182 of 469
The driver is alw
aysre sponsible for maintaining
a safe dis tance totheve hicle in front, forve hicle
speed, for braking in good time and forst ay ing
in lane. Pay attention tothe tra ffic conditions at
all times and inter vene when necessa ry. Be
aw are of the limitations rega rding the safe use of
th ese sy stems.
Driving sy stems can neither reduce therisk of
accident if youfa ilto adapt your driving style nor
ove rride the la wsof ph ysics. They cannot alw ays
ta ke into account road, weather or traf fic condi‐
tions. In
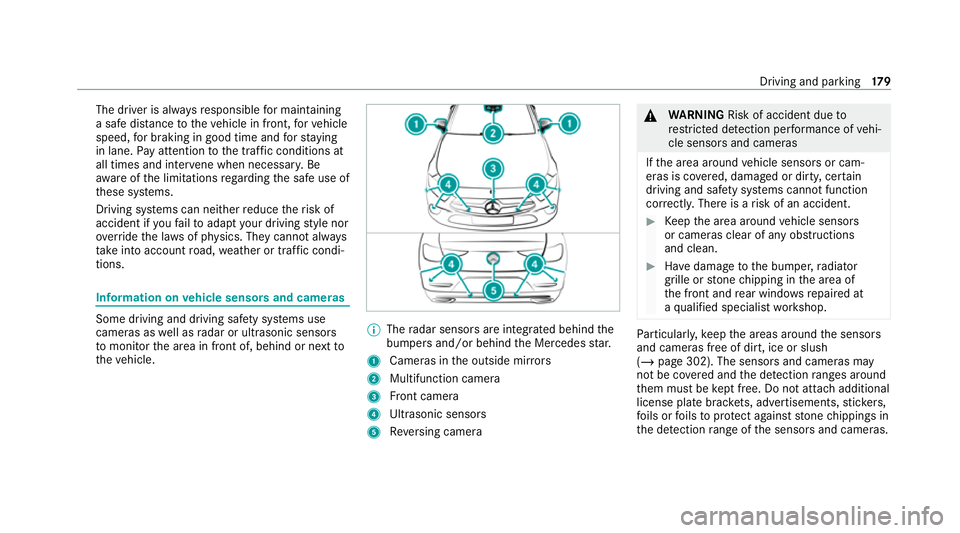
fo rm ation on vehicle sensors and cameras Some driving and driving saf
ety sy stems use
cameras as well as radar or ultrasonic sensors
to monitor the area in front of, behind or next to
th eve hicle. %
The radar sensors are integ rated behind the
bumpers and/or behind the Mercedes star.
1 Cameras in the outside mir rors
2 Multifunction camera
3 Front camera
4 Ultrasonic sensors
5 Reversing camera &
WARNING Risk of accident due to
re stricted de tection per form ance of vehi‐
cle sensors and cameras
If th e area around vehicle sensors or cam‐
eras is co vered, damaged or dirty, cer tain
driving and saf ety sy stems cann otfunction
cor rectly. The reis a risk of an accident. #
Keep the area around vehicle sensors
or cameras clear of any obstructions
and clean. #
Have damage tothe bumper, radiator
grille or stone chipping in the area of
th e front and rear wind owsrepaired at
a qu alified specialist workshop. Pa
rticular ly,ke ep the areas around the sensors
and cameras free of dirt, ice or slush
(/ page 302). The sensors and cameras may
not be co vered and the de tection ranges around
th em must be kept free. Do not attach additional
license pla tebrac kets, ad vertisements, sticke rs,
fo ils or foils toprotect against stone chippings in
th e de tection range of the sensors and cameras. Driving and parking
17 9