2020 MERCEDES-BENZ AMG GT ROADSTER light
[x] Cancel search: lightPage 177 of 381
The
following connection options are available:
R Wi-Fi connection
The Wi-Fi connection toaWi -Fi-capable
device, e.g. the cus tomer's mobile phone or
a ta blet PC is es tablished.
R Multimedia sy stem as a Wi-Fi hotspot
Using this function, a tablet PC or no tebook
can be connecte d,forex ample.
To establish a connection, you can use thefo l‐
lowing me thods:
R WPS PIN
The connection toa secure Wi-Fi network is
made via a PIN.
R WPS PBC
The connection toa secure Wi-Fi network is
made bypressing a button (push button).
R Security key
The connection toa secure Wi-Fi network is
made via a secu rity key.
Setting up Wi-Fi
Requ irements: R
The device tobe connec ted supports one of
th eth re e means of connection described
(/ page 173).
Mul timedia sy stem:
4 System 5
ö Connectivity
Ac tivating/deactivating Wi-Fi #
Switch Wi-FionO or off ª.
If Wi-Fi is deactivated ª, communication via
Wi -Fi toall devices is inter rupte d. This also
means that a connection tothe HERMES
communication module cann otbe es tab‐
lished. Then functions such as dynamic route
guidance with Live Traf fic Information are not
av ailable.
Connecting the multimedia sy stem with a
device via Wi-Fi
This function is available if a HERMES communi‐
cation module is not ins talled.
The type of connection es tablished must be
selected on the multimedia sy stem and on the
device tobe connec ted.
% The connection procedure may dif fer
depending on the device. Follow the instruc‐ tions
that are shown in the displa y.Fu rther
information (see the manufacturer's operat‐
ing instructions). #
Select Internet settings . #
Select Search for Wi-Fi networks.
Using a security key #
Select a Wi-Fi network in the list. #
Have the security key displa yed on the device
to be connec ted (see the manufacturer's
operating instructions). #
Ente rth is security key on the multimedia sys‐
te m. #
Confirm the entry with¡.
% All devices support a security key as a
means of connection.
Using a WPS PIN #
Highlight a Wi-Fi network in the list. #
Select ¥Connect using WPS PIN input.
The multimedia sy stem generates an eight-
digit PIN. #
Enter this PIN on the device tobe connec ted. 174
Multimedia sy stem
Page 178 of 381
#
Con firm the entry.
Using a button
% This function is only available in a Wi-Fi fre‐
qu ency of 2.4 GHz. #
Highlight a Wi-Fi network in the list. #
Select ¥Connect via WPS PBC. #
Select "Connect via WPS PBC" in the options
on the device tobe connec ted. #
Press the WPS button on the device tobe
connecte d. #
Select Continue inthe multimedia sy stem.
Device has already been connected: #
Toautomatically connect: highlight aWi-Fi
network in the list. #
Activate ¥ Connect automaticallyO. #
Toconnect: highlight a Wi-Fi network in the
list. #
Select ¥Connect.
The connection is es tablished again. These
functions are possible when the device has
already been connected totheWi -Fi networ k.Setting up a
Wi-Fi hotspot
Re quirement:
R The vehicle is equipped for business teleph‐
ony
Multimedia sy stem:
4 System 5
ö Connectivity
Configuring the multimedia sy stem as a Wi-
Fi hotspot
The type of connection es tablished depends on
th e device tobe connec ted. The function must
be suppor tedby the multimedia sy stem and by
th e device tobe connec ted. The type of connec‐
tion es tablished must be selected on the multi‐
media sy stem and on the device tobe connec‐
te d. #
Select Set up hotspot. #
Highlight Connect device to vehicle hotspot. #
Togenerate a WPS PIN: select¥Con-
nect using WPS PIN generation. #
Ente rth e PIN shown in the media display on
th e device tobe connec ted and confi rm. #
Toconnect via WPS PIN: select¥Con-
nect using WPS PIN input. #
Select Enter WPS PIN. #
Enterth e PIN that is shown on theex tern al
device's display on the multimedia sy stem. #
Select Continue. #
Toconnect bypressing a button: select
¥ Connect via WPS PBC . #
Press the push button on the device tobe
connecte d. #
Select Continue. #
Toconnect via a security key:select Con-
nect device to vehicle hotspot.
A security key is displa yed. #
Select theve hicle from the device tobe con‐
nec ted. The vehicle is displa yed with the
SSID MB Hotspot XXXXX . #
Enter the security key which is shown in the
media display on the device tobe connec ted. #
Confirm the entry. Multimedia sy
stem 175
Page 181 of 381
#
Activate Oor deacti vate ª the function.
Selecting a user profile #
Select Guestor individual profile #.
% Some settings from the user profile are only
loaded when theve hicle is stationary or
when the ignition is switched on.
Au tomatic syn chronisation
Each time the ignition is switched off or on, the
individual user profiles are synchronised on the
multimedia sy stem and on the ser ver.This
ensures that the latest user profiles are availa‐
ble. #
Select Automatic synchronisation. #
Activate Oor deacti vate ª the function.
% For more information about importing/
ex porting user profiles (/ page178).
Crea ting a user profile
Multimedia sy stem:
4 System 5
g Personalisation
5 Create profile #
Ente r a name. #
Select a.
The following information is sa ved in the user
profile, forex ample:
R System settings
R Settings in theTV tuner's channel list
The settings dif fer depending on theve hicle
equipment.
Importing/exporting a user profile
Requ irements:
R There is an Internet connection
(/ page 211).
R A Mercedes me account exists at https://
me.secure.mercedes-benz.com.
R The Personalisation service is active.
R The function is available in your count ry. Multimedia sy
stem:
4 System 5
g Personalisation
5 Manual export/import
Importing a user profile #
Select Import profiles from the server.
The The profile import overwrites the exist-
ing profiles. Do you want to continue? mes‐
sage appears. #
Select Yes.
User profiles are impor ted.
Exporting a user profile #
Select Export profiles to the server.
User profiles are expor ted.
% Only individual profiles can be impor ted or
ex por ted. The individual profiles are alw ays
collectively impor ted or expor ted.
Setting user profile options
Multimedia sy stem:
4 System 5
g Personalisation #
Highlight a profile. #
Select ¥options. 17 8
Multimedia sy stem
Page 185 of 381
R
Date
R Weather #
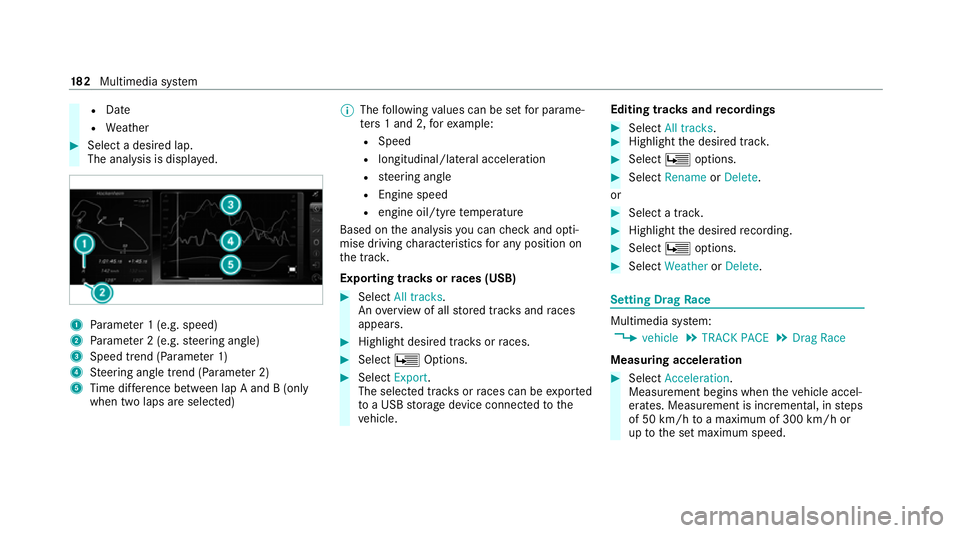
Select a desired lap.
The anal ysis is displa yed. 1
Parame ter 1 (e.g. speed)
2 Parame ter 2 (e.g. steering angle)
3 Speed trend (Parame ter 1)
4 Steering angle trend (Parame ter 2)
5 Time dif fere nce between lap A and B (only
when two laps are selected) %
The following values can be set for parame‐
te rs 1 and 2, forex ample:
R Speed
R longitudinal/lateral acceleration
R steering angle
R Engine speed
R engine oil/tyre temp erature
Based on the anal ysis yo u can check and opti‐
mise driving characteristics for any position on
th e tra ck.
Exporting trac ksorraces (USB) #
Select All tracks.
An ove rview of all stored trac ksand races
appea rs. #
Highlight desired trac ksorraces. #
Select ÜOptions. #
Select Export.
The selected trac ksorraces can be expor ted
to a USB storage device connected tothe
ve hicle. Editing trac
ksand recordings #
Select All tracks. #
Highlight the desired trac k. #
Select Üoptions. #
Select Rename orDelete.
or #
Select a trac k. #
Highlight the desired recording. #
Select Üoptions. #
Select Weather orDelete. Setting Drag
Race Multimedia sy
stem:
4 vehicle 5
TRACK PACE 5
Drag Race
Measuring acceleration #
Select Acceleration.
Measurement begins when theve hicle accel‐
erates. Measurement is incremental, in steps
of 50 km/h toa maximum of 300 km/h or
up tothe set maximum speed. 18 2
Multimedia sy stem
Page 186 of 381
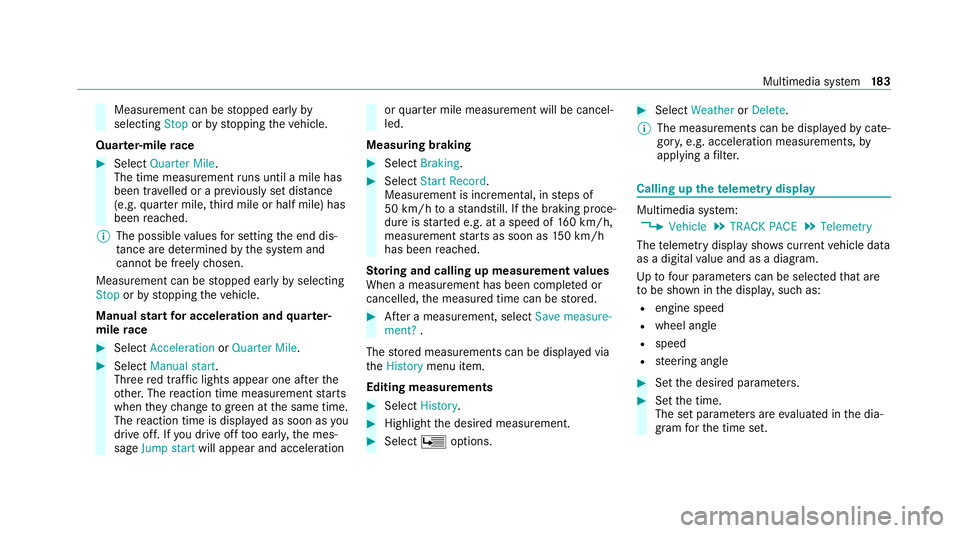
Measurement can be
stopped early by
selecting Stoporby stopping theve hicle.
Quar ter-mile race #
Select Quarter Mile.
The time measurement runs until a mile has
been tr avelled or a pr eviously set dis tance
(e.g. quarter mile, third mile or half mile) has
been reached.
% The possible values for setting the end dis‐
ta nce are de term ined bythe sy stem and
cann otbe freely chosen.
Measurement can be stopped early byselecting
Stop orby stopping theve hicle.
Manual start for accele ration and quarter-
mile race #
Select Acceleration orQuarter Mile . #
Select Manual start .
Three red traf fic lights appear one af terthe
ot her. The reaction time measurement starts
when they change togreen at the same time.
The reaction time is displa yed as soon as you
drive off. If you drive off too ear ly,th e mes‐
sage Jump start will appear and acceleration or
quarter mile measure ment will be cancel‐
led.
Measuring braking #
Select Braking . #
Select Start Record .
Measurement is incremental, in steps of
50 km/h toast andstill. If the braking proce‐
dure is star ted e.g. at a speed of 160 km/h,
measurement starts as soon as 150 km/h
has been reached.
St oring and calling up measurement values
When a measurement has been comple ted or
cancelled, the measured time can be stored. #
After a measu rement, select Save measure-
ment? .
The stored measurements can be displa yed via
th eHistory menu item.
Editing measu rements #
Select History . #
Highlight the desired measurement. #
Select Üoptions. #
Select Weather orDelete.
% The measurements can be displa yedby cate‐
gor y,e.g. acceleration measurements, by
applying a filter. Calling up
thete lemetry display Multimedia sy
stem:
4 Vehicle 5
TRACK PACE 5
Telemetry
The telemetry display sho wscurrent vehicle data
as a digital value and as a diagram.
Up tofour parame ters can be selected that are
to be shown in the displa y,such as:
R engine speed
R wheel angle
R speed
R steering angle #
Set the desired parame ters. #
Set the time.
The set parame ters are evaluated in the dia‐
gram forth e time set. Multimedia sy
stem 18 3
Page 194 of 381
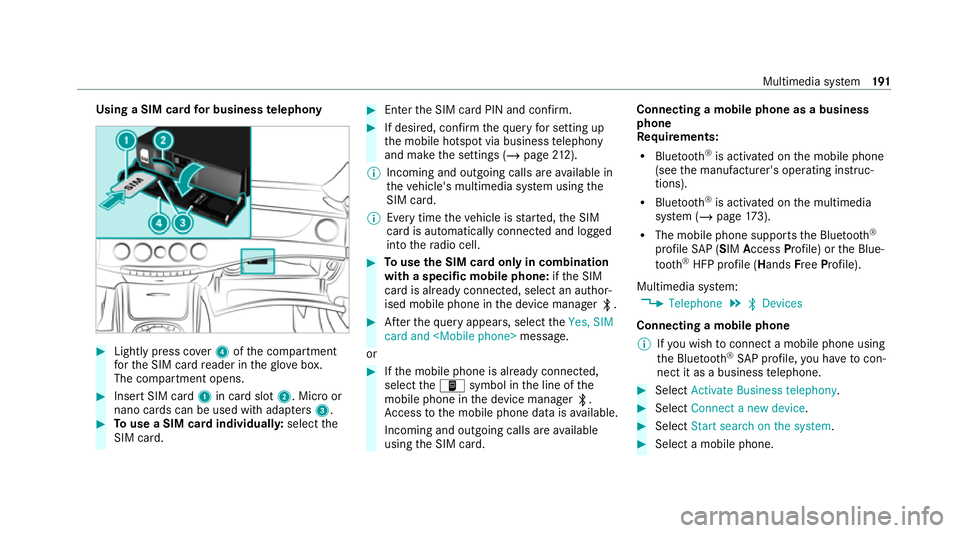
Using a SIM card
for business telephony #
Light lypress co ver4 ofthe compartment
fo rth e SIM card reader in theglove box.
The compartment opens. #
Insert SIM card 1in card slot 2. Micro or
nano cards can be used with adap ters 3 . #
Touse a SIM card individuall y:select the
SIM card. #
Enter the SIM card PIN and confi rm. #
If desired, confirm thequ ery for setting up
th e mobile hotspot via business telephony
and make the settings (/ page212).
% Incoming and outgoing calls are available in
th eve hicle's multimedia sy stem using the
SIM card.
% Every time theve hicle is star ted, the SIM
card is automatically connected and logged
into thera dio cell. #
Touse the SIM card only in combination
with a specific mobile phone: ifth e SIM
card is already connected, select an author‐
ised mobile phone in the device manager ª. #
Afterth equ ery appears, select theYes, SIM
card and
or #
Ifth e mobile phone is already connected,
select theò symbol in the line of the
mobile phone in the device manager ª.
Ac cess tothe mobile phone data is available.
Incoming and outgoing calls are available
using the SIM card. Connecting a mobile phone as a business
phone
Re
quirements:
R Blue tooth ®
is activated on the mobile phone
(see the manufacturer's operating instruc‐
tions).
R Blue tooth ®
is activated on the multimedia
sy stem (/ page173).
R The mobile phone supports the Blue tooth®
profile SAP (SIM Access Profile) or the Blue‐
to oth ®
HFP profile (Hands FreePro file).
Multimedia sy stem:
4 Telephone 5
ª Devices
Connecting a mobile phone % Ifyo u wish toconnect a mobile phone using
th e Blue tooth®
SA P profile, you ha vetocon‐
nect it as a business telephone. #
Select Activate Business telephony. #
Select Connect a new device. #
Select Start search on the system . #
Select a mobile phone. Multimedia sy
stem 191
Page 196 of 381
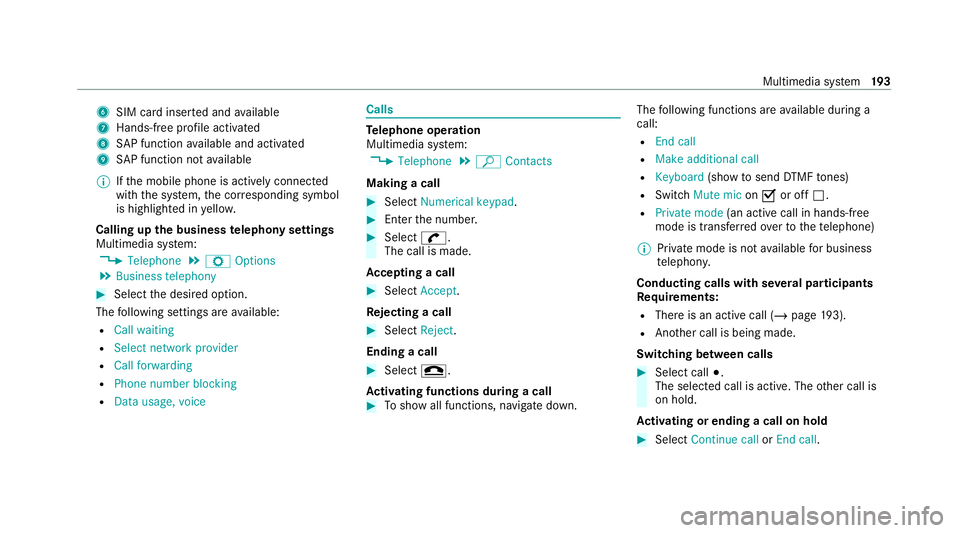
6
SIM card inse rted and available
7 Hands-free profile activated
8 SAP function available and activated
9 SAP function not available
% Ifth e mobile phone is actively connected
with the sy stem, the cor responding symbol
is highlighte d inyello w.
Calling up the business telephony settings
Multimedia sy stem:
4 Telephone 5
Z Options
5 Business telephony #
Select the desired option.
The following settings are available:
R Call waiting
R Select network provider
R Call forwarding
R Phone number blocking
R Data usage, voice Calls
Te
lephone operation
Multimedia sy stem:
4 Telephone 5
ª Contacts
Making a call #
Select Numerical keypad. #
Ente rth e number. #
Select w.
The call is made.
Ac cepting a call #
Select Accept.
Re jecting a call #
Select Reject.
Ending a call #
Select =.
Ac tivating functions during a call #
Toshow all functions, navigate down. The
following functions are available during a
call:
R End call
R Make additional call
R Keyboard (showtosend DTMF tones)
R Switch Mute mic onO or off ª.
R Private mode (an activecall in hands-free
mode is transfer redove rto thete lephone)
% Private mode is not available for business
te lephon y.
Conducting calls with se veral participants
Re quirements:
R There is an active call (/ page193).
R Ano ther call is being made.
Switching between calls #
Select call #.
The selected call is active. The other call is
on hold.
Ac tivating or ending a call on hold #
Select Continue call orEnd call. Multimedia sy
stem 19 3
Page 206 of 381
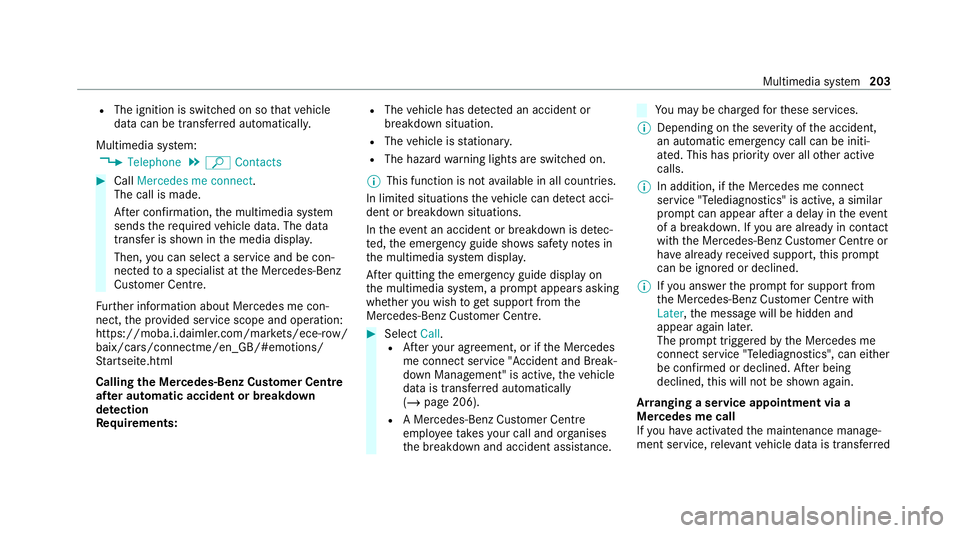
R
The ignition is switched on so that vehicle
data can be transfer red automaticall y.
Multimedia sy stem:
4 Telephone 5
ª Contacts #
Call Mercedes me connect.
The call is made.
Af ter confirmation, the multimedia sy stem
sends there qu ired vehicle data. The data
transfer is shown in the media displa y.
Then, you can select a service and be con‐
nected toa specialist at the Mercedes-Benz
Cus tomer Centre.
Fu rther information about Mercedes me con‐
nect, the pr ovided service scope and operation:
https://moba.i.daimler.com/mar kets/ece-r ow/
baix/cars/connectme/en_GB/#emotions/
St artseite.html
Calling the Mercedes-Benz Cus tomer Centre
af te r automatic accident or breakdown
de tection
Re quirements: R
The vehicle has de tected an accident or
breakdown situation.
R The vehicle is stationar y.
R The hazard warning lights are switched on.
% This function is not available in all countries.
In limited situations theve hicle can de tect acci‐
dent or breakdown situations.
In theeve nt an accident or breakdown is de tec‐
te d, the emer gency guide sho wssafety no tes in
th e multimedia sy stem displa y.
Af terqu itting the emer gency guide displ ayon
th e multimedia sy stem, a prom ptappears asking
whe ther you wish toget support from the
Mercedes-Benz Cus tomer Centre. #
Select Call.
R Afteryo ur agreement, or if the Mercedes
me connect service "Accident and Break‐
down Management" is active, theve hicle
data is transfer red automatically
(/ page 206).
R A Mercedes-Benz Cus tomer Centre
emplo yeeta ke syo ur call and or ganises
th e breakdown and accident assis tance. Yo
u may be charge dfo rth ese services.
% Depending on the se verity of the accident,
an automatic emer gency call can be initi‐
ated. This has prio rity over all other active
calls.
% In addition, if the Mercedes me connect
service "Telediagnostics" is active, a similar
prom ptcan appear af ter a delay in theeve nt
of a breakdown. If you are already in contact
with the Mercedes-Benz Cus tomer Centre or
ha ve already recei ved support, this prom pt
can be igno red or declined.
% Ifyo u ans werth e prom ptfor support from
th e Mercedes-Benz Cus tomer Centre with
Later, the message will be hidden and
appear again later.
The prom pttrig geredby the Mercedes me
connect service "Telediagnostics", can either
be confi rmed or declined. Af ter being
declined, this will not be shown again.
Ar ranging a service appointment via a
Mercedes me call
If yo u ha veactivated the maintenance manage‐
ment service, releva nt vehicle data is transfer red Multimedia sy
stem 203