2020 MASERATI GRANTURISMO CONVERTIBLE height
[x] Cancel search: heightPage 44 of 296
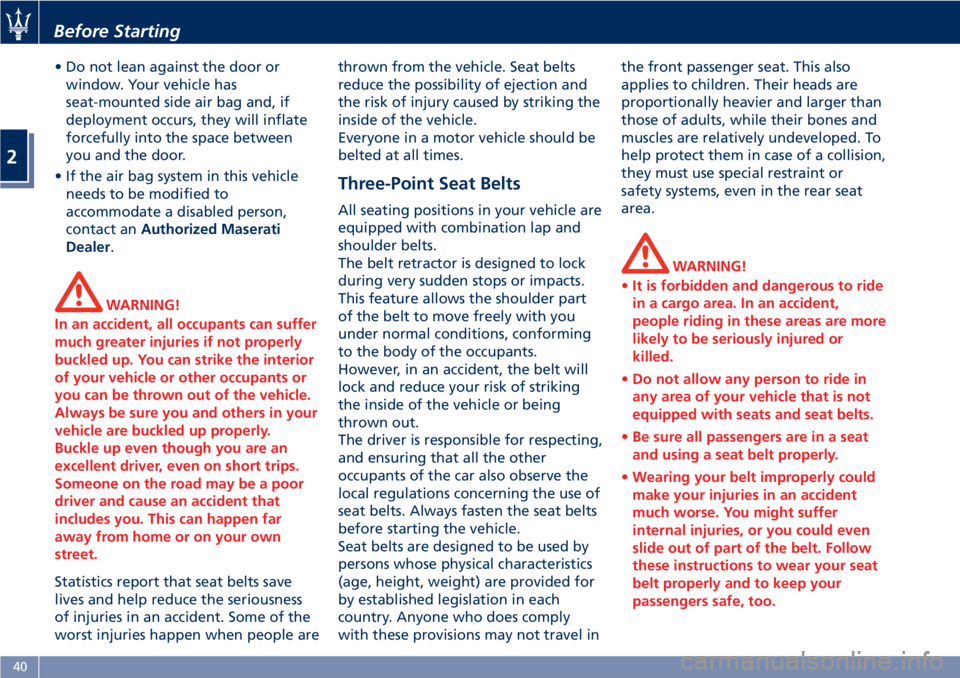
• Do not lean against the door or
window. Your vehicle has
seat-mounted side air bag and, if
deployment occurs, they will inflate
forcefully into the space between
you and the door.
• If the air bag system in this vehicle
needs to be modified to
accommodate a disabled person,
contact anAuthorized Maserati
Dealer.
WARNING!
In an accident, all occupants can suffer
much greater injuries if not properly
buckled up. You can strike the interior
of your vehicle or other occupants or
you can be thrown out of the vehicle.
Always be sure you and others in your
vehicle are buckled up properly.
Buckle up even though you are an
excellent driver, even on short trips.
Someone on the road may be a poor
driver and cause an accident that
includes you. This can happen far
away from home or on your own
street.
Statistics report that seat belts save
lives and help reduce the seriousness
of injuries in an accident. Some of the
worst injuries happen when people arethrown from the vehicle. Seat belts
reduce the possibility of ejection and
the risk of injury caused by striking the
inside of the vehicle.
Everyone in a motor vehicle should be
belted at all times.
Three-Point Seat Belts
All seating positions in your vehicle are
equipped with combination lap and
shoulder belts.
The belt retractor is designed to lock
during very sudden stops or impacts.
This feature allows the shoulder part
of the belt to move freely with you
under normal conditions, conforming
to the body of the occupants.
However, in an accident, the belt will
lock and reduce your risk of striking
the inside of the vehicle or being
thrown out.
The driver is responsible for respecting,
and ensuring that all the other
occupants of the car also observe the
local regulations concerning the use of
seat belts. Always fasten the seat belts
before starting the vehicle.
Seat belts are designed to be used by
persons whose physical characteristics
(age, height, weight) are provided for
by established legislation in each
country. Anyone who does comply
with these provisions may not travel inthe front passenger seat. This also
applies to children. Their heads are
proportionally heavier and larger than
those of adults, while their bones and
muscles are relatively undeveloped. To
help protect them in case of a collision,
they must use special restraint or
safety systems, even in the rear seat
area.
WARNING!
•It is forbidden and dangerous to ride
in a cargo area. In an accident,
people riding in these areas are more
likely to be seriously injured or
killed.
•Do not allow any person to ride in
any area of your vehicle that is not
equipped with seats and seat belts.
•Be sure all passengers are in a seat
and using a seat belt properly.
•Wearing your belt improperly could
make your injuries in an accident
much worse. You might suffer
internal injuries, or you could even
slide out of part of the belt. Follow
these instructions to wear your seat
belt properly and to keep your
passengers safe, too.
Before Starting
2
40
Page 45 of 296
•Two people should never be belted
into a single seat belt. People belted
together can crash into one another
in an accident, hurting one another
severely. Never use a lap/shoulder
belt for more than one person.
•Remember that, in the event of an
accident, the rear seat passengers
not wearing the seat belts are not
only subject to personal injuries but
also represent a serious danger for
the front seat occupants.
Three-Point Seat Belts Use Instructions
• Enter the vehicle and close the door.
Sit back and adjust the seat.
• The seat belt latch plate is on the
rear door pillar, above the seat on
the external side (for front seats) or
on the internal side (for rear seats).
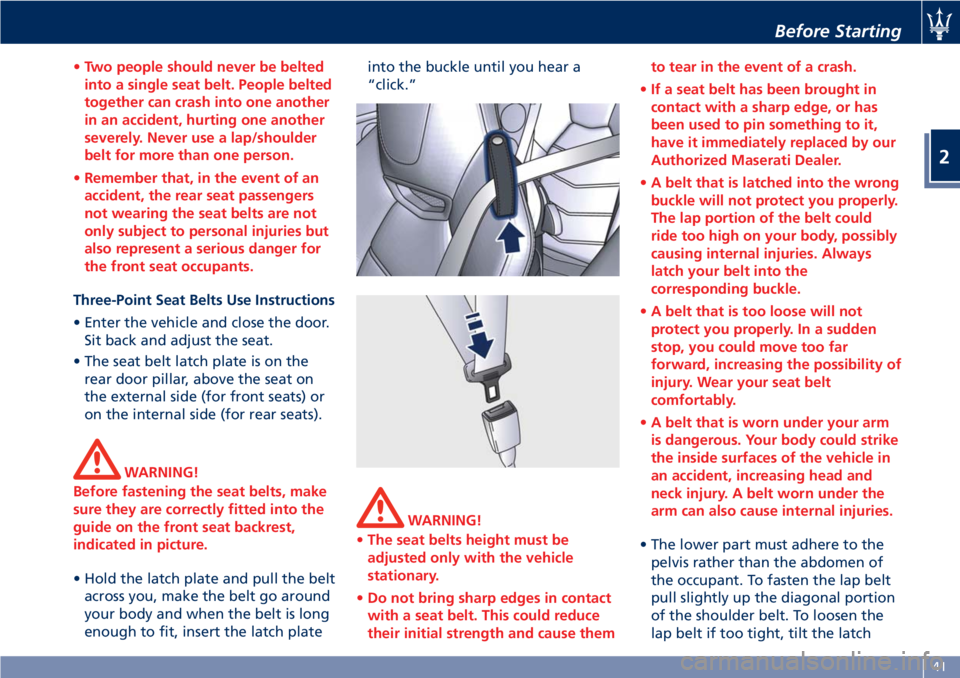
WARNING!
Before fastening the seat belts, make
sure they are correctly fitted into the
guide on the front seat backrest,
indicated in picture.
• Hold the latch plate and pull the belt
across you, make the belt go around
your body and when the belt is long
enough to fit, insert the latch plateinto the buckle until you hear a
“click.”
WARNING!
•The seat belts height must be
adjusted only with the vehicle
stationary.
•Do not bring sharp edges in contact
with a seat belt. This could reduce
their initial strength and cause themto tear in the event of a crash.
•If a seat belt has been brought in
contact with a sharp edge, or has
been used to pin something to it,
have it immediately replaced by our
Authorized Maserati Dealer.
•A belt that is latched into the wrong
buckle will not protect you properly.
The lap portion of the belt could
ride too high on your body, possibly
causing internal injuries. Always
latch your belt into the
corresponding buckle.
•A belt that is too loose will not
protect you properly. In a sudden
stop, you could move too far
forward, increasing the possibility of
injury. Wear your seat belt
comfortably.
•A belt that is worn under your arm
is dangerous. Your body could strike
the inside surfaces of the vehicle in
an accident, increasing head and
neck injury. A belt worn under the
arm can also cause internal injuries.
• The lower part must adhere to the
pelvis rather than the abdomen of
the occupant. To fasten the lap belt
pull slightly up the diagonal portion
of the shoulder belt. To loosen the
lap belt if too tight, tilt the latch
Before Starting
2
41
Page 47 of 296
under “Child Restraint Systems” in this
section.
When the passenger seating position
with ALR is being used for normal
usage, only pull the belt out far
enough to comfortably wrap around
the occupant so as to not activate the
ALR. If the ALR is activated, you will
hear a ratcheting sound as the belt
retracts. In this case, allow the belt to
retract completely and then carefully
pull out only the amount of belt
necessary to comfortably wrap around
the seat occupant.
Slide the latch plate into the buckle
until you hear a "click".
WARNING!
•Remember that, in the event of a
violent impact, the passengers in the
rear seats that are not wearing the
seat belts are not only subject to
personal injury but they also
represent a danger for passengers
sitting in the front seats.
•Always fasten the seat belts.
•Traveling without the seat belts
fastened significantly increases the
risk of serious injury in the event of
a collision, even with the air bags.•In the event of a collision, the seat
belts help reduce the possibility of
the vehicle’s occupants being
thrown against the structures of the
passenger compartment or out of
the vehicle.
•The air bags are designed to work
together with the seat belts, not to
substitute them. The front air bags
only deploy in the event of certain
head-on collisions of sufficient
intensity. They may not be activated
if the vehicle rolls over, or in the
event of rear bumps or minor frontal
collisions, or non-frontal collisions.
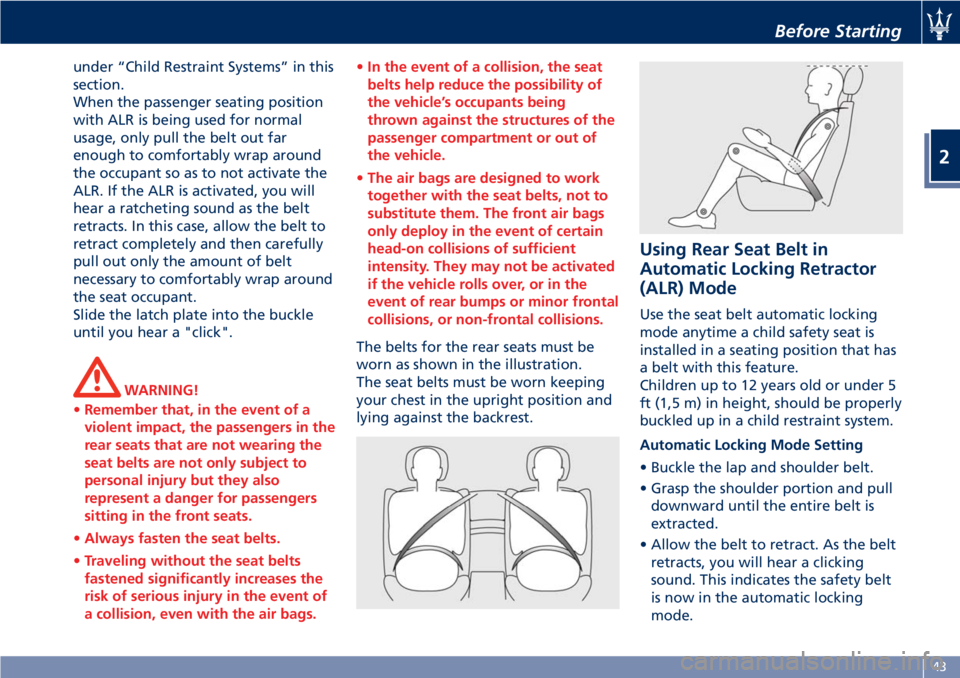
The belts for the rear seats must be
worn as shown in the illustration.
The seat belts must be worn keeping
your chest in the upright position and
lying against the backrest.
Using Rear Seat Belt in
Automatic Locking Retractor
(ALR) Mode
Use the seat belt automatic locking
mode anytime a child safety seat is
installed in a seating position that has
a belt with this feature.
Children up to 12 years old or under 5
ft (1,5 m) in height, should be properly
buckled up in a child restraint system.
Automatic Locking Mode Setting
• Buckle the lap and shoulder belt.
• Grasp the shoulder portion and pull
downward until the entire belt is
extracted.
• Allow the belt to retract. As the belt
retracts, you will hear a clicking
sound. This indicates the safety belt
is now in the automatic locking
mode.
Before Starting
2
43
Page 59 of 296
not hold the child, no matter how
strong you are. The child and others
could be badly injured. Any child
riding in your vehicle should always
be in a proper restraint system
suitable for the child’s size.
There are different sizes and types of
restraint systems for children from
newborn size to the child almost large
enough for an adult safety belt.
Always refer to the manual provided
with child seat to ensure it is the
proper type according the travelling
child. Use the restraint system that is
correct for your child.
Infants and Child Restraints
Safety experts recommend that
children ride rearwardfacing in the
vehicle until they are two years old or
until they reach either the height or
weight limit of their rear facing child
seat.
Two types of child restraint systems
can be used rearward-facing: infant
carriers and convertible child seats.
The infant carrier is only used
rearward-facing in the vehicle. It is
recommended for children from birth
until they reach the weight or height
limit of the infant carrier.Convertible child seats can be used
either rearward-facing or
forward-facing in the vehicle.
Convertible child seats often have a
higher weight limit in the
rearward-facing direction than infant
carriers do, so they can be used
rearward-facing by children who have
outgrown their infant carrier but are
still younger than at least two years
old.
Children should remain rearward-
facing until they reach the highest
weight or height allowed by their
child seat. Both types of child restraint
systems are fixed to the car by the
lap/shoulder belt or the LATCH child
restraint anchor system. Refer to
“Lower Anchors and Tether for
CHildren (LATCH)” in this section.
WARNING!
•Never place a rear facing infant seat
in front of an air bag. A deploying of
the passenger front air bag can
cause death or serious injury to a
child 12 years or younger, including
a child in a rearward facing infant
seat.•Only use a rearward-facing child
restraint in a vehicle with a rear
seat.
Older Children and Child
Restraints
Children who are two years old or
who have outgrown their rear-facing
child seat can ride forward-facing in
the vehicle. Forward-facing child seats
and convertible child seats used in the
forward-facing direction are for
children who are over two years old or
who have outgrown the rear-facing
weight or height limit of their
rear-facing child seat.
Children should remain in a
forward-facing child seat with a
harness for as long as possible, up to
the highest weight or height allowed
by the child seat. These child seats are
also fixed to the car by the
lap/shoulder belt or the LATCH child
restraint anchorage system. Refer to
“Lower Anchors and Tether for
CHildren (LATCH)” in this section.
All children whose weight or height is
above the forward-facing limit for the
child seat should use a belt-
positioning booster seat until the
vehicle’s seat belts fit properly. If the
child cannot sit with knees bent over
Before Starting
2
55
Page 60 of 296
the vehicle’s seat cushion while the
back is against the seatback, they
should use a belt-positioning booster
seat.
The child and belt-positioning booster
seat are fixed to the car by the
lap/shoulder belt.
Children Too Large for Booster
Seats
Children who are large enough to
wear the shoulder belt comfortably
and whose legs are long enough to
bend over the front of the seat when
their back is against the seatback
should use the lap/shoulder belt in a
rear seat.
• Make sure that the child is upright in
the seat.
• The lap portion should be low on the
hips and as snug as possible.
• Check belt fit periodically. A child’s
squirming or slouching can move the
belt out of position.
• If the shoulder belt contacts the face
or neck, move the child closer to the
center of the vehicle. Never allow a
child to put the shoulder belt under
an arm or behind their back.NOTE:
For additional information, refer to
www.seatcheck.org or call
1–866–SEATCHECK. Canadian residents
should refer to Transport Canada’s
website for additional information:
http://www.tc.gc.ca/roadsafety/
safedrivers/childsafety/index.htmWARNING!
•Improper installation can lead to
failure of an infant or child restraint.
It could come loose in a collision. The
child could be badly injured or killed.
Follow the restraint manufacturer’s
directions exactly when installing an
infant or child restraint.
•A rearward-facing child restraint
should only be used in a rear seat. A
rearward-facing child restraint in the
front seat may be struck by a
deploying passenger air bag, which
may cause severe or fatal injury to
the infant.
Here are Some Tips on Getting
the Most Out of Your Child
Restraint
• Before buying any restraint system,
make sure that it has a labelcertifying that it meets all applicable
Safety Standards. Maserati also
recommends that you make sure that
you can install the child restraint in
the vehicle where you will use it
before you buy it.
• The restraint system must be
appropriate for your child’s weight
and height.
• Check the label on the restraint
system for weight and height limits.
• Carefully follow the instructions that
come with the restraint system.
• If installed improperly, it may not
work when needed.
• Fit the child into the seat according
to the child restraint manufacturer’s
directions.
WARNING!
When your child restraint system is
not in use, secure it in the vehicle with
the seat belt or remove it from the
vehicle. Do not leave it loose in the
vehicle. In a sudden stop or accident, it
could strike the occupants or
seatbacks and cause serious personal
injury.
Before Starting
2
56
Page 75 of 296

1Adjustable side air vents.
2Hood lid opening lever.
3Headlight and fog light switch.
4"Mode" and adjust "+" and
"–" buttons.
5Front parking sensors
disabling/enabling.
6Trunk lid opening button.
7Fuel tank door opening button
(see "Refueling" in section
"Driving" for operation).
8Multifunction lever (Cruise
Control, turn signals, headlight
washer and headlight
selection).
9Lower gearshift paddle
"DOWN".
10Instrument cluster.
11Steering wheel height and
depth adjustment lever.
12Upper air vent.
13Sun radiation sensor.
14Horn control.
15Multimedia controls repeated
on the steering wheel.
16Windshield/headlight
wiper/washer control lever.17Upper gearshift paddle "UP".
18Ignition switch.
19Clock.
20Central adjustable air vents.
21MTC+ display.
22Glove compartment.
23Side window vents.
Front Dome Console
Components
1Reading lights control button.
2Central light control button.
3Reading lights.
4Central light.5Anti-lift and anti-intrusion
alarm system deactivation
button.
6Paired phone hands-free
microphone.
Understanding the Vehicle
3
71
Page 78 of 296
Front Seats
Seats and seat belts are part of the
Occupant Restraint System of the
vehicle. For further information, see
chapter “Occupant Restraint System”
in Section “Before Starting”.
WARNING!
Be sure everyone in your vehicle is in a
seat and using a seat belt properly.
Seat Adjustments
The seats can only be adjusted with
the key in the ignition switch inMAR
(ON)position.
It is however possible, when the door
is closed, to operate the seat for
approx. 15 seconds after turning the
key toSTOP (OFF)position and then
for other 15 seconds after the last
operation.
The power seats switches are located
on the outboard side of the seat
cushion.
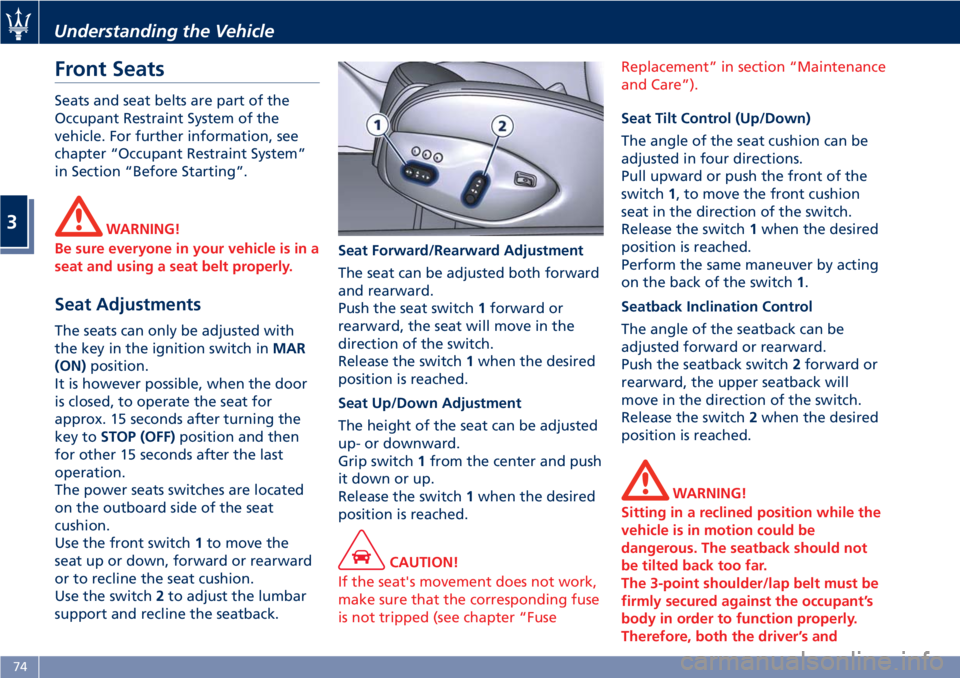
Use the front switch1to move the
seat up or down, forward or rearward
or to recline the seat cushion.
Use the switch2to adjust the lumbar
support and recline the seatback.Seat Forward/Rearward Adjustment
The seat can be adjusted both forward
and rearward.
Push the seat switch1forward or
rearward, the seat will move in the
direction of the switch.
Release the switch1when the desired
position is reached.
Seat Up/Down Adjustment
The height of the seat can be adjusted
up- or downward.
Grip switch1from the center and push
it down or up.
Release the switch1when the desired
position is reached.
CAUTION!
If the seat's movement does not work,
make sure that the corresponding fuse
is not tripped (see chapter “FuseReplacement” in section “Maintenance
and Care”).
Seat Tilt Control (Up/Down)
The angle of the seat cushion can be
adjusted in four directions.
Pull upward or push the front of the
switch1, to move the front cushion
seat in the direction of the switch.
Release the switch1when the desired
position is reached.
Perform the same maneuver by acting
on the back of the switch1.
Seatback Inclination Control
The angle of the seatback can be
adjusted forward or rearward.
Push the seatback switch2forward or
rearward, the upper seatback will
move in the direction of the switch.
Release the switch2when the desired
position is reached.
WARNING!
Sitting in a reclined position while the
vehicle is in motion could be
dangerous. The seatback should not
be tilted back too far.
The 3-point shoulder/lap belt must be
firmly secured against the occupant’s
body in order to function properly.
Therefore, both the driver’s and
Understanding the Vehicle
3
74
Page 192 of 296
Tire Sizing Chart
EXAMPLE: P285/40 ZR19 (100Y) XL or
285/40 ZR19 (Y100) XL
Size Designation:
P= Passenger car tire size based on
U.S. design standards
“...blank...”= Passenger car tire
based on European design standards
285= Section width in millimeters
(mm)
40= Aspect ratio in percent (%) —
Ratio of section height to section
width of tire
ZR= Construction Code
• Z: means a tire usable at speeds
greater than 150 mph (240 km/h)
• R: means radial construction
19= Rim diameter in inches (in)
Service Description:
100= Load Index — A numerical
code associated with the maximum
load a tire can carry
Y= Speed Symbol — A symbol
indicating the range of speeds at
which a tire can carry a load
corresponding to its load index
under certain operating conditions.
The maximum speed corresponding
to the speed symbol should only be
achieved under specified operating
conditions (i.e., tire pressure, vehicle
loading, road conditions, and posted
speed limits)
Load Identification:
“...blank...”= Absence of any text on
the sidewall of the tire indicates a
Standard Load (SL) tire
XL= Extra Load (or reinforced) tire
LL= Light Load tire
Tire Identification Number (TIN)
The TIN may be found on one or both
sides of the tire, however the date
code may only be on one side. Tires
with white sidewalls will have the full
TIN, including the date code, located
on the white sidewall side of the tire.Look for the TIN on the outboard side
of black sidewall tires as mounted on
the vehicle. If the TIN is not found on
the outboard side, then you will find it
on the inboard side of the tire.
EXAMPLE: DOT MA L9 ABCD 0313
DOT= Department of Transportation
— This symbol certifies that the tire is
in compliance with the U.S.
Department of Transportation tire
safety standards and is approved for
highway use.
MA= Code representing the tire
manufacturing location (two digits).
L9= Code representing the tire size
(two digits).
ABCD= Code used by the tire
manufacturer (one to four digits).
03= Number representing the week
in which the tire was manufactured
(two digits). In this case, 03 means
the 3
rdweek.
13= Number representing the year
in which the tire was manufactured
(two digits). In this case, 13 means
the year 2013.
Driving
5
188