2020 LINCOLN CORSAIR stop start
[x] Cancel search: stop startPage 217 of 591

GENERAL INFORMATION
Note:
Occasional brake noise is normal. If
a metal-to-metal, continuous grinding or
continuous squeal sound is present, the
brake linings may be worn-out and an
authorized dealer should check them. If the
vehicle has continuous vibration or shudder
in the steering wheel while braking, an
authorized dealer should check your vehicle.
Note: Brake dust may accumulate on the
wheels, even under normal driving
conditions. Some dust is inevitable as the
brakes wear and does not contribute to
brake noise. Wet brakes result in reduced
braking efficiency. Gently press the brake
pedal a few times when driving from a car
wash or standing water to dry the brakes.
See Cleaning the Wheels (page 352). Brake Over Accelerator
In the event the accelerator pedal becomes
stuck or entrapped, apply steady and firm
pressure to the brake pedal to slow the
vehicle and reduce engine power. If you
experience this condition, apply the brakes
and bring your vehicle to a safe stop. Switch
the engine off, move the transmission to park
(P) and apply the parking brake. Inspect the
accelerator pedal and the area around it for
any items or debris that may be obstructing
its movement. If none are found and the
condition persists, have your vehicle towed
to the nearest authorized dealer.
Emergency Brake Assist
Emergency brake assist detects when you
brake heavily by measuring the rate at which
you press the brake pedal. It provides
maximum braking efficiency as long as you
press the pedal. Emergency brake assist
can reduce stopping distances in critical
situations. Anti-lock Brake System
This system helps you maintain steering
control during emergency stops by keeping
the brakes from locking. This lamp momentarily illuminates
when you switch the ignition on.
If the light does not illuminate
during start up, remains on or flashes, the
anti-lock braking system may be disabled.
Have the system checked by an authorized
dealer. If the anti-lock brake system is
disabled, normal braking is still effective.
See
Warning Lamps and Indicators (page
118).
Note: Indicators vary depending on region. This lamp also illuminates
momentarily when you switch the
ignition on to confirm the lamp is
functional. If it does not illuminate
when you switch the ignition on,
or begins to flash at any time, have
the system checked by an authorized dealer.
If the brake warning lamp illuminates with
the parking brake released, have the system
checked immediately.
214
Corsair (CTF) Canada/United States of America, enUSA, Edition date: 201906, Second-Printing Brakes E270480
Page 221 of 591

Using Hill Start Assist
1. Bring your vehicle to a complete
standstill. Keep the brake pedal pressed
and select an uphill gear (for example,
drive (D) or first (1) when facing uphill or
reverse (R) when facing downhill).
2. If the sensors detect that your vehicle is on a slope, the system will activate
automatically.
3. When you remove your foot from the brake pedal, your vehicle will remain on
the slope without rolling away for about
two or three seconds. This hold time will
automatically be extended if you are in
the process of driving off.
4. Drive off in the normal manner. The brakes will release automatically.
Switching the System On and Off
Vehicles with Automatic Transmission
When you switch the ignition on, the system
automatically turns on. You cannot switch
the system on or off. AUTO HOLD WARNING: The system does not
replace the parking brake. When you leave
your vehicle, always apply the parking
brake. WARNING: You must remain in your
vehicle when the system turns on. At all
times, you are responsible for controlling
your vehicle, supervising the system and
intervening, if required. Failure to take care
may result in the loss of control of your
vehicle, serious personal injury or death. WARNING:
The system turns off if
there is a malfunction or if you excessively
rev the engine.
The system is designed to apply the brakes
to hold your vehicle at a standstill after you
stop your vehicle and release the brake
pedal. This could be beneficial in certain
situations, for example when waiting on a hill
or in traffic. Switching Auto Hold On and Off Press the button in the instrument
panel to access the Auto Hold
feature on the touchscreen.
Note: You can only switch the system on
after you close the driver door, fasten your
seatbelt and start the engine.
Note: The system remembers the last setting
when you start your vehicle.
Make sure you switch the system off before
towing with your vehicle or before using an
automatic car wash.
Using Auto Hold
1. Use the brakes to bring your vehicle to a complete stop. The auto hold active
indicator illuminates in the information
display.
2. Release the brake pedal. The system holds your vehicle at a standstill. The
auto hold active indicator remains
illuminated in the information display.
218
Corsair (CTF) Canada/United States of America, enUSA, Edition date: 201906, Second-Printing BrakesE287975
Page 222 of 591

Note:
The system only activates if you apply
enough brake pressure. If your vehicle is on
a steep slope, you need to press the brake
pedal harder before the system activates.
Note: Under certain conditions, the system
could apply the electric parking brake. The
brake system warning lamp illuminates. The
electric parking brake releases when you
press the accelerator pedal. See Electric
Parking Brake (page 215).
Note: If auto-start-stop turns off the engine,
auto hold remains active.
Note: The system deactivates if you shift into
reverse (R) and press the brake pedal.
3. Pull away in the normal manner. The system releases the brakes and the auto
hold active indicator turns off.
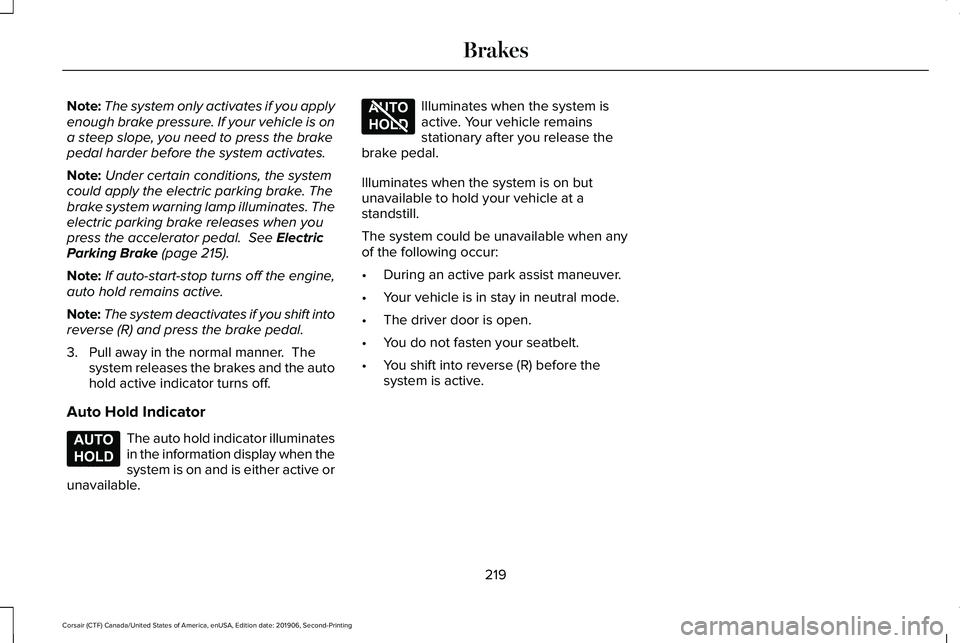
Auto Hold Indicator The auto hold indicator illuminates
in the information display when the
system is on and is either active or
unavailable. Illuminates when the system is
active. Your vehicle remains
stationary after you release the
brake pedal.
Illuminates when the system is on but
unavailable to hold your vehicle at a
standstill.
The system could be unavailable when any
of the following occur:
• During an active park assist maneuver.
• Your vehicle is in stay in neutral mode.
• The driver door is open.
• You do not fasten your seatbelt.
• You shift into reverse (R) before the
system is active.
219
Corsair (CTF) Canada/United States of America, enUSA, Edition date: 201906, Second-Printing BrakesE197933 E197934
Page 257 of 591

The cruise control indicator
replaces the adaptive cruise
control indicator if you select
normal cruise control. The gap setting does
not display, and the system does not respond
to lead vehicles. Automatic braking remains
active to maintain set speed. The system
remembers the last setting when you start
your vehicle.
SWITCHING LANE CENTERING ON
AND OFF
The cruise controls are on the steering
wheel. See Cruise Control (page 92). Press the button.
The indicator appears in the information
display. When the system is on, the color of
the indicator changes to indicate the system
status.
See Adaptive Cruise Control
Indicators (page 252).
Note: Adaptive cruise control must be on
before you can switch lane centering on. Activating Lane Centering
The system only activates when all of the
following occur:
•
You have adaptive cruise control with
stop-and-go on.
• Your hands are on the steering wheel.
• The system detects both lane markings.
Note: If it does not detect valid lane
markings, the system stays inactive until
valid markings are available.
You can override the system at any time by
steering your vehicle.
System Alerts and Automatic
Cancellation
You must keep your hands on the steering
wheel at all times.
When the system is active and detects no
steering activity for a certain period of time,
the system alerts you to put your hands on
the steering wheel. If you do not react to the
warnings the system cancels and slows your
vehicle down to idle speeds while
maintaining steering control. The system also alerts you if your vehicle
crosses lane markings without detected
steering activity.
Note:
The system may detect a light grip or
touch on the steering wheel as hands-off
driving.
When an external condition cancels the
system, for example, no lane markings
available, a tone sounds as the icon turns
amber then gray, and a message appears in
the information display. If your vehicle starts to slow down,
you must provide steering input to
the wheel and press and release
the button to regain full system performance.
Automatic cancellation can also occur if:
• The lane becomes too wide or too
narrow.
• The system cannot detect valid lane
markings.
• Lane markings are crossed.
Note: The system disables until the next key
cycle if your vehicle slows down due to driver
inactivity twice within a key cycle.
254
Corsair (CTF) Canada/United States of America, enUSA, Edition date: 201906, Second-Printing Adaptive Cruise Control
(If Equipped)E71340 E297977 E281472
Page 260 of 591

Adaptive Cruise Control – Information
Messages - Vehicles With: Adaptive
Cruise Control With Stop and Go
Note:
Depending on your vehicle options
and instrument cluster type, not all messages
display or are available. Note:
Certain messages may be abbreviated
or shortened depending upon which cluster
type you have. Action
Message
A malfunction is preventing the adaptive cruise from engaging.
Adaptive Cruise Malfunction
Front Sensor Not Aligned Contact an authorized dealer to have the radar checked for proper coverage and operation. Conditions exist preventing the system from being available.
Adaptive Cruise Not Available
The radar is blocked because of poor radar visibility due to inclement weather or ice, mud, orwater in front of the radar. You can typically clean the sensor to resolve this.
Adaptive Cruise Not Available Sensor
Blocked See Manual Due to the nature of radar technology, it is possible to get a blockage warning with no actual
block. This happens, for example, when driving in sparse rural or desert environments. A false blocked condition either self clears, or clears after you restart your vehicl\
e.
You have selected normal cruise control. The system does not brake or react to traffic.
Normal Cruise Active Adaptive Braking Off
Displays when the adaptive cruise is going to cancel and you must take control.
Adaptive Cruise - Driver Resume Control
Displays when the vehicle speed is too slow to activate the adaptive cru\
ise and there is no leadvehicle in range.
Adaptive Cruise Speed Too Low to
Activate
257
Corsair (CTF) Canada/United States of America, enUSA, Edition date: 201906, Second-Printing Adaptive Cruise Control (If Equipped)
Page 295 of 591

Trailer Lamps
WARNING: Never connect any trailer
lamp wiring to the vehicle's tail lamp wiring;
this may damage the electrical system
resulting in fire. Contact your authorized
dealer as soon as possible for assistance
in proper trailer tow wiring installation.
Additional electrical equipment may be
required.
Trailer lamps are required on most towed
vehicles. Make sure all running lights, brake
lights, turn signals and hazard lights are
working.
Before Towing a Trailer
Practice turning, stopping and backing up to
get the feel of your vehicle-trailer
combination before starting on a trip. When
turning, make wider turns so the trailer
wheels clear curbs and other obstacles. When Towing a Trailer
•
Do not drive faster than 70 mph
(113 km/h) during the first 500 mi
(800 km).
• Do not make full-throttle starts.
• Check your hitch, electrical connections
and trailer wheel lug nuts thoroughly after
you have traveled
50 mi (80 km).
• When stopped in congested or heavy
traffic during hot weather, place the
transmission in park (P) to aid engine and
transmission cooling and to help A/C
performance.
• Turn off the speed control with heavy
loads or in hilly terrain. The speed control
may turn off automatically when you are
towing on long, steep grades.
• Shift to a lower gear when driving down
a long or steep hill. Do not apply the
brakes continuously, as they may
overheat and become less effective. •
If your transmission is equipped with a
Grade Assist or Tow/Haul feature, use
this feature when towing. This provides
engine braking and helps eliminate
excessive transmission shifting for
optimum fuel economy and transmission
cooling.
• Allow more distance for stopping with a
trailer attached. Anticipate stops and
brake gradually.
• Avoid parking on a grade. However, if
you must park on a grade:
1. Turn the steering wheel to point your vehicle tires away from traffic flow.
2. Set your vehicle parking brake.
3. Place the transmission in park (P).
4. Place wheel chocks in front and back of the trailer wheels. Chocks are not
included with your vehicle.
Launching or Retrieving a Boat or
Personal Watercraft (PWC)
Note: Disconnect the wiring to the trailer
before
backing the trailer into the water.
292
Corsair (CTF) Canada/United States of America, enUSA, Edition date: 201906, Second-Printing Towing
Page 303 of 591

The fuel pump shutoff stops the flow of fuel
to the engine in the event of a moderate to
severe crash. Not every impact causes a
shutoff.
Should your vehicle shut off after a crash,
you may restart your vehicle.
If your vehicle has a key system:
1. Switch off the ignition.
2. Switch to start position.
3. Switch off the ignition.
4. Switch on the ignition to re-enable the
fuel pump.
5. If the vehicle does not start, repeat steps
1 through 4.
If your vehicle has a push button start
system:
1. Press START/STOP to switch off your
vehicle.
2. Press the brake pedal and
START/STOP
to switch on your vehicle.
3. Remove your foot from the brake pedal and press
START/STOP to switch off
your vehicle. 4. You can attempt to start the vehicle by
pressing the brake pedal and
START/STOP
, or press START/STOP
without pressing the brake pedal.
5. If the vehicle does not start, repeat steps
1 through 4.
JUMP STARTING THE VEHICLE WARNING:
Batteries normally
produce explosive gases which can cause
personal injury. Therefore, do not allow
flames, sparks or lighted substances to
come near the battery. When working near
the battery, always shield your face and
protect your eyes. Always provide correct
ventilation. WARNING:
Keep batteries out of
reach of children. Batteries contain sulfuric
acid. Avoid contact with skin, eyes or
clothing. Shield your eyes when working
near the battery to protect against possible
splashing of acid solution. In case of acid
contact with skin or eyes, flush immediately
with water for a minimum of 15 minutes and
get prompt medical attention. If acid is
swallowed, call a physician immediately. WARNING:
Use only adequately
sized cables with insulated clamps. WARNING: Make sure that the cables
are clear of any moving parts and fuel
delivery system parts.
Note: Do not attempt to push-start your
automatic transmission vehicle. Attempting
to push-start a vehicle with an automatic
transmission may cause transmission
damage.
Note: Do not disconnect the battery of the
disabled vehicle as this could damage the
vehicle electrical system.
300
Corsair (CTF) Canada/United States of America, enUSA, Edition date: 201906, Second-Printing Roadside Emergencies
Page 341 of 591

You may notice a reduction in vehicle speed
caused by reduced engine power in order
to manage the engine coolant temperature.
Your vehicle may enter this mode if certain
high-temperature and high-load conditions
take place. The amount of speed reduction
depends on vehicle loading, grade and
ambient temperature. If this occurs, there is
no need to stop your vehicle. You can
continue to drive.
The air conditioning may automatically turn
on and off during severe operating
conditions to protect the engine from
overheating. When the coolant temperature
decreases to the normal operating
temperature, the air conditioning turns on.
If the coolant temperature gauge moves fully
into the red zone, or if the coolant
temperature warning or service engine soon
messages appear in your information display,
do the following:
1.
Stop your vehicle as soon as it is safe to
do so. Fully apply the parking brake, shift
into park (P) or neutral (N). 2. Leave the engine running until the
coolant temperature gauge needle
returns to the normal position. If the
temperature does not drop after several
minutes, follow the remaining steps.
3. Switch the engine off and wait for it to cool. Check the coolant level.
4. If the coolant level is at or below the minimum mark, add prediluted coolant
immediately.
5. If the coolant level is normal, restart the engine and continue.
AUTOMATIC TRANSMISSION
FLUID CHECK
The automatic transmission does not have
a transmission fluid dipstick.
The automatic transmission does not
consume fluid. However, the fluid level
should be checked if the transmission is not
working properly, for example if the
transmission slips or shifts slowly or if you
notice some sign of fluid leakage. Note:
Transmission fluid should be checked
by an authorized dealer. If required, fluid
should be added by an authorized dealer.
Do not use supplemental transmission fluid
additives, treatments or cleaning agents. The
use of these materials may affect
transmission operation and result in damage
to internal transmission components.
BRAKE FLUID CHECK WARNING: Do not use any fluid other
than the recommended brake fluid as this
will reduce brake efficiency. Use of
incorrect fluid could result in the loss of
vehicle control, serious personal injury or
death. WARNING: Only use brake fluid from
a sealed container. Contamination with dirt,
water, petroleum products or other
materials may result in brake system
damage or failure. Failure to adhere to this
warning could result in the loss of vehicle
control, serious personal injury or death.
338
Corsair (CTF) Canada/United States of America, enUSA, Edition date: 201906, Second-Printing Maintenance