Page 397 of 516
3976-3. Do-it-yourself maintenance
6
Maintenance and care
6Reinstall the fender liner and install
the 3 fender liner clips.
■Front turn signal lights (vehicles
with single-bea m headlights)
1 Removing the engine compartment
cover. 1
Push the center of the clip.
2 Remove the clip.
2 For the right side only: Remove the
bolt, and move the washer fluid
inlet.
3 Turn the bulb base counterclock-
wise and remove it.
Page 398 of 516
3986-3. Do-it-yourself maintenance
4Remove the light bulb.
5 Install a new light bulb and then
install the bulb base to the light unit
by inserting it and turning it clock-
wise.
After installing the bulb base, wiggle it
lightly to make sure it is securely installed
and turn the lights on to visually check that
there is no light lea king from between the
bulb base and light unit.
6 For the right side only: Fix the
washer fluid inlet.
1 Align the tab position and install
washer fluid inlet.
2 Fasten the bolt.
Page 399 of 516
3996-3. Do-it-yourself maintenance
6
Maintenance and care
7Install the engine compartment
cover.
1 Push up center portion
2 Insert
3 Press
■Rear turn signal lights (bulb type)
1 Open the back door and apply pro-
tective tape to the vehicle body
around the taillight.
Use masking tape, etc. Do not use duct
tape, as it may leave residue or damage the
paint when removed.
2Using a flathead screwdriver,
remove the cover.
To prevent scratching the vehicle, wrap the
tip of the flathead scre wdriver with a cloth,
etc.
3 Remove the 2 screws.
4 Remove the taillight unit.
1 Attach 2 long pieces of masking
Page 400 of 516
4006-3. Do-it-yourself maintenance
tape to the taillight unit and fold the
excess in half.
2 Hold the folded portion and pull it
toward the rear of the vehicle to
remove the light unit.
5 Turn the bulb base counterclock-
wise and remove it.
6 Remove the light bulb.
7 Install a new light bulb and then
install the bulb base to the light unit
by inserting it and turning it clock-
wise.
After installing the bulb base, wiggle it
lightly to make sure it is securely installed
and turn on the rear turn signal lights to
visually check that ther e is no light leaking from between the bulb
base and light unit.
8Install the light unit.
Align the tabs and push the light unit-
toward the front of the vehicle to install it.
9Install the 2 screws.
Page 401 of 516
4016-3. Do-it-yourself maintenance
6
Maintenance and care
10Install the cover.
11 Remove the protective tape.
■Back-up lights (bulb type)
1 Open the back door and remove
the cover.
Using a flathead screwdriver, remove the
cover.
To prevent scratching to the vehicle, wrap
the tip of the flathead screwdriver with a
cloth, etc.
2 Turn the bulb base counterclock-
wise and remove it. 3
Remove the light bulb.
4 Install a new light bulb and then
install the bulb base to the light unit
by inserting it and turning it clock-
wise.
After installing the bulb base, wiggle it
lightly to make sure it is securely installed
and turn on the back-up lights to visually
check that there is no light leaking from
between the bulb ba se and light unit.
5Install the cover.
Align the tabs of the cover with the grooves
and install the cover.
Page 402 of 516

4026-3. Do-it-yourself maintenance
WARNING
■To prevent injury
Before performing any light bulb
replacement procedure, be sure to turn
the engine switch off. Failure to do so
may result in burns from hot components
or a part of your bo dy may get caught on
an operating component, possibly caus-
ing serious injury.
■Replacing light bulbs
●Turn off the lights. Do not attempt to
replace the bulb immediately after
turning off the lights.
The bulbs become very hot and may
cause burns.
●Do not touch the glass portion of the
light bulb with bare hands. When it is
unavoidable to hold the glass portion,
use and hold with a clean dry cloth to
avoid getting moisture and oils on the
bulb.
Also, if the bulb is scratched or
dropped, it may blow out or crack.
●Fully install light bulbs and any parts
used to secure them. Failure to do so
may result in heat damage, fire, or
water entering the headlight unit. This
may damage the headlights or cause
condensation to build up on the lens.
●Do not attempt to repair or disassem-
ble the light bulbs, connectors, electric
circuits or component parts.
Doing so may result in death or serious
injury due to electric shock.
■To prevent damage or fire
●Make sure bulbs are fully seated and
locked.
●Check the wattage of the bulb before
installing to prev ent heat damage.
Page 403 of 516

403
7
7
When trouble arises
When trouble arises
.7-1. Essential informationEmergency flashers.................. 404
If your vehicle has to be stopped in an emergency .......................... 404
If the vehicle is trapped in rising water............................................ 405
7-2. Steps to take in an emergency If your vehicle needs to be towed........................................................ 407
If you think something is wrong .......................................................... 411
Fuel pump shut off system ...... 412
If a warning light turns on or a warning buzzer sounds ........ 413
If a warning message is displayed ........................................................ 422
If you have a flat tire.................. 426
If the engine wi ll not start .......438
If you lose your keys ................. 440
If the fuel filler door cannot be opened........................................ 440
If the electronic key does not operate properly ..................... 441
If the vehicle battery is discharged ........................................................ 443
If your vehicle overheats ........ 447
If the vehicle becomes stuck ........................................................ 449
Page 404 of 516

4047-1. Essential information
7-1.Essential information
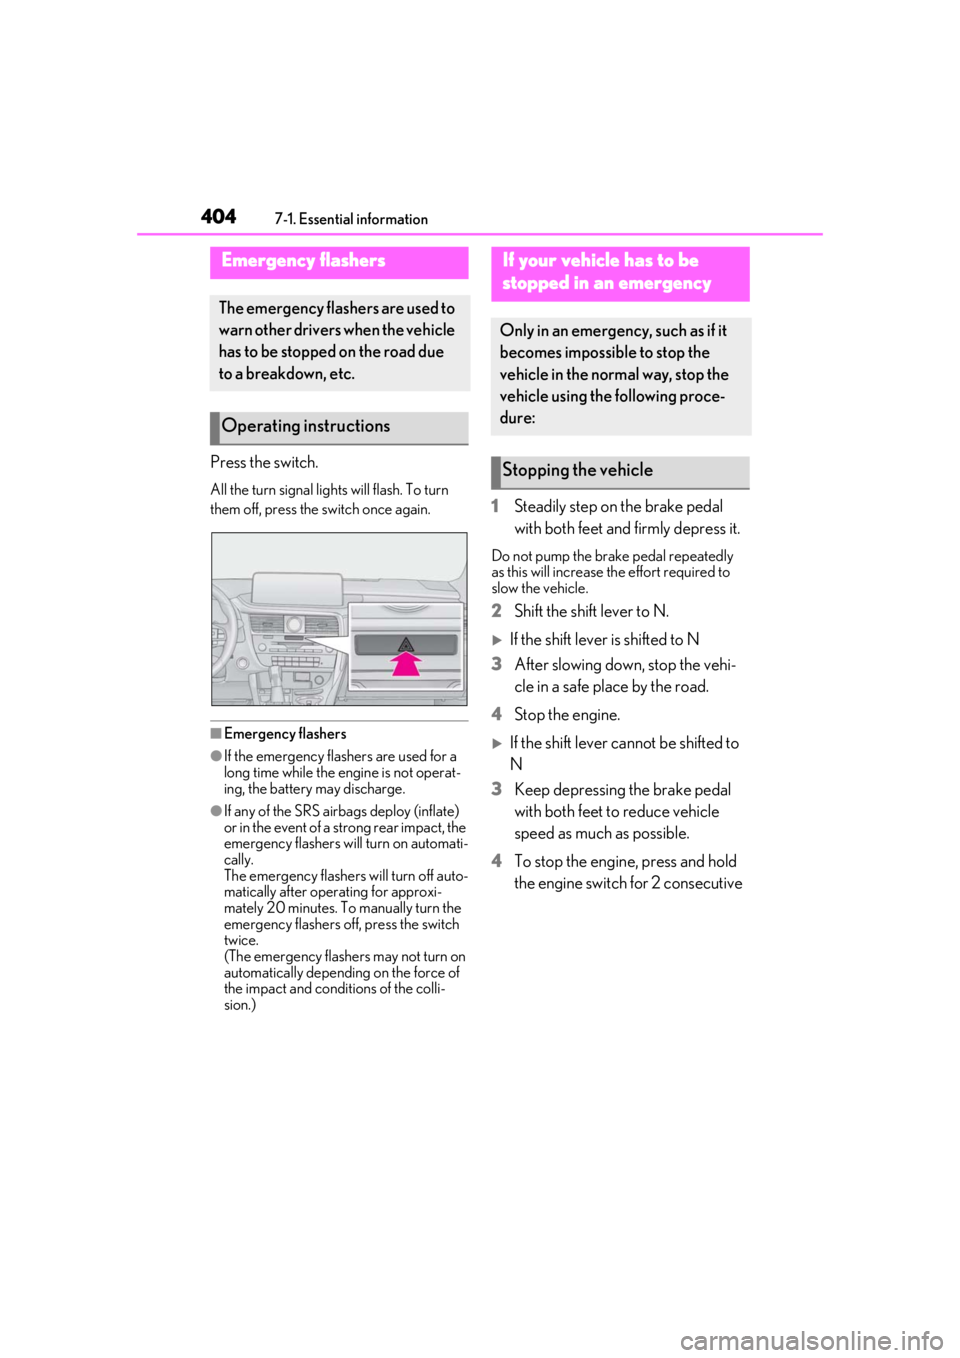
Press the switch.
All the turn signal lights will flash. To turn
them off, press the switch once again.
■Emergency flashers
●If the emergency flashers are used for a
long time while the engine is not operat-
ing, the battery may discharge.
●If any of the SRS airbags deploy (inflate)
or in the event of a strong rear impact, the
emergency flashers will turn on automati-
cally.
The emergency flashers will turn off auto-
matically after operating for approxi-
mately 20 minutes. To manually turn the
emergency flashers off, press the switch
twice.
(The emergency flashers may not turn on
automatically depending on the force of
the impact and conditions of the colli-
sion.)
1 Steadily step on the brake pedal
with both feet and firmly depress it.
Do not pump the brake pedal repeatedly
as this will increase the effort required to
slow the vehicle.
2Shift the shift lever to N.
If the shift lever is shifted to N
3 After slowing down, stop the vehi-
cle in a safe place by the road.
4 Stop the engine.
If the shift lever cannot be shifted to
N
3 Keep depressing the brake pedal
with both feet to reduce vehicle
speed as much as possible.
4 To stop the engine, press and hold
the engine switch for 2 consecutive
Emergency flashers
The emergency flashers are used to
warn other drivers when the vehicle
has to be stopped on the road due
to a breakdown, etc.
Operating instructions
If your vehicle has to be
stopped in an emergency
Only in an emergency, such as if it
becomes impossible to stop the
vehicle in the normal way, stop the
vehicle using the following proce-
dure:
Stopping the vehicle