2020 KIA SEDONA hood open
[x] Cancel search: hood openPage 14 of 604

Your vehicle at a glance
42
INTERIOR OVERVIEW
1. Inside door handle.................................4-28
2. Power window switch ............................4-54
3. Central door lock switch ........................4-29
4. Power window and rear sunrooflock button .............................................4-56
5. Outside rearview mirror control .............4-87
6. Outside rearview mirror folding switch ..4-88
7. Fuel filler lid open switch .......................4-61
8. Instrument panel illumination control switch.........................................4-92
9. BCW ON/OFF button ............................5-86
10. LDW ON/OFF button ...........................5-98
11. AC inverter button .............................4-204
12. ESC OFF button..................................5-35
13. Steering wheel ....................................4-72
14. Tilt and telescopic steering control lever .........................................4-74
15. Inner panel fuse panel. .......................7-55
16. Brake pedal .........................................5-21
17. Hood release lever ..............................4-58
18. Seat .......................................................3-2
OYP018003N❈ The actual interior in the vehicle may differ from the illustration
Page 110 of 604

Features of your vehicle
Folding key . . . . . . . . . . . . . . . . . . . . . . . . . . . . . . . . 4-5
• Record your key number . . . . . . . . . . . . . . . . . . . . . . . 4-5
• Key operations . . . . . . . . . . . . . . . . . . . . . . . . . . . . . . . . 4-5
• Transmitter precautions . . . . . . . . . . . . . . . . . . . . . . . . 4-9
• Battery replacement . . . . . . . . . . . . . . . . . . . . . . . . . . 4-10
• Immobilizer system . . . . . . . . . . . . . . . . . . . . . . . . . . . 4-11
• Limp home (override) procedure . . . . . . . . . . . . . . . 4-13
Smart key . . . . . . . . . . . . . . . . . . . . . . . . . . . . . . . . 4-14
• Record your key number . . . . . . . . . . . . . . . . . . . . . . 4-14
• Smart key function . . . . . . . . . . . . . . . . . . . . . . . . . . . 4-14
• Loss of the smart key . . . . . . . . . . . . . . . . . . . . . . . . . 4-18
• Smart key precautions . . . . . . . . . . . . . . . . . . . . . . . . 4-19
• Battery replacement . . . . . . . . . . . . . . . . . . . . . . . . . . 4-20
• Smart key immobilizer system . . . . . . . . . . . . . . . . . . 4-21
Theft-alarm system . . . . . . . . . . . . . . . . . . . . . . . . 4-23
• Armed stage . . . . . . . . . . . . . . . . . . . . . . . . . . . . . . . . . 4-23
• Theft-alarm stage . . . . . . . . . . . . . . . . . . . . . . . . . . . . 4-24
• Disarmed stage. . . . . . . . . . . . . . . . . . . . . . . . . . . . . . . 4-24
Door locks . . . . . . . . . . . . . . . . . . . . . . . . . . . . . . . . 4-26
• Operating door locks from outside the vehicle. . . . . 4-26
• Operating door locks from inside the vehicle . . . . . . 4-28
• Impact sensing door unlock system . . . . . . . . . . . . . . 4-31
• Automatic door lock system . . . . . . . . . . . . . . . . . . . . 4-31
• Child-protector rear door lock. . . . . . . . . . . . . . . . . . 4-31
Liftgate (for manual liftgate) . . . . . . . . . . . . . . . . 4-32
• Opening the liftgate . . . . . . . . . . . . . . . . . . . . . . . . . . . 4-32
• Closing the liftgate. . . . . . . . . . . . . . . . . . . . . . . . . . . . 4-33
• Emergency liftgate safety release. . . . . . . . . . . . . . . . 4-34
Power sliding door and power liftgate . . . . . . . . . 4-35
• Automatic stop and reversal . . . . . . . . . . . . . . . . . . . 4-37
• How to reset the power sliding door and power liftgate . . . . . . . . . . . . . . . . . . . . . . . . . . . . . . . 4-38
• Power door on/off button . . . . . . . . . . . . . . . . . . . . . . 4-39
• Power sliding door operation . . . . . . . . . . . . . . . . . . . 4-40
• Power liftgate operation . . . . . . . . . . . . . . . . . . . . . . . 4-43
• Power liftgate opening height user setting . . . . . . . . 4-46
• Emergency liftgate safety release. . . . . . . . . . . . . . . . 4-47
• Smart liftgate . . . . . . . . . . . . . . . . . . . . . . . . . . . . . . . . 4-48
Windows . . . . . . . . . . . . . . . . . . . . . . . . . . . . . . . . . 4-53
• Power windows . . . . . . . . . . . . . . . . . . . . . . . . . . . . . . 4-54
Hood. . . . . . . . . . . . . . . . . . . . . . . . . . . . . . . . . . . . \
. 4-58
• Opening the hood . . . . . . . . . . . . . . . . . . . . . . . . . . . . 4-58
• Closing the hood . . . . . . . . . . . . . . . . . . . . . . . . . . . . . 4-59
Fuel filler lid . . . . . . . . . . . . . . . . . . . . . . . . . . . . . . 4-61
• Opening the fuel filler lid . . . . . . . . . . . . . . . . . . . . . . 4-61
• Closing the fuel filler lid . . . . . . . . . . . . . . . . . . . . . . . 4-61
• Emergency fuel filler lid release . . . . . . . . . . . . . . . . 4-64
4
Page 116 of 604

47
Features of your vehicle
1. Close all doors, engine hood andliftgate.
2. Press the lock button (1).
3. All doors and liftgate will lock. The hazard warning lights will blink
once.
4. If the lock button is pressed once more within 4 seconds, the hazard
warning lights will blink and the
horn will sound once.
5. Make sure that doors are locked by checking the door lock button inside
or pulling the outside door handle.Door Unlock (2)
1. Press the unlock button (2).
2. The driver's door will unlock. Thehazard warning lights will blink two
times.
3. Press the unlock button (2) twice within 4 seconds and all doors and
liftgate will unlock. The hazard
warning lights will blink two times.
✽ ✽NOTICE
You can activate or deactivate the
Two Turn Unlock function. Refer to
“User settings” in this chapter.
Left power sliding door opening
or closing (if equipped) (3)
When the power door ON/OFF but-
ton is ON (not depressed):
The left sliding door is opened or
closed automatically if the button is
pressed and held.
When the left sliding door is closed
and more than one door is locked, and
the button is pressed for more than
one second all doors will be unlocked.
Page 124 of 604

415
Features of your vehicle
Door LockUsing the door handle button
1. Carry the smart key.
2. Close all doors, engine hood andliftgate.
3. Press the button of the outside door handle.
4. The hazard warning lights will blink and the chime will sound once.
5. Make sure that doors are locked by pulling the outside door handle.✽ ✽NOTICE
• The button will only operate when
the smart key is within 0.7 ~ 1 m
(28 ~ 40 in.) from the outside door
handle.
• In some instances, when the out- side door button is pressed, the
doors will not lock and the chime
will sound for 3 seconds if any of
following occur:- The smart key is in the vehicle.
- The engine start/stop button is in ACC or ON position.
- Any door except the liftgate is open.
OYP044003K
OYP044025K
■
Type A
■ Type B
Page 125 of 604

Features of your vehicle
16
4
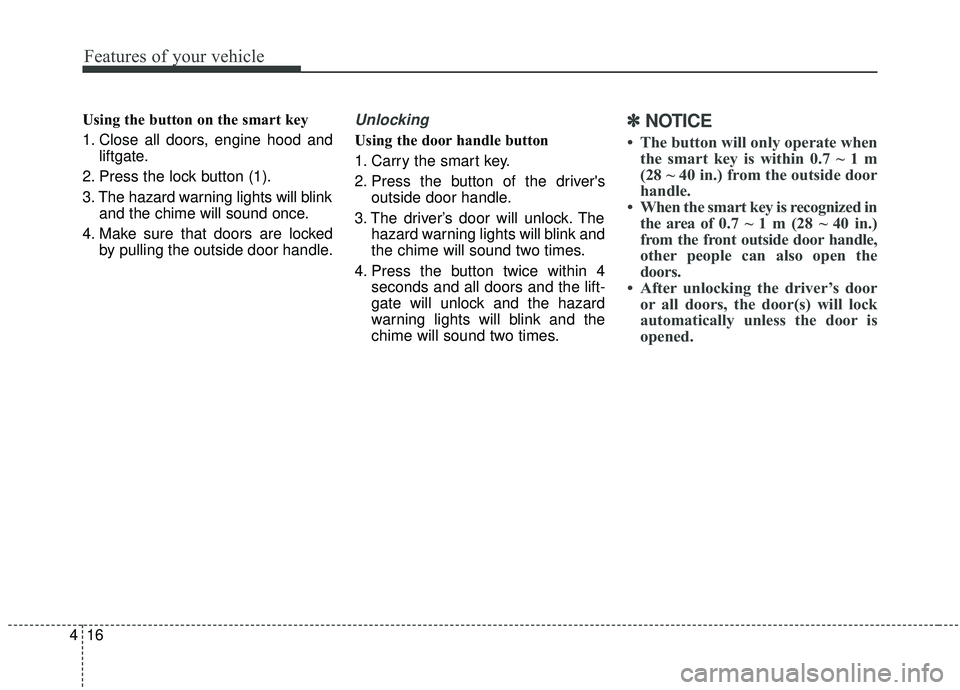
Using the button on the smart key
1. Close all doors, engine hood and
liftgate.
2. Press the lock button (1).
3. The hazard warning lights will blink and the chime will sound once.
4. Make sure that doors are locked by pulling the outside door handle.Unlocking
Using the door handle button
1. Carry the smart key.
2. Press the button of the driver'soutside door handle.
3. The driver’s door will unlock. The hazard warning lights will blink and
the chime will sound two times.
4. Press the button twice within 4 seconds and all doors and the lift-
gate will unlock and the hazard
warning lights will blink and the
chime will sound two times.
✽ ✽NOTICE
• The button will only operate when
the smart key is within 0.7 ~ 1 m
(28 ~ 40 in.) from the outside door
handle.
• When the smart key is recognized in the area of 0.7 ~ 1 m (28 ~ 40 in.)
from the front outside door handle,
other people can also open the
doors.
• After unlocking the driver’s door or all doors, the door(s) will lock
automatically unless the door is
opened.
Page 132 of 604

423
Features of your vehicle
This system is designed to provide
protection from unauthorized entry
into the vehicle. This system is oper-
ated in three stages: the first is the
"Armed" stage, the second is the
"Theft-alarm" stage, and the third is
the "Disarmed" stage. If triggered,
the system provides an audible
alarm with blinking of the hazard
warning lights.
Armed stage
Park the vehicle and stop the engine.
Arm the system as described below.
1. Remove the ignition key from theignition switch and exit the vehicle.
2. Make sure that all doors (and lift- gate) and engine hood are closed
and latched.
3. Lock the doors using the transmit- ter of the keyless entry system (or
smart key) or ignition key.
After completion of the steps above,
the hazard warning lights will blink
(for smart key, the chime also
sounds) once to indicate that the
system is armed. If any door (or liftgate) or engine
hood remains open, the hazard
warning lights and the chime will not
operate and the theft-alarm will not
arm. If all doors (and liftgate) and
engine hood are closed after the lock
button is pressed, the hazard warn-
ing lights blink once.
The system can also be armed by
locking the doors with the key from
the front doors; however, the hazard
warning lights will not blink using this
method.
✽ ✽
NOTICE
The theft-alarm system can be deac-
tivated by an authorized Kia dealer.
If you want this feature, consult an
authorized Kia dealer.
THEFT-ALARM SYSTEM
Armed
stage
Theft-alarm stageDisarmedstage
Page 133 of 604

Features of your vehicle
24
4
Do not arm the system until all
passengers have left the vehicle. If
the system is armed while a pas-
senger(s) remains in the vehicle,
the alarm may be activated when
the remaining passenger(s) leave
the vehicle. If any door (or liftgate)
or engine hood is opened within
30 seconds after the system
enters the armed stage, the sys-
tem is disarmed to prevent an
unnecessary alarm.Theft-alarm stage
The alarm will be activated if any of
the following occurs while the system
is armed.
A front or rear door is opened with-
out using the ignition key or trans-
mitter (or smart key).
The liftgate is opened without using the transmitter (or smart key).
The engine hood is opened.
The hazard warning lights will blink
and the alarm will sound for around
30 seconds, and then stop for 10
seconds. This pattern will repeat
twice unless the system is dis-
armed. To turn off the system, unlock
the doors with the ignition key or
transmitter (or smart key).
Disarmed stage
The system will be disarmed when
The doors (and liftgate) are unlocked with the transmitter (or
smart key) or the ignition key.
The power sliding door out handle is pulled while the power door
ON/OFF button is ON (not
depressed).
After depressing the unlock button,
the hazard warning lights will blink
and the chime will sound twice (in
smart key) to indicate that the sys-
tem is disarmed.
After depressing the unlock button, if
any door (or liftgate) is not opened
within 30 seconds, the system will be
rearmed.
Page 167 of 604

Features of your vehicle
58
4
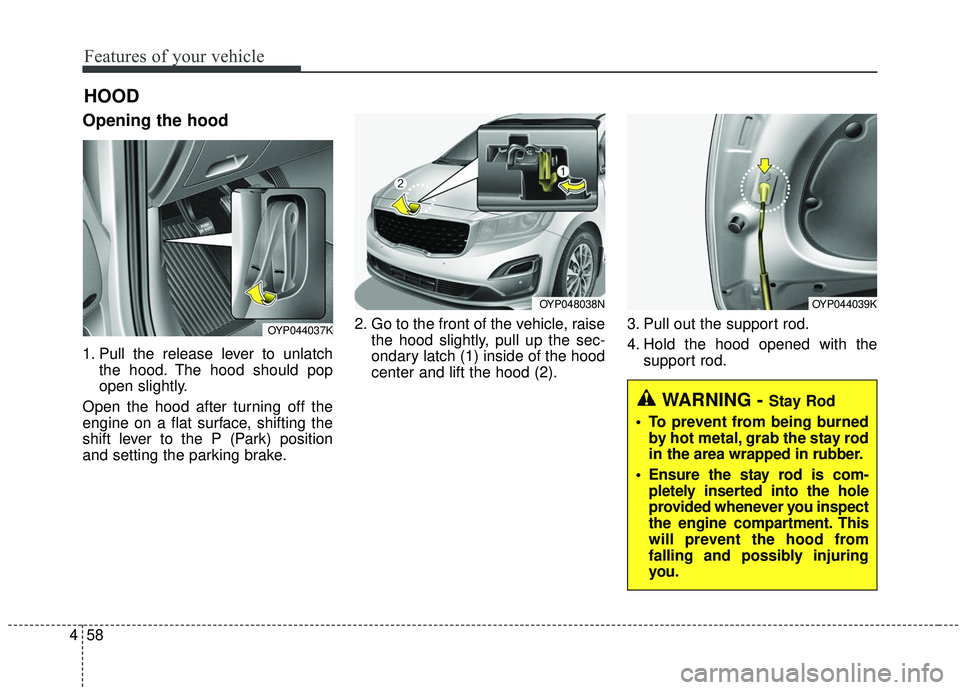
Opening the hood
1. Pull the release lever to unlatch
the hood. The hood should pop
open slightly.
Open the hood after turning off the
engine on a flat surface, shifting the
shift lever to the P (Park) position
and setting the parking brake. 2. Go to the front of the vehicle, raise
the hood slightly, pull up the sec-
ondary latch (1) inside of the hood
center and lift the hood (2). 3. Pull out the support rod.
4. Hold the hood opened with the
support rod.
HOOD
OYP044037K
OYP048038NOYP044039K
WARNING - Stay Rod
To prevent from being burned by hot metal, grab the stay rod
in the area wrapped in rubber.
Ensure the stay rod is com- pletely inserted into the hole
provided whenever you inspect
the engine compartment. This
will prevent the hood from
falling and possibly injuring
you.