2020 KIA RIO remove seats
[x] Cancel search: remove seatsPage 25 of 516

Safety features of your vehicle
83
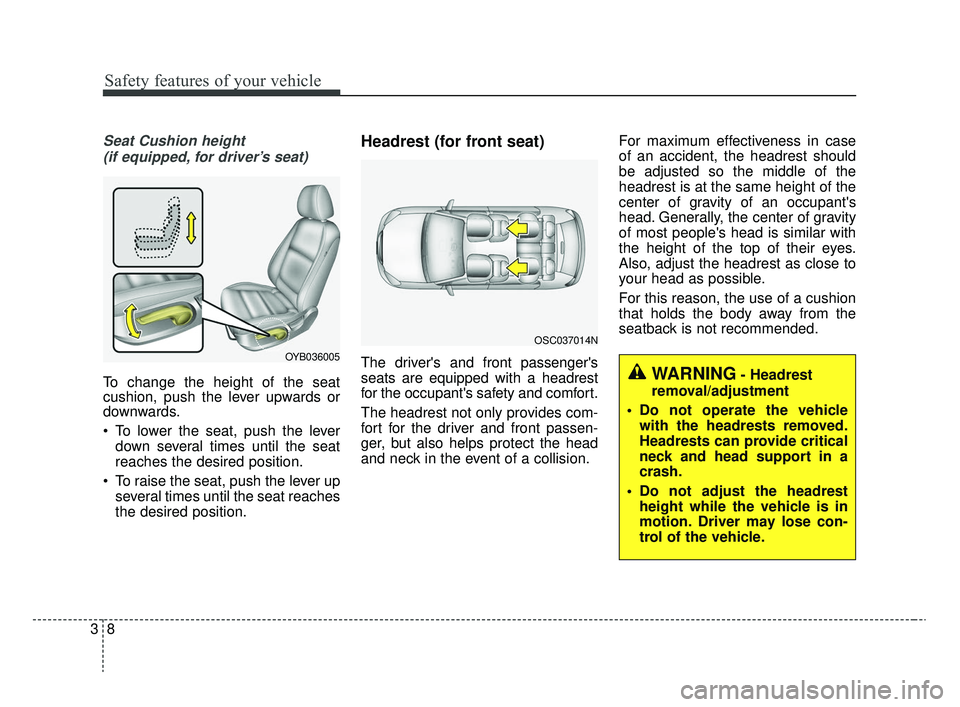
Seat Cushion height (if equipped, for driver’s seat)
To change the height of the seat
cushion, push the lever upwards or
downwards.
To lower the seat, push the lever down several times until the seat
reaches the desired position.
To raise the seat, push the lever up several times until the seat reaches
the desired position.
Headrest (for front seat)
The driver's and front passenger's
seats are equipped with a headrest
for the occupant's safety and comfort.
The headrest not only provides com-
fort for the driver and front passen-
ger, but also helps protect the head
and neck in the event of a collision. For maximum effectiveness in case
of an accident, the headrest should
be adjusted so the middle of the
headrest is at the same height of the
center of gravity of an occupant's
head. Generally, the center of gravity
of most people's head is similar with
the height of the top of their eyes.
Also, adjust the headrest as close to
your head as possible.
For this reason, the use of a cushion
that holds the body away from the
seatback is not recommended.OYB036005
WARNING- Headrest
removal/adjustment
Do not operate the vehicle with the headrests removed.
Headrests can provide critical
neck and head support in a
crash.
Do not adjust the headrest height while the vehicle is in
motion. Driver may lose con-
trol of the vehicle.
OSC037014N
SC CAN (ENG) 3.QXP 6/7/2019 9:37 AM Page 8
Page 33 of 516

Safety features of your vehicle
16
3
Seat belt restraint system
Seat belts are designed to bear upon
the bony structure of the body, and
should be worn low across the front
of the pelvis, chest and shoulders, as
applicable; wearing the lap section of
the belt across the abdominal area
must be avoided.
Seat belts should be adjusted as
firmly as possible, consistent with
comfort, to provide the protection for
which they have been designed.
A slack belt will greatly reduce the
protection afforded to the wearer.
Care should be taken to avoid con-
tamination of the webbing with pol-
ishes, oils and chemicals, and partic-
ularly battery acid. Cleaning may
safely be carried out using mild soap
and water. The belt should be
replaced if webbing becomes frayed,
contaminated or damaged. For maximum restraint system pro-
tection, the seat belts must always
be used whenever the vehicle is
moving. A properly positioned
shoulder belt should be positioned
midway over your shoulder across
your collarbone.
Never allow children to ride in the front passenger seat. See child
restraint system section for further
discussion.
No modifications or additions should be made by the user which
would either prevent the seat belt
adjusting devices from operating to
remove slack, or prevent the seat
belt assembly from being adjusted
to remove slack.
When you fasten the seat belt, be careful not to latch the seat belt in
buckles of other seats. It's very
dangerous and you may not be
protected by the seat belt properly.
Do not unfasten the seat belt and do not fasten and unfasten the seat
belt repeatedly while driving. This
could result in loss of control, and
an accident causing death, serious
injury, or property damage. When fastening the seat belt,
make sure that the seat belt does
not pass over objects that are hard
or can break easily.
SEAT BELTS
WARNING- Shoulder belt
Never wear the shoulder belt
under your arm or behind your
back. An improperly positioned
shoulder belt cannot protect the
occupant in a crash.
WARNING- Damaged seat belt
Replace the entire seat belt
assembly if any part of the web-
bing or hardware is damaged as
you can no longer be sure that a
damaged seat belt will provide
protection in a crash.
SC CAN (ENG) 3.QXP 6/7/2019 9:38 AM Page 16
Page 47 of 516

Safety features of your vehicle
30
3
✽ ✽
NOTICE
If the vehicle headrest prevents
proper installation of a child seat (as
described in the child seat system
manual), the headrest of the respec-
tive seating position shall be read-
justed or entirely removed.
Placing a passenger seat belt
into the auto lock mode
The auto lock mode will help prevent
the normal movement of the child in
the vehicle from causing the seat belt
to loosen and compromise the child
restraint system. To secure a child
restraint system, use the following
procedure. To install a child restraint system on
the outboard or center rear seats, do
the following:
1. Place the child restraint system in
the seat and route the lap/shoulder
belt around or through the restraint,
following the restraint manufactur-
er’s instructions. Be sure the seat
belt webbing is not twisted.
2. Fasten the lap/shoulder belt latch into the buckle. Listen for the dis-
tinct “click” sound.
Position the release button so that itis easy to access in case of an emer-gency.
WARNING- Child seat
installation
Always follow the instructions provided by the child restraint
system manufacturer. Child
restraint system manufactur-
ers know their products best.
Failure to observe this manu- al's instructions regarding
child restraint system and the
instructions provided with the
child restraint system could
result in the improper installa-
tion of the child restraint sys-
tem which may reduce the
protection to your child in a
crash or a sudden stop.
E2MS103005
OEN036101
SC CAN (ENG) 3.QXP 6/7/2019 9:38 AM Page 30
Page 50 of 516

333
Safety features of your vehicle
1.Route the child restraint seat teth-er strap over the seatback.
For vehicles with adjustable head-
rests, route the tether strap under
the headrest (remove the headrest
and the re-install it) and between
the headrest posts, otherwise
route the tether strap over the top
of the seatback. 2. Connect the tether strap hook to
the appropriate child restraint
hook holder and tighten to secure
the child restraint seat.
Check that the child restraint system
is secure by pushing and pulling it in
different directions. Incorrectly fitted
child restraints may swing, twist, tip
or separate causing death or serious
injury.
Securing a child restraint seat with child seat lower anchor system
Some child seat manufacturers
make child restraint seats that are
labeled as LATCH or LATCH-com-
patible child restraint seats. LATCH
stands for "Lower Anchors and
Tethers for Children". These seats
include two rigid or webbing mount-
ed attachments that connect to two
LATCH anchors at specific seating
positions in your vehicle. This type of
child restraint seat eliminates the
need to use seat belts to attach the
child seat in the rear seats.
OTF030030N
WARNING- Tether strap
Never mount more than one
child restraint to a single tether
or to a single lower anchorage
point. The increased load
caused by multiple seats may
cause the tethers or anchorage
points to break.
B230D01NF
SC CAN (ENG) 3.QXP 6/7/2019 9:38 AM Page 33
Page 51 of 516

Safety features of your vehicle
34
3
Child restraint symbols are located
on the left and right rear seat backs
to indicate the position of the lower
anchors for child restraints. LATCH anchors have been provided in
your vehicle. The LATCH anchors are
located in the left and right outboard
rear seating positions. Their locations
are shown in the illustration. There is no
LATCH anchor provided for the center
rear seating position.
The LATCH anchors are located
between the seatback and the seat
cushion of the rear seat left and right
outboard seating positions.
When you install your child's restraint
system using the LATCH anchors
buckle the shoulder lap belt, then lock
the retractor and pull the belt to remove
the slack in the belt so it lies flat against
the vehicle seat.
Follow the child seat manufacturer’s
instructions to properly install child
restraint seats with LATCH or LATCH-
compatible attachments.
Once you have installed the LATCH
child restraint, assure that the seat is
properly attached to the LATCH and
tether anchors.
Also, test the child restraint seat before
you place the child in it. Tilt the seat
from side to side. Also try to tug the seat
forward. Check to see if the anchors
hold the seat in place.
OTF030031N
Lower Anchor
Position Indicator
Lower Anchor
WARNING - Unused rear seatbelts
Always fasten the seatbelts
behind the child restraint seat
when they are not used to
secure the child seat. Failure to
do so may result in child stran-
gulation.
WARNING - LATCH lower
anchors
Never attempt to attach a
LATCH equipped seat in the
center seating position. LATCH
lower anchors are only to be
used with the left and right rear
outboard seating positions. You
may damage the anchors or the
anchors may fail and break in a
collision.
SC CAN (ENG) 3.QXP 6/7/2019 9:38 AM Page 34
Page 221 of 516

4141
Features of your vehicle
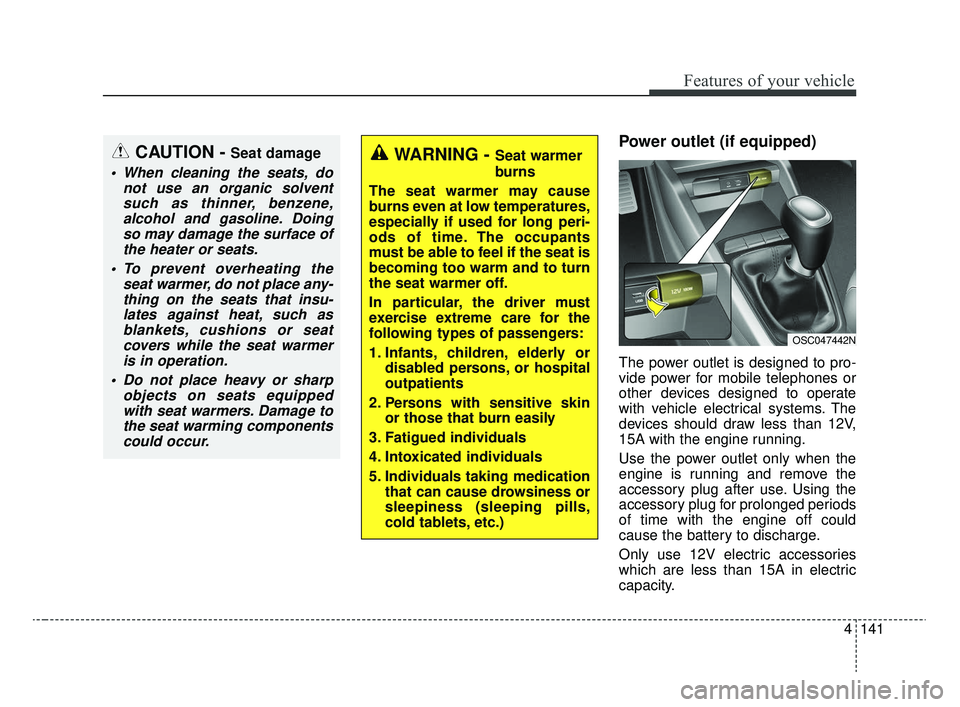
Power outlet (if equipped)
The power outlet is designed to pro-
vide power for mobile telephones or
other devices designed to operate
with vehicle electrical systems. The
devices should draw less than 12V,
15A with the engine running.
Use the power outlet only when the
engine is running and remove the
accessory plug after use. Using the
accessory plug for prolonged periods
of time with the engine off could
cause the battery to discharge.
Only use 12V electric accessories
which are less than 15A in electric
capacity.
CAUTION - Seat damage
When cleaning the seats, donot use an organic solventsuch as thinner, benzene,alcohol and gasoline. Doingso may damage the surface ofthe heater or seats.
To prevent overheating the seat warmer, do not place any-thing on the seats that insu-lates against heat, such asblankets, cushions or seatcovers while the seat warmeris in operation.
Do not place heavy or sharp objects on seats equippedwith seat warmers. Damage tothe seat warming componentscould occur.
WARNING - Seat warmer
burns
The seat warmer may cause
burns even at low temperatures,
especially if used for long peri-
ods of time. The occupants
must be able to feel if the seat is
becoming too warm and to turn
the seat warmer off.
In particular, the driver must
exercise extreme care for the
following types of passengers:
1. Infants, children, elderly or disabled persons, or hospital
outpatients
2. Persons with sensitive skin or those that burn easily
3. Fatigued individuals
4. Intoxicated individuals
5. Individuals taking medication that can cause drowsiness or
sleepiness (sleeping pills,
cold tablets, etc.)
OSC047442N
SC CAN (ENG) 4.QXP 12/12/2019 5:15 PM Page 141
Page 489 of 516

Maintenance
106
8
Taking care of leather seats
(if equipped)
Vacuum the seat periodically to remove dust and sand on the seat.
It will prevent abrasion or damage of
the leather and maintain its quality.
Wipe the natural leather seat cover often with dry or soft cloth.
Sufficient use of a leather protec- tive may prevent abrasion of the
cover and helps maintain the color.
Be sure to read the instructions
and consult a specialist when
using leather coating or protective
agents.
Leather with bright colors(beige, cream beige) is easily contaminat-
ed and clear in appearance. Clean
the seats frequently.
Avoid wiping with wet cloth. It may cause the surface to crack.
Cleaning the leather seats
(if equipped)
Remove all contaminations instant- ly. Refer to instructions below for
removal of each contaminant.
Cosmetic products(sunscreen, foundation, etc.)
- Apply cleansing cream on a clothand wipe the contaminated point.
Wipe off the cream with a wet cloth
and remove water with a dry cloth.
Beverages(coffee, soft drink, etc.) - Apply a small amount of neutraldetergent and wipe until contami-
nations do not smear.
Oil - Remove oil instantly withabsorbable cloth and wipe with
stain remover for natural leather
only.
Chewing gum - Harden the gum with ice andremove gradually.
CAUTION - Leather
When cleaning leather products(steering wheel, seats etc.), useneutral detergents or low alco-hol content solutions. If you usehigh alcohol content solutionsor acid/alkaline detergents, thecolor of the leather may fade orthe surface may get stripped off.
SC CAN (ENG) 8.qxp 6/7/2019 9:44 AM Page 106