2020 KIA RIO fuel
[x] Cancel search: fuelPage 350 of 516

What to do in an emergency
87
TIRE PRESSURE MONITORING SYSTEM (TPMS - TYPE A, IF EQUIPPED)
(1) Low tire pressure telltale/TPMS malfunction indicator
Each tire, including the spare (if pro-
vided), should be checked monthly
when cold and inflated to the inflation
pressure recommended by the vehi-
cle manufacturer on the vehicle plac-
ard or tire inflation pressure label. (If
your vehicle has tires of a different
size than the size indicated on the
vehicle placard or tire inflation pres-
sure label, you should determine the
proper tire inflation pressure for
those tires.) As an added safety feature, your
vehicle has been equipped with a tire
pressure monitoring system (TPMS)
that illuminates a low tire pressure
telltale when one or more of your
tires is significantly under-inflated.
Accordingly, when the low tire pres-
sure telltale illuminates, you should
stop and check your tires as soon as
possible, and inflate them to the
proper pressure. Driving on a signifi-
cantly under-inflated tire causes the
tire to overheat and can lead to tire
failure. Under-inflation also reduces
fuel efficiency and tire tread life, and
may affect the vehicle’s handling and
stopping ability.
Please note that the TPMS is not a
substitute for proper tire maintenance,
and it is the driver’s responsibility to
maintain correct tire pressure, even if
under-inflation has not reached the
level to trigger illumination of the
TPMS low tire pressure telltale.
Your vehicle has also been equipped
with a TPMS malfunction indicator to
indicate when the system is not oper-
ating properly. The TPMS malfunction
indicator is combined with the low tire
pressure telltale. When the system
detects a malfunction, the telltale will
flash for approximately one minute
and then remain continuously illumi-
nated. This sequence will continue
upon subsequent vehicle start-ups as
long as the malfunction exists. When
the malfunction indicator is illuminat-
ed, the system may not be able to
detect or signal low tire pressure as
intended. TPMS malfunctions may
occur for a variety of reasons, includ-
ing the installation of replacement or
alternate tires or wheels on the vehi-
cle that prevent the TPMS from func-
tioning properly. Always check the
TPMS malfunction telltale after
replacing one or more tires or wheels
on your vehicle to ensure that the
replacement or alternate tires and
wheels allow the TPMS to continue to
function properly.
OSC066001
SC CAN (ENG) 7.qxp 6/7/2019 9:46 AM Page 8
Page 356 of 516

What to do in an emergency
14
7
Each tire, including the spare (if pro-
vided), should be checked monthly
when cold and inflated to the inflation
pressure recommended by the vehi-
cle manufacturer on the vehicle plac-
ard or tire inflation pressure label. (If
your vehicle has tires of a different
size than the size indicated on the
vehicle placard or tire inflation pres-
sure label, you should determine the
proper tire inflation pressure for
those tires.)
As an added safety feature, your
vehicle has been equipped with a tire
pressure monitoring system (TPMS)
that illuminates a low tire pressure
telltale when one or more of your
tires is significantly under-inflated.
Accordingly, when the low tire pres-
sure telltale illuminates, you should
stop and check your tires as soon as
possible, and inflate them to the
proper pressure. Driving on a signifi-
cantly under-inflated tire causes the
tire to overheat and can lead to tire
failure. Under-inflation also reduces
fuel efficiency and tire tread life, and
may affect the vehicle’s handling and
stopping ability. Please note that the TPMS is not a
substitute for proper tire maintenance,
and it is the driver’s responsibility to
maintain correct tire pressure, even if
under-inflation has not reached the
level to trigger illumination of the
TPMS low tire pressure telltale.
Your vehicle has also been equipped
with a TPMS malfunction indicator to
indicate when the system is not
operating properly. The TPMS mal-
function indicator is combined with
the low tire pressure telltale. When
the system detects a malfunction,
the telltale will flash for approximate-
ly one minute and then remain con-
tinuously illuminated. This sequence
will continue upon subsequent vehi-
cle start-ups as long as the malfunc-
tion exists. When the malfunction
indicator is illuminated, the system
may not be able to detect or signal
low tire pressure as intended. TPMS
malfunctions may occur for a variety
of reasons, including the installation
of replacement or alternate tires or
wheels on the vehicle that prevent
the TPMS from functioning properly.
Always check the TPMS malfunction
telltale after replacing one or more
tires or wheels on your vehicle to
ensure that the replacement or alter-
nate tires and wheels allow the TPMS
to continue to function properly.
SC CAN (ENG) 7.qxp 6/7/2019 9:46 AM Page 14
Page 386 of 516

• Side marker (Rear) (LED type) bulb replacement (Rear combination lamp Type B) (for 4 door) . . . . 8-92
• Back-up lamp bulb replacement (for 4 door) . . . . . . 8-92
• Tail lamp (Bulb type) bulb replacement (for 4 door) . . . . . . . . . . . . . . . . . . . . . . . . . . . . . . . . . 8-93
• Stop and tail lamp (LED type) bulb replacement (for 4 door) . . . . . . . . . . . . . . . . . . . . . . . . . . . . . . . . . 8-94
• High mounted stop lamp bulb replacement (for 4 door) . . . . . . . . . . . . . . . . . . . . . . . . . . . . . . . . . 8-94
• Trunk lamp bulb replacement (for 4 door) . . . . . . . 8-95
• Map lamp bulb replacement . . . . . . . . . . . . . . . . . . . 8-95
• Vanity mirror lamp bulb replacement . . . . . . . . . . . 8-96
• Room lamp bulb replacement . . . . . . . . . . . . . . . . . . 8-97
• Glove box lamp bulb replacement . . . . . . . . . . . . . . . 8-97
• Liftgate room lamp bulb replacement (for 5 door) . 8-98
Appearance care . . . . . . . . . . . . . . . . . . . . . . . . . . . 8-99
• Exterior care . . . . . . . . . . . . . . . . . . . . . . . . . . . . . . . . 8-99
• Interior care . . . . . . . . . . . . . . . . . . . . . . . . . . . . . . . . 8-105
Emission control system . . . . . . . . . . . . . . . . . . . 8-108
• Crankcase emission control system . . . . . . . . . . . . . 8-108
• Evaporative emission control (including ORVR: Onboard Refueling Vapor Recovery) system . . . . 8-108
• Exhaust emission control system . . . . . . . . . . . . . . . 8-1098
SC CAN (ENG) 8.qxp 6/7/2019 9:40 AM Page 3
Page 390 of 516

87
Maintenance
OWNER MAINTENANCE
The following lists are vehicle checks
and inspections that should be per-
formed by the owner or an author-
ized Kia dealer at the frequencies
indicated to help ensure safe,
dependable operation of your vehi-
cle.
Any adverse conditions should be
brought to the attention of your deal-
er as soon as possible.
These Owner Maintenance Checks
are generally not covered by war-
ranties and you may be charged for
labor, parts and lubricants used.Owner maintenance schedule
When you stop for fuel:
Check the engine oil level.
Check the coolant level in coolantreservoir.
Check the windshield washer fluid level.
Look for low or under-inflated tires.
While operating your vehicle:
Note any changes in the sound of the exhaust or any smell of
exhaust fumes in the vehicle.
Check for vibrations in the steering wheel. Notice any increased steer-
ing effort or looseness in the steer-
ing wheel, or change in its straight-
ahead position.
Notice if your vehicle constantly turns slightly or “pulls” to one side
when traveling on smooth, level
road.
When stopping, listen and check for unusual sounds, pulling to one
side, increased brake pedal travel
or “hard-to-push” brake pedal.
WARNING- Hot coolant
Be careful when checking your
engine coolant level when the
engine is hot. Scalding hot
coolant and steam may blow
out under pressure.
SC CAN (ENG) 8.qxp 6/7/2019 9:40 AM Page 7
Page 394 of 516

811
Maintenance
Normal Maintenance Schedule - Non Turbo Models
The following maintenance services must be performed to ensure good emission control and performance.
Keep receipts for all vehicle emission services to protect your warranty. Where both mileage and time are shown, the
frequency of service is determined by whichever occurs first.
Number of months or driving distance, whichever comes first
Months1224364860728496108120132144156168180
Miles×1,0007.51522.530 37.5 45 52.5 60 67.5 75 82.5 90 97.5 105 112.5
Km×1,00012 24 36 48 60 72 84 96 108 120 132 144 156 168 180
Drive belts *1At first, inspect at 96,000 km (60,000 miles) or 72 months,
after that, inspect every 24,000 km (15,000 miles) or 24 months
Engine oil and engine oil
filterGamma II 1.6L
MPIRRRRRRRRRRRRRRR
Fuel additives *2Add every 12,000 km (7,500 miles) or 12 months
Air cleaner filterIIIRIIIRIIIRIII
Spark plugsGamma II 1.6L
MPIReplace every 156,000 km (97,500 miles)
Rotate tiresRotate every 12,000 km (7,500 miles)
I : Inspect and if necessary, adjust, correct, clean or replace.
R : Replace or change.
*
1: The drive belt should be replaced when cracks occur or tension is reduced.
*2: If TOP TIER Detergent Gasoline is not available, one bottle of additive is recommended. Additives are available from your authorized Kia dealer along with information on how to use them. Do not mix other additives.
MAINTENANCE INTERVALS
MAINTENANCE
ITEM
SC CAN (ENG) 8.qxp 6/13/2019 5:09 PM Page 11
Page 396 of 516

813
Maintenance
Number of months or driving distance, whichever comes first
Months1224364860728496108120132144156168180
Miles×1,0007.51522.530 37.5 45 52.5 60 67.5 75 82.5 90 97.5 105 112.5
Km×1,00012 24 36 48 60 72 84 96 108 120 132 144 156 168 180
Cooling system---I-I-I-I-I-I-
Intelligent variable transmission fluidNo check, No service required
Manual transmission fluid *3---I---I---I---
Vapor hose and fuel filler cap-I-I-I-I-I-I-I-
Fuel tank air filter *4-I-I-I-I-I-I-I-
Fuel lines, hoses and connections---I---I---I---
Parking brake-I-I-I-I-I-I-I-
Brake/clutch (if equipped) fluidIIIRIIIRIIIRIII
Clutch (if equipped) and brake pedal
free playIIIIIIIIIIIIIII
All latch, hinges and locks-I-I-I-I-I-I-I-
Canister---I---I---I---
Normal Maintenance Schedule - Non Turbo Models (CONT.)
I : Inspect and if necessary, adjust, correct, clean or replace.
R : Replace or change.
*
3: Manual transmission fluid should be changed anytime it has been submerged in water.
*4: Fuel tank air filter is considered to be maintenance free but periodic inspection is recommended as the level of maintenance will be dependent upon the quality fuel used in the vehicle.
MAINTENANCE INTERVALS
MAINTENANCE
ITEM
SC CAN (ENG) 8.qxp 12/12/2019 4:19 PM Page 13
Page 399 of 516

Maintenance
16
8
EXPLANATION OF SCHEDULED MAINTENANCE ITEMS
Engine oil and filter
The engine oil and filter should be
changed at the intervals specified in
the maintenance schedule. If the
vehicle is being driven in severe con-
ditions, more frequent oil and filter
changes are required.
Drive belts
Inspect all drive belts for evidence of
cuts, cracks, excessive wear or oil
saturation, and replace if necessary.
Drive belts should be checked peri-
odically for proper tension and
adjusted as necessary.
Fuel filter (for gasoline)
Kia gasoline vehicle is equipped a
lifetime fuel filter that integrated with
the fuel tank. Regular maintenance
or replacement is not needed but
depends on fuel quality. If there are
some important safety matters like
fuel flow restriction, surging, loss of
power, hard starting problem, etc.,
fuel filter inspection or replace is
needed.
The fuel filter be inspected or
replaced by an authorized Kia dealer.
Fuel lines, fuel hoses and con-
nections
Check the fuel lines, fuel hoses and
connections for leakage and dam-
age. Have an authorized Kia dealer
replace any damaged or leaking
parts immediately.
Vapor hose and fuel filler cap
The vapor hose and fuel filler cap
should be inspected at the intervals
specified in the maintenance sched-
ule. Make sure that a new vapor hose
or fuel filler cap is installed correctly.
SC CAN (ENG) 8.qxp 6/7/2019 9:40 AM Page 16
Page 423 of 516

Maintenance
40
8
TIRES AND WHEELS
Tire care
For proper maintenance, safety, and
maximum fuel economy, you must
always maintain recommended tire
inflation pressures and stay within
the load limits and weight distribution
recommended for your vehicle.
Recommended cold tire infla-
tion pressures
All tire pressures (including the
spare) should be checked when the
tires are cold. “Cold Tires” means the
vehicle has not been driven for at
least three hours or driven less than
1.6 km (1 mile).
Recommended pressures must be
maintained for the best ride, top vehi-
cle handling, and minimum tire wear.
For recommended inflation pressure
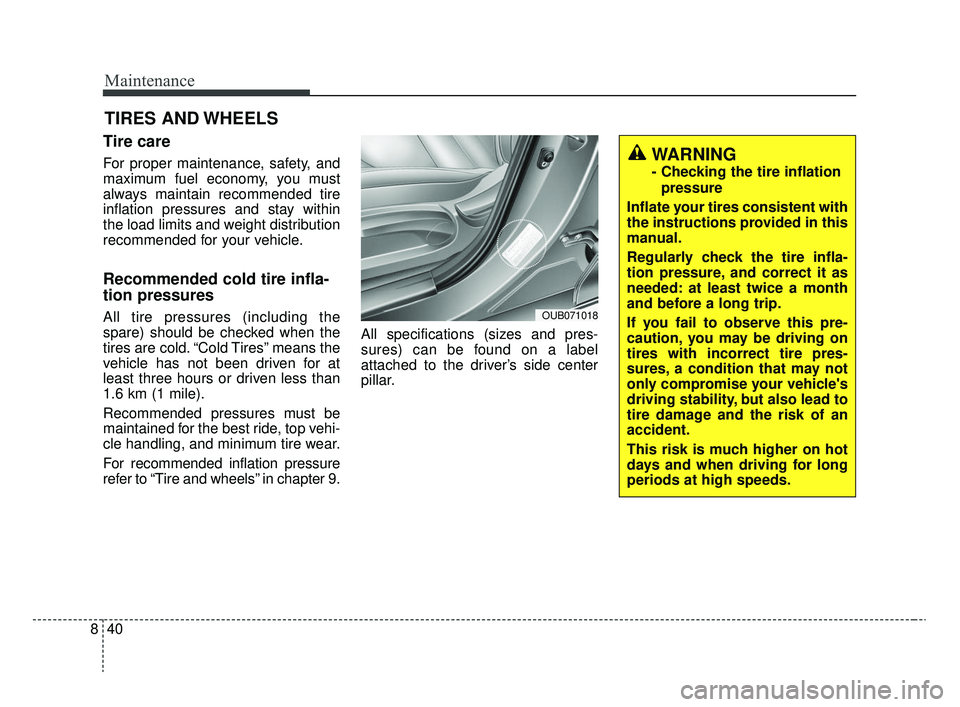
refer to “Tire and wheels” in chapter 9. All specifications (sizes and pres-
sures) can be found on a label
attached to the driver’s side center
pillar.OUB071018
WARNING
- Checking the tire inflation
pressure
Inflate your tires consistent with
the instructions provided in this
manual.
Regularly check the tire infla-
tion pressure, and correct it as
needed: at least twice a month
and before a long trip.
If you fail to observe this pre-
caution, you may be driving on
tires with incorrect tire pres-
sures, a condition that may not
only compromise your vehicle's
driving stability, but also lead to
tire damage and the risk of an
accident.
This risk is much higher on hot
days and when driving for long
periods at high speeds.
SC CAN (ENG) 8.qxp 6/7/2019 9:41 AM Page 40