Page 511 of 597

743
Maintenance
Tire replacement
If the tire is worn evenly, a tread wear
Indicator (A) will appear as a solid
band across the tread. This shows
there is less than 1/16 inch (1.6 mm)
of tread left on the tire. Replace the
tire when this happens.
Do not wait for the band to appear
across the entire tread before replac-
ing the tire.The ABS works by comparing the
speed of the wheels. The tire size
affects wheel speed. When replacing
tires, all 4 tires must use the same
size originally supplied with the vehi-
cle. Using tires of a different size can
cause the ABS (Anti-lock Brake
System) and ESC (Electronic
Stability Control) to work irregularly.
✽ ✽
NOTICE
We recommend that when replacing
tires, use the same which were origi-
nally supplied with the vehicle. If
not, driving performance could be
altered.
Wheel replacement
When replacing the metal wheels for
any reason, make sure the new
wheels are equivalent to the original
factory units in diameter, rim width
and offset.
A wheel that is not the correct size
may adversely affect wheel and
bearing life, braking and stopping
abilities, handling characteristics,
ground clearance, body-to-tire clear-
ance, snow chain clearance,
speedometer and odometer calibra-
tion, headlight aim and bumper
height.
OUM076204L
Page 545 of 597

777
Maintenance
Headlamp (Low beam) bulb
replacement (Headlamp Type A)
1. Open the hood.
2. Remove the headlamp bulb coverby turning it counterclockwise.
3. Remove the bulb-socket from the headlamp assembly by turning the
bulb-socket counterclockwise until
the tabs on the bulb-socket align
with the slots on the headlamp
assembly.
4. Remove the bulb from bulb-socket by pulling it out. 5. Insert a new bulb by inserting it
into the bulb-socket.
6. Install the bulb-socket in the head- lamp assembly by aligning the
tabs on the bulb-socket with the
slots in the headlamp assembly.
Push the bulb-socket into the
headlamp assembly and turn the
bulb-socket clockwise.
7. Install the headlamp bulb cover by turning it clockwise.
Headlamp bulb
OJFA075073
WARNING- Halogen
bulbs
Handle halogen bulbs with care.
Halogen bulbs contain pres- surized gas that will produce
flying pieces of glass if bro-
ken.
Avoid scratches and abra- sions to the halogen bulbs. If
the bulbs are lit, avoid contact
with liquids.
OHD076046
Page 546 of 597

Maintenance
78
7
Never touch the glass with bare
hands. Residual oil may cause the
bulb to overheat and burst when lit.
A bulb should be operated only
when installed in a headlamp.
If a bulb becomes damaged or cracked, replace it immediately
and carefully dispose of it.
Wear eye protection when chang- ing a bulb. Allow the bulb to cool
down before handling it.Headlamp (High beam) bulb
replacement (Headlamp Type A)
1. Open the hood.
2. Remove the headlamp bulb cover by turning it counterclockwise.
3. Disconnect the headlamp bulb socket-connector.
4. Remove the bulb-socket from the headlamp assembly by turning the
bulb-socket counterclockwise until
the tabs on the bulb-socket align
with the slots on the headlamp
assembly. 5. Install a new bulb-socket assem-
bly in the headlamp assembly by
aligning the tabs on the bulb-sock-
et with the slots in the headlamp
assembly. Push the bulb-socket
into the headlamp assembly and
turn the bulb-socket clockwise.
6. Install the headlamp bulb cover by turning it clockwise.
OJFA075076
Page 548 of 597

Maintenance
80
7
Front turn signal lamp (Bulb
type) bulb replacement
(Headlamp Type B)
1. Open the hood.
2. Remove the bulb-socket from the
headlamp assembly by turning the
bulb-socket counterclockwise until
the tabs on the bulb-socket align
with the slots on the headlamp
assembly.
3. Remove the bulb from the bulb- socket by pressing it in and rotat-
ing it counterclockwise until the
tabs on the bulb align with the
slots in the bulb-socket. Pull the
bulb out of the bulb-socket. 4. Insert a new bulb by inserting it
into the bulb-socket and rotating it
until it locks into place.
5. Install the socket in the headlamp assembly by aligning the tabs on
the bulb-socket with the slots in
the assembly. Push the bulb-sock-
et into the headlamp assembly
and turn the socket clockwise.
Front turn signal lamp (Bulb
type) bulb replacement
(Headlamp Type A)
If the front turn signal lamp (Bulb
type) (1) does not operate, have the
vehicle checked by an authorized Kia
dealer.
OJFA075079OJF078238
Page 551 of 597
783
Maintenance
3. Remove the nuts from the vehicle.
4. Disconnect the rear combinationlamp connector.
5. Remove the rear combinationlamp assembly from the body of
the vehicle.
6. Remove the socket from the assembly by turning the socket
counterclockwise until the tabs on
the socket align with the slots on
the assembly. 7. Remove the bulb from the socket
by pressing it in and rotating it
counterclockwise until the tabs on
the bulb align with the slots in the
socket. Pull the bulb out of the
socket.
8. Insert a new bulb by inserting it into the socket and rotating it until
it locks into place.
9. Install the socket in the assembly by aligning the tabs on the socket
with the slots in the assembly.
Push the socket into the assembly
and turn the socket clockwise.
10. Install the rear combination lamp assembly to the body of the vehi-
cle.
11. Install the service cover by put- ting it into the service hole.
OJF075042
OJF075043
OJF075093
Page 553 of 597
785
Maintenance
3. Remove the nuts from the vehicle.
4. Disconnect the rear combinationlamp (inside) connector.
5. Remove the rear combination lamp (inside) assembly from the
body of the vehicle.
6. Remove the socket from the assembly by turning the socket
counterclockwise until the tabs on
the socket align with the slots on
the assembly.
7. Remove the bulb from bulb-socket by pulling it out.
8. Insert a new bulb by inserting it into the bulb-socket.
9. Install the socket in the assembly by aligning the tabs on the socket
with the slots in the assembly.
Push the socket into the assembly
and turn the socket clockwise.
10. Install the rear combination lamp (inside) assembly to the body of
the vehicle.
11. Install the trunk lid cover.License plate lamp (Bulb type)
bulb replacement
1. Open the trunk lid.
2. Loosen the retaining screw of the trunk lid cover and then remove
the cover.
OJF075082
OJF075083
OJF075094
OJF075081
Page 554 of 597

Maintenance
86
7
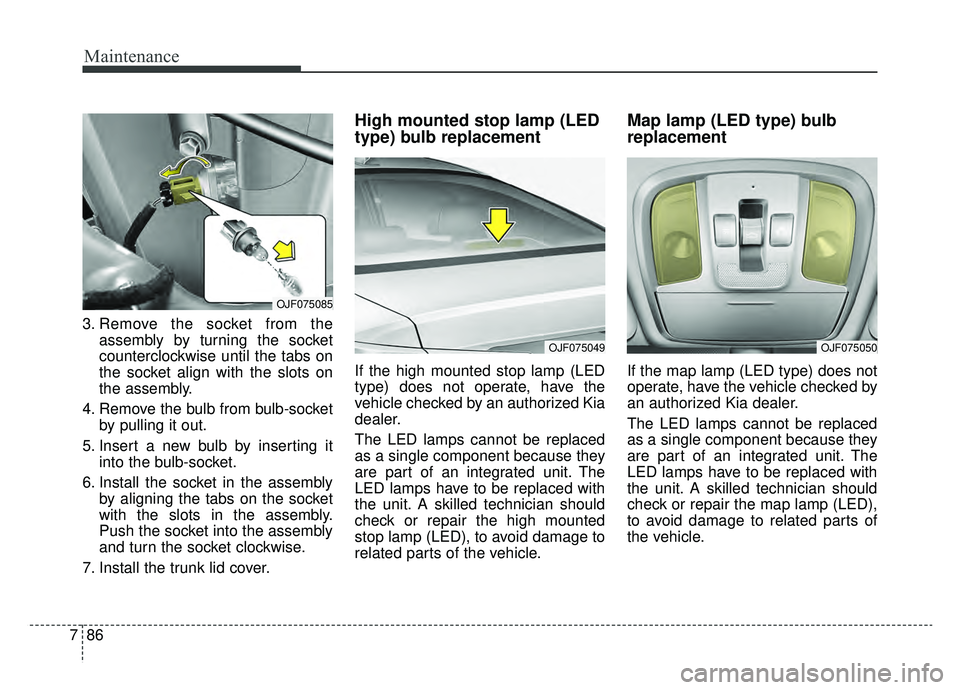
3. Remove the socket from the
assembly by turning the socket
counterclockwise until the tabs on
the socket align with the slots on
the assembly.
4. Remove the bulb from bulb-socket by pulling it out.
5. Insert a new bulb by inserting it into the bulb-socket.
6. Install the socket in the assembly by aligning the tabs on the socket
with the slots in the assembly.
Push the socket into the assembly
and turn the socket clockwise.
7. Install the trunk lid cover.
High mounted stop lamp (LED
type) bulb replacement
If the high mounted stop lamp (LED
type) does not operate, have the
vehicle checked by an authorized Kia
dealer.
The LED lamps cannot be replaced
as a single component because they
are part of an integrated unit. The
LED lamps have to be replaced with
the unit. A skilled technician should
check or repair the high mounted
stop lamp (LED), to avoid damage to
related parts of the vehicle.
Map lamp (LED type) bulb
replacement
If the map lamp (LED type) does not
operate, have the vehicle checked by
an authorized Kia dealer.
The LED lamps cannot be replaced
as a single component because they
are part of an integrated unit. The
LED lamps have to be replaced with
the unit. A skilled technician should
check or repair the map lamp (LED),
to avoid damage to related parts of
the vehicle.
OJF075085
OJF075049OJF075050
Page 556 of 597

Maintenance
88
7
1. Using a flat-blade screwdriver,
gently pry the lens cover from
lamp housing.
2. Remove the bulb by pulling it straight out.
3. Install a new bulb in the socket.
4. Align the lens cover tabs with the lamp housing notches and snap
the lens into place.
✽ ✽NOTICE
Be careful not to dirty or damage the
lens, lens tab, and plastic housings.
Personal lamp (LED type) bulb
replacement
If the personal lamp (LED type) does
not operate, have the vehicle
checked by an authorized Kia dealer.
The LED lamps cannot be replaced
as a single component because they
are part of an integrated unit. The
LED lamps have to be replaced with
the unit. A skilled technician should
check or repair the personal lamp
(LED), to avoid damage to related
parts of the vehicle.
Glove box lamp (Bulb type)
bulb replacement
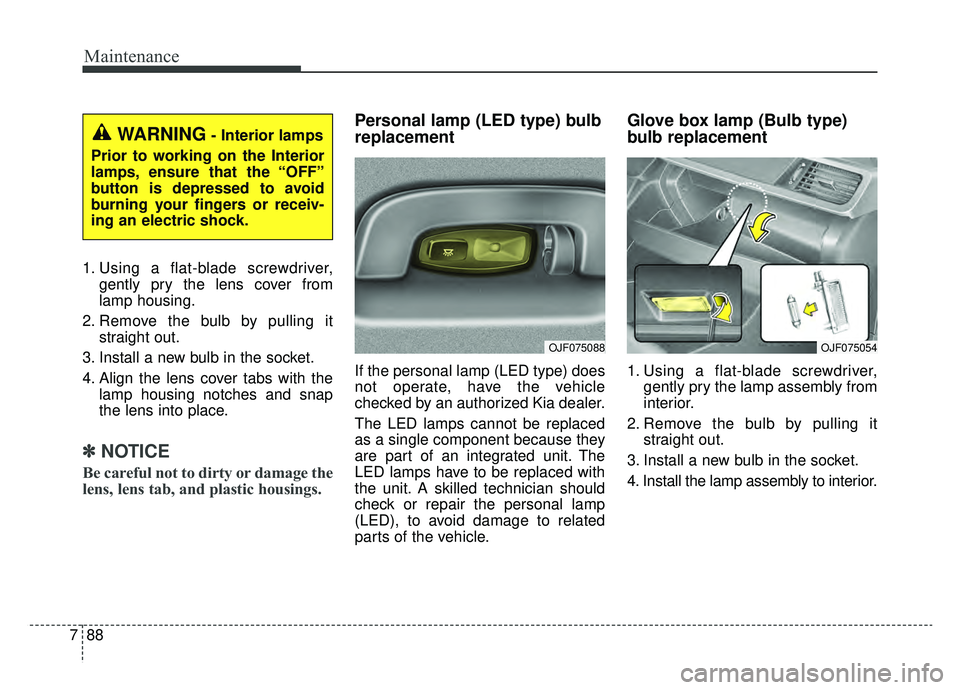
1. Using a flat-blade screwdriver,
gently pry the lamp assembly from
interior.
2. Remove the bulb by pulling it straight out.
3. Install a new bulb in the socket.
4. Install the lamp assembly to interior.
WARNING- Interior lamps
Prior to working on the Interior
lamps, ensure that the “OFF”
button is depressed to avoid
burning your fingers or receiv-
ing an electric shock.
OJF075088OJF075054