2020 KIA K900 instrument cluster
[x] Cancel search: instrument clusterPage 12 of 66
INSTRUMENT CLUSTER
10
Forward Collision-Avoidance Assist (FCA)†6
The FCA system is designed to detect slowing or stopped
traffic ahead and, under certain conditions, can apply the
brakes in order to help avoid or reduce the effects of a
potential collision. Initially, FCA provides Forward Collision
Warning (FCW ) when it detects a potential collision with a
vehicle, pedestrian or cyclist in front, emitting an audible
warning and visual alert on the instrument cluster.
To activate the systems, go to Vehicle Settings in the audio
head unit and select Vehicle > Driver Assistance > Forward
Safety. Then select Active Assistance, Warning Only or Off.
The initial warning time can be selected when in Vehicle
Settings. Select Vehicle > Driver Assistance > Warning
Timing > Normal/Later.
If the system detects that the collision risk has increased,
the FCA system automatically applies the brakes to reduce
your speed, potentially helping to reduce the effects of a
possible collision. FCA can be turned ON in the User Settings
menu on the Instrument Cluster display.
The FCA / FCW will become active when the:
§ Engine Start /Stop button is ON
§ Vehicle is traveling faster than 6 mph
§ Electronic Stability Control (ESC) is ON
§ The system detects a vehicle, pedestrian or cyclist in
front
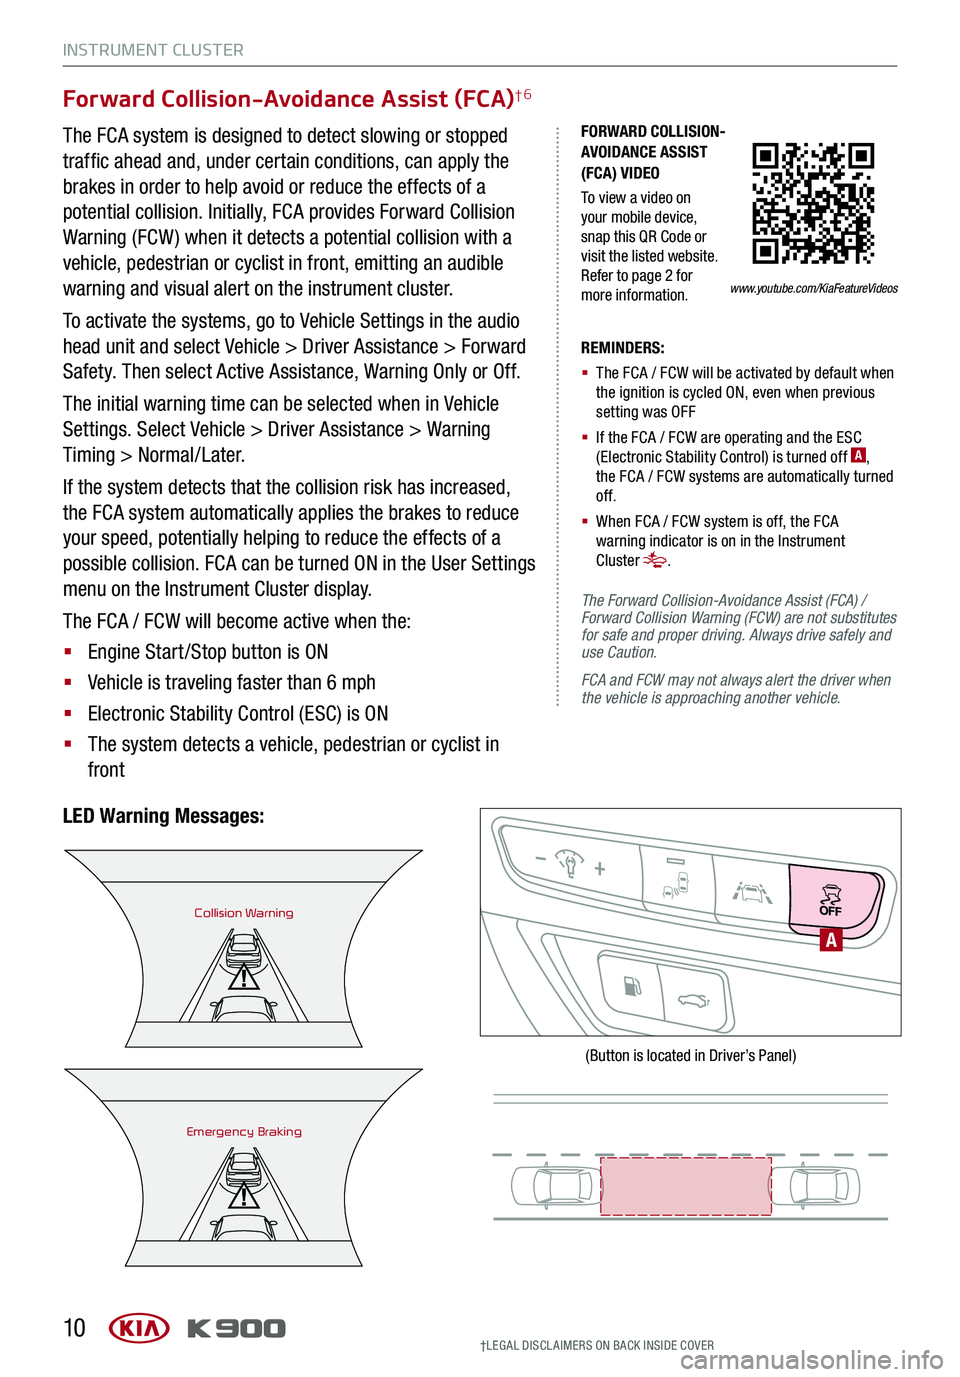
LED Warning Messages:
REMINDERS:
§
The FCA / FCW will be activated by default when the ignition is cycled ON, even when previous setting was OFF
§ If the FCA / FCW are operating and the ESC (Electronic Stability Control) is turned off A, the FCA / FCW systems are automatically turned of f.
§ When FCA / FCW system is off, the FCA warning indicator is on in the Instrument Cluster .
The Forward Collision-Avoidance Assist (FCA) / Forward Collision Warning (FCW) are not substitutes for safe and proper driving. Always drive safely and use Caution.
FCA and FCW may not always alert the driver when the vehicle is approaching another vehicle.
Collision Warning
Emergency Braking
A
(Button is located in Driver’s Panel)
†LEG AL DISCL AIMERS ON BACK INSIDE COVER
FORWARD COLLISION- AVOIDANCE ASSIST (FCA) VIDEO
To view a video on your mobile device, snap this QR Code or visit the listed website. Refer to page 2 for more information.www.youtube.com/KiaFeatureVideos
Page 13 of 66
INSTRUMENT CLUSTER
11ALWAYS CHECK THE OWNER’S MANUAL FOR COMPLE TE OPERATING INFORMATION AND SAFETY WARNINGS.†LEG AL DISCL AIMERS ON BACK INSIDE COVER
The Head-Up Display is a supplemental system. Do not solely rely on the system, always drive safely, and pay attention to the driving conditions on the road.
REMINDERS:
§
The HUD image on the windshield glass may not be visible when:
§
The driver has poor sitting posture
§ The driver is wearing polarized sunglasses
§ There is an object covering the HUD
§ Driving on a wet road
§ There is excessive lighting inside or outside the vehicle
§
Modifications made to the windshield, such as tinting or other aftermarket treatments, could affect the HUD. When replacing the front windshield glass of vehicles equipped with the HUD, owners must replace it with windshield glass designed for HUD operation. Otherwise, duplicated images may be displayed on the windshield glass.
§ If Turn By Turn ( TBT ) navigation information is selected as HUD content, TBT information will not be displayed on the LCD.
Head-Up Display (HUD) User Settings
Drivers can adjust the HUD settings from the LCD Instrument
Cluster modes in User Settings. HUD settings include:
§ Display Height: Adjust the height of the HUD image on the
windshield glass
§ Rotation: Adjust the degree of HUD rotation
§ Brightness: Adjust the intensity of the HUD brightness
§ Contents Select: Activate or deactivate HUD content ( TBT,
SCC, LK A, BSCW )
§ Speedometer Size: Choose the size of the HUD
speedometer (Small, Medium, Large)
§ Speedometer Color: Choose the color of the HUD
speedometer (White, Amber, Green)
Head-Up Display (HUD)† 12
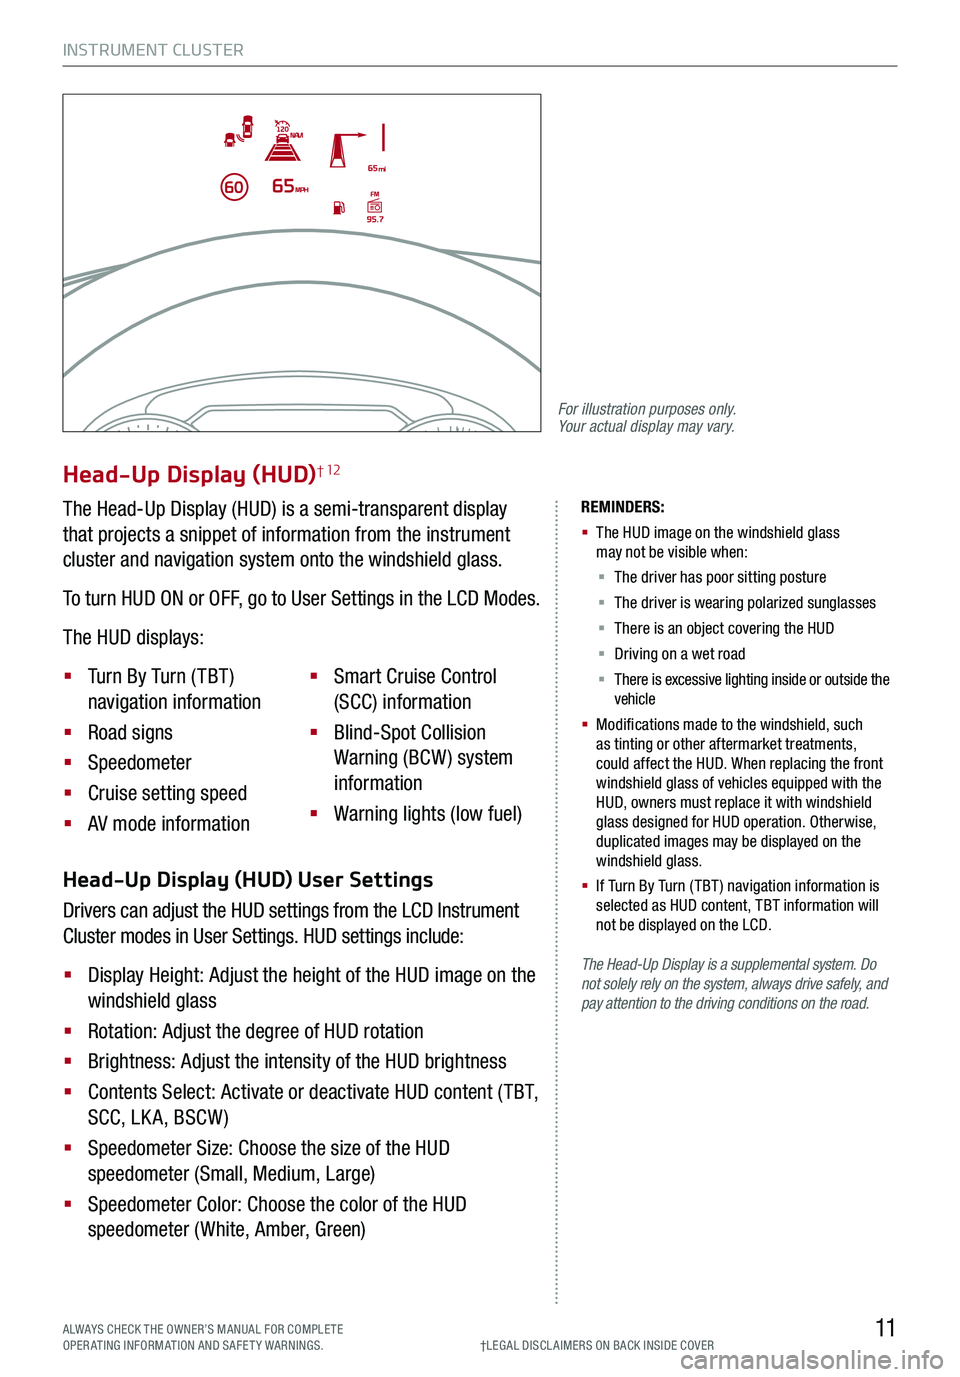
The Head-Up Display (HUD) is a semi-transparent display
that projects a snippet of information from the instrument
cluster and navigation system onto the windshield glass.
To turn HUD ON or OFF, go to User Settings in the LCD Modes.
The HUD displays:
§ Turn By Turn ( TBT )
navigation information
§ Road signs
§ Speedometer
§ Cruise setting speed
§ AV mode information
§ Smart Cruise Control
(SCC) information
§ Blind-Spot Collision
Warning (BCW ) system
information
§ Warning lights (low fuel)
For illustration purposes only. Your actual display may vary.
Page 14 of 66
INSTRUMENT CLUSTER
12
REMINDERS:
§ If the driver changes the speed while in automatic speed setting mode, it deactivates and enters a manual mode
§ When the ignition is cycled, the system returns to its previous state, on or off
A
Highway Driving Assist is not a substitute for safe driving, may not detect all objects around the vehicle, and only functions on certain federal highways. Always drive safely and use caution. See the Owner’s Manual for more detailed information, limitations and conditions.
Images are for illustrative purposes only and may not reflect actual feature or operation.
Highway Driving Assist (HDA)
The Highway Driving Assist (HDA) system is designed to adjust
the vehicle distance and the speed of the vehicle when driving
on federal highways. The system can adjust the vehicle’s
speed based on available highway speed information. When
conditions are met, the system will enter the automatic speed
setting mode, which is designed to set the speed automatically
by adjusting to the changing speed limits of the highway
section. An AUTO symbol will be displayed in green on the
instrument cluster and a chime will sound.
To turn the HDA system on, go to Vehicle Settings in the audio
head unit. Go to Vehicle > Drive Assistance > Driving Assist >
Highway Driving Assist (HDA).
The HDA system will operate only when these conditions
are met:
§ The vehicle is traveling slower than 95 mph
§ When driving on federal highways
§ When the SCC system is on and operating
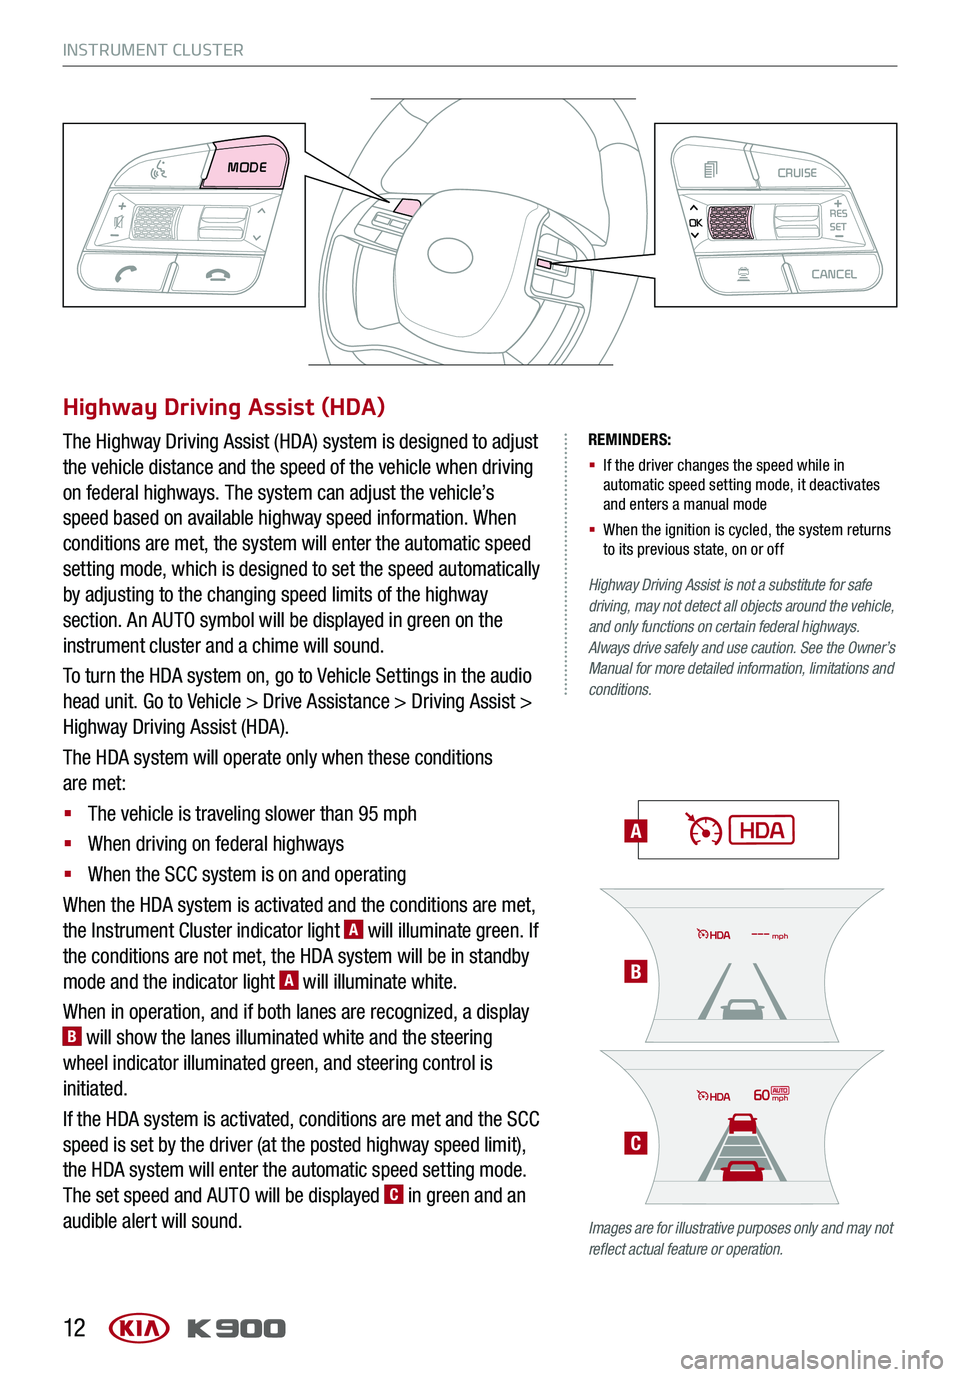
When the HDA system is activated and the conditions are met,
the Instrument Cluster indicator light A will illuminate green. If
the conditions are not met, the HDA system will be in standby
mode and the indicator light A will illuminate white.
When in operation, and if both lanes are recognized, a display B will show the lanes illuminated white and the steering
wheel indicator illuminated green, and steering control is
initiated.
If the HDA system is activated, conditions are met and the SCC
speed is set by the driver (at the posted highway speed limit),
the HDA system will enter the automatic speed setting mode.
The set speed and AUTO will be displayed C in green and an
audible alert will sound.
60mph
mph
MODE CRUISECANCEL
RES
OKSET
B
C
Page 15 of 66
DRIVER’S PANEL
13ALWAYS CHECK THE OWNER’S MANUAL FOR COMPLE TE OPERATING INFORMATION AND SAFETY WARNINGS.
Idle, Stop and Go (ISG) System
The ISG system is designed to reduce fuel consumption by
automatically shutting down the engine when the vehicle
is at a standstill.
When the ISG system is ON and the vehicle is at a standstill,
the engine will stop, and the green AUTO STOP indicator
on the instrument cluster will illuminate.
The engine will restart when the brake pedal is released or
the shift lever is moved from D (Drive) to the R (Reverse)
position or to Sport Shift mode. When the engine restarts,
the green AUTO STOP indicator on the instrument cluster
will turn off.
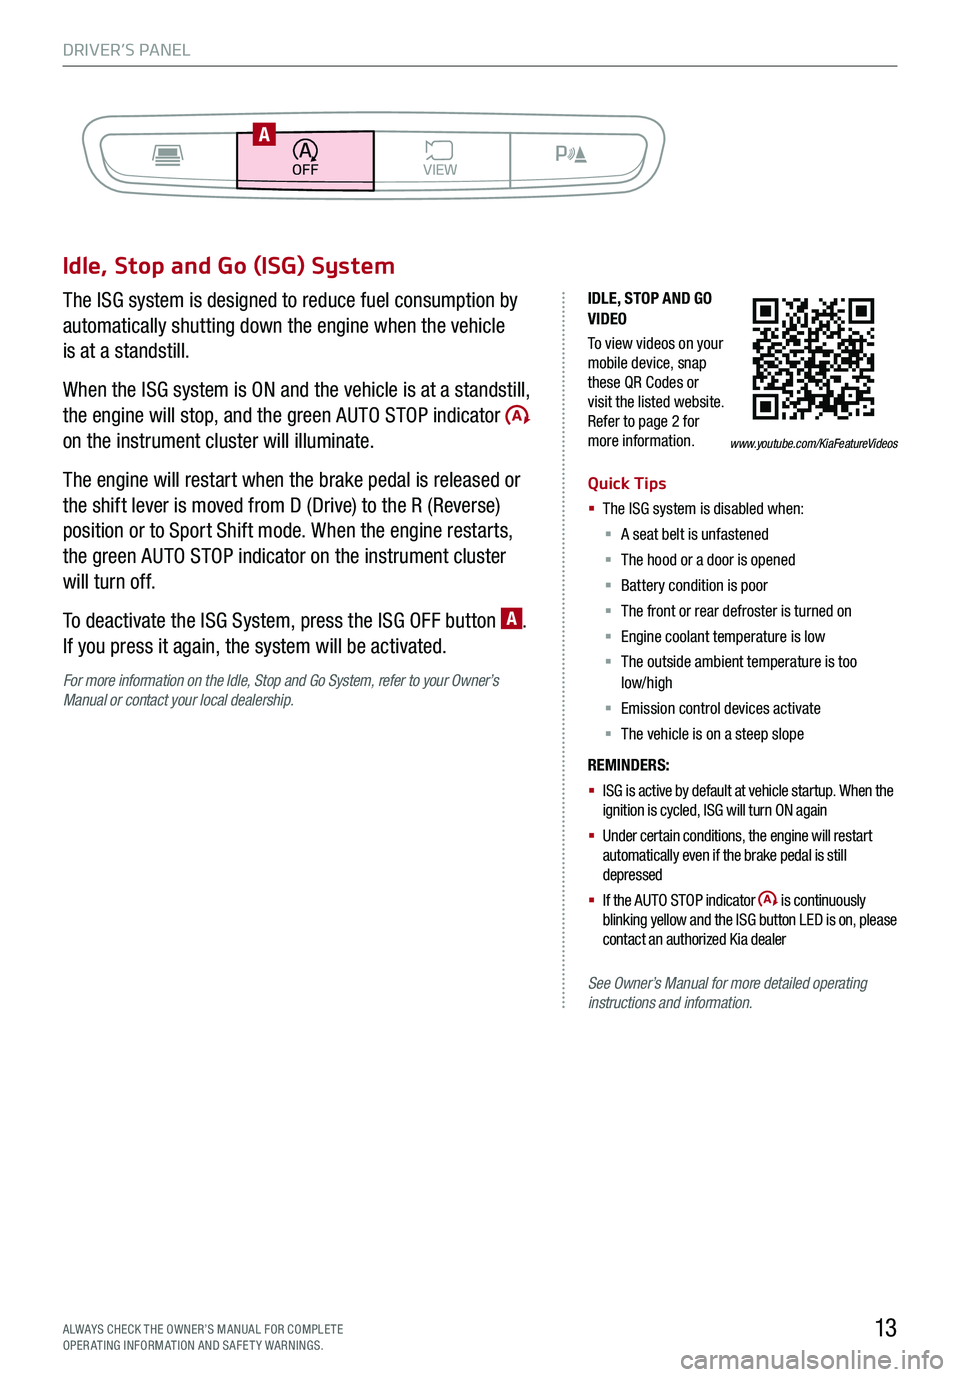
To deactivate the ISG System, press the ISG OFF button A.
If you press it again, the system will be activated.
For more information on the Idle, Stop and Go System, refer to your Owner’s Manual or contact your local dealership.
IDLE, STOP AND GO VIDEO
To view videos on your mobile device, snap these QR Codes or visit the listed website. Refer to page 2 for more information.
Quick Tips
§ The ISG system is disabled when:
§ A seat belt is unfastened
§ The hood or a door is opened
§ Battery condition is poor
§ The front or rear defroster is turned on
§ Engine coolant temperature is low
§ The outside ambient temperature is too low/high
§ Emission control devices activate
§ The vehicle is on a steep slope
REMINDERS:
§ ISG is active by default at vehicle startup. When the ignition is cycled, ISG will turn ON again
§ Under certain conditions, the engine will restart automatically even if the brake pedal is still depressed
§ If the AUTO STOP indicator is continuously blinking yellow and the ISG button LED is on, please contact an authorized Kia dealer
See Owner’s Manual for more detailed operating instructions and information.
www.youtube.com/KiaFeatureVideos
BACKMENUHOME
OFFVIEW
DRIVE
MODE AUTO
HOLD
PA
Page 16 of 66
DRIVER’S PANEL
14
AB
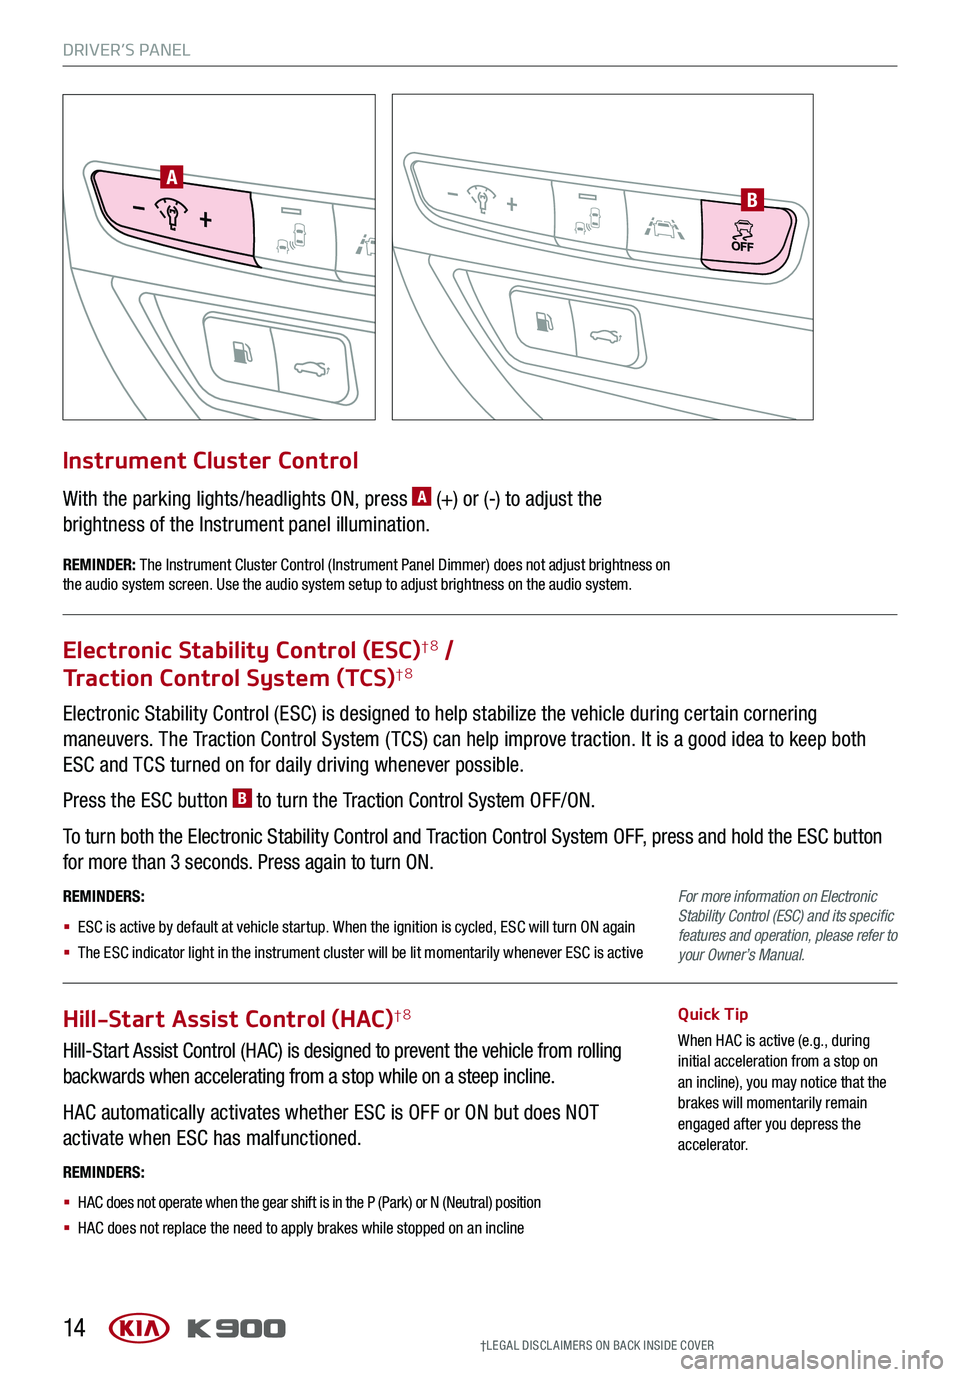
Electronic Stability Control (ESC) is designed to help stabilize the vehicle during certain cornering
maneuvers. The Traction Control System ( TCS) can help improve traction. It is a good idea to keep both
ESC and TCS turned on for daily driving whenever possible.
Press the ESC button B to turn the Traction Control System OFF/ON.
To turn both the Electronic Stability Control and Traction Control System OFF, press and hold the ESC button
for more than 3 seconds. Press again to turn ON.
REMINDERS:
§ ESC is active by default at vehicle startup. When the ignition is cycled, ESC will turn ON again
§ The ESC indicator light in the instrument cluster will be lit momentarily whenever ESC is active
Electronic Stability Control (ESC)†8 /
Traction Control System (TCS)†8
Hill-Start Assist Control (HAC)†8
Hill-Start Assist Control (HAC) is designed to prevent the vehicle from rolling
backwards when accelerating from a stop while on a steep incline.
HAC automatically activates whether ESC is OFF or ON but does NOT
activate when ESC has malfunctioned.
Quick Tip
When HAC is active (e.g., during initial acceleration from a stop on an incline), you may notice that the brakes will momentarily remain engaged after you depress the accelerator.
REMINDERS:
§ HAC does not operate when the gear shift is in the P (Park) or N (Neutral) position
§ HAC does not replace the need to apply brakes while stopped on an incline
With the parking lights/headlights ON, press A (+) or (-) to adjust the
brightness of the Instrument panel illumination.
Instrument Cluster Control
REMINDER: The Instrument Cluster Control (Instrument Panel Dimmer) does not adjust brightness on the audio system screen. Use the audio system setup to adjust brightness on the audio system.
For more information on Electronic Stability Control (ESC) and its specific features and operation, please refer to your Owner’s Manual.
†LEG AL DISCL AIMERS ON BACK INSIDE COVER
Page 18 of 66

DRIVER’S PANEL
16
EFC H
0
12
3
4
5
6
7
8
MPH
20
0
40
60 80
100
120
140
160
†LEG AL DISCL AIMERS ON BACK INSIDE COVER
Blind Spot View Monitor System†6
Blind-Spot View Monitor (BVM) system displays the rear
and side view areas of the vehicle in the cluster when the
system is activated.
To turn the BVM system on, go to the User Settings in the
audio control unit. The BVM system is activated when
the ignition switch is turned to ON and the turn signal is
activated.
To deactivate the BVM system:
§ The turn signal is deactivated
§ The ignition switch is turned to the OFF position
(Type A cluster shown)
For illustrative purposes only. Your actual display, buttons and/or features may vary.
Your vehicle’s instrument cluster & indicator light locations may differ from those in the images. See your Owner’s Manual for more information.
Rear Cross-Traffic Collision Avoidance Assist (RCCA)†6
A
REMINDERS:
§ The RCCA feature can be turned OFF/ON in User Settings, under Driver Assistance, Parking Safety
§ When vehicle power is cycled, RCCA will remain in the previous state
§ When a vehicle is approaching within the sensing range, and traveling between 5 and 22.5 mph, the RCCA system will show a warning
§ The RCCA systems are supplemental systems. Do not solely rely on these systems and always pay attention to the road and its conditions
The above image is for illustration purposes only and may not reflect actual operation.
If the RCCA system sensors detect vehicles approaching
from the rear left or rear right side A, the system will sound
an audible alert, the warning indicators on the outside
rearview mirror will illuminate and a message will appear on
the LCD screen.
To activate the systems, go to Vehicle Settings in the audio
head unit. Select Vehicle > Driving Assist > Parking Safety
> Rear Cross-Traffic Safety. To select the initial warning
activation time, when in Vehicle Settings, select Driver
Assistance, then Warning Time. Select the Normal or the
Later option.
The system will operate under the conditions:
§ When the vehicle is in Reverse
§ When the vehicle is moving slower than 6 mph
Quick Tip
§ The RCCA Warning Volume can be adjusted in the Vehicle Settings on the audio head unit
Page 19 of 66

DRIVER’S PANEL
17ALWAYS CHECK THE OWNER’S MANUAL FOR COMPLE TE OPERATING INFORMATION AND SAFETY WARNINGS.†LEG AL DISCL AIMERS ON BACK INSIDE COVER
(Button is located on driver’s panel, left of the steering wheel)
LANE KEEPING ASSIST VIDEO
To view a video on your mobile device, snap this QR Code or visit the listed website. Refer to page 2 for more information.
Lane Keeping Assist (LKA)†6
With the Engine Start /Stop button in the ON position, press
the LK A button A to turn system ON. The instrument
cluster indicator will initially illuminate white. It will
remain white when the vehicle is traveling slower than
40 mph and the system does not detect the lane markers.
When the system detects the lane markers and can assist
the steering, the LK A icon will illuminate green.
If the LK A detects that you are moving outside of your lane,
the system may give an audible warning and display an LDW
(Lane Departure Warning) alert on the instrument cluster. If
the vehicle continues to move outside of the lane, LK A will
apply a slight adjustment to the steering, trying to prevent
the vehicle from moving outside of its lane.
LK A is the operating mode by default when the LK A button
is depressed to ON. To switch between modes (Active
LK A and Lane Departure), go to User Settings in the audio
control unit.
All systems will operate under the following conditions:
§ The vehicle speed exceeds approximately 40 mph
§ The LK A system recognizes both sides of the lane
markers the vehicle is traveling in
§ The vehicle is between the lane markers
REMINDERS:
§
LK A will not issue a warning if the turn signal or hazard signal is activated
§
LK A will return to its previous state when the ignition is cycled
§ LK A may not always alert the driver if the vehicle is about to be driven outside of its lane. Refer to the Owner’s Manual for more information
Lane Keeping Assist (LKA) is not a substitute for safe and proper driving. Always drive safely and use caution. LKA may not always alert the driver if the vehicle is about to be driven outside of its lane.
For illustrative purposes only. Your actual display, buttons and/or features may vary.
When the front camera detects the lane you are traveling in, both lanes are illuminatedWhen the front camera does not detect the lane you are traveling in, the lanes are not illuminated
When the front camera detects the vehicle moving outside of the lane you are traveling in, a vehicle crossing lane indicator will blink, either on the left or right lane (as shown in both images above)
A
Lane Keep AssistLane Keep AssistLane Keep AssistLane Keep Assist
Lane Keep AssistLane Keep AssistLane Keep AssistLane Keep Assist
www.youtube.com/KiaFeatureVideos
WARNINGAUTO
WARNINGAUTO
Quick Tip
§ The LK A Warning Volume can be adjusted in the Vehicle Settings on the audio head unit
Page 20 of 66

DRIVER’S PANEL
18
Lane Follow Assist (LFA)
Lane Follow Assist (LFA) is designed to help ensure that
the vehicle stays in its lane by monitoring the detected lane
ahead and adjusting steering.
To activate or deactivate the LFA system, go to the Vehicle
Settings on the audio head unit. Select Vehicle > Driver
Assistance > Driving Assist > Lane Follow Assist.
The LFA system will operate only when these conditions are
met:
§ When the SCC system is on and operating
§ When the system recognizes both lanes the vehicle is
traveling in
§ The vehicle is traveling slower than 95 mph
Once the system is activated and operating, the LFA system
indicator light will illuminate on the Instrument Cluster.
When the indicator is green, the steering assist mode is
activated. When it is white, it is deactivated.
REMINDERS:
§ If the ignition is cycled, LFA returns to its previous state, on or off
§ The LFA system is not a substitute for safe and proper driving. Always drive safely and use caution
See the Owner’s Manual for more detailed information, limitations and conditions.
Images are for illustrative purposes only and may not reflect actual feature or operation.
(Button on right of steering wheel)
CRUISECANCEL
RES
OKSET