Page 526 of 568

789
Maintenance
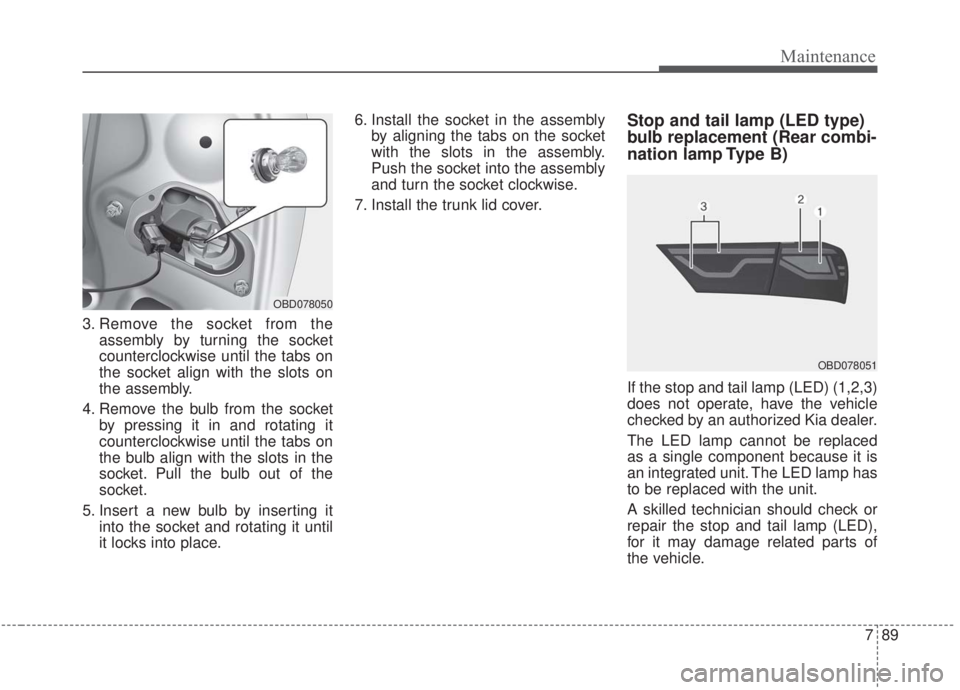
3. Remove the socket from theassembly by turning the socket
counterclockwise until the tabs on
the socket align with the slots on
the assembly.
4. Remove the bulb from the socket by pressing it in and rotating it
counterclockwise until the tabs on
the bulb align with the slots in the
socket. Pull the bulb out of the
socket.
5. Insert a new bulb by inserting it into the socket and rotating it until
it locks into place. 6. Install the socket in the assembly
by aligning the tabs on the socket
with the slots in the assembly.
Push the socket into the assembly
and turn the socket clockwise.
7. Install the trunk lid cover.
Stop and tail lamp (LED type)
bulb replacement (Rear combi-
nation lamp Type B)
If the stop and tail lamp (LED) (1,2,3)
does not operate, have the vehicle
checked by an authorized Kia dealer.
The LED lamp cannot be replaced
as a single component because it is
an integrated unit. The LED lamp has
to be replaced with the unit.
A skilled technician should check or
repair the stop and tail lamp (LED),
for it may damage related parts of
the vehicle.
OBD078051
OBD078050
Page 527 of 568
Maintenance
90
7
Side marker (LED type) bulb
replacement (Rear combina-
tion lamp Type B)
If the side marker (LED) (1) does not
operate, have the vehicle checked by
an authorized Kia dealer.
The LED lamp cannot be replaced
as a single component because it is
an integrated unit. The LED lamp has
to be replaced with the unit.
A skilled technician should check or
repair the side marker (LED), for it
may damage related parts of the
vehicle.
Rear turn signal lamp bulb
replacement
If the rear turn signal lamp (1) does
not operate, have the vehicle
checked by an authorized Kia dealer.
Back up lamp bulb replace-
ment
If the back up lamp (1) does not
operate, have the vehicle checked by
an authorized Kia dealer.
OBD078052OBD078053
OBDM078123N
Page 528 of 568

791
Maintenance
High mounted stop lamp (LED
type) bulb replacement
If the high mounted stop lamp (LED)
(1) does not operate, have the vehi-
cle checked by an authorized Kia
dealer.
The LED lamp cannot be replaced
as a single component because it is
an integrated unit. The LED lamp has
to be replaced with the unit.
A skilled technician should check or
repair the high mounted stop lamp
(LED), for it may damage related
parts of the vehicle.
High mounted stop lamp (bulb
type) bulb replacement
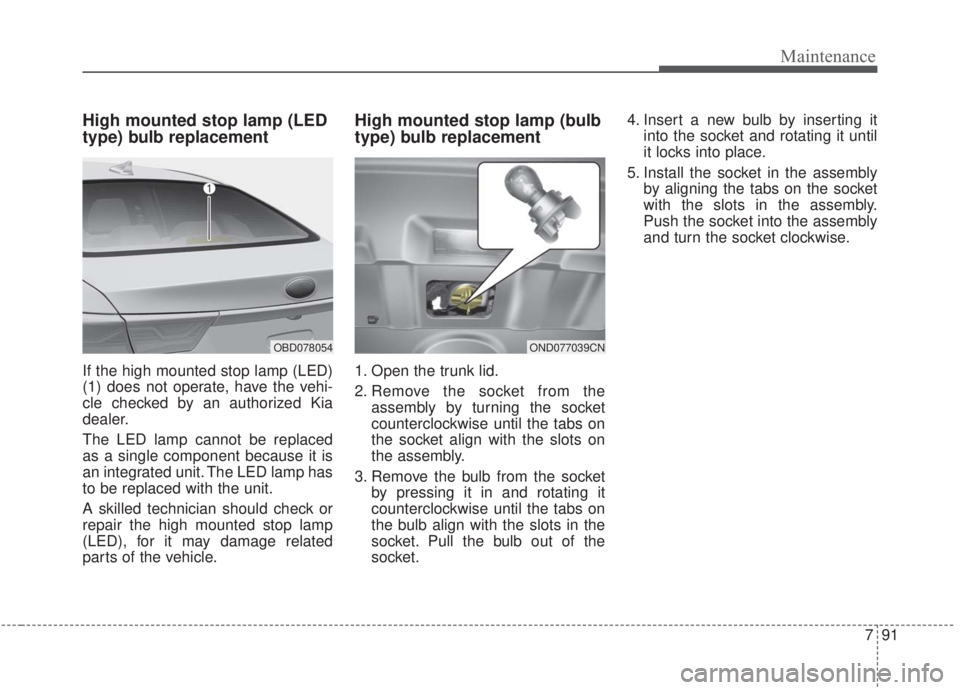
1. Open the trunk lid.
2. Remove the socket from theassembly by turning the socket
counterclockwise until the tabs on
the socket align with the slots on
the assembly.
3. Remove the bulb from the socket by pressing it in and rotating it
counterclockwise until the tabs on
the bulb align with the slots in the
socket. Pull the bulb out of the
socket. 4. Insert a new bulb by inserting it
into the socket and rotating it until
it locks into place.
5. Install the socket in the assembly by aligning the tabs on the socket
with the slots in the assembly.
Push the socket into the assembly
and turn the socket clockwise.
OND077039CNOBD078054
Page 529 of 568
Maintenance
92
7
License plate lamp bulb
replacement
1. Remove the lamp assembly by
using a flat-blade screwdriver.
2. Remove the socket from the assembly by turning the socket
counterclockwise until the tabs on
the socket align with the slots on
the assembly.
3. Remove the bulb from bulb-socket by pulling it out.
4. Insert a new bulb by inserting it into the bulb-socket. 5. Install the socket in the assembly
by aligning the tabs on the socket
with the slots in the assembly.
Push the socket into the assembly
and turn the socket clockwise.
6. Install the lamp assembly to the body of the vehicle.
Map lamp (Bulb type) bulb
replacement
OBD078119L
WARNING
Prior to working on the Interior
lamps, ensure that the “OFF”
button is depressed to avoid
burning your fingers or receiv-
ing an electric shock.
OBD078055
Page 530 of 568
793
Maintenance
1. Using a flat-blade screwdriver,gently pry the lens cover from
lamp housing.
2. Remove the bulb by pulling it straight out.
3. Install a new bulb in the socket.
4. Align the lens cover tabs with the lamp housing notches and snap
the lens into place.Map lamp (LED type) bulb
replacement
If the map lamp (LED) (1) does not
operate, have the vehicle checked by
an authorized Kia dealer.
The LED lamp cannot be replaced
as a single component because it is
an integrated unit. The LED lamp has
to be replaced with the unit.
A skilled technician should check or
repair the map lamp (LED), for it may
damage related parts of the vehicle.
Room lamp (Bulb type) bulb
replacement
OBD078057ODE076049
WARNING
Prior to working on the Interior
lamps, ensure that the “OFF”
button is depressed to avoid
burning your fingers or receiv-
ing an electric shock.
CAUTION
Be careful not to dirty or dam-age the lens, lens tab, and plas-tic housings.
Page 531 of 568
Maintenance
94
7
1. Using a flat-blade screwdriver,
gently pry the lens cover from
lamp housing.
2. Remove the bulb by pulling it straight out.
3. Install a new bulb in the socket.
4. Align the lens cover tabs with the lamp housing notches and snap
the lens into place.Room lamp (LED type) bulb
replacement
If the room lamp (LED) (1) does not
operate, have the vehicle checked by
an authorized Kia dealer.
The LED lamp cannot be replaced
as a single component because it is
an integrated unit. The LED lamp has
to be replaced with the unit.
A skilled technician should check or
repair the room lamp (LED), for it
may damage related parts of the
vehicle.
Vanity mirror lamp bulb
replacement
ODEP077070OYB077106K
WARNING
Prior to working on the Interior
lamps, ensure that the “OFF”
button is depressed to avoid
burning your fingers or receiv-
ing an electric shock.
CAUTION
Be careful not to dirty or dam-age the lens, lens tab, and plas-tic housings.
Page 532 of 568
795
Maintenance
1. Using a flat-blade screwdriver,gently pry the lamp assembly from
interior.
2. Remove the bulb by pulling it straight out.
3. Install a new bulb in the socket.
4. Install the lamp assembly to interior.Glove box lamp replacement
1. Using a flat-blade screwdriver, gently pry the lamp assembly from
interior.
2. Remove the bulb by pulling it straight out.
3. Install a new bulb in the socket.
4. Install the lamp assembly to interi- or.
OBD078058
CAUTION
Be careful not to dirty or dam-age the lens, lens tab, and plas-tic housings.
CAUTION
Be careful not to dirty or dam-age the lens, lens tab, and plas-tic housings.
Page 533 of 568
Maintenance
96
7
Trunk room lamp replacement
1. Open the trunk lid.
2. Remove the lamp assembly by
using a flat-blade screwdriver.
3. Remove the cover from the lamp assembly.
4. Remove the bulb by pulling it straight out.
5. Install a new bulb in the socket.
6. Install the cover to the lamp assembly.
7. Install the lamp assembly to the body of the vehicle.
CAUTION
Be careful not to dirty or dam-age the lens, lens tab, and plas-tic housings.
OND077040CN