2020 JEEP WRANGLER change time
[x] Cancel search: change timePage 184 of 276

Checking Oil Level — Gasoline Engine
To ensure proper lubrication of your vehicle's
engine, the engine oil must be maintained at
the correct level. The engine oil level should
be checked five minutes after a warmed up
engine has been shut off.
Checking the oil while the vehicle is on level
ground will improve the accuracy of the oil
level readings. Always maintain the oil level
within the SAFE zone on the dipstick. Adding
1 quart (0.95 liters) of oil when the reading is
at the bottom of the crosshatch zone will
result in a reading at the top of the cross-
hatch zone on these engines.
CAUTION!
Overfilling or underfilling the crankcase
will cause aeration or loss of oil pressure.
This could damage your engine.
Checking Oil Level — Diesel Engine
To assure proper engine lubrication, the en-
gine oil must be maintained at the correct
level. Check the oil level at regular intervals,
such as every fuel stop.For vehicles equipped with a Diesel Particu-
late Filter (DPF), it is acceptable to have an
oil level up to 3/8 inch (10 mm) above the
MAX line. Beyond 3/8 inch (10 mm) it is
recommended to change the oil.
The best time to check the engine oil level is
about five minutes after a fully warmed en-
gine is shut off.
Checking the oil while the vehicle is on level
ground will improve the accuracy of the oil
level readings. Maintain the oil level between
the MIN and MAX markings on the dipstick.
Adding 1 U.S. Quart (0.95 L) of oil when the
reading is at the MIN mark will result in a
MAX reading on these engines.
Cooling System
WARNING!
• You or others can be badly burned by hot
engine coolant (antifreeze) or steam
from your radiator. If you see or hear
steam coming from under the hood, do
not open the hood until the radiator has
had time to cool. Never open a cooling
WARNING!
system pressure cap when the radiator
or coolant bottle is hot.
• Keep hands, tools, clothing, and jewelry
away from the radiator cooling fan when
the hood is raised. The fan starts auto-
matically and may start at any time,
whether the engine is running or not.
• When working near the radiator cooling
fan, disconnect the fan motor lead or
turn the ignition to the OFF mode. The
fan is temperature controlled and can
start at any time the ignition is in the ON
mode.
Engine Coolant Checks
Check the engine coolant (antifreeze) protec-
tion every 12 months (before the onset of
freezing weather, where applicable). If the
engine coolant (antifreeze) is dirty or rusty in
appearance, the system should be drained,
flushed and refilled with fresh engine coolant
(antifreeze). Check the front of the A/C con-
denser (if equipped) or radiator for any accu-
mulation of bugs, leaves, etc. If dirty, clean
SERVICING AND MAINTENANCE
182
Page 220 of 276
NOTE:
• Your radio has many features that add to
the comfort and convenience for you and
your passengers.
• Some of these radio features should not be
used when driving because they take your
eyes from the road or your attention from
driving.
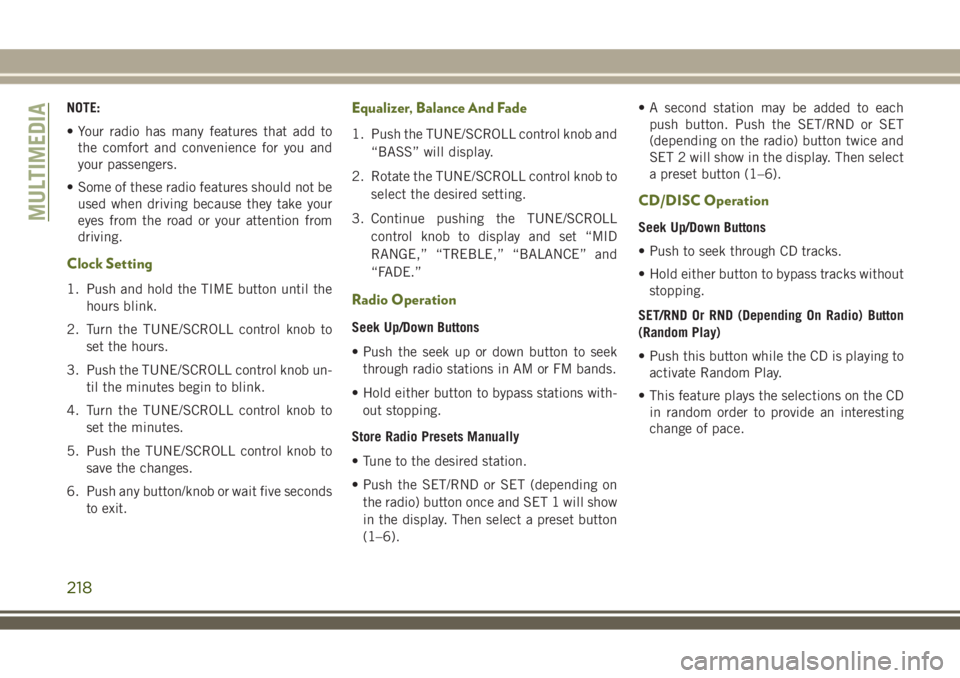
Clock Setting
1. Push and hold the TIME button until the
hours blink.
2. Turn the TUNE/SCROLL control knob to
set the hours.
3. Push the TUNE/SCROLL control knob un-
til the minutes begin to blink.
4. Turn the TUNE/SCROLL control knob to
set the minutes.
5. Push the TUNE/SCROLL control knob to
save the changes.
6. Push any button/knob or wait five seconds
to exit.
Equalizer, Balance And Fade
1. Push the TUNE/SCROLL control knob and
“BASS” will display.
2. Rotate the TUNE/SCROLL control knob to
select the desired setting.
3. Continue pushing the TUNE/SCROLL
control knob to display and set “MID
RANGE,” “TREBLE,” “BALANCE” and
“FADE.”
Radio Operation
Seek Up/Down Buttons
• Push the seek up or down button to seek
through radio stations in AM or FM bands.
• Hold either button to bypass stations with-
out stopping.
Store Radio Presets Manually
• Tune to the desired station.
• Push the SET/RND or SET (depending on
the radio) button once and SET 1 will show
in the display. Then select a preset button
(1–6).• A second station may be added to each
push button. Push the SET/RND or SET
(depending on the radio) button twice and
SET 2 will show in the display. Then select
a preset button (1–6).
CD/DISC Operation
Seek Up/Down Buttons
• Push to seek through CD tracks.
• Hold either button to bypass tracks without
stopping.
SET/RND Or RND (Depending On Radio) Button
(Random Play)
• Push this button while the CD is playing to
activate Random Play.
• This feature plays the selections on the CD
in random order to provide an interesting
change of pace.MULTIMEDIA
218
Page 223 of 276
NOTE:
• Your radio may not be equipped with the
Uconnect Voice Command and Uconnect
Phone features. To determine if your radio
has these features, push the Voice Com-
mand button on the radio. You will hear a
voice prompt if you have the feature, or see
a message on the radio stating “Uconnect
Phone not available” if you do not.
• Your radio has many features that add to
the comfort and convenience of you and
your passengers. Some of these radio fea-
tures should not be used when driving be-
cause they take your eyes from the road or
your attention from driving.Clock Setting
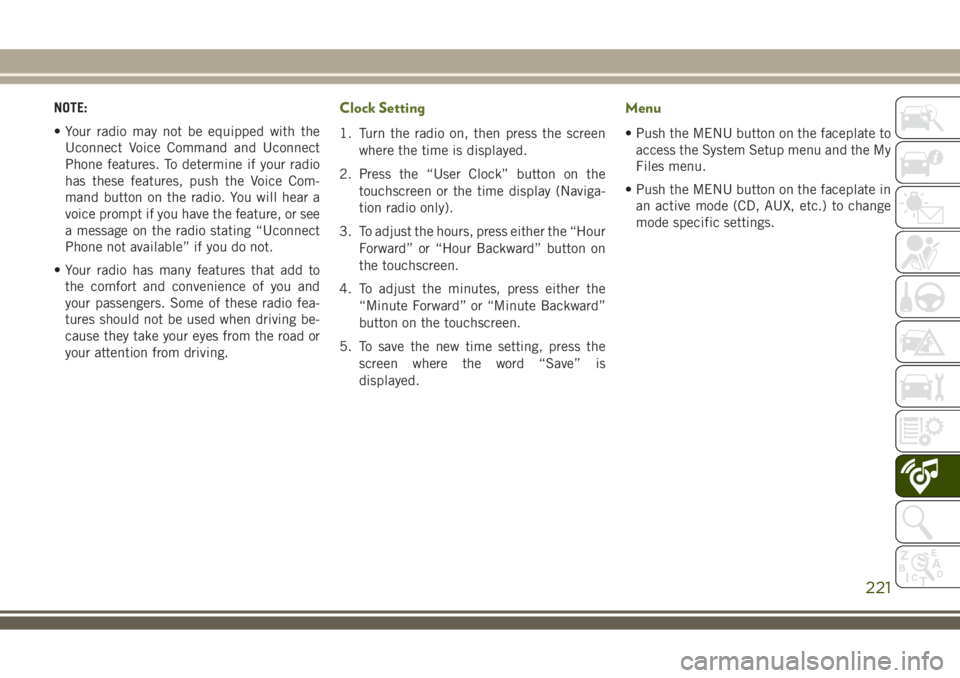
1. Turn the radio on, then press the screen
where the time is displayed.
2. Press the “User Clock” button on the
touchscreen or the time display (Naviga-
tion radio only).
3. To adjust the hours, press either the “Hour
Forward” or “Hour Backward” button on
the touchscreen.
4. To adjust the minutes, press either the
“Minute Forward” or “Minute Backward”
button on the touchscreen.
5. To save the new time setting, press the
screen where the word “Save” is
displayed.
Menu
• Push the MENU button on the faceplate to
access the System Setup menu and the My
Files menu.
• Push the MENU button on the faceplate in
an active mode (CD, AUX, etc.) to change
mode specific settings.
221
Page 224 of 276
Equalizer, Balance And Fade
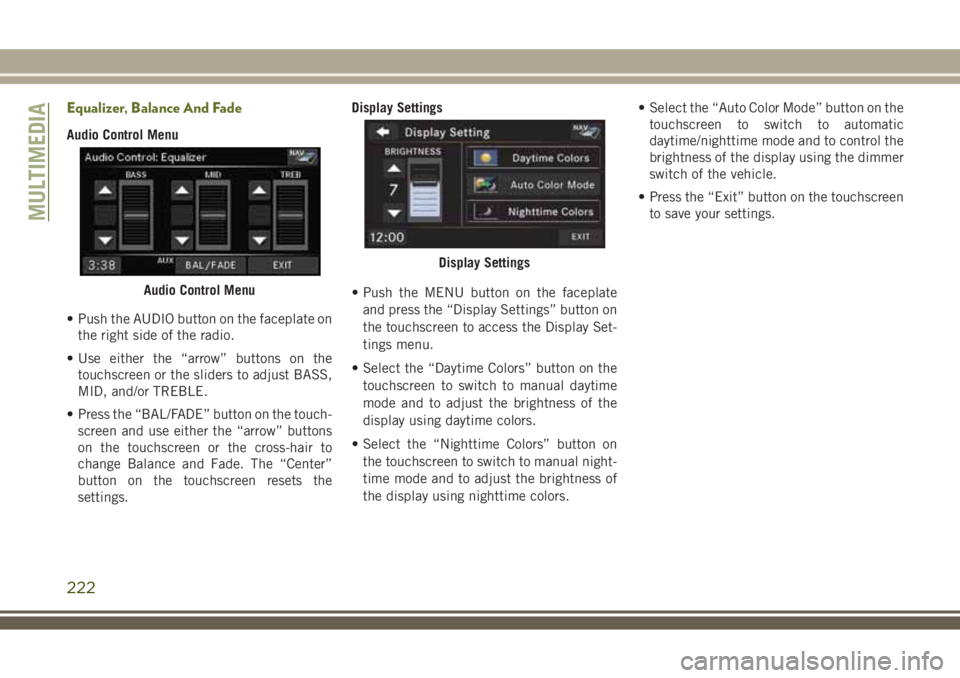
Audio Control Menu
• Push the AUDIO button on the faceplate on
the right side of the radio.
• Use either the “arrow” buttons on the
touchscreen or the sliders to adjust BASS,
MID, and/or TREBLE.
• Press the “BAL/FADE” button on the touch-
screen and use either the “arrow” buttons
on the touchscreen or the cross-hair to
change Balance and Fade. The “Center”
button on the touchscreen resets the
settings.Display Settings
• Push the MENU button on the faceplate
and press the “Display Settings” button on
the touchscreen to access the Display Set-
tings menu.
• Select the “Daytime Colors” button on the
touchscreen to switch to manual daytime
mode and to adjust the brightness of the
display using daytime colors.
• Select the “Nighttime Colors” button on
the touchscreen to switch to manual night-
time mode and to adjust the brightness of
the display using nighttime colors.• Select the “Auto Color Mode” button on the
touchscreen to switch to automatic
daytime/nighttime mode and to control the
brightness of the display using the dimmer
switch of the vehicle.
• Press the “Exit” button on the touchscreen
to save your settings.
Audio Control Menu
Display Settings
MULTIMEDIA
222
Page 226 of 276
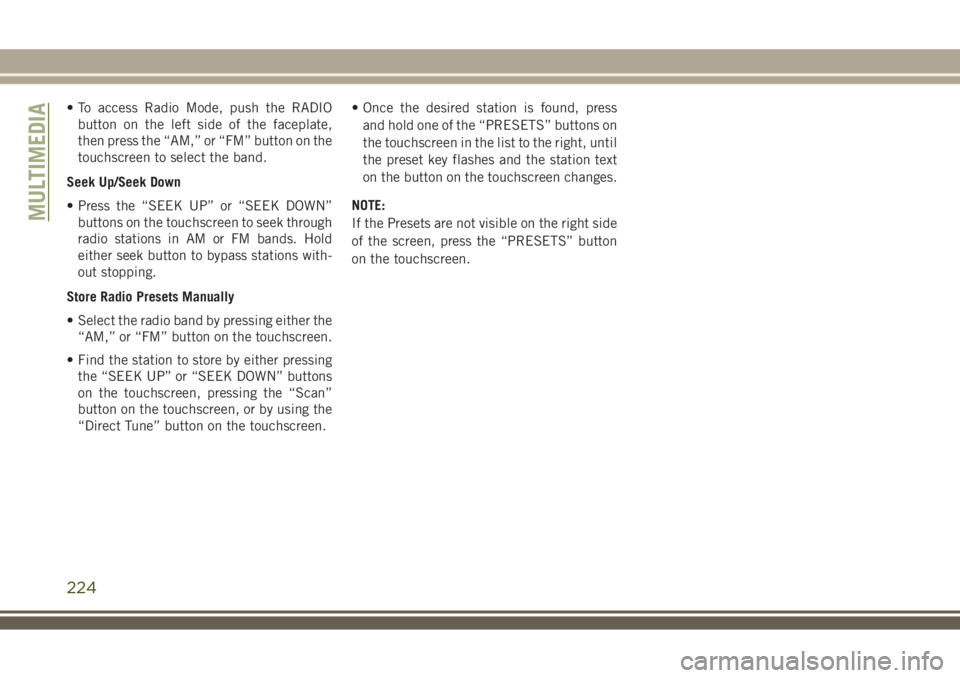
• To access Radio Mode, push the RADIO
button on the left side of the faceplate,
then press the “AM,” or “FM” button on the
touchscreen to select the band.
Seek Up/Seek Down
• Press the “SEEK UP” or “SEEK DOWN”
buttons on the touchscreen to seek through
radio stations in AM or FM bands. Hold
either seek button to bypass stations with-
out stopping.
Store Radio Presets Manually
• Select the radio band by pressing either the
“AM,” or “FM” button on the touchscreen.
• Find the station to store by either pressing
the “SEEK UP” or “SEEK DOWN” buttons
on the touchscreen, pressing the “Scan”
button on the touchscreen, or by using the
“Direct Tune” button on the touchscreen.• Once the desired station is found, press
and hold one of the “PRESETS” buttons on
the touchscreen in the list to the right, until
the preset key flashes and the station text
on the button on the touchscreen changes.
NOTE:
If the Presets are not visible on the right side
of the screen, press the “PRESETS” button
on the touchscreen.
MULTIMEDIA
224
Page 228 of 276
• Push the MEDIA button on the faceplate to
display the media source tabs at the top of
the screen. Select the source by pressing
the “HDD,” “DISC” or “AUX” media source
button on the touchscreen.
NOTE:
Your Touchscreen Radio will usually auto-
matically switch to the appropriate mode
when something is first connected or inserted
into the system.
Insert A CD/DVD Disc
• To insert a disc, push the LOAD button on
the faceplate.
• With the printed side upwards, insert the
disc into the disc slot of the radio. The radio
pulls the disc in automatically and closes
the flip screen. The radio selects the appro-
priate mode after the disc is recognized,
and starts playing the first track. The dis-
play shows “Reading...” during this
process.Seek Up/Seek Down
• Push the SEEK UP or SEEK DOWN buttons
on the faceplate to seek through tracks in
Disc Mode. Holding the SEEK UP button on
the touchscreen will fast forward through
the track until the beginning of the track is
reached; if still held it will fast-forward
through the next sequential track(s) (if ran-
dom play mode is not active) until released.
Holding the SEEK DOWN button on the
touchscreen will fast-reverse through the
track until the beginning of the track is
reached; if still held it will fast-reverse
through the next sequential track(s) (if ran-
dom play mode is not active) until released.
Audio Jack Operation
The AUX/Audio Jack provides a means to
connect a portable audio device, such as an
MP3 player or an iPod, to the vehicle’s sound
system. This requires the use of a 3.5 mm
stereo audio patch cable.• Push the MEDIA button on the faceplate
then the “AUX” button on the touchscreen
to change the mode to auxiliary device if
the Audio Jack is connected, allowing the
music from your portable device to play
through the vehicle's speakers.
NOTE:
The functions of the portable device are con-
trolled using the device itself, not the buttons
on the radio. However, the volume may be
controlled using the radio or portable device.
Hard Disk Drive (HDD) Operation
• The Hard Disk Drive (HDD) mode gives you
access to the audio files on the internal
hard disk drive. It functions similar to a CD
player, with the exception that the internal
HDD can hold more tracks.
• It is also possible to import display pictures
to the internal hard disk drive. The pictures
can be displayed on the right half of the
radio screen.
MULTIMEDIA
226
Page 234 of 276

TIPS CONTROLS AND
GENERAL INFORMATION
Steering Wheel Audio Controls
The steering wheel audio controls are located
on the rear surface of the steering wheel.Left Switch
• Push the switch up or down to search for
the next listenable station or select the next
or previous CD track.
• Push the button in the center to select the
next preset station (radio) or to change CDs
if equipped with a CD Player.
Right Switch
• Push the switch up or down to increase or
decrease the volume.
• Push the button in the center to change
modes AM/FM/CD.
Reception Conditions
Reception conditions change constantly
while driving. Reception may be interfered
with by the presence of mountains, buildings
or bridges, especially when you are far away
from the broadcaster.
The volume may be increased when receiving
traffic alerts and news.
Care And Maintenance
Observe the following precautions to ensure
the system is fully operational:
• The display lens should not come into con-
tact with pointed or rigid objects which
could damage its surface; use a soft, dry
anti-static cloth to clean and do not press.
• Never use alcohol, gas and derivatives to
clean the display lens.
• Prevent any liquid from entering the sys-
tem: this could damage it beyond repair.
Anti-Theft Protection
The system is equipped with an anti-theft
protection system based on the exchange of
information with the electronic control unit
(Body Computer) on the vehicle.
This guarantees maximum safety and pre-
vents the secret code from being entered
after the power supply has been discon-
nected.
Steering Wheel Audio Controls
(Rearview Of Steering Wheel)
MULTIMEDIA
232
Page 237 of 276

• Next you will be asked to give this new
pairing a priority of 1 through 7 (up to seven
phones may be paired); 1 is the highest and
7 is the lowest priority. The system will only
connect to the highest priority phone that
exists within the proximity of the vehicle.
• You will then need to start the pairing
procedure on your cell phone. Follow the
Bluetooth instructions in your cell phone
Owner's Manual to complete the phone
pairing setup.
NOTE:
Keep in mind that software updates – either
on your phone or Uconnect system – may
interfere with the Bluetooth connection. If
this happens, simply repeat the pairing pro-
cess. However, first, make sure to delete the
device from the list of phones on your
Uconnect system. Next, be sure to remove
Uconnect from the list of devices in your
phone’s Bluetooth settings.Phonebook
Phonebook Download — Automatic Phonebook
Transfer From Mobile Phone
If equipped and specifically supported by
your phone, Uconnect Phone automatically
downloads names (text names) and number
entries from your mobile phone’s phonebook.
Specific Bluetooth Phones with Phone Book
Access Profile may support this feature.
Automatic Transfer is indicated by a green
arrow at the bottom of the screen. See
UconnectPhone.com for supported phones.
• Automatic download and update, if sup-
ported, begins as soon as the Bluetooth
wireless phone connection is made to the
Uconnect Phone. For example, after you
start the vehicle.NOTE:
The mobile phone may require authorization
prior to download.
• A maximum of 1,000 entries per phone will
be downloaded and updated every time a
phone is connected to the Uconnect Phone.
• Depending on the maximum number of
entries downloaded, there may be a short
delay before the latest downloaded names
can be used. Until then, if available, the
previously downloaded phonebook is avail-
able for use.
• Only the phonebook of the currently con-
nected mobile phone is accessible.
• Only the mobile phone’s phonebook is
downloaded. The SIM card phonebook is
not part of the Mobile phonebook.
• This downloaded phonebook cannot be ed-
ited or deleted on the Uconnect Phone.
These can only be edited on the mobile
phone. The changes are transferred and
updated to Uconnect Phone on the next
phone connection.
Uconnect myPhone
235