Page 129 of 276

WARNING!
windows, other controls, or move the
vehicle.
Key Ignition Park Interlock
This vehicle is equipped with a Key Ignition
Park Interlock which requires the transmis-
sion to be in PARK before the ignition can be
turned to the LOCK/OFF (key removal) posi-
tion. The key can only be removed from the
ignition when the ignition is in the LOCK/OFF
position, and once removed the transmission
is locked in PARK.
NOTE:
If a malfunction occurs, the system will trap
the key in the ignition to warn you that this
safety feature is inoperable. The engine can
be started and stopped but the key cannot be
removed until you obtain service.
Brake/Transmission Shift Interlock
System
This vehicle is equipped with a Brake Trans-
mission Shift Interlock System (BTSI) that
holds the transmission gear selector in PARK
unless the brakes are applied. To shift the
transmission out of PARK, the ignition must
be in the ON/RUN position (engine running or
not) and the brake pedal must be pressed.
Five-Speed Automatic Transmission — If
Equipped
The transmission gear position display (lo-
cated in the instrument cluster) indicates the
transmission gear range. You must press the
brake pedal to move the gear selector out of
PARK (refer to “Brake/Transmission Shift In-
terlock System” in this section). To drive,
move the gear selector from PARK or NEU-
TRAL to the DRIVE position.The electronically-controlled transmission
adapts its shift schedule based on driver
inputs, along with environmental and road
conditions. The transmission electronics are
self-calibrating; therefore, the first few shifts
on a new vehicle may be somewhat abrupt.
This is a normal condition, and precision
shifts will develop within a few hundred miles
(kilometers).
Only shift from DRIVE to PARK or REVERSE
when the accelerator pedal is released and
the vehicle is stopped. Be sure to keep your
foot on the brake pedal when shifting be-
tween these gears.
The transmission gear selector has only
PARK, REVERSE, NEUTRAL, and DRIVE
shift positions. Manual shifts can be made
using the Autostick shift control. Moving the
gear selector to the left or right (-/+) while in
the DRIVE position will manually select the
transmission gear and will display the current
127
Page 130 of 276

gear in the instrument cluster as 1, 2, 3, etc.
Refer to “AutoStick” in this section for fur-
ther information.
Autostick
AutoStick is a driver-interactive transmission
feature providing manual shift control, giving
you more control of the vehicle. AutoStick
allows you to maximize engine braking, elimi-
nate undesirable upshifts and downshifts,
and improve overall vehicle performance.This system can also provide you with more
control during passing, city driving, cold slip-
pery conditions, mountain driving, trailer
towing, and many other situations.
Operation
When the gear selector is in the DRIVE posi-
tion, the transmission will operate automati-
cally, shifting between the five available
gears. To engage AutoStick, simply tap the
gear selector to the right or left (+/-) while in
the DRIVE position. Tapping (-) to enter
AutoStick mode will downshift the transmis-
sion to the next lower gear, while using (+) to
enter AutoStick mode will retain the current
gear. When AutoStick is active, the current
transmission gear is displayed in the instru-
ment cluster.
In AutoStick mode, the transmission will
shift up or down when (+/-) is manually se-
lected by the driver, unless an engine lugging
or overspeed condition would result. It will
remain in the selected gear until anotherupshift or downshift is chosen, except as
described below.
• The transmission will automatically upshift
when necessary to prevent engine over-
speed.
• Heavily pressing the accelerator pedal will
generate an automatic downshift (for im-
proved acceleration) when reasonable.
• The transmission will automatically down-
shift as the vehicle slows (to prevent engine
lugging) and will display the current gear.
• The transmission will automatically down-
shift to first gear when coming to a stop.
After a stop, the driver should manually
upshift (+) the transmission as the vehicle
is accelerated.
• You can start out, from a stop, in first or
second gear. Tapping (+) (at a stop) will
allow starting in second gear. Starting out
in second gear can be helpful in snowy or
icy conditions.
Gear Selector
STARTING AND OPERATING
128
Page 131 of 276

• The system will ignore attempts to upshift
at too low of a vehicle speed.
• Avoid using speed control when AutoStick
is engaged.
• Transmission shifting will be more notice-
able when AutoStick is enabled.
NOTE:
When the transfer case is in the 4L (Low)
range, the transmission will shift automati-
cally (but no higher than the displayed gear).
To disengage AutoStick mode, hold the gear
selector to the right (+) until "D" is once again
displayed in the instrument cluster. You can
shift in or out of the AutoStick mode at any
time without taking your foot off the accelera-
tor pedal.
WARNING!
Do not downshift for additional engine
braking on a slippery surface. The drive
wheels could lose their grip and the ve-
hicle could skid, causing a collision or
personal injury.
FOUR–WHEEL DRIVE
OPERATION (COMMAND-
TRAC I OR ROCK-TRAC)
WARNING!
Failure to engage a transfer case position
completely can cause transfer case dam-
age or loss of power and vehicle control.
You could have a collision. Do not drive the
vehicle unless the transfer case is fully
engaged.
Operating Instructions/Precautions
The transfer case provides four mode posi-
tions:
• 2H (Two-Wheel Drive High Range)
• 4H (Four-Wheel Drive High Range)
• N (Neutral)
• 4L (Four-Wheel Drive Low Range)The transfer case is intended to be driven in
the 2H position for normal street and highway
conditions, such as hard-surfaced roads.
In the event that additional traction is re-
quired, the transfer case 4H and 4L positions
can be used to lock the front and rear drive-
shafts together, forcing the front and rear
wheels to rotate at the same speed. The 4H
and 4L positions are intended for loose, slip-
pery road surfaces only and not intended for
normal driving. Driving in the 4H and 4L
Four-Wheel Drive Gear Selector
129
Page 132 of 276

positions on hard-surfaced roads will cause
increased tire wear and damage to the drive-
line components. Refer to “Shifting Proce-
dures” in this section for further information
on shifting into 4H or 4L.
The “4WD Indicator Light” (located in the
instrument cluster) alerts the driver that the
vehicle is in four-wheel drive, and the front
and rear driveshafts are locked together. The
light will illuminate when the transfer case is
shifted into the 4H position.
NOTE:
Do not attempt to shift when only the front or
rear wheels are spinning. The transfer case is
not equipped with a synchronizer, and the
front and rear driveshaft speeds must be
equal for a shift to take place. Shifting while
the front or rear wheels are spinning at differ-
ent speeds can cause damage to the transfer
case.When operating your vehicle in 4L, the en-
gine speed will be approximately three times
(four times for Rubicon models) that of the
2H or 4H positions at a given road speed.
Take care not to overspeed the engine.
Proper operation of four-wheel drive vehicles
depends on tires of equal size, type, and
circumference on each wheel. Any difference
will adversely affect shifting and cause dam-
age to the transfer case.
Because four-wheel drive provides improved
traction, there is a tendency to exceed safe
turning and stopping speeds. Do not go faster
than road conditions permit.Shift Positions
For additional information on the appropriate
use of each 4WD system mode position, see
the information below:
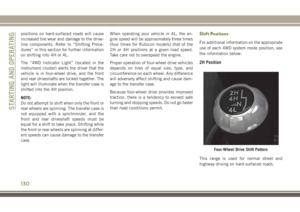
2H Position
This range is used for normal street and
highway driving on hard-surfaced roads.
Four-Wheel Drive Shift Pattern
STARTING AND OPERATING
130
Page 133 of 276

4H Position
This range locks the front and rear driveshafts
together, forcing the front and rear wheels to
rotate at the same speed. This range (4H)
provides additional traction for loose, slip-
pery road surfaces and should not be used on
dry pavement.
The “4WD Indicator Light” (located in the
instrument cluster) will illuminate when the
transfer case is shifted into the 4H position.
N (Neutral) Position
This range disengages the front and rear
driveshafts from the powertrain. It is to be
used for flat towing behind another vehicle.
Refer to “Recreational Towing” in “Starting
And Operating” for further information.
WARNING!
You or others could be injured or killed if
you leave the vehicle unattended with the
transfer case in the NEUTRAL (N) position
without first fully engaging the parking
brake. The transfer case NEUTRAL (N)
position disengages both the front and rear
WARNING!
driveshafts from the powertrain, and will
allow the vehicle to roll, even if the auto-
matic transmission is in PARK (or manual
transmission is in gear). The parking brake
should always be applied when the driver
is not in the vehicle.
4L Position
This range locks the front and rear driveshafts
together, forcing the front and rear wheels to
rotate at the same speed. This range (4L)
provides additional traction and maximum
pulling power for loose, slippery road sur-
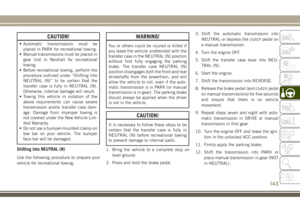
faces only. Do not exceed 25 mph (40 km/h).
CAUTION!
Exceeding 25 mph (40 km/h) while the
transfer case is engaged in 4L may result
in an engine overspeed condition and en-
gine damage.
The “4WD Indicator Light” (located in the
instrument cluster) will illuminate when the
transfer case is shifted into the 4L position.NOTE:
When in 4L, the “ESC Off Indicator Light”
will display in the instrument cluster.
Shifting Procedures
2H to 4H or 4H to 2H
Shifting between 2H and 4H can be made
with the vehicle stopped or in motion. With
the vehicle in motion, the transfer case will
engage/disengage faster if you momentarily
release the accelerator pedal after complet-
ing the shift. Apply a constant force when
shifting the transfer case lever.
4H to 4L or 4L to 4H
With the vehicle rolling at 2 to 3 mph (3 to
5 km/h), shift an automatic transmission into
NEUTRAL (N), or press the clutch pedal on a
manual transmission. While the vehicle is
coasting at 2 to 3 mph (3 to 5 km/h), shift the
transfer case lever firmly to the desired posi-
tion. Do not pause with the transfer case in N
(Neutral). Once the shift is completed, place
the automatic transmission into DRIVE or
release the clutch pedal on a manual trans-
mission.
131
Page 134 of 276

NOTE:
Shifting into or out of 4L is possible with the
vehicle completely stopped; however, diffi-
culty may occur due to the mating teeth not
being properly aligned. Several attempts may
be required for clutch teeth alignment and
shift completion to occur. The preferred
method is with the vehicle rolling at 2 to
3 mph (3 to 5 km/h). Avoid attempting to
engage or disengage 4L with the vehicle
moving faster than 2 to 3 mph (3 to 5 km/h).
WARNING!
Failure to engage a transfer case position
completely can cause transfer case dam-
age or loss of power and vehicle control.
You could have a collision. Do not drive the
vehicle unless the transfer case is fully
engaged.
Trac-Lok Rear Axle — If Equipped
The Trac-Lok rear axle provides a constant
driving force to both rear wheels and reduces
wheel spin caused by the loss of traction at
one driving wheel. If traction differs between
the two rear wheels, the differential auto-
matically proportions the usable torque by
providing more torque to the wheel that has
traction.
Trac-Lok is especially helpful during slippery
driving conditions. With both rear wheels on a
slippery surface, a slight application of the
accelerator will supply maximum traction.
WARNING!
On vehicles equipped with a limited-slip
differential, never run the engine with one
rear wheel off the ground. The vehicle may
drive through the rear wheel remaining on
the ground and cause you to lose control of
your vehicle.
Axle Lock (Tru-Lok) — Rubicon Models
The AXLE LOCK switch is located on the
instrument panel (to the left of the steering
column).
This feature will only activate when the fol-
lowing conditions are met:
• Key in ignition, vehicle in 4L (Low) range.
• Vehicle speed should be 10 mph (16 km/h)
or less.
Axle Lock Switch
STARTING AND OPERATING
132
Page 135 of 276

To activate the system, push the bottom of
the AXLE LOCK switch once to lock the rear
axle only (the “Rear Axle Lock Indicator
Light” will illuminate), push the bottom of
the switch again to lock the front axle (the
“Front Axle Lock Indicator Light” will illumi-
nate). When the rear axle is locked, pushing
the bottom of switch again will lock or unlock
the front axle.
NOTE:
The indicator lights will flash until the axles
are fully locked or unlocked.
To unlock the axles, push the top of the AXLE
LOCK switch.
Axle lock will disengage if the vehicle is taken
out of 4L (Low) range, or the ignition switch is
turned to the OFF position.
Electronic Sway Bar Disconnect — If
Equipped
Your vehicle may be equipped with an elec-
tronic disconnecting stabilizer/sway bar. This
system allows greater front suspension travel
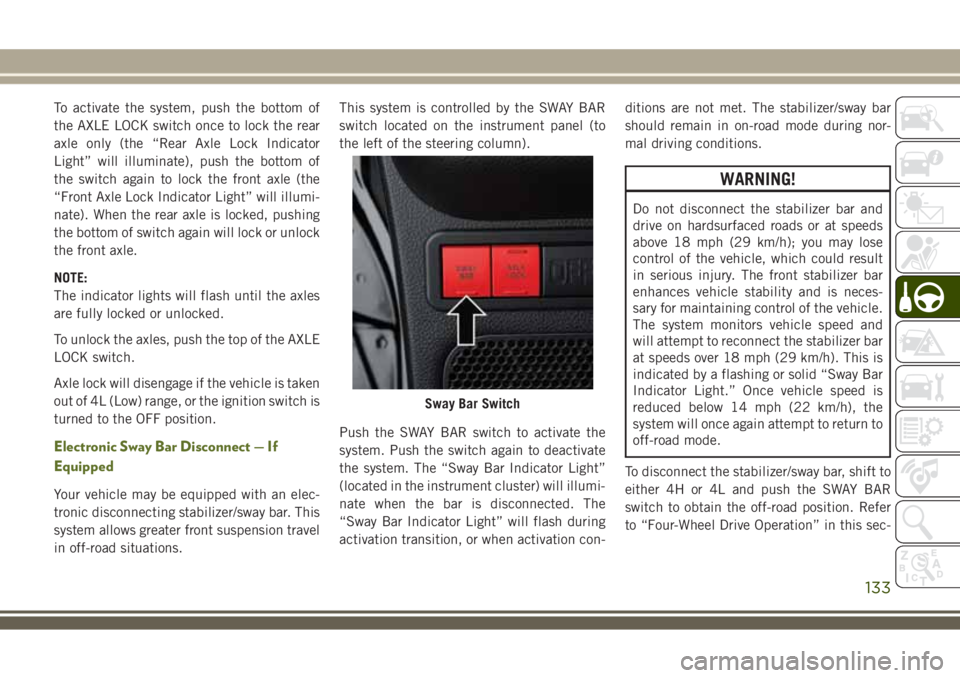
in off-road situations.This system is controlled by the SWAY BAR
switch located on the instrument panel (to
the left of the steering column).
Push the SWAY BAR switch to activate the
system. Push the switch again to deactivate
the system. The “Sway Bar Indicator Light”
(located in the instrument cluster) will illumi-
nate when the bar is disconnected. The
“Sway Bar Indicator Light” will flash during
activation transition, or when activation con-ditions are not met. The stabilizer/sway bar
should remain in on-road mode during nor-
mal driving conditions.
WARNING!
Do not disconnect the stabilizer bar and
drive on hardsurfaced roads or at speeds
above 18 mph (29 km/h); you may lose
control of the vehicle, which could result
in serious injury. The front stabilizer bar
enhances vehicle stability and is neces-
sary for maintaining control of the vehicle.
The system monitors vehicle speed and
will attempt to reconnect the stabilizer bar
at speeds over 18 mph (29 km/h). This is
indicated by a flashing or solid “Sway Bar
Indicator Light.” Once vehicle speed is
reduced below 14 mph (22 km/h), the
system will once again attempt to return to
off-road mode.
To disconnect the stabilizer/sway bar, shift to
either 4H or 4L and push the SWAY BAR
switch to obtain the off-road position. Refer
to “Four-Wheel Drive Operation” in this sec-
Sway Bar Switch
133
Page 136 of 276

tion for further information. The “Sway Bar
Indicator Light” will flash until the stabilizer/
sway bar has been fully disconnected.
NOTE:
The stabilizer/sway bar may be torque locked
due to left and right suspension height differ-
ences. This condition is due to driving sur-
face differences or vehicle loading. In order
for the stabilizer/sway bar to disconnect/
reconnect, the right and left halves of the bar
must be aligned. This alignment may require
that the vehicle be driven onto level ground or
rocked from side to side.
To return to on-road mode, push the SWAY
BAR switch again.
WARNING!
If the stabilizer/sway bar will not return to
on-road mode, the “Sway Bar Indicator
Light” will flash in the instrument cluster
and vehicle stability is greatly reduced. Do
not attempt to drive the vehicle over
18 mph (29 km/h). Driving faster than
18 mph (29 km/ h) may cause loss of
control of the vehicle, which could result
WARNING!
in serious injury. Contact your local autho-
rized dealer for assistance.
STOP/START SYSTEM —
DIESEL MODELS WITH
MANUAL TRANSMISSION
ONLY
The Stop/Start function is developed to save
fuel and reduce emissions. The system will
stop the engine automatically during a ve-
hicle stop if the required conditions are met.
Pressing the clutch pedal will automatically
restart the vehicle.
Automatic Mode
The Stop/Start feature is en-
abled after every normal cus-
tomer engine start. It will remain
in STOP/START NOT READY un-
til you drive forward with a ve-
hicle speed greater than 3 mph (5 km/h). Atthat time, the system will go into STOP/
START READY and if all other conditions are
met, can go into an STOP/START AUTO STOP
ACTIVE mode.
To Activate The STOP/START AUTO STOP ACTIVE
Mode, The Following Must Occur:
• The system must be in STOP/START
READY state. A STOP/START READY mes-
sage will be displayed in the instrument
cluster. Refer to “Instrument Cluster Dis-
play” in “Getting To Know Your Instrument
Panel” for further information.
• Vehicle speed must be less 3 mph (5 km/h).
• The gear selector must be in the NEUTRAL
position and the clutch pedal must be fully
released
The engine will shut down,the tachometer will
fall to the Stop/Start position,the STOP/START
AUTO STOP ACTIVE message will appear,
and the heater/air conditioning (HVAC) air
flow will be reduced.
STARTING AND OPERATING
134