2020 JEEP PATRIOT service
[x] Cancel search: servicePage 233 of 332

WARNING!(Continued)
•Being under a jacked-up vehicle is danger-
ous. The vehicle could slip off the jack and
fall on you. You could be crushed. Never
put any part of your body under a vehicle
that is on a jack. If you need to get under a
raised vehicle, take it to a service center
where it can be raised on a lift.
•Never start or run the engine while the
vehicle is on a jack.
•The jack is designed to be used as a tool
for changing tires only. The jack should not
be used to lift the vehicle for service pur-
poses. The vehicle should be jacked on a
firm level surface only. Avoid ice or slippery
areas.
Jack LocationThe jack and jack-handle are stowed under the
load floor in the cargo area.
Spare Tire StowageThe compact spare tire is stowed under the rear
load floor in the cargo area.
Spare Tire Removal
Lift up the load floor cover and remove the hold
down.
Preparations For Jacking
1. Park the vehicle on a firm level surface,
avoiding ice or slippery areas.
WARNING!
Do not attempt to change a tire on the side of
the vehicle close to moving traffic, pull far
enough off the road to avoid the danger of
being hit when operating the jack or chang-
ing the wheel.
2. Turn on the Hazard Warning flasher.
3. Set the parking brake.
4. Place the gear selector in PARK (automatic
transmission) or REVERSE (manual trans-
mission).
5. Turn OFF the ignition.
6. Block both the front and rear
of the wheel diagonally op-
posite of the jacking posi-
tion. For example, if chang-
ing the right front tire, block
the left rear wheel.
Spare Tire And Jack Stowage
229
Page 234 of 332
NOTE:
Passengers should not remain in the vehicle
while the vehicle is being jacked.
Jacking Instructions
WARNING!
Carefully follow these tire changing warnings
to help prevent personal injury or damage to
your vehicle:
•Always park on a firm, level surface as far
from the edge of the roadway as possible
before raising the vehicle.
•Turn on the Hazard Warning flasher.
•Block the wheel diagonally opposite the
wheel to be raised.
•Set the parking brake firmly and set an
automatic transmission in PARK; a manual
transmission in REVERSE.
•Never start or run the engine with the
vehicle on a jack.
(Continued)
WARNING!(Continued)
•Do not let anyone sit in the vehicle when it
is on a jack.
•Do not get under the vehicle when it is on
a jack. If you need to get under a raised
vehicle, take it to a service center where it
can be raised on a lift.
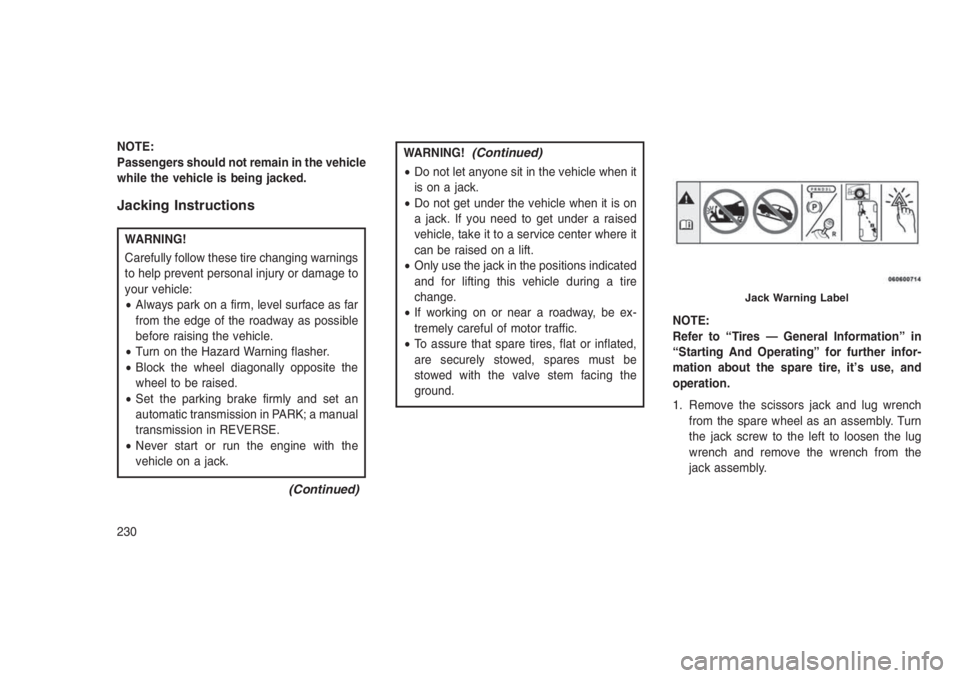
•Only use the jack in the positions indicated
and for lifting this vehicle during a tire
change.
•If working on or near a roadway, be ex-
tremely careful of motor traffic.
•To assure that spare tires, flat or inflated,
are securely stowed, spares must be
stowed with the valve stem facing the
ground.NOTE:
Refer to “Tires — General Information” in
“Starting And Operating” for further infor-
mation about the spare tire, it’s use, and
operation.
1. Remove the scissors jack and lug wrench
from the spare wheel as an assembly. Turn
the jack screw to the left to loosen the lug
wrench and remove the wrench from the
jack assembly.
Jack Warning Label
230
Page 237 of 332

WARNING!
To avoid possible personal injury, handle the
wheel covers with care to avoid contact with
any sharp edges.
NOTE:
The wheel cover is held on the wheel by the
wheel nuts. When reinstalling the original
wheel, properly align the wheel cover to the
valve stem, place the wheel cover onto the
wheel, then install the wheel nuts.
6. Lower the vehicle by turning the jack screw
to the left.
7. Finish tightening the lug nuts. Push down on
the wrench while at the end of the handle for
increased leverage. Tighten the lug nuts in a
star pattern until each nut has been tight-
ened twice. Refer to “Torque Specifications”
in this section for the correct lug nut torque.
If you doubt that you have tightened the nutscorrectly, have them checked with a torque
wrench by your authorized dealer or service
station.
8. Remove the wheel blocks and lower the jack
until it is free. Release the parking brake.
Reassemble the lug wrench to the jack as-
sembly and stow it in the spare tire area.
Secure the assembly using the means pro-
vided.
WARNING!
A loose tire or jack thrown forward in a
collision or hard stop could endanger the
occupants of the vehicle. Always stow the
jack parts and the spare tire in the places
provided.
9. Place the deflated (flat) tire in the cargo
area,have the tire repaired or replaced as
soon as possible.
WARNING!
A loose tire thrown forward in a collision or
hard stop could injure the occupants in the
vehicle. Have the deflated (flat) tire repaired
or replaced immediately.
10. Check the spare tire pressure as soon as
possible. Correct the tire pressure as re-
quired.
Road Tire Installation
Vehicles Equipped With Wheel Covers
1. Mount the road tire on the axle.
2. Align the valve notch in the wheel cover with
the valve stem on the wheel. Install the cover
by hand. Do not use a hammer or excessive
force to install the cover.
233
Page 239 of 332

TIRE SERVICE KIT — IF
EQUIPPED
Small punctures up to 1/4 inch (6 mm) in the tire
tread can be sealed with Tire Service Kit. For-
eign objects (e.g., screws or nails) should not be
removed from the tire. Tire Service Kit can be
used in outside temperatures down to approxi-
mately -4°F (-20°C).
This kit will provide a temporary tire seal, allow-
ing you to drive your vehicle up to 100 miles
(160 km) with a maximum speed of 55 mph
(90 km/h).
Tire Service Kit StorageThe Tire Service Kit is located under the load
floor in the cargo area.
Tire Service Kit Components And
OperationUsing The Mode Select Knob And Hoses
Your Tire Service Kit is equipped with the fol-
lowing symbols to indicate the air or sealant
mode.
Selecting Air Mode
Push in the Mode Select Knob (5) and
turn to this position for air pump opera-
tion only. Use the Black Air Pump Hose
(7) when selecting this mode.
Selecting Sealant Mode
Push in the Mode Select Knob (5) and
turn to this position to inject the Tire
Service Kit Sealant and to inflate the
tire. Use the Sealant Hose (clear hose) (6) when
selecting this mode.
Using The Power Button
Push and release the Power Button (4)
once to turn On the Tire Service Kit.
Push and release the Power Button (4) again to
turn Off the Tire Service Kit.
Tire Service Kit Components
1 — Sealant
Bottle5 — Mode Select Knob
2 — Deflation
Button6 — Sealant Hose
(Clear)
3 — Pressure
Gauge7 — Air Pump Hose
(Black)
4 — Power
Button8 — Power Plug (located
on the bottom side of the
Tire Service Kit)
235
Page 240 of 332

Using The Deflation Button
Push the Deflation Button (2) to reduce
the air pressure in the tire if it becomes
over-inflated.
Tire Service Kit Usage Precautions
•Replace the Tire Service Kit Sealant Bottle
(1) and Sealant Hose (6) prior to the expira-
tion date (printed at the lower right hand
corner on the bottle label) to assure optimum
operation of the system. Refer to “Sealing a
Tire with Tire Service Kit” section (F) “Sealant
Bottle and Hose Replacement”.•The Sealant Bottle (1) and Sealant Hose (6)
are a one tire application use and need to be
replaced after each use. Always replace
these components immediately at your origi-
nal equipment vehicle dealer.
•When the Tire Service Kit sealant is in a
liquid form, clean water, and a damp cloth will
remove the material from the vehicle or tire
and wheel components. Once the sealant
dries, it can easily be peeled off and properly
discarded.
•For optimum performance, make sure the
valve stem on the wheel is free of debris
before connecting the Tire Service Kit.
•You can use the Tire Service Kit air pump to
inflate bicycle tires. The kit also comes with
two needles, located in the Accessory Stor-
age Compartment (on the bottom of the air
pump) for inflating sport balls, rafts, or similar
inflatable items. However, use only the Air
Pump Hose (7) and make sure the Mode
Select Knob (5) is in the Air Mode when
inflating such items to avoid injecting sealant
into them. The Tire Service Kit Sealant is onlyintended to seal punctures less than 1/4 inch
(6 mm) diameter in the tread of your vehicle.
•Do not lift or carry the Tire Service Kit by the
hoses.WARNING!
•Do not attempt to seal a tire on the side of
the vehicle closest to traffic. Pull far
enough off the road to avoid the danger of
being hit when using the Tire Service Kit.
•Do not use Tire Service Kit or drive the
vehicle under the following circumstances:
•If the puncture in the tire tread is ap-
proximately 1/4 inch (6 mm) or larger.
•If the tire has any sidewall damage.
•If the tire has any damage from driving
with extremely low tire pressure.
•If the tire has any damage from driving
on a flat tire.
•If the wheel has any damage.
•If you are unsure of the condition of the
tire or the wheel.
(Continued)Tire Service Kit Expiration Date Location
236
Page 241 of 332
WARNING!(Continued)
•Keep Tire Service Kit away from open
flames or heat source.
•A loose Tire Service Kit thrown forward in a
collision or hard stop could endanger the
occupants of the vehicle. Always stow the
Tire Service Kit in the place provided.
Failure to follow these warnings can result
in injuries that are serious or fatal to you,
your passengers, and others around you.
•Take care not to allow the contents of Tire
Service Kit to come in contact with hair,
eyes, or clothing. Tire Service Kit sealant is
harmful if inhaled, swallowed, or absorbed
through the skin. It causes skin, eye, and
respiratory irritation. Flush immediately
with plenty of water if there is any contact
with eyes or skin. Change clothing as soon
as possible, if there is any contact with
clothing.
(Continued)
WARNING!(Continued)
•Tire Service Kit Sealant solution contains
latex. In case of an allergic reaction or
rash, consult a physician immediately.
Keep Tire Service Kit out of reach of
children. If swallowed, rinse mouth imme-
diately with plenty of water and drink plenty
of water. Do not induce vomiting! Consult a
physician immediately.
Sealing A Tire With Tire Service Kit
(A) Whenever You Stop To Use Tire Service
Kit:
1. Pull over to a safe location and turn on the
vehicle’s Hazard Warning flashers.
2. Verify that the valve stem (on the wheel with
the deflated tire) is in a position that is near
to the ground. This will allow the Tire Service
Kit Hoses (6) and (7) to reach the valve stem
and keep the Tire Service Kit flat on the
ground. This will provide the best positioning
of the kit when injecting the sealant into thedeflated tire and running the air pump. Move
the vehicle as necessary to place the valve
stem in this position before proceeding.
3. Place the transmission in PARK (auto trans-
mission) or in Gear (manual transmission)
and place the ignition in the OFF position.
4. Set the parking brake.
(B) Setting Up To Use Tire Service Kit:
1. Push in the Mode Select Knob (5) and turn to
the Sealant Mode position.
2. Uncoil the Sealant Hose (6) and then re-
move the cap from the fitting at the end of the
hose.
3. Place the Tire Service Kit flat on the ground
next to the deflated tire.
4. Remove the cap from the valve stem and
then screw the fitting at the end of the
Sealant Hose (6) onto the valve stem.
5. Uncoil the Power Plug (8) and insert the plug
into the vehicle’s 12 Volt power outlet.
237
Page 242 of 332

NOTE:
Do not remove foreign objects (e.g., screws
or nails) from the tire.
(C) Injecting Tire Service Kit Sealant Into
The Deflated Tire:
•Always start the engine before turning ON
the Tire Service Kit.
NOTE:
Manual transmission vehicles must have the
parking brake engaged and the gear selec-
tor in NEUTRAL.
•After pushing the Power Button (4), the seal-
ant (white fluid) will flow from the Sealant
Bottle (1) through the Sealant Hose (6) and
into the tire.
NOTE:
Sealant may leak out through the puncture
in the tire.
If the sealant (white fluid) does not flow
within0–10seconds through the Sealant
Hose (6):
1. Push the Power Button (4) to turn Off the Tire
Service Kit. Disconnect the Sealant Hose (6)from the valve stem. Make sure the valve
stem is free of debris. Reconnect the Seal-
ant Hose (6) to the valve stem. Check that
the Mode Select Knob (5) is in the Sealant
Mode position and not Air Mode. Push the
Power Button (4) to turn On the Tire Service
Kit.
2. Connect the Power Plug (8) to a different 12
Volt power outlet in your vehicle or another
vehicle, if available. Make sure the engine is
running before turning ON the Tire Service
Kit.
3. The Sealant Bottle (1) may be empty due to
previous use. Call for assistance.
NOTE:
If the Mode Select Knob (5) is on Air Mode
and the pump is operating, air will dispense
from the Air Pump Hose (7) only, not the
Sealant Hose (6).
If the sealant (white fluid) does flow through
the Sealant Hose (6):
1. Continue to operate the pump until sealant is
no longer flowing through hose (typicallytakes 30 - 70 seconds). As the sealant flows
through the Sealant Hose (6), the Pressure
Gauge (3) can read as high as 70 psi (4.8
Bar). The Pressure Gauge (3) will decrease
quickly from approximately 70 psi (4.8 Bar)
to the actual tire pressure when the Sealant
Bottle (1) is empty.
2. The pump will start to inject air into the tire
immediately after the Sealant Bottle (1) is
empty. Continue to operate the pump and
inflate the tire to the pressure indicated on
the tire pressure label on the driver-side
latch pillar (recommended pressure). Check
the tire pressure by looking at the Pressure
Gauge (3).
If the tire does not inflate to at least 26 psi
(1.8 Bar) pressure within 15 minutes:
•The tire is too badly damaged. Do not at-
tempt to drive the vehicle further. Call for
assistance.
238
Page 243 of 332

NOTE:
If the tire becomes over-inflated, push the
Deflation Button to reduce the tire pressure
to the recommended inflation pressure be-
fore continuing.
If the tire inflates to the recommended pres-
sure or is at least 26 psi (1.8 Bar) pressure
within 15 minutes:
1. Push the Power Button (4) to turn off the Tire
Service Kit.
2. Remove the Speed Limit sticker from the top
of the Sealant Bottle (1) and place the sticker
on the instrument panel.
3. Immediately disconnect the Sealant Hose
(6) from the valve stem, reinstall the cap on
the fitting at the end of the hose, and place
the Tire Service Kit in the vehicle storage
location. Quickly proceed to (D) “Drive Ve-
hicle.”CAUTION!
•The metal end fitting from Power Plug (8)
may get hot after use, so it should be
handled carefully.
•Failure to reinstall the cap on the fitting at
the end of the Sealant Hose (6) can result
in sealant contacting your skin, clothing,
and the vehicle’s interior. It can also result
in sealant contacting internal Tire Service
Kit components which may cause perma-
nent damage to the kit.
(D) Drive Vehicle:
Immediately after injecting sealant and inflating
the tire, drive the vehicle 5 miles (8 km) or 10
minutes to ensure distribution of the Tire Ser-
vice Kit Sealant within the tire. Do not exceed
55 mph (90 km/h).
WARNING!
Tire Service Kit is not a permanent flat tire
repair. Have the tire inspected and repaired
(Continued)
WARNING!(Continued)
or replaced after using Tire Service Kit. Do
not exceed 55 mph (90 km/h) until the tire is
repaired or replaced. Failure to follow this
warning can result in injuries that are serious
or fatal to you, your passengers, and others
around you.
(E) After Driving:
Pull over to a safe location. Refer to “Whenever
You Stop to Use Tire Service Kit” before con-
tinuing.
1. Push in the Mode Select Knob (5) and turn to
the Air Mode position.
2. Uncoil the power plug and insert the plug
into the vehicle’s 12 Volt power outlet.
3. Uncoil the Air Pump Hose (7) (black in color)
and screw the fitting at the end of hose (7)
onto the valve stem.
4. Check the pressure in the tire by reading the
Pressure Gauge (3).
239