Page 204 of 580

3. Push and hold the power liftgate closeswitch
located on the liftgate for
more than 3 seconds or until two beeps
are heard.
The liftgate will open to the selected position
setting. To change the position of the liftgate,
repeat steps 1-3.
OPENING THE FUEL-FILLER
DOOR
The fuel-filler door automatically unlocks
when the driver’s door is unlocked.
1. Unlock the fuel-filler door using one of the following operations:
∙ Unlock the driver’s door with the Intel- ligent Key.
∙ Push the power door lock switch to the unlock position.
∙ Touch the one touch unlock sensor (driver’s or front passenger’s) while
carrying the Intelligent Key with you. For additional information, refer to
“Locking all doors and fuel-filler door”
in this section.
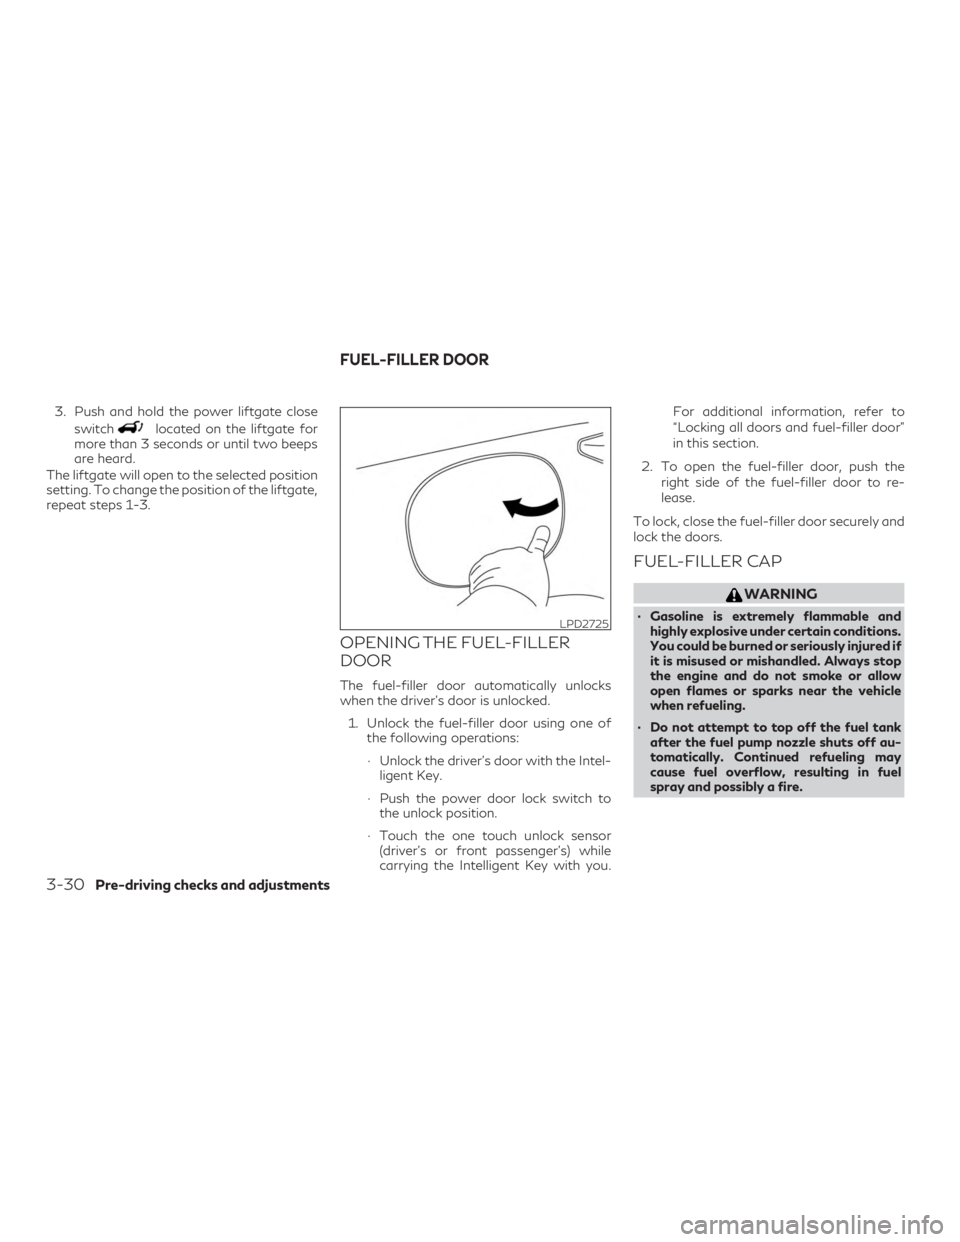
2. To open the fuel-filler door, push the right side of the fuel-filler door to re-
lease.
To lock, close the fuel-filler door securely and
lock the doors.
FUEL-FILLER CAP
WARNING
∙ Gasoline is extremely flammable and highly explosive under certain conditions.
You could be burned or seriously injured if
it is misused or mishandled. Always stop
the engine and do not smoke or allow
open flames or sparks near the vehicle
when refueling.
∙ Do not attempt to top off the fuel tank after the fuel pump nozzle shuts off au-
tomatically. Continued refueling may
cause fuel overflow, resulting in fuel
spray and possibly a fire.LPD2725
FUEL-FILLER DOOR
3-30Pre-driving checks and adjustments
Page 206 of 580

To remove the fuel-filler cap:1. Turn the fuel-filler cap counterclockwise to remove.
2. Put the fuel-filler cap on the cap holder
�Awhile refueling.
To install the fuel-filler cap: 1. Insert the fuel-filler cap straight into the fuel-filler tube.
2. Turn the fuel-filler cap clockwise until a single click is heard.
Loose Fuel Cap warning
The Loose Fuel Cap warning will appear in
the vehicle information display when the
fuel-filler cap is not tightened correctly after
the vehicle has been refueled. It may take a
few driving trips for the message to be dis-
played. To turn off the warning, perform the
following:
1. Remove and install the fuel-filler cap as soon as possible. For additional informa-
tion, refer to “Fuel-filler cap” in this sec-
tion.
2. Tighten the fuel-filler cap until it a single click is heard. 3. Press the
button on the steering
wheel for about 1 second to turn off the
Loose Fuel Cap warning message in the
vehicle information display.
LPD2726LPD2985
3-32Pre-driving checks and adjustments
Page 207 of 580

MANUAL OPERATION (if so
equipped)
Tilt and telescopic operation
Pull the lock lever�1down:
∙ Adjust the steering wheel up or down in direction
�2to the desired position.
∙ Adjust the steering wheel forward or backward in direction
�3to the desired
position.
Push the lock lever
�1up firmly to lock the
steering wheel in place.
AUTOMATIC OPERATION (if so
equipped)
Tilt and telescopic operation
To adjust the steering wheel move the switch
�1in the following directions:
∙ Adjust the steering wheel up or down in direction
�2to the desired tilt position. ∙ Adjust the steering wheel forward or
backward in direction
�3to the desired
telescopic position.
Entry/Exit function (if so equipped)
The automatic drive positioner system will
make the steering wheel move up automati-
cally when the driver’s door is opened and the
ignition switch is in the LOCK position. This
lets the driver get into and out of the seat
more easily. The steering wheel moves back
into position when the driver’s door is closed
and the ignition switch is pushed.
For additional information, refer to “Auto-
matic drive positioner” in this section.
LPD2728LPD2752
STEERING WHEEL
Pre-driving checks and adjustments3-33
Page 208 of 580
1. To block glare from the front, swingdown the sun visor
�1.
2. To block glare from the side, remove the sun visor from the center mount and
swing the visor to the side
�2.
3. Slide the extension
�3sun visor in or out
as needed.
CAUTION
∙ Do not store the sun visor before return- ing the extension to its original position.
∙ Do not pull the extension sun visor forc- ibly downward.
VANITY MIRRORS
To access the vanity mirror, pull the sun visor
down and flip open the mirror cover. The
vanity mirror will illuminate when the mirror
cover is open.
WPD0344
Driver’s and passenger’s side
LPD2583
SUN VISORS
3-34Pre-driving checks and adjustments
Page 214 of 580

To use the memory function, set the climate,
navigation and audio systems to the driver’s
preferred settings. Lock the doors with the
Intelligent Key. Each Intelligent Key may be
set with the driver’s individual preferences.
When a new Intelligent Key is used, “Connec-
tion with the key has been done” will be dis-
played on the vehicle information display and
the memorized settings are available.
To engage the memorized settings, perform
the following:1. Carry the Intelligent Key that is linked to the memorized settings.
2. Unlock the doors by pushing the driver’s door handle request switch or the
button on the Intelligent Key.
3. Place the ignition switch in the ON posi- tion. The settings linked to the Intelligent
Key will start.
For additional information on using the cli-
mate control system, refer to “Heater and air
conditioner (automatic)” in the “Monitor, cli-
mate, audio, phone and voice recognition
systems” section of this manual. For additional information, refer to the
“Monitor, climate, audio, phone and voice
recognition systems” section of this manual
or the separate INFINITI InTouch™ Owner’s
Manual.
SYSTEM OPERATION
The automatic drive positioner system will
not work or will stop operating under the
following conditions:
∙ When the vehicle speed is above 4 mph (7 km/h).
∙ When any of the memory switches are pushed while the automatic drive posi-
tioner is operating.
∙ When the switch for the driver’s seat and steering column is pushed while the au-
tomatic drive positioner is operating.
∙ When the seat has already been moved to the memorized position.
∙ When no seat position is stored in the memory switch.
∙ When the shift lever is moved from P (Park) to any other position.
3-40Pre-driving checks and adjustments
Page 223 of 580

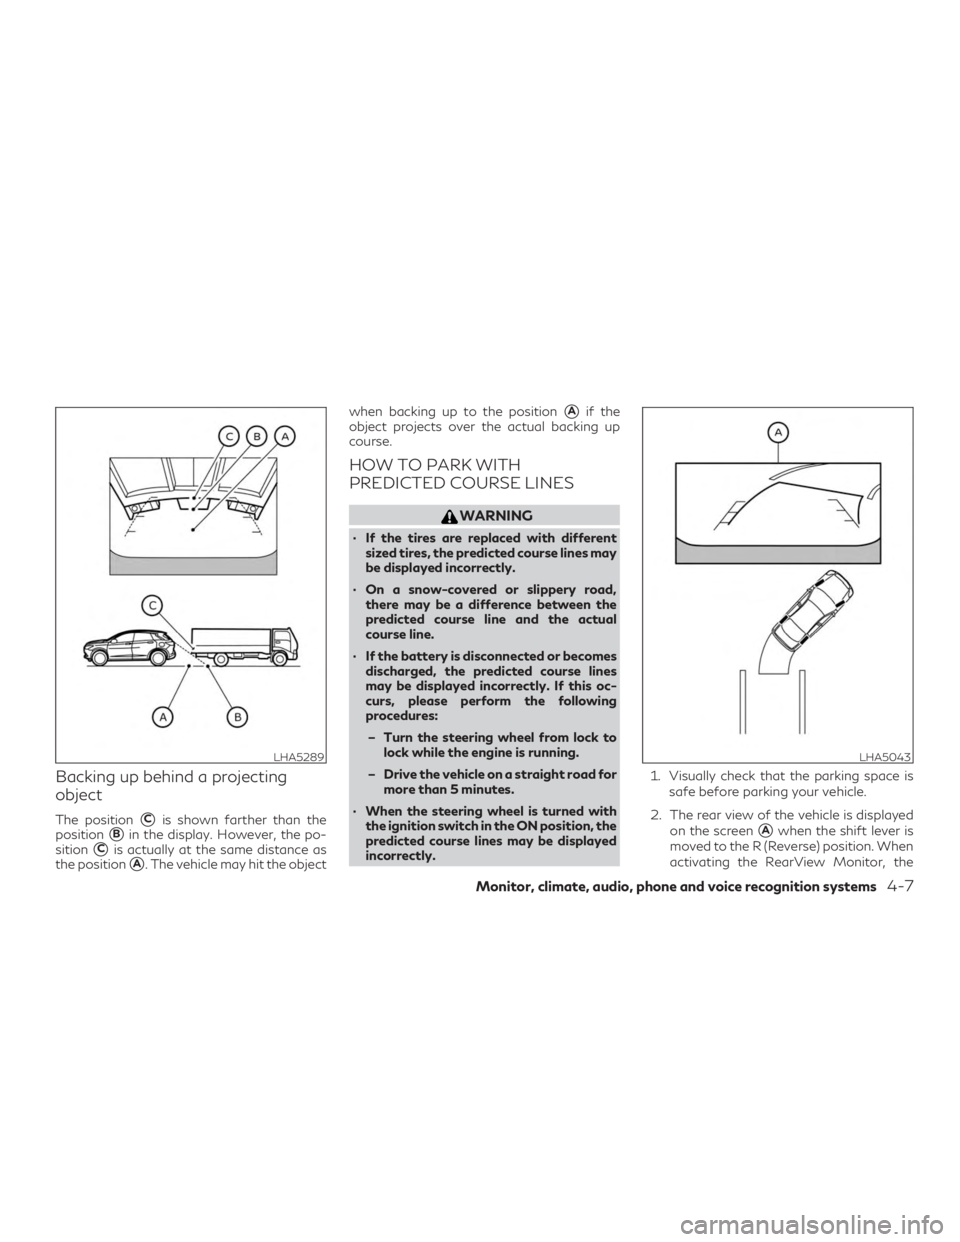
Backing up behind a projecting
object
The position�Cis shown farther than the
position
�Bin the display. However, the po-
sition
�Cis actually at the same distance as
the position
�A. The vehicle may hit the object when backing up to the position
�Aif the
object projects over the actual backing up
course.
HOW TO PARK WITH
PREDICTED COURSE LINES
WARNING
∙ If the tires are replaced with different sized tires, the predicted course lines may
be displayed incorrectly.
∙ On a snow-covered or slippery road, there may be a difference between the
predicted course line and the actual
course line.
∙ If the battery is disconnected or becomes discharged, the predicted course lines
may be displayed incorrectly. If this oc-
curs, please perform the following
procedures:
– Turn the steering wheel from lock to lock while the engine is running.
– Drive the vehicle on a straight road for more than 5 minutes.
∙ When the steering wheel is turned with the ignition switch in the ON position, the
predicted course lines may be displayed
incorrectly. 1. Visually check that the parking space is
safe before parking your vehicle.
2. The rear view of the vehicle is displayed on the screen
�Awhen the shift lever is
moved to the R (Reverse) position. When
activating the RearView Monitor, the
LHA5289LHA5043
Monitor, climate, audio, phone and voice recognition systems4-7
Page 234 of 580

Backing up near a projecting object
The predicted course lines�Ado not touch
the object in the display. However, the vehicle
may hit the object if it projects over the actual
backing up course.
Backing up behind a projecting
object
The position�Cis shown farther than the
position
�Bin the display. However, the po-
sition
�Cis actually at the same distance as
the position
�A. The vehicle may hit the object when backing up to the position
�Aif the
object projects over the actual backing up
course.
HOW TO PARK WITH
PREDICTED COURSE LINES
WARNING
∙ If the tires are replaced with different sized tires, the predicted course lines may
be displayed incorrectly.
∙ On a snow-covered or slippery road, there may be a difference between the
predicted course line and the actual
course line.
∙ If the battery is disconnected or becomes discharged, the predicted course lines
may be displayed incorrectly. If this oc-
curs, please perform the following
procedures:
– Turn the steering wheel from lock to lock while the engine is running.
– Drive the vehicle on a straight road for more than 5 minutes.
∙ When the steering wheel is turned with the ignition switch in the ON position, the
predicted course lines may be displayed
incorrectly.
LHA4995LHA5289
4-18Monitor, climate, audio, phone and voice recognition systems
Page 249 of 580

– When there is dirt, water drops orsnow on the camera lens.
– When the position of the moving ob- jects in the display is not changed.
∙ The MOD system might detect flowing water droplets on the camera lens, white
smoke from the muffler, moving shad-
ows, etc.
∙ The MOD system may not function prop- erly depending on the speed, direction,
distance or shape of the moving objects.
∙ If your vehicle sustains damage to the parts where the camera is installed, leav-
ing it misaligned or bent, the sensing zone
may be altered and the MOD system may
not detect objects properly.
∙ When the temperature is extremely high or low, the screen may not display objects
clearly. This is not a malfunction. NOTE:
The blue or green MOD icon will change to
orange if one of the following has occurred:
∙ When the system is malfunctioning.
∙ When the component temperature reaches a high level (icon will blink).
∙ When the Rear View camera has de- tected a blockage (icon will blink).
If the icon light continues to illuminate or-
ange, have the MOD system checked. It is
recommended that you visit an INFINITI re-
tailer for this service.
SYSTEM MAINTENANCE
CAUTION
∙ Do not use alcohol, benzine or thinner to clean the camera. This will cause
discoloration.
∙ Do not damage the camera as the moni- tor screen may be adversely affected.
If dirt, rain or snow accumulates on any of the
cameras
�1, the MOD system may not oper-
ate properly. Clean the camera by wiping
with a cloth dampened with a diluted mild
cleaning agent and then wiping with a dry
cloth.
LHA4554
Monitor, climate, audio, phone and voice recognition systems4-33