Page 120 of 546

3-29
Convenient features of your vehicle
3
Erasing programmed HomeLink but-
tons
To erase the three programmed but-
tons (individual buttons cannot be
erased):
Press and hold the left and center
buttons simultaneously, until the
indicator light begins to flash
(approximately 20 seconds).
Release both buttons. Do not hold
for longer than 30 seconds.
HomeLink is now in the train (or
learning) mode and can be pro-
grammed at any time.
Gate operator & Canadian program-
ming
During programming, your handheld
transmitter may automatically stop
transmitting. Continue to press the
Integrated HomeLink
®Wireless
Control System button (note steps 2
through 3 in the Programming por-
tion of this document) while you
press and re-press ("cycle") your
handheld transmitter every two sec-
onds until the frequency signal has
been learned. The indicator light will
flash slowly and then rapidly after
several seconds upon successful
training.
FCC ID: NZLZTVHL3
IC: 4112A-ZTVHL3
Information
This device complies with Part 15 of
the FCC Rules.
Operation is subject to the following
three conditions:
1. This device may not cause harmful
interference.
2. This device must accept any inter-
ference received, including interfer-
ence that may cause undesired
operation.
3. The transceiver has been tested and
complies with FCC and Industry
Canada rules. Changes or modifica-
tions not expressly approved by the
party responsible for compliance
could void the user's authority to
operate the device.
i
OHD046306N Flashing
Page 122 of 546

3-31
Convenient features of your vehicle
3
Your mirror will automatically dim
upon detecting glare from the vehi-
cles traveling behind you. The auto-
dimming function can be controlled
by pressing the Dimming ON/OFF
button:
1. Pressing and holding the button
for 3 seconds turns the auto-dim-
ming function OFF which is indi-
cated by the green Status
Indicator LED turning off.
2. Pressing and holding the button
for 3 seconds again turns the auto-
dimming function ON which is indi-
cated by the green Status Indicator
LED turning on.
The mirror defaults to the ON posi-
tion each time the vehicle is started.Integrated HomeLink®Wireless
Control System
The HomeLink®Wireless Control
System can replace up to three
hand-held radio-frequency (RF)
transmitters with a single built-in
device. This innovative feature will
learn the radio frequency codes of
most current transmitters to operate
devices such as gate operators,
garage door openers, entry door
locks, security systems, even home
lighting. Both standard and rolling
code-equipped transmitters can be
programmed by following the out-
lined procedures.
Additional HomeLink
®information
can be found at: www.homelink.com
or by calling 1-800-355-3515.
Retain the original transmitter of the
RF device you are programming for
use in other vehicles as well as for
future HomeLink
®programming. It is
also suggested that upon the sale of
the vehicle, the programmed
HomeLink
®buttons be erased for
security purposes.
Before programming
HomeLink®to a garage door
opener or gate operator, make
sure people and objects are out
of the way of the device to pre-
vent potential harm or damage.
Do not use the HomeLink
®with
any garage door opener that
lacks the safety stop and
reverse features required by
U.S. federal safety standards
(this includes any garage door
opener model manufactured
before April 1, 1982). A garage
door that cannot detect an
object - signaling the door to
stop and reverse - does not
meet current U.S. federal safety
standards. Using a garage door
opener without these features
increases the risk of serious
injury or death.
WARNING
Page 124 of 546

3-33
Convenient features of your vehicle
3
Information
• Some garage door openers require
to press the programmed button on
the mirror up to three times right
after the programming is just com-
pleted to operate the garage door.
• The indicator (4) is turned ON in
Orange and flashes for about 60sec-
onds, during the programing mode
and if a programing is not succeed-
ed within the 60 seconds, the pro-
graming mode will be abort.
HomeLink
®should now activate your
rolling code equipped device.
Gate operator & Canadian program-
ming
During programming, your handheld
transmitter may automatically stop
transmitting. Continue to press the
Integrated HomeLink
®Wireless
Control System button while you
press and re-press ("cycle") your
handheld transmitter every two sec-
onds until the frequency signal has
been learned. The indicator light will
flash slowly and then rapidly after
several seconds upon successful
training.
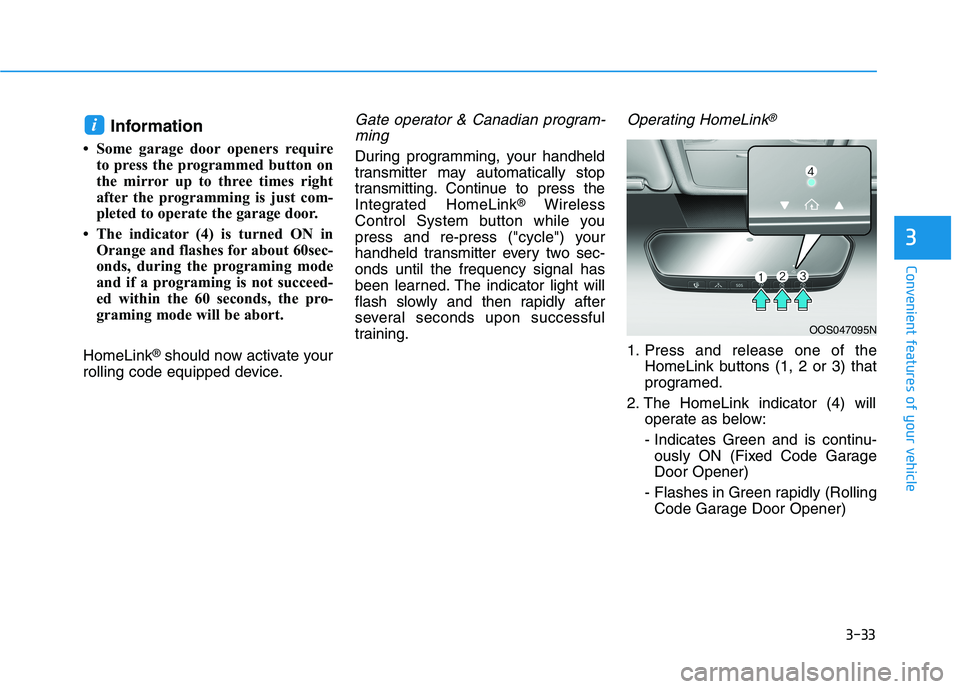
Operating HomeLink®
1. Press and release one of the
HomeLink buttons (1, 2 or 3) that
programed.
2. The HomeLink indicator (4) will
operate as below:
- Indicates Green and is continu-
ously ON (Fixed Code Garage
Door Opener)
- Flashes in Green rapidly (Rolling
Code Garage Door Opener)
i
OOS047095N
Page 148 of 546

3-57
Convenient features of your vehicle
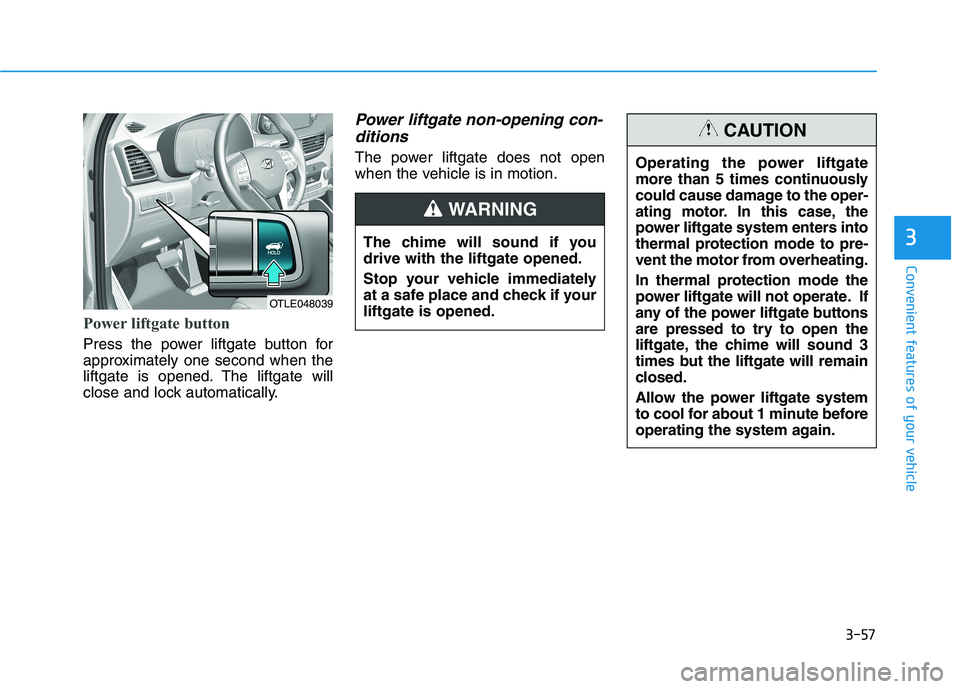
Power liftgate button
Press the power liftgate button for
approximately one second when the
liftgate is opened. The liftgate will
close and lock automatically.
Power liftgate non-opening con-
ditions
The power liftgate does not open
when the vehicle is in motion.
3
OTLE048039
The chime will sound if you
drive with the liftgate opened.
Stop your vehicle immediately
at a safe place and check if your
liftgate is opened.
WARNING
Operating the power liftgate
more than 5 times continuously
could cause damage to the oper-
ating motor. In this case, the
power liftgate system enters into
thermal protection mode to pre-
vent the motor from overheating.
In thermal protection mode the
power liftgate will not operate. If
any of the power liftgate buttons
are pressed to try to open the
liftgate, the chime will sound 3
times but the liftgate will remain
closed.
Allow the power liftgate system
to cool for about 1 minute before
operating the system again.
CAUTION
Page 162 of 546
3-71
Convenient features of your vehicle
3
Information
If the icy road warning light appears
while driving, you should drive more
attentively and safely refraining from
over-speeding, rapid acceleration,
sudden braking or sharp turning, etc.
Automatic transmission shift
indicator (If equipped)
This indicator displays which auto-
matic transmission shift lever is
selected.
Reverse : R
Neutral : N
Manual Shift Mode
- 1, 2, 3, 4, 5, 6
Shift indicator pop-up (if equipped)
The pop-up displays the current gear
position selected for 2 seconds
(P/R/N/D).
i
OTL045132/OTL045133
■Type A■Type B
OTL045134/OTL045135
■Type A■Type B
Page 175 of 546

3-84
Convenient features of your vehicle
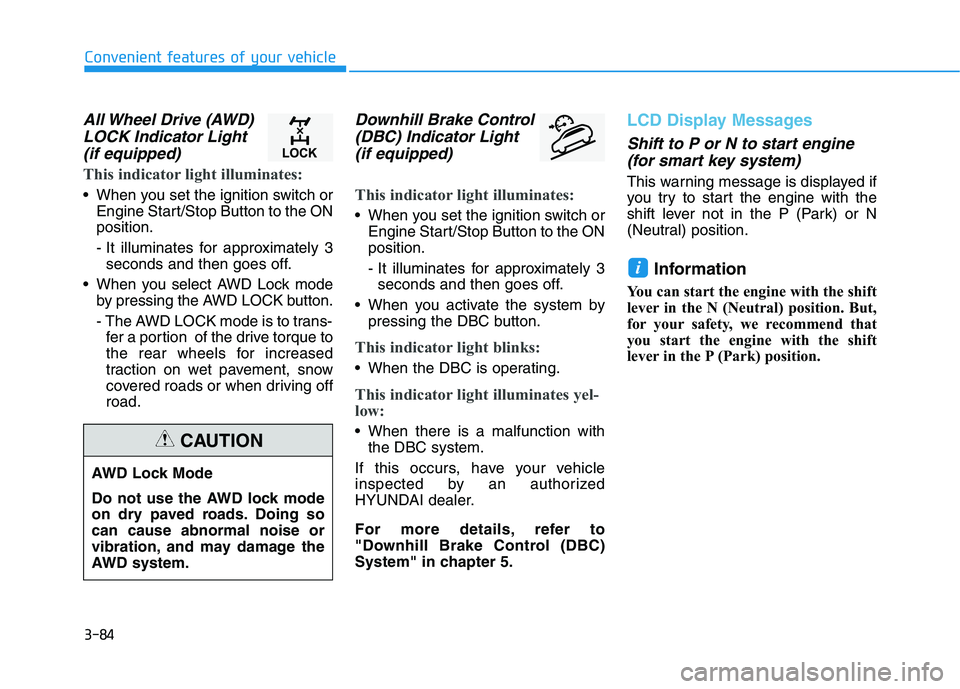
All Wheel Drive (AWD)
LOCK Indicator Light
(if equipped)
This indicator light illuminates:
When you set the ignition switch or
Engine Start/Stop Button to the ON
position.
- It illuminates for approximately 3
seconds and then goes off.
When you select AWD Lock mode
by pressing the AWD LOCK button.
- The AWD LOCK mode is to trans-
fer a portion of the drive torque to
the rear wheels for increased
traction on wet pavement, snow
covered roads or when driving off
road.
Downhill Brake Control
(DBC) Indicator Light
(if equipped)
This indicator light illuminates:
When you set the ignition switch or
Engine Start/Stop Button to the ON
position.
- It illuminates for approximately 3
seconds and then goes off.
When you activate the system by
pressing the DBC button.
This indicator light blinks:
When the DBC is operating.
This indicator light illuminates yel-
low:
When there is a malfunction with
the DBC system.
If this occurs, have your vehicle
inspected by an authorized
HYUNDAI dealer.
For more details, refer to
"Downhill Brake Control (DBC)
System" in chapter 5.
LCD Display Messages
Shift to P or N to start engine
(for smart key system)
This warning message is displayed if
you try to start the engine with the
shift lever not in the P (Park) or N
(Neutral) position.
Information
You can start the engine with the shift
lever in the N (Neutral) position. But,
for your safety, we recommend that
you start the engine with the shift
lever in the P (Park) position.
i
AWD Lock Mode
Do not use the AWD lock mode
on dry paved roads. Doing so
can cause abnormal noise or
vibration, and may damage the
AWD system.
CAUTION
Page 178 of 546

3-87
Convenient features of your vehicle
3
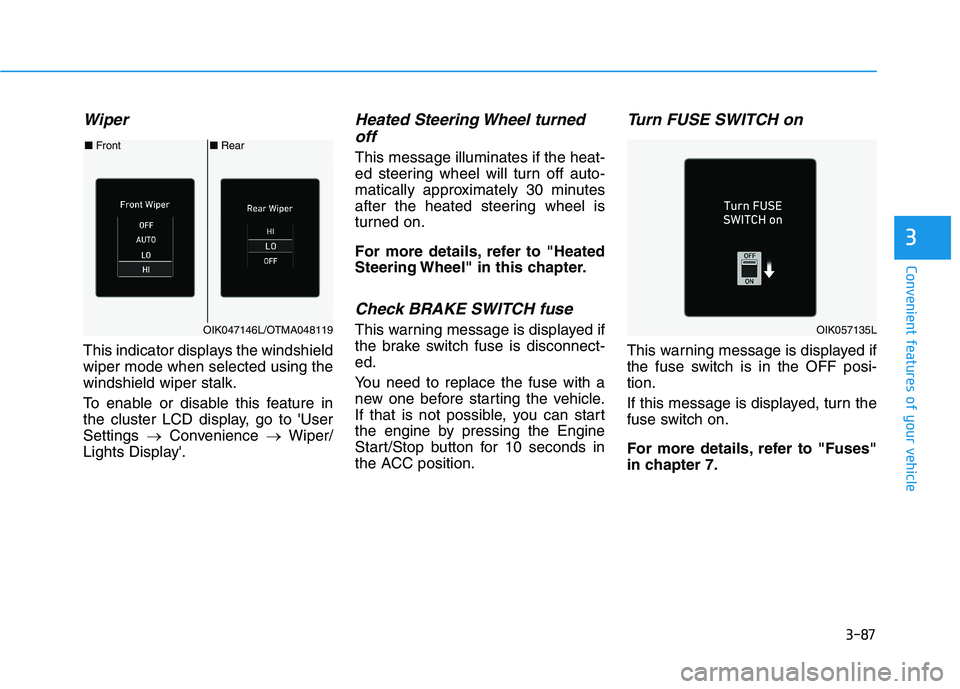
Wiper
This indicator displays the windshield
wiper mode when selected using the
windshield wiper stalk.
To enable or disable this feature in
the cluster LCD display, go to 'User
Settings →Convenience →Wiper/
Lights Display'.
Heated Steering Wheel turned
off
This message illuminates if the heat-
ed steering wheel will turn off auto-
matically approximately 30 minutes
after the heated steering wheel is
turned on.
For more details, refer to "Heated
Steering Wheel" in this chapter.
Check BRAKE SWITCH fuse
This warning message is displayed if
the brake switch fuse is disconnect-
ed.
You need to replace the fuse with a
new one before starting the vehicle.
If that is not possible, you can start
the engine by pressing the Engine
Start/Stop button for 10 seconds in
the ACC position.
Turn FUSE SWITCH on
This warning message is displayed if
the fuse switch is in the OFF posi-
tion.
If this message is displayed, turn the
fuse switch on.
For more details, refer to "Fuses"
in chapter 7.
■Rear ■Front
OIK047146L/OTMA048119OIK057135L
Page 179 of 546

3-88
Convenient features of your vehicle
Low Pressure
This warning message is displayed if
the tire pressure is low. The corre-
sponding tire on the vehicle will be
illuminated.
For more details, refer to "Tire
Pressure Monitoring System
(TPMS)" in chapter 6.
Low washer fluid
This warning message is displayed
on the service reminder mode if the
washer fluid level in the reservoir is
nearly empty.
If this warning message is displayed,
have the washer fluid reservoir
refilled.
Low fuel
This warning message is displayed if
the fuel tank is almost out of fuel.
When this message is displayed, the
vehicle range is approximately 30
miles (50 km).
When this message is displayed, the
low fuel level warning light in the
cluster will come on.
It is recommended to look for the
nearest fueling station and refuel as
soon as possible.
Add fuel as soon as possible.
Engine overheated
This warning message is displayed
with a warning chime when the
engine coolant temperature is above
248°F (120°C). This means that the
engine is overheated and may be
damaged.
If your vehicle is overheated, refer
to "Overheating" in chapter 6.
OTLE048608