2020 HYUNDAI TUCSON ULTIMATE light
[x] Cancel search: lightPage 250 of 546
3-159
Convenient features of your vehicle
3
I IN
NT
TE
ER
RI
IO
OR
R
F
FE
EA
AT
TU
UR
RE
ES
S
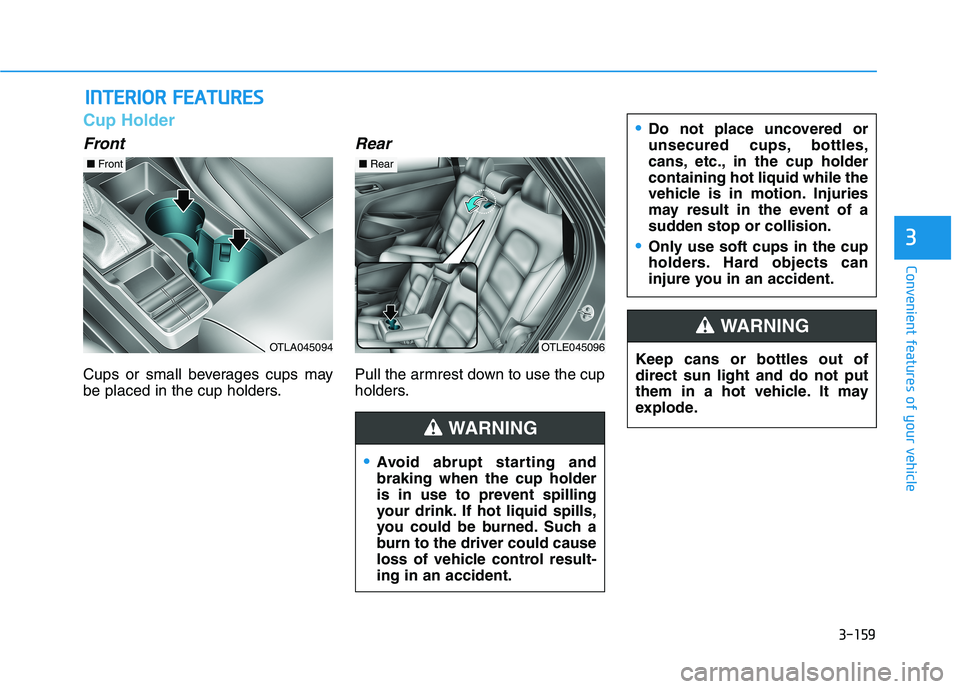
Cup Holder
Front
Cups or small beverages cups may
be placed in the cup holders.
Rear
Pull the armrest down to use the cup
holders.
Avoid abrupt starting and
braking when the cup holder
is in use to prevent spilling
your drink. If hot liquid spills,
you could be burned. Such a
burn to the driver could cause
loss of vehicle control result-
ing in an accident.
Do not place uncovered or
unsecured cups, bottles,
cans, etc., in the cup holder
containing hot liquid while the
vehicle is in motion. Injuries
may result in the event of a
sudden stop or collision.
Only use soft cups in the cup
holders. Hard objects can
injure you in an accident.
WARNING
Keep cans or bottles out of
direct sun light and do not put
them in a hot vehicle. It may
explode.
WARNING
OTLA045094
■Front
OTLE045096
■Rear
Page 253 of 546

3-162
Convenient features of your vehicle
USB Charger (if equipped)
The USB charging port is designed
to recharge small electronic devices
using a USB charging cable.
The USB charging port is powered
only when the ignition switch is ON.
Disconnect the USB cable from the
USB port after use. A smart phone or a tablet PC may
get warm during the re-charging
process. It does not indicate any
malfunction with the charging sys-
tem.
A smart phone or a tablet PC,
which adopts a different re-charg-
ing method, may not be properly
re-charged. In this case, use an
exclusive charger of your device.
The charging terminal is only to
recharge a device. Do not use the
charging terminal either to turn ON
an audio or to play media.
Wireless Cellular Phone
Charging System (if equipped)
[A]: Indicator light, [B]: Charging pad
On certain models, the vehicle
comes equipped with a wireless cel-
lular phone charger.
The system is available when all
doors are closed, and when the igni-
tion switch is ON.
OTLE048618
OTLE048619
■Rear
Page 254 of 546
3-163
Convenient features of your vehicle
3
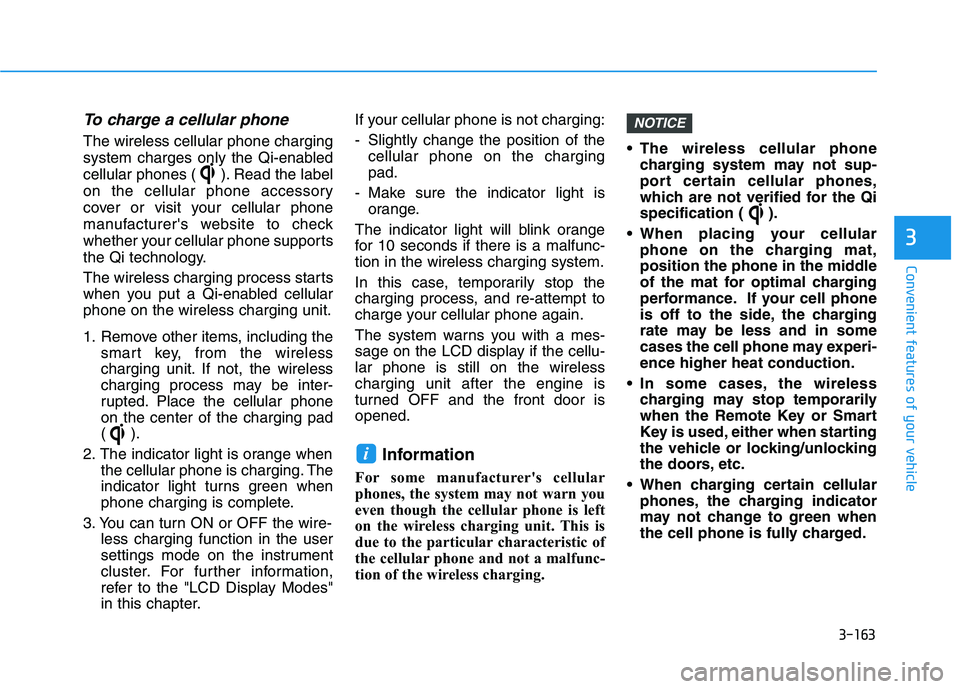
To charge a cellular phone
The wireless cellular phone charging
system charges only the Qi-enabled
cellular phones ( ). Read the label
on the cellular phone accessory
cover or visit your cellular phone
manufacturer's website to check
whether your cellular phone supports
the Qi technology.
The wireless charging process starts
when you put a Qi-enabled cellular
phone on the wireless charging unit.
1. Remove other items, including the
smart key, from the wireless
charging unit. If not, the wireless
charging process may be inter-
rupted. Place the cellular phone
on the center of the charging pad
().
2. The indicator light is orange when
the cellular phone is charging. The
indicator light turns green when
phone charging is complete.
3. You can turn ON or OFF the wire-
less charging function in the user
settings mode on the instrument
cluster. For further information,
refer to the "LCD Display Modes"
in this chapter.If your cellular phone is not charging:
- Slightly change the position of the
cellular phone on the charging
pad.
- Make sure the indicator light is
orange.
The indicator light will blink orange
for 10 seconds if there is a malfunc-
tion in the wireless charging system.
In this case, temporarily stop the
charging process, and re-attempt to
charge your cellular phone again.
The system warns you with a mes-
sage on the LCD display if the cellu-
lar phone is still on the wireless
charging unit after the engine is
turned OFF and the front door is
opened.
Information
For some manufacturer's cellular
phones, the system may not warn you
even though the cellular phone is left
on the wireless charging unit. This is
due to the particular characteristic of
the cellular phone and not a malfunc-
tion of the wireless charging. The wireless cellular phone
charging system may not sup-
port certain cellular phones,
which are not verified for the Qi
specification ( ).
When placing your cellular
phone on the charging mat,
position the phone in the middle
of the mat for optimal charging
performance. If your cell phone
is off to the side, the charging
rate may be less and in some
cases the cell phone may experi-
ence higher heat conduction.
In some cases, the wireless
charging may stop temporarily
when the Remote Key or Smart
Key is used, either when starting
the vehicle or locking/unlocking
the doors, etc.
When charging certain cellular
phones, the charging indicator
may not change to green when
the cell phone is fully charged.
NOTICE
i
Page 268 of 546

5
Lane Keeping Assist (LKA) System ...................5-87
LKA System Operation...................................................5-89
Warning Light and Message.........................................5-91
Limitations of the System .............................................5-93
LKA System Function Change......................................5-95
Driver Attention Warning (DAW) System .........5-96
System Setting and Activation.....................................5-96
Resetting the System .....................................................5-97
System Standby ...............................................................5-98
System Malfunction .......................................................5-98
Cruise Control .....................................................5-100
Cruise Control operation .............................................5-100
Smart Cruise Control With Stop &
Go System ...........................................................5-105
Smart Cruise Control Switch ......................................5-105
Smart Cruise Control Speed .......................................5-106
Smart Cruise Control Vehicle-to-Vehicle
Distance ...........................................................................5-110
Smart Cruise Control Radar Sensor .........................5-114
To Adjust the Sensitivity of
Smart Cruise Control ....................................................5-115
Conventional Cruise Control Mode ...........................5-116
Limitations of the System...........................................5-117
Special Driving Conditions ................................5-122
Hazardous driving conditions ....................................5-122
Rocking the vehicle ......................................................5-122
Smooth cornering .........................................................5-123
Driving at night ..............................................................5-123
Driving in the rain .........................................................5-123
Driving in flooded areas..............................................5-124
Highway driving .............................................................5-124
Reducing the risk of a rollover .................................5-125
Winter Driving ....................................................5-126
Snow or Icy Conditions................................................5-126
Winter Precautions .......................................................5-128
Trailer Towing .....................................................5-130
If you decide to pull a trailer .....................................5-130
Trailer towing equipment ............................................5-132
Driving with a trailer ....................................................5-133
Maintenance when trailer towing.............................5-136
Vehicle Load Limit..............................................5-138
Tire Loading Information Label .................................5-139
Page 270 of 546

5-4
Driving your vehicle
Before Entering the Vehicle
• Be sure all windows, outside mir-
ror(s), and outside lights are clean
and unobstructed.
Remove frost, snow, or ice.
Visually check the tires for uneven
wear and damage.
Check under the vehicle for any
sign of leaks.
Be sure there are no obstacles
behind you if you intend to back up.
Before Starting
Make sure the hood, the liftgate,
and the doors are securely closed
and locked.
Adjust the position of the seat and
steering wheel.
Adjust the inside and outside
rearview mirrors.
Verify all the lights work.
Fasten your seatbelt. Check that all
passengers have fastened their
seatbelts.
Check the gauges and indicators in
the instrument panel and the mes-
sages on the instrument display
when the ignition switch is in the
ON position.
Check that any items you are car-
rying are stored properly or fas-
tened down securely. CALIFORNIA PROPOSITION 65
WARNING
Engine exhaust and a wide vari-
ety of automobile components
including components found in
the interior furnishings in a
vehicle, contain or emit harmful
chemicals known to the State of
California to cause cancer and
birth defects and reproductive
harm. In addition, certain fluids
contained in vehicles and cer-
tain products of components
contain or emit chemicals
known to the State of California
to cause cancer and birth
defects or other reproductive
harm.WARNING
B BE
EF
FO
OR
RE
E
D
DR
RI
IV
VI
IN
NG
G
Page 272 of 546
5-6
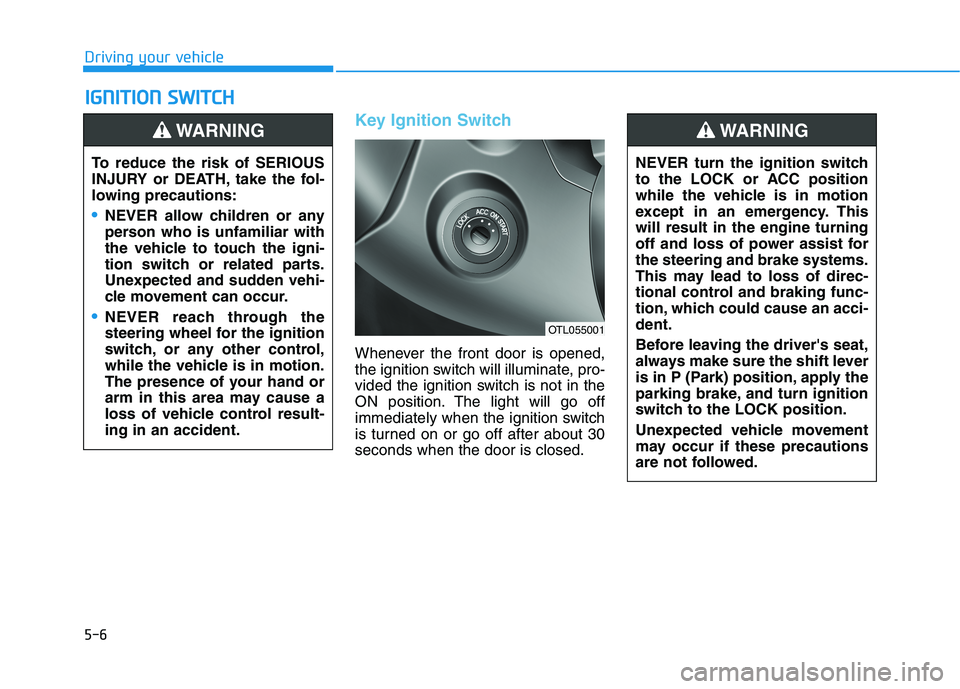
Key Ignition Switch
Whenever the front door is opened,
the ignition switch will illuminate, pro-
vided the ignition switch is not in the
ON position. The light will go off
immediately when the ignition switch
is turned on or go off after about 30
seconds when the door is closed.
I IG
GN
NI
IT
TI
IO
ON
N
S
SW
WI
IT
TC
CH
H
Driving your vehicle
To reduce the risk of SERIOUS
INJURY or DEATH, take the fol-
lowing precautions:
NEVER allow children or any
person who is unfamiliar with
the vehicle to touch the igni-
tion switch or related parts.
Unexpected and sudden vehi-
cle movement can occur.
NEVER reach through the
steering wheel for the ignition
switch, or any other control,
while the vehicle is in motion.
The presence of your hand or
arm in this area may cause a
loss of vehicle control result-
ing in an accident.
WARNING
NEVER turn the ignition switch
to the LOCK or ACC position
while the vehicle is in motion
except in an emergency. This
will result in the engine turning
off and loss of power assist for
the steering and brake systems.
This may lead to loss of direc-
tional control and braking func-
tion, which could cause an acci-
dent.
Before leaving the driver's seat,
always make sure the shift lever
is in P (Park) position, apply the
parking brake, and turn ignition
switch to the LOCK position.
Unexpected vehicle movement
may occur if these precautions
are not followed.
WARNING
OTL055001
Page 273 of 546
5-7
Driving your vehicle
5
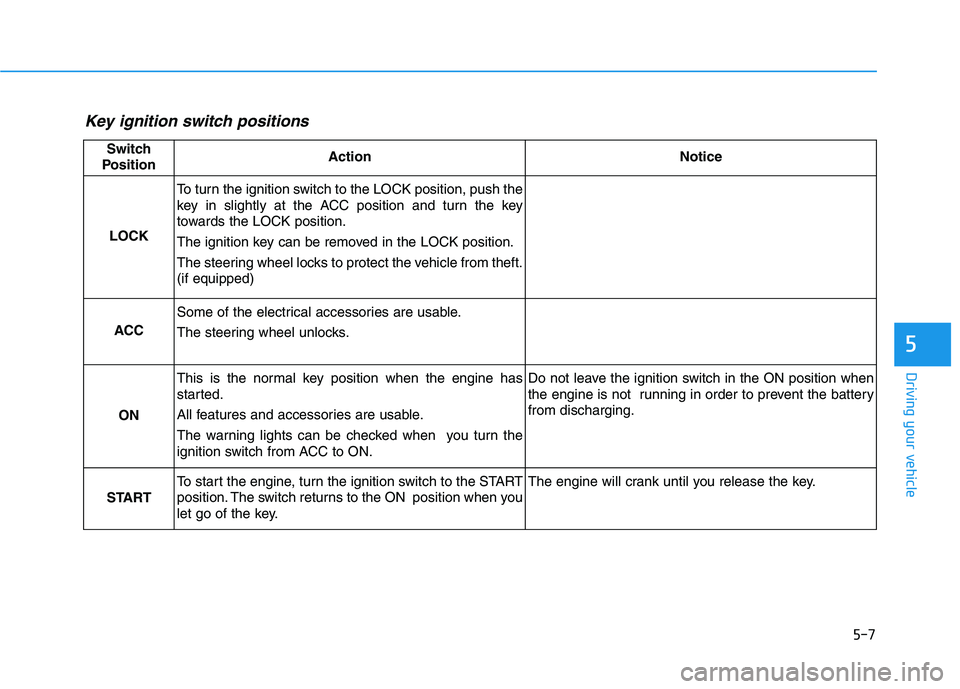
Key ignition switch positions
Switch
PositionActionNotice
LOCK
To turn the ignition switch to the LOCK position, push the
key in slightly at the ACC position and turn the key
towards the LOCK position.
The ignition key can be removed in the LOCK position.
The steering wheel locks to protect the vehicle from theft.
(if equipped)
ACC
Some of the electrical accessories are usable.
The steering wheel unlocks.
ON
This is the normal key position when the engine has
started.
All features and accessories are usable.
The warning lights can be checked when you turn the
ignition switch from ACC to ON.Do not leave the ignition switch in the ON position when
the engine is not running in order to prevent the battery
from discharging.
START
To start the engine, turn the ignition switch to the START
position. The switch returns to the ON position when you
let go of the key.The engine will crank until you release the key.
Page 277 of 546
5-11
Driving your vehicle
5
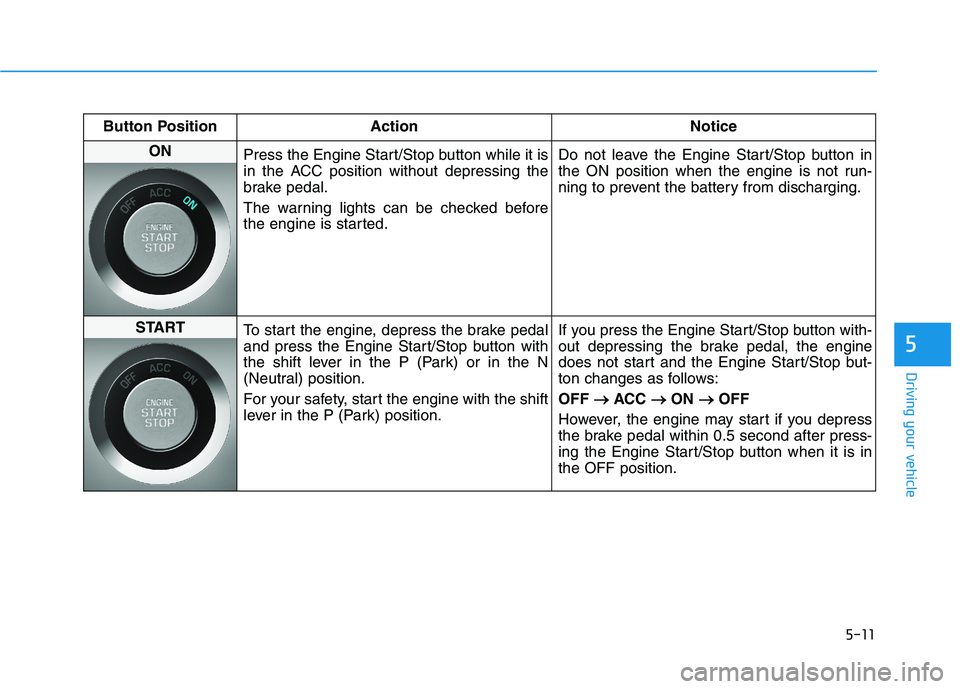
Button Position Action Notice
ON
Press the Engine Start/Stop button while it is
in the ACC position without depressing the
brake pedal.
The warning lights can be checked before
the engine is started.Do not leave the Engine Start/Stop button in
the ON position when the engine is not run-
ning to prevent the battery from discharging.
START
To start the engine, depress the brake pedal
and press the Engine Start/Stop button with
the shift lever in the P (Park) or in the N
(Neutral) position.
For your safety, start the engine with the shift
lever in the P (Park) position.If you press the Engine Start/Stop button with-
out depressing the brake pedal, the engine
does not start and the Engine Start/Stop but-
ton changes as follows:
OFF → →
ACC → →
ON → →
OFF
However, the engine may start if you depress
the brake pedal within 0.5 second after press-
ing the Engine Start/Stop button when it is in
the OFF position.