2020 Hyundai Tucson instrument panel
[x] Cancel search: instrument panelPage 14 of 637
Your vehicle at a glance
1
Your vehicle at a glance
1Exterior overview (I) .............................................1-2
Exterior overview (II) ............................................1-3
Interior overview ....................................................1-4
Instrument panel overview ...................................1-5
Engine compartment .............................................1-6
Page 17 of 637
1-4
Your vehicle at a glance
I IN
NT
TE
ER
RI
IO
OR
R
O
OV
VE
ER
RV
VI
IE
EW
W
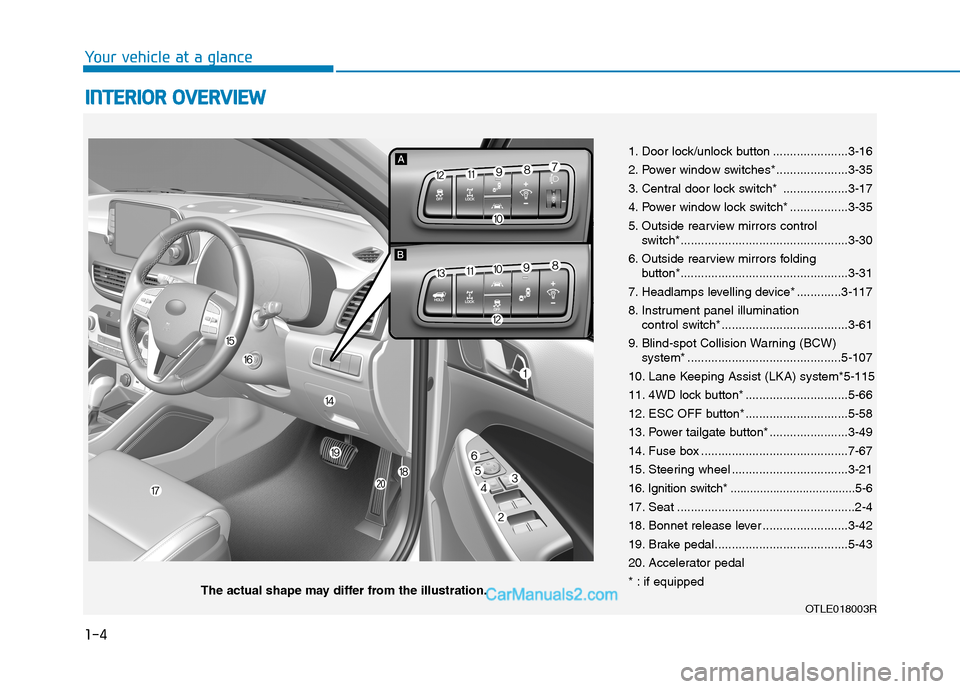
1. Door lock/unlock button ......................3-16
2. Power window switches*.....................3-35
3. Central door lock switch* ...................3-17
4. Power window lock switch* .................3-35
5. Outside rearview mirrors control
switch*.................................................3-30
6. Outside rearview mirrors folding
button*.................................................3-31
7. Headlamps levelling device* .............3-117
8. Instrument panel illumination
control switch*.....................................3-61
9. Blind-spot Collision Warning (BCW)
system* .............................................5-107
10. Lane Keeping Assist (LKA) system*5-115
11. 4WD lock button* ..............................5-66
12. ESC OFF button* ..............................5-58
13. Power tailgate button* .......................3-49
14. Fuse box ...........................................7-67
15. Steering wheel ..................................3-21
16. Ignition switch* ......................................5-6
17. Seat ....................................................2-4
18. Bonnet release lever .........................3-42
19. Brake pedal.......................................5-43
20. Accelerator pedal
* : if equipped
OTLE018003R
The actual shape may differ from the illustration.
Page 26 of 637
2-5
Safety system of your vehicle
2
Safety precautions
Adjusting the seats so that you are
sitting in a safe, comfortable position
plays an important role in driver and
passenger safety, together with seat
belts and air bags, if an accident
occurs.
Air bags
You can take steps to reduce the risk
of being injured by an inflating air
bag. Sitting too close to an air bag
greatly increases the risk of injury in
the event the air bag inflates. Move
your seat as far back as possible
from front air bags, whilst still main-
taining control of the vehicle.
Seat belts
Always fasten your seat belt before
starting any trip.
At all times, passengers should sit
upright and be properly restrained.
Infants and small children must be
restrained in appropriate Child
Restraint Systems. Children who
have outgrown a booster seat and
adults must be restrained using the
seat belts.
Do not use a cushion that
reduces friction between the
seat and the passenger. The
passenger's hips may slide
under the lap portion of the seat
belt during an accident or a
sudden stop. Serious or fatal
internal injuries could result
because the seat belt cannot
operate properly.
WARNING
To reduce the risk of serious
injury or death from an inflating
air bag, take the following pre-
cautions:
•Adjust the driver’s seat as far
to the rear as possible whilst
maintaining the ability to
maintain full control of the
vehicle.
Adjust the front passenger
seat as far to the rear as pos-
sible.
Hold the steering wheel by the
rim with hands at the 9 o’clock
and 3 o’clock positions to
minimise the risk of injuries to
your hands and arms.
NEVER place anything or any-
one between the air bag.
Do not allow the front passen-
ger to place feet or legs on the
instrument panel to minimise
the risk of leg injuries.
WARNING
Page 70 of 637
2-49
Safety system of your vehicle
2
Where are the air bags?
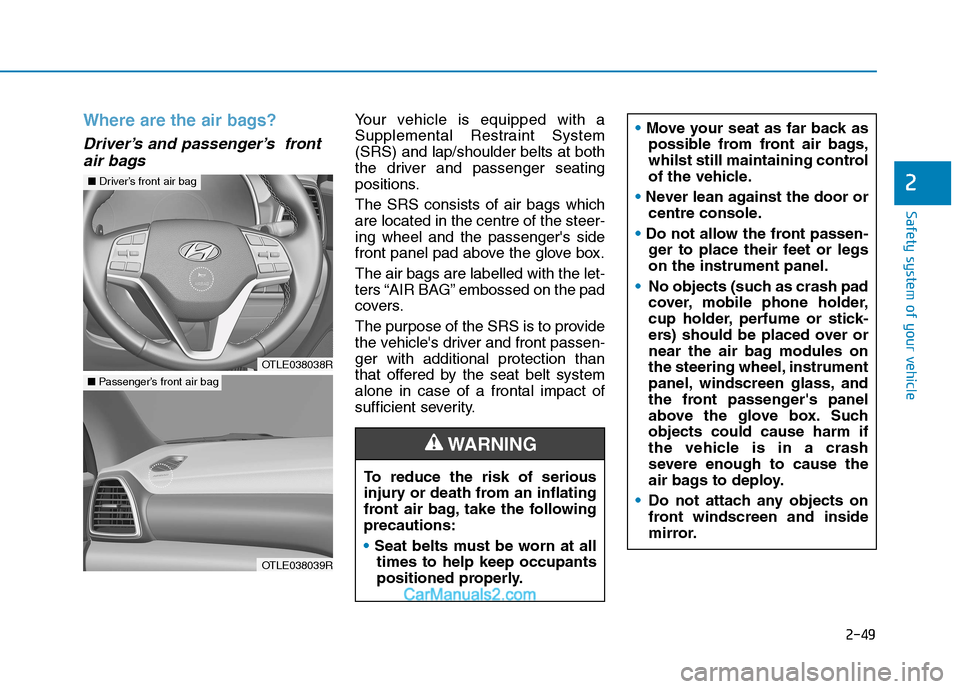
Driver’s and passenger’s front
air bags
Your vehicle is equipped with a
Supplemental Restraint System
(SRS) and lap/shoulder belts at both
the driver and passenger seating
positions.
The SRS consists of air bags which
are located in the centre of the steer-
ing wheel and the passenger's side
front panel pad above the glove box.
The air bags are labelled with the let-
ters “AIR BAG” embossed on the pad
covers.
The purpose of the SRS is to provide
the vehicle's driver and front passen-
ger with additional protection than
that offered by the seat belt system
alone in case of a frontal impact of
sufficient severity.
To reduce the risk of serious
injury or death from an inflating
front air bag, take the following
precautions:
Seat belts must be worn at all
times to help keep occupants
positioned properly.
WARNING
Move your seat as far back as
possible from front air bags,
whilst still maintaining control
of the vehicle.
Never lean against the door or
centre console.
Do not allow the front passen-
ger to place their feet or legs
on the instrument panel.
No objects (such as crash pad
cover, mobile phone holder,
cup holder, perfume or stick-
ers) should be placed over or
near the air bag modules on
the steering wheel, instrument
panel, windscreen glass, and
the front passenger's panel
above the glove box. Such
objects could cause harm if
the vehicle is in a crash
severe enough to cause the
air bags to deploy.
Do not attach any objects on
front windscreen and inside
mirror.
OTLE038038R
■Driver’s front air bag
OTLE038039R
■Passenger’s front air bag
Page 74 of 637
2-53
Safety system of your vehicle
2
SRS warning light
The SRS air bag warning light on the
instrument panel will illuminate for
about 6 seconds after the ignition
switch is turned to the ON position,
after which the air bag warning light
should go out.During a frontal collision, sensors will
detect the vehicle’s deceleration. If
the rate of deceleration is high
enough, the control unit will inflate
the front air bags, at the time and
with the force needed.
The front air bags help protect the
driver and front passenger by
responding to frontal impacts in
which seat belts alone cannot pro-
vide adequate restraint. When need-
ed, the side air bags help provide
protection in the event of a side
impact.
Air bags are activated (able to
inflate if necessary) only when the
ignition switch is in the ON posi-
tion.
Air bags inflate in the event of cer-
tain frontal or side collisions to help
protect the occupants from serious
physical injury.
There is no single speed at which
the air bags will inflate. Generally,
air bags are designed to inflate
based upon the severity of a colli-
sion and its direction. These two
factors determine whether the sen-
sors produce an electronic deploy-
ment/inflation signal. The light stays on after illumi-
nating for approximately six
seconds.
The light comes on whilst the
vehicle is in motion.
The light blinks when the
engine is running.
We recommend that an autho-
rised HYUNDAI dealer inspect
the SRS as soon as possible if
any of these conditions occur.
If your SRS malfunctions, the
air bag may not inflate properly
during an accident increasing
the risk of serious injury or
death.
If any of the following condi-
tions occur, your SRS is mal-
functioning:
The light does not turn on for
approximately six seconds
when the ignition switch is in
the ON position.
WARNING
Page 77 of 637
2-56
Safety system of your vehicle
What to expect after an air bag
inflates
After a frontal or side air bag inflates,
it will deflate very quickly. Air bag
inflation will not prevent the driver
from seeing out of the windscreen or
being able to steer. Curtain air bags
may remain partially inflated for
some time after they deploy.After an air bag inflates, take
the following precautions:
Open your windows and
doors as soon as possible
after impact to reduce pro-
longed exposure to the smoke
and powder released by the
inflating air bag.
Do not touch the air bag stor-
age area’s internal compo-
nents immediately after an air
bag has inflated. The parts
that come into contact with an
inflating air bag may be very
hot.
Always wash exposed skin
areas thoroughly with cold
water and mild soap.
We recommend that an autho-
rised HYUNDAI dealer replace
the air bag immediately after
deployment. Air bags are
designed to be used only
once.
WARNING
To prevent objects from becom-
ing dangerous projectiles when
the passenger's air bag inflates:
Do not install or place any
objects (drink holder, CD
holder, stickers, etc.) on the
front passenger's panel above
the glove box where the pas-
senger's air bag is located.
Do not install a container of
liquid air freshener near the
instrument cluster or on the
instrument panel surface.
WARNING
Page 84 of 637
2-63
Safety system of your vehicle
2
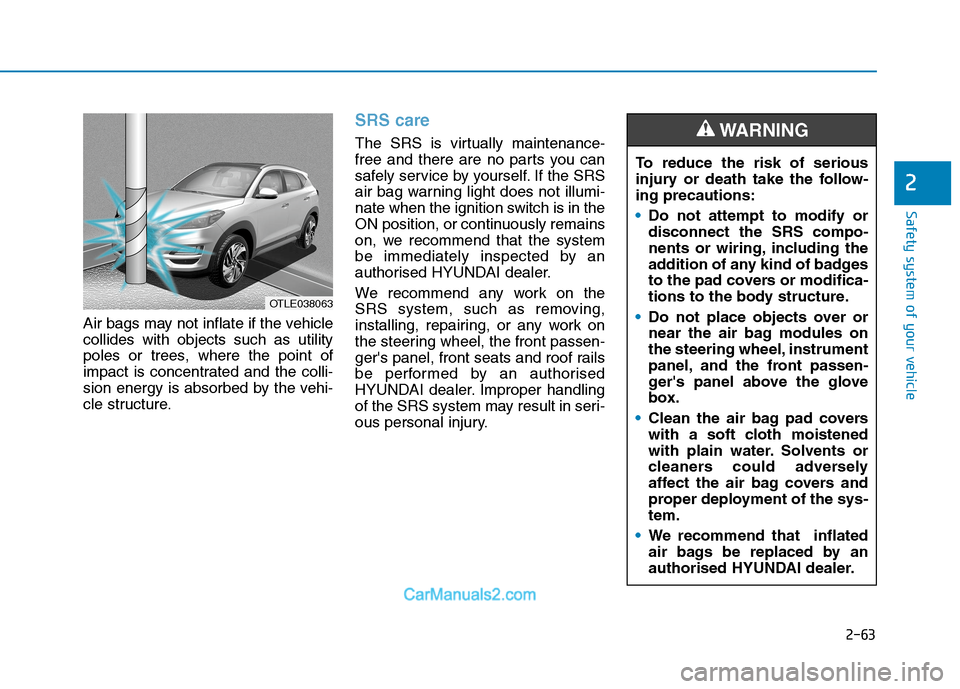
Air bags may not inflate if the vehicle
collides with objects such as utility
poles or trees, where the point of
impact is concentrated and the colli-
sion energy is absorbed by the vehi-
cle structure.
SRS care
The SRS is virtually maintenance-
free and there are no parts you can
safely service by yourself. If the SRS
air bag warning light does not illumi-
nate when the ignition switch is in the
ON position, or continuously remains
on, we recommend that the system
be immediately inspected by an
authorised HYUNDAI dealer.
We recommend any work on the
SRS system, such as removing,
installing, repairing, or any work on
the steering wheel, the front passen-
ger's panel, front seats and roof rails
be performed by an authorised
HYUNDAI dealer. Improper handling
of the SRS system may result in seri-
ous personal injury.
OTLE038063
To reduce the risk of serious
injury or death take the follow-
ing precautions:
Do not attempt to modify or
disconnect the SRS compo-
nents or wiring, including the
addition of any kind of badges
to the pad covers or modifica-
tions to the body structure.
Do not place objects over or
near the air bag modules on
the steering wheel, instrument
panel, and the front passen-
ger's panel above the glove
box.
Clean the air bag pad covers
with a soft cloth moistened
with plain water. Solvents or
cleaners could adversely
affect the air bag covers and
proper deployment of the sys-
tem.
We recommend that inflated
air bags be replaced by an
authorised HYUNDAI dealer.
WARNING
Page 108 of 637
3-22
Convenient features of your vehicle
Tilt steering / Telescope steering
(if equipped)
Information
After adjustment, sometimes the lock-
release lever may not lock the steering
wheel.
It is not a malfunction. This occurs
when two gears are not engaged cor-
rectly. In this case, adjust the steering
wheel again and then lock the steering
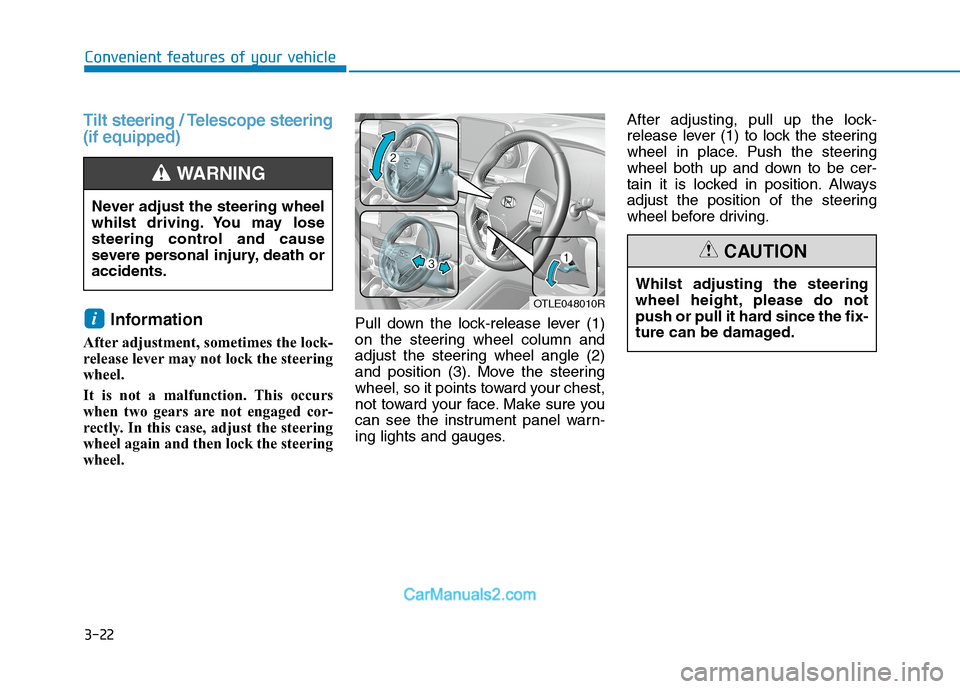
wheel.Pull down the lock-release lever (1)
on the steering wheel column and
adjust the steering wheel angle (2)
and position (3). Move the steering
wheel, so it points toward your chest,
not toward your face. Make sure you
can see the instrument panel warn-
ing lights and gauges.After adjusting, pull up the lock-
release lever (1) to lock the steering
wheel in place. Push the steering
wheel both up and down to be cer-
tain it is locked in position. Always
adjust the position of the steering
wheel before driving.
i
Never adjust the steering wheel
whilst driving. You may lose
steering control and cause
severe personal injury, death or
accidents.
WARNING
OTLE048010R
Whilst adjusting the steering
wheel height, please do not
push or pull it hard since the fix-
ture can be damaged.
CAUTION