Page 108 of 637

3-22
Convenient features of your vehicle
Tilt steering / Telescope steering
(if equipped)
Information
After adjustment, sometimes the lock-
release lever may not lock the steering
wheel.
It is not a malfunction. This occurs
when two gears are not engaged cor-
rectly. In this case, adjust the steering
wheel again and then lock the steering
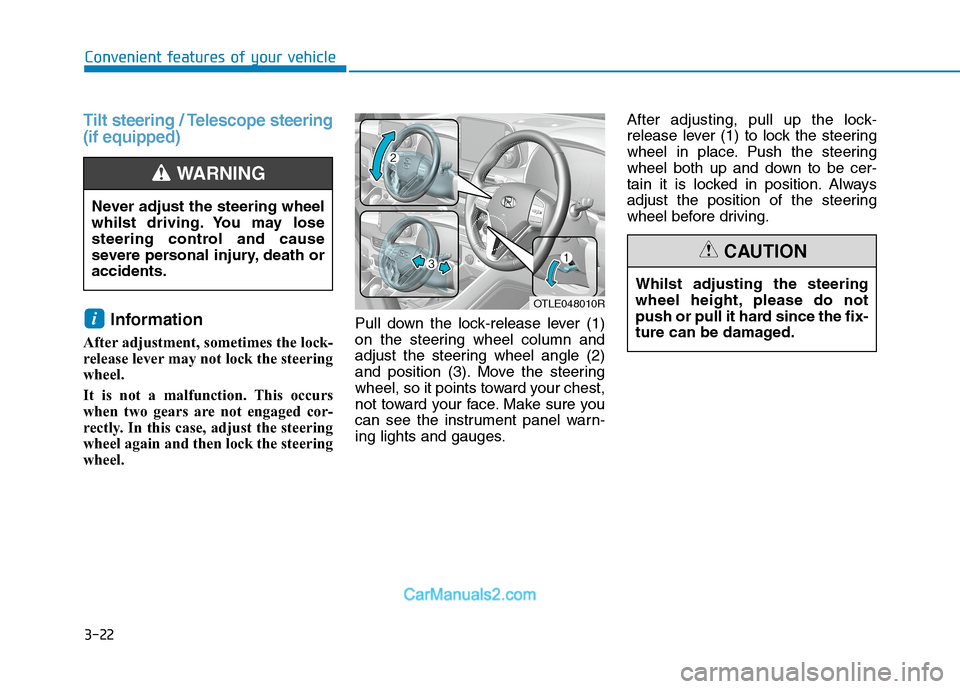
wheel.Pull down the lock-release lever (1)
on the steering wheel column and
adjust the steering wheel angle (2)
and position (3). Move the steering
wheel, so it points toward your chest,
not toward your face. Make sure you
can see the instrument panel warn-
ing lights and gauges.After adjusting, pull up the lock-
release lever (1) to lock the steering
wheel in place. Push the steering
wheel both up and down to be cer-
tain it is locked in position. Always
adjust the position of the steering
wheel before driving.
i
Never adjust the steering wheel
whilst driving. You may lose
steering control and cause
severe personal injury, death or
accidents.
WARNING
OTLE048010R
Whilst adjusting the steering
wheel height, please do not
push or pull it hard since the fix-
ture can be damaged.
CAUTION
Page 110 of 637
3-24
Convenient features of your vehicle
M MI
IR
RR
RO
OR
RS
S
Inside rearview mirror
Before you start driving, adjust the
rearview mirror to the centre on the
view through the rear window.When cleaning the mirror, use a
paper towel or similar material
dampened with glass cleaner. Do
not spray glass cleaner directly on
the mirror as that may cause the
liquid cleaner to enter the mirror
housing.
NOTICE
Make sure your line of sight is
not obstructed. Do not place
objects on the rear seat, lug-
gage compartment, or behind
the rear headrests which could
interfere with your vision
through the rear window.
WARNING
To prevent serious injury during
an accident or deployment of
the air bag, do not modify the
rearview mirror and do not
install a wide mirror.
WARNING
NEVER adjust the mirror whilst
driving. This may cause loss of
vehicle control resulting in an
accident.
WARNING
Page 111 of 637

3-25
Convenient features of your vehicle
3
Day/night rearview mirror
(if equipped)
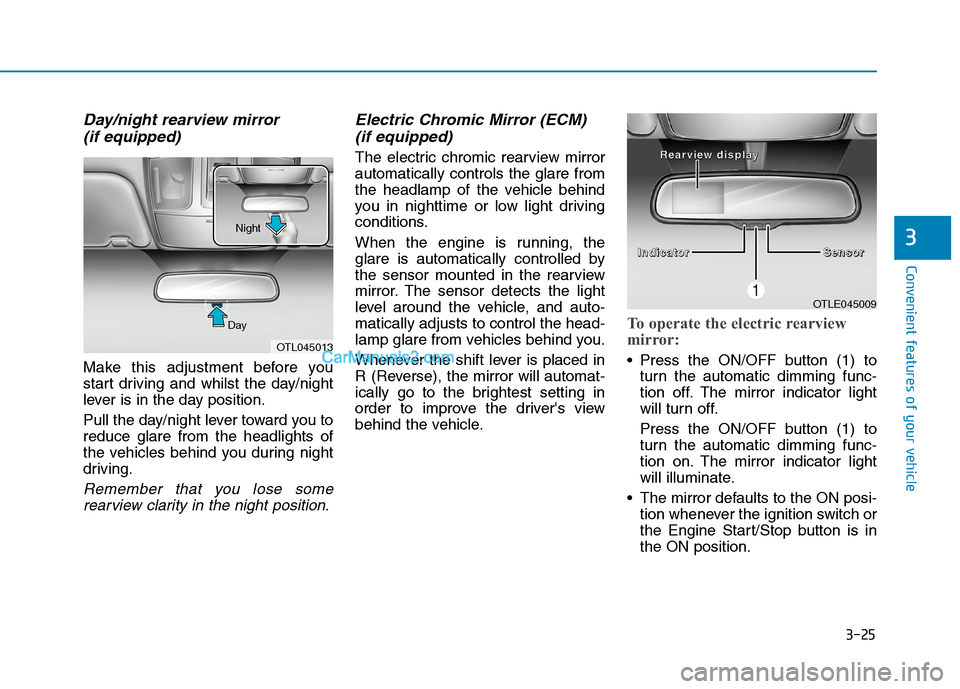
Make this adjustment before you
start driving and whilst the day/night
lever is in the day position.
Pull the day/night lever toward you to
reduce glare from the headlights of
the vehicles behind you during night
driving.
Remember that you lose some
rearview clarity in the night position.
Electric Chromic Mirror (ECM)
(if equipped)
The electric chromic rearview mirror
automatically controls the glare from
the headlamp of the vehicle behind
you in nighttime or low light driving
conditions.
When the engine is running, the
glare is automatically controlled by
the sensor mounted in the rearview
mirror. The sensor detects the light
level around the vehicle, and auto-
matically adjusts to control the head-
lamp glare from vehicles behind you.
Whenever the shift lever is placed in
R (Reverse), the mirror will automat-
ically go to the brightest setting in
order to improve the driver's view
behind the vehicle.
To operate the electric rearview
mirror:
Press the ON/OFF button (1) to
turn the automatic dimming func-
tion off. The mirror indicator light
will turn off.
Press the ON/OFF button (1) to
turn the automatic dimming func-
tion on. The mirror indicator light
will illuminate.
The mirror defaults to the ON posi-
tion whenever the ignition switch or
the Engine Start/Stop button is in
the ON position.
OTLE045009
I I I I
n n n n
d d d d
i i i i
c c c c
a a a a
t t t t
o o o o
r r r r
S S S S
e e e e
n n n n
s s s s
o o o o
r r r r R R R R
e e e e
a a a a
r r r r
v v v v
i i i i
e e e e
w w w w
d d d d
i
i i i
s s s s
p p p p
l l l l
a a a a
y y y y
OTL045013 DayNight
Page 114 of 637
3-28
Convenient features of your vehicle
3. Press the button until the new zone
number appears in the display.
After you stop pressing the button
in, the display will show a compass
direction within a few seconds.1. Do not install the ski rack,
antenna, etc. which are
attached to the vehicle by a
magnet. They affect the oper-
ation of the compass.
2. If the compass deviates from
the correct indication soon
after repeated adjustment, we
recommend that you have the
compass checked at an
authorised HYUNDAI dealer.
3. The compass may not indi-
cate the correct compass
point in tunnels or whilst
driving up or down a steep
hill.
(The compass returns to the
correct compass point when
the vehicle moves to an area
where the geomagnetism is
stabilised.)
4. When cleaning the mirror,
use a paper towel or similar
material dampened with
glass cleaner. Do not spray
glass cleaner directly on the
mirror as that may cause the
liquid cleaner to enter the
mirror housing.CAUTION
Page 116 of 637
3-30
Convenient features of your vehicle
Adjusting the rearview mirrors:
1. Press either the L (Front left side)
or R (Front right side) button (1) to
select the rearview mirror you
would like to adjust.
2. Use the mirror adjustment control
(2) to position the selected mirror
up, down, left or right.
3. After adjustment, put the button
into neutral (centre) position to
prevent inadvertent adjustment. The mirrors stop moving when
they reach the maximum adjust-
ing angles, but the motor contin-
ues to operate whilst the switch
is pressed. Do not press the
switch longer than necessary,
the motor may be damaged.
Do not attempt to adjust the out-
side rearview mirrors by hand
otherwise the motor may be
damaged.
Folding the outside rearview
mirrors
Manual type
To fold the outside rearview mirrors,
grasp the housing of the mirror and
then fold it toward the rear of the
vehicle.
NOTICE
OTL045019
OTLE045017
Page 148 of 637

3-62
Convenient features of your vehicle
Tachometer
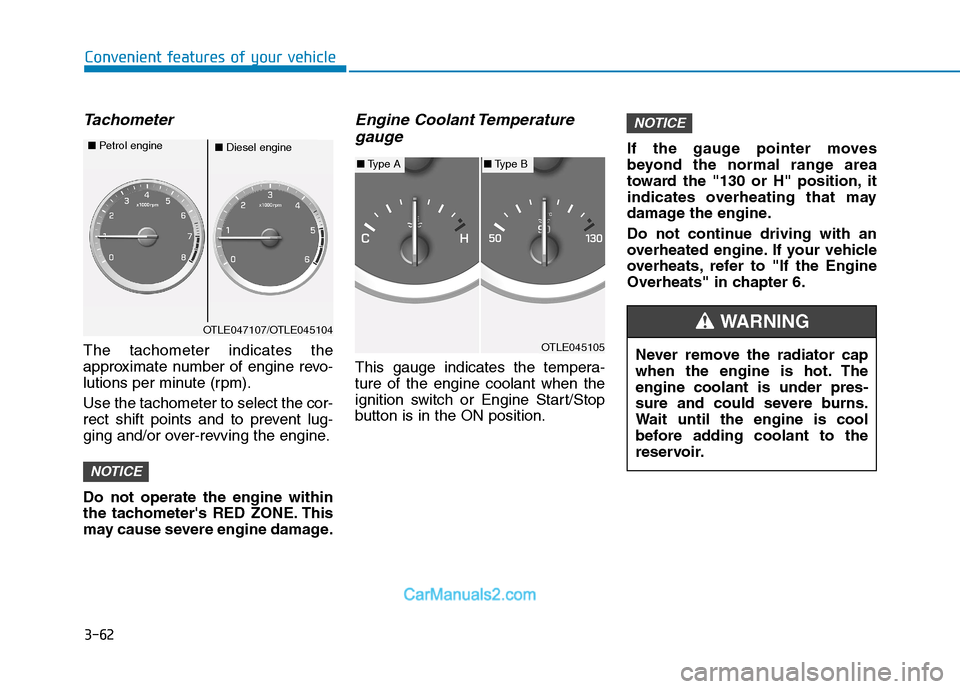
The tachometer indicates the
approximate number of engine revo-
lutions per minute (rpm).
Use the tachometer to select the cor-
rect shift points and to prevent lug-
ging and/or over-revving the engine.
Do not operate the engine within
the tachometer's RED ZONE. This
may cause severe engine damage.
Engine Coolant Temperature
gauge
This gauge indicates the tempera-
ture of the engine coolant when the
ignition switch or Engine Start/Stop
button is in the ON position.If the gauge pointer moves
beyond the normal range area
toward the "130 or H" position, it
indicates overheating that may
damage the engine.
Do not continue driving with an
overheated engine. If your vehicle
overheats, refer to "If the Engine
Overheats" in chapter 6.
NOTICE
NOTICE
OTLE047107/OTLE045104
■Diesel engine ■Petrol engine
OTLE045105
■Type A■Type B
Never remove the radiator cap
when the engine is hot. The
engine coolant is under pres-
sure and could severe burns.
Wait until the engine is cool
before adding coolant to the
reservoir.
WARNING
Page 178 of 637

3-92
Convenient features of your vehicle
Parking Brake & Brake
Fluid Warning Light
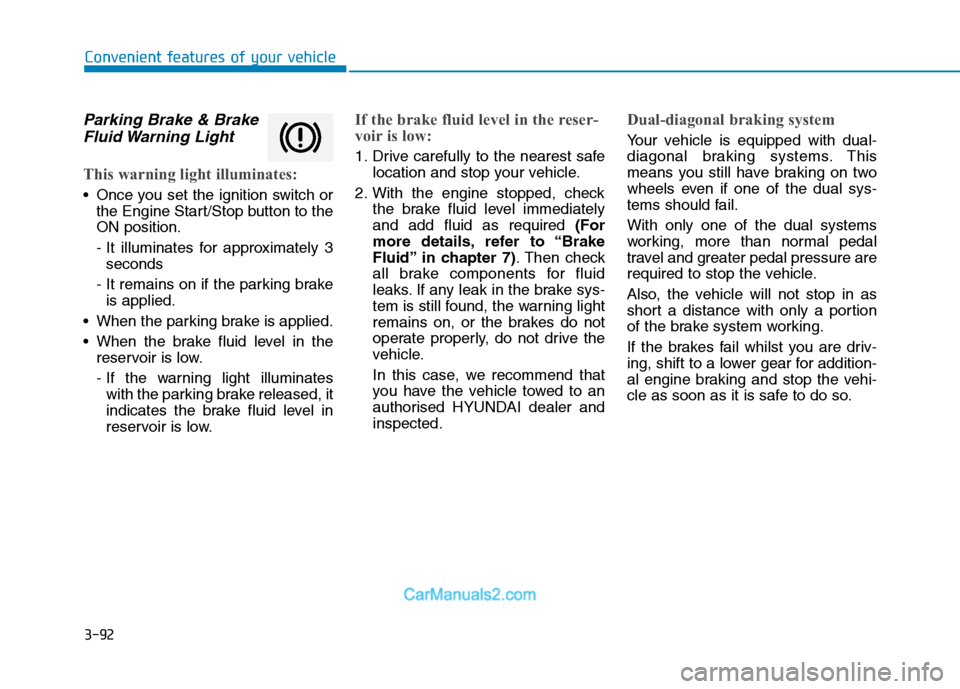
This warning light illuminates:
Once you set the ignition switch or
the Engine Start/Stop button to the
ON position.
- It illuminates for approximately 3
seconds
- It remains on if the parking brake
is applied.
When the parking brake is applied.
When the brake fluid level in the
reservoir is low.
- If the warning light illuminates
with the parking brake released, it
indicates the brake fluid level in
reservoir is low.
If the brake fluid level in the reser-
voir is low:
1. Drive carefully to the nearest safe
location and stop your vehicle.
2. With the engine stopped, check
the brake fluid level immediately
and add fluid as required (For
more details, refer to “Brake
Fluid” in chapter 7). Then check
all brake components for fluid
leaks. If any leak in the brake sys-
tem is still found, the warning light
remains on, or the brakes do not
operate properly, do not drive the
vehicle.
In this case, we recommend that
you have the vehicle towed to an
authorised HYUNDAI dealer and
inspected.
Dual-diagonal braking system
Your vehicle is equipped with dual-
diagonal braking systems. This
means you still have braking on two
wheels even if one of the dual sys-
tems should fail.
With only one of the dual systems
working, more than normal pedal
travel and greater pedal pressure are
required to stop the vehicle.
Also, the vehicle will not stop in as
short a distance with only a portion
of the brake system working.
If the brakes fail whilst you are driv-
ing, shift to a lower gear for addition-
al engine braking and stop the vehi-
cle as soon as it is safe to do so.
Page 195 of 637
3-109
Convenient features of your vehicle
3
Parking lamps position ( )
The parking lamps, licence plate
lamps and instrument panel lamps
are turned ON.
Headlamps position ( )
The headlamps, parking lamps,
licence plate lamps and instrument
panel lamps are turned ON.
Information
The ignition switch button must be in
the ON position to turn on the head-
lamps.
High beam operation
To turn on the high beam head-
lamps, push the lever away from you.
The lever will return to its original
position.
The high beam indicator will light
when the headlamp high beams are
switched on.
To turn off the high beam head-
lamps, pull the lever towards you.
The low beams will turn on.
i
OTL045253ROTL045252R
OTL045255R