2020 Hyundai Sonata Marker
[x] Cancel search: MarkerPage 502 of 537

08
8-55
Consult an authorized HYUNDAI dealer
to replace most vehicle light bulbs. It is
difficult to replace vehicle light bulbs
because other parts of the vehicle must
be removed before you can get to the
bulb. This is especially true for removing
the headlamp assembly to get to the
bulb(s).
Removing/installing the headlamp
assembly can result in damage to the
vehicle.
Information
The headlamp and tail lamp lenses could
appear frosty if the vehicle is washed after
driving or the vehicle is driven at night
in wet weather. This condition is caused
by temperature difference between the
lamp inside and outside and, it does not
indicate a problem with your vehicle.
When moisture condenses in the lamp,
it will be removed after driving with the
headlamp on. The removable level may
differ depending on lamp size, lamp
position and environmental condition.
However, if moisture is not removed, we
recommend that your vehicle is inspected
by an authorized HYUNDAI dealer.
WARNING
• Prior to replacing a lamp, depress
the foot brake, move the shift button
into P (Park) apply the parking brake,
place the ignition switch to the
LOCK/OFF position, and take the key
with you when leaving the vehicle
to avoid sudden movement of the
vehicle and to prevent possible
electric shock.
• Be aware the bulbs may be hot and
may burn your fingers.
Headlamp, Parking Lamp,
Daytime Running Light, Turn
Signal Lamp, Cornering Lamp
and Side Marker
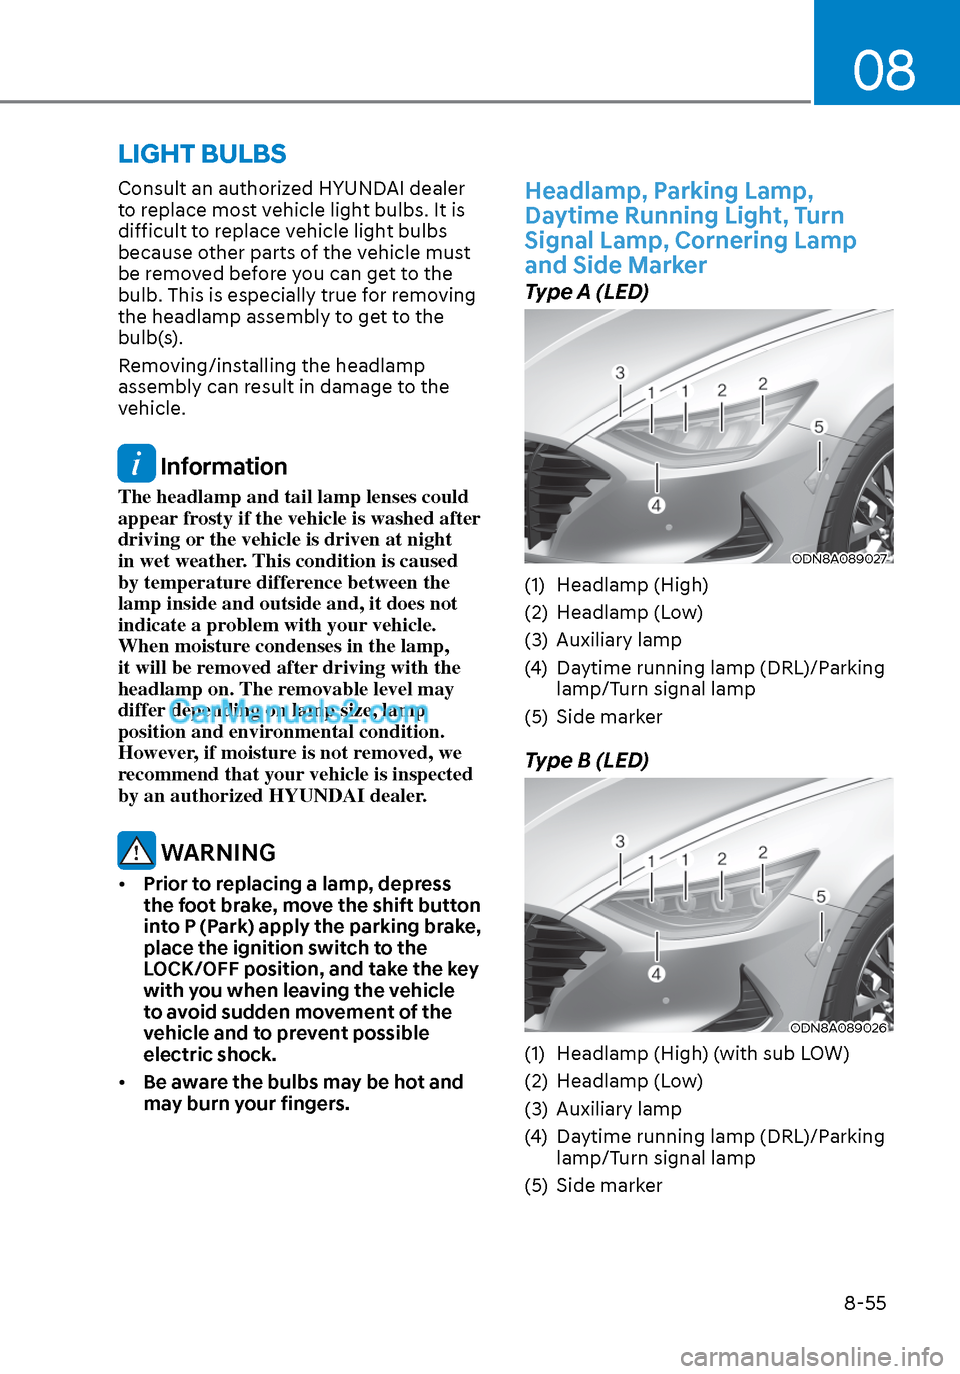
Type A (LED)
ODN8A089027ODN8A089027
(1) Headlamp (High)
(2) Headlamp (Low)
(3) Auxiliary lamp
(4) Daytime running lamp (DRL)/Parking
lamp/Turn signal lamp
(5) Side marker
Type B (LED)
ODN8A089026ODN8A089026
(1) Headlamp (High) (with sub LOW)
(2) Headlamp (Low)
(3) Auxiliary lamp
(4) Daytime running lamp (DRL)/Parking lamp/Turn signal lamp
(5) Side marker
LIGHT BULBS
Page 503 of 537

Maintenance8-56
Lamps
If the LED lamp does not operate, have
the s
ystem checked by an authorized
HYUNDAI dealer.
The LED lamps cannot be replaced as
a single unit because it is an integrated
unit. The LED lamps has to be replaced
with the unit.
A skilled technician should check or
repair the LED lamp, for it may damage
related parts of the vehicle.
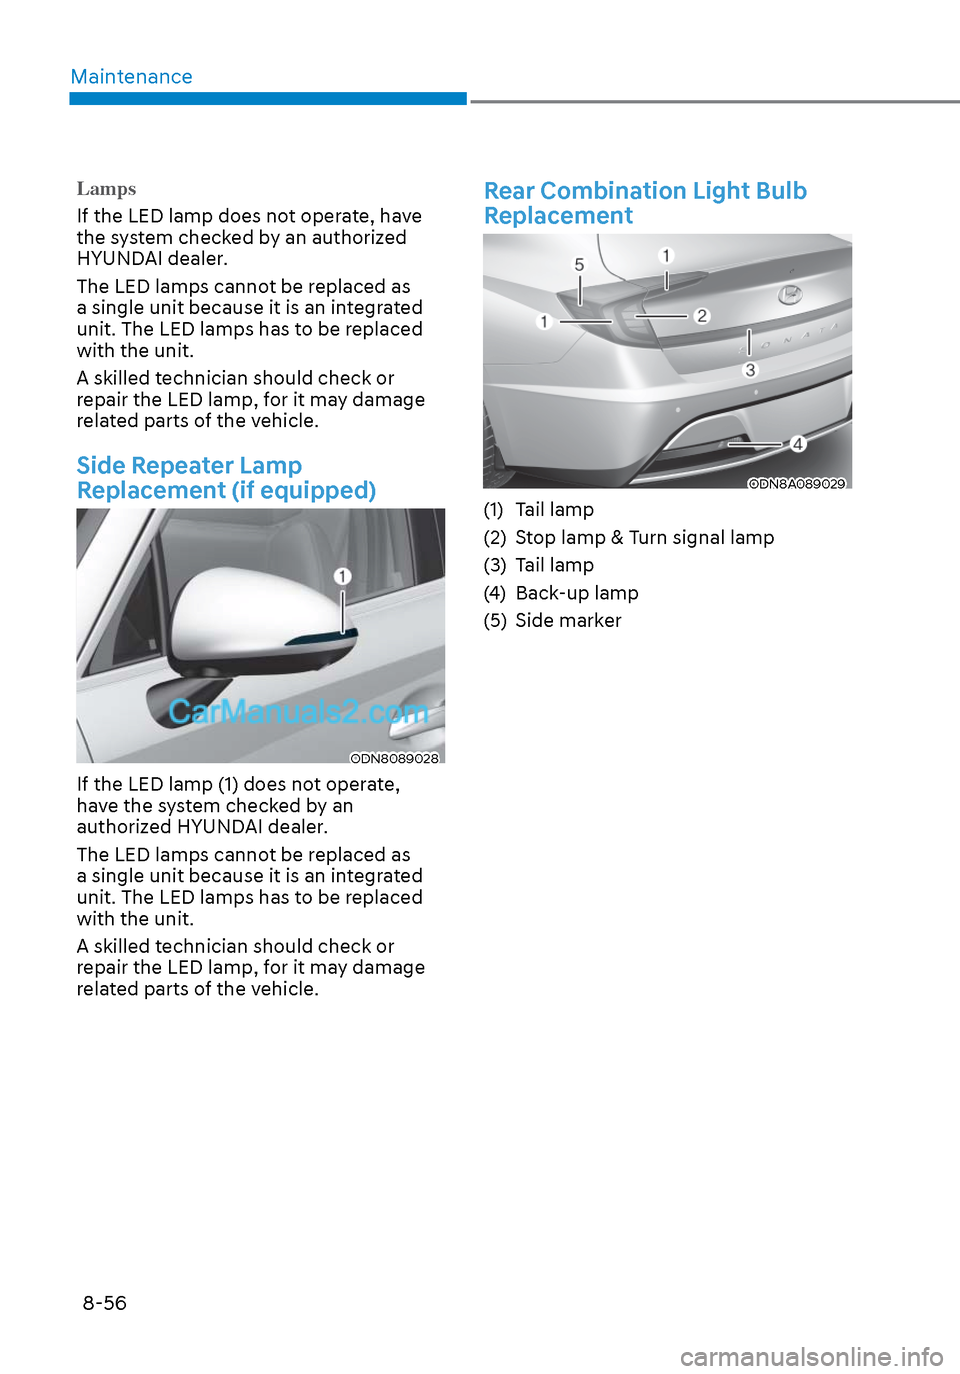
Side Repeater Lamp
Replacement (if equipped)
ODN8089028ODN8089028
If the LED lamp (1) does not operate,
have the system checked by an
authorized HYUNDAI dealer.
The LED lamps cannot be replaced as
a single unit because it is an integrated
unit. The LED lamps has to be replaced
with the unit.
A skilled technician should check or
repair the LED lamp, for it may damage
related parts of the vehicle.
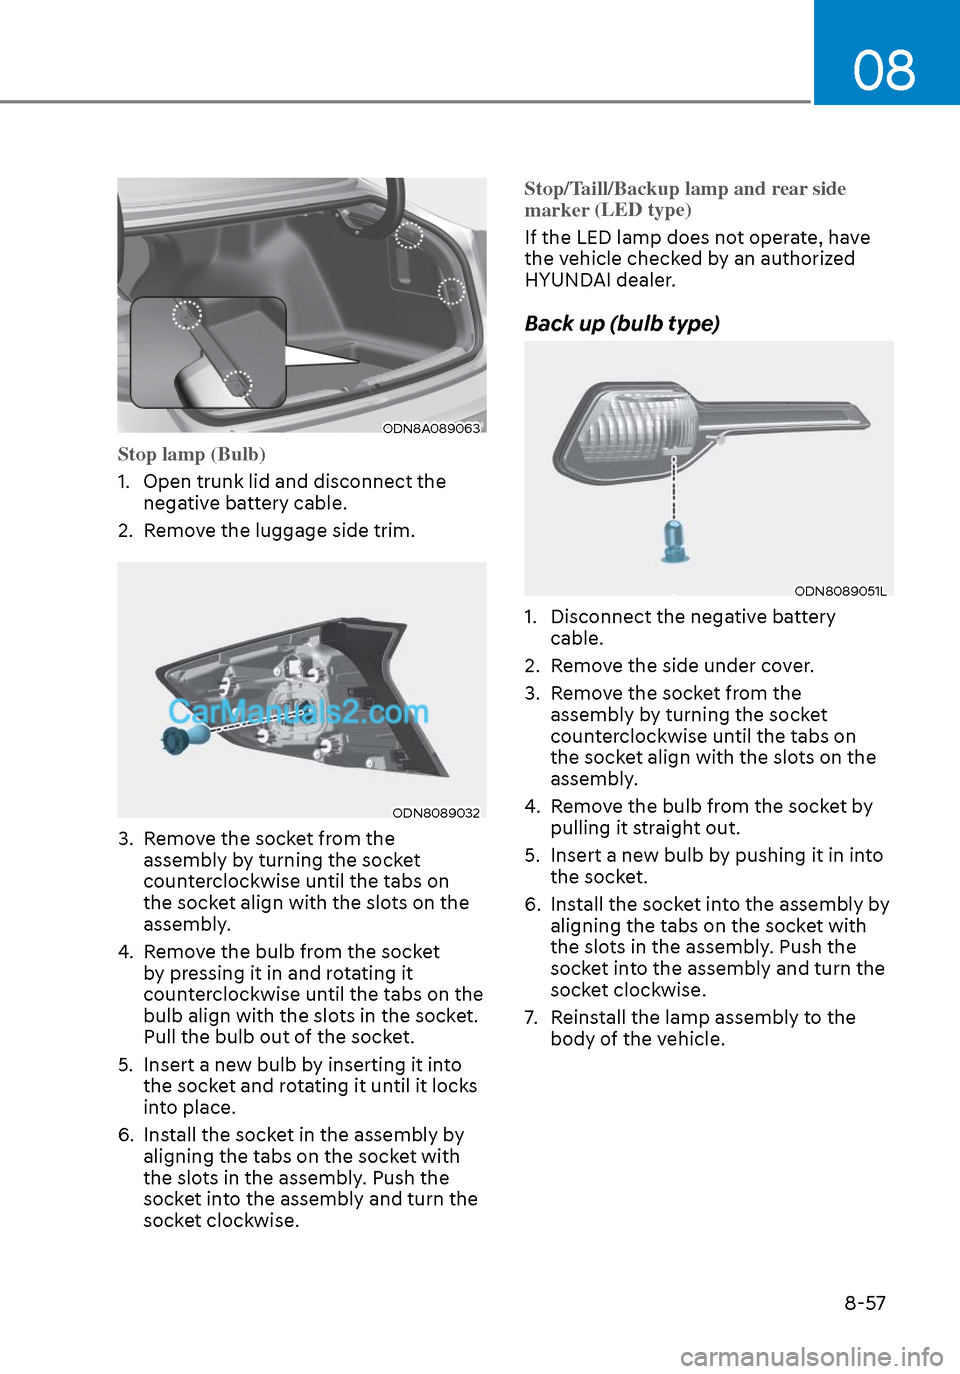
Rear Combination Light Bulb
Replacement
ODN8A089029ODN8A089029
(1) Tail lamp
(2) Stop lamp & Turn signal lamp
(3) Tail lamp
(4) Back-up lamp
(5) Side marker
Page 504 of 537

08
8-57
ODN8A089063ODN8A089063
Stop lamp (Bulb)
1. Open trunk lid and disconnect the nega
tive battery cable.
2. Remove the luggage side trim.
ODN8089032ODN8089032
3. Remove the socket from the assembly by turning the socket
counterclockwise until the tabs on
the socket align with the slots on the
assembly.
4. Remove the bulb from the socket by pressing it in and rotating it
counterclockwise until the tabs on the
bulb align with the slots in the socket.
Pull the bulb out of the socket.
5. Insert a new bulb by inserting it into the socket and rotating it until it locks
into place.
6. Install the socket in the assembly by aligning the tabs on the socket with
the slots in the assembly. Push the
socket into the assembly and turn the
socket clockwise. Stop/Taill/Backup lamp and rear side
marker
(LED type)
If the LED lamp does not operate, have
the v
ehicle checked by an authorized
HYUNDAI dealer.
Back up (bulb type)
ODN8089051LODN8089051L
1. Disconnect the negative battery cable.
2. Remove the side under cover.
3. Remove the socket from the assembly by turning the socket
counterclockwise until the tabs on
the socket align with the slots on the
assembly.
4. Remove the bulb from the socket by pulling it straight out.
5. Insert a new bulb by pushing it in into the socket.
6. Install the socket into the assembly by aligning the tabs on the socket with
the slots in the assembly. Push the
socket into the assembly and turn the
socket clockwise.
7. Reinstall the lamp assembly to the body of the vehicle.
Page 523 of 537

IndexI-4
Bulb replacement ........................................................................\
......................... 8-55 Headlamp ...............................................................\
......................................... 8-55
Parking lamp ........................................................................\
........................... 8-55
Daytime running light ........................................................................\
............. 8-55
Turn signal lamp ........................................................................\
...................... 8-55
Cornering lamp .........................................................\
...................................... 8-55
Side marker ........................................................................\
............................. 8-55
Auxiliary lamp ........................................................................\
........................ 8-55
Side repeater lamp ........................................................................\
................... 8-56
Rear combination light bulb ........................................................................\
.... 8-56
High mounted stop lamp ........................................................................\
......... 8-58
License plate light ........................................................................\
.................. 8-58
Interior light ........................................................................\
........................... 8-59
Bulb wattage ........................................................................\
.................................. 2-8
C
California perchlorate notice ........................................................................\
....... 8-70
Capacities (Lubricants) ........................................................................\
................ 2-11
Care Tire care ........................................................................\
................................... 8-34
Exterior care ........................................................................\
............................ 8-61
Interior care ........................................................................\
............................. 8-65
Center console storage ........................................................................\
............... 5-144
Central door lock/unlock switch ........................................................................\
.. 5-33
Certification label ........................................................................\
........................ 2-13
Check tire inflation pressure ........................................................................\
........ 8-35
Child restraint system (CRS) ........................................................................\
....... 3-29 Selecting a child restraint system (CRS) ......................................................... 3-30
Rearward-facing child restraint system ........................................................... 3-30
Forward-facing child restraint system ............................................................. 3-31
Booster seats........................................................................\
............................ 3-31
Installing a child restraint system (CRS) ........................................................ 3-31
Lower anchors and tether for Children (LATCH System) .............................. 3-32
Lower anchors ........................................................................\
........................ 3-33
Tether anchors ........................................................................\
......................... 3-34
Lap/shoulder belt ........................................................................\
..................... 3-35
Child-protector rear door lock ........................................................................\
..... 5-35
Climate control air filter ........................................................................\
.............. 8-28