2020 HYUNDAI SONATA HYBRID fuel pressure
[x] Cancel search: fuel pressurePage 145 of 527
04
4-41
Utility View Mode
The Utility view mode displays
information related to vehicle driving
parameters including fuel economy and
trip distance information.
Utility Items
The utility items appear as well in utility
view mode, driving assist view mode and
turn by turn view mode. The utility items
in utility view mode display in the center
of the instrument cluster but the items in
other modes show up on the right side of
the instrument cluster.
The information provided may differ
depending on which functions are
applicable to your vehicle.
Fuel Economy Information
The average fuel economy and instant
fuel economy are displayed
• Manual reset: Press and hold OK
button to initialize set up
• Automatic reset: Automatically reset
the average fuel economy when the
set-up conditions are satisfied in User
Settings menu.
Driving Information
The trip distance for each ignition cycle,
fuel economy (undisplayed item in fuel
economy: driving speed), trip time
are shown. Press and hold OK button
to initialize set up. When the engine
has been OFF for 4 hours or longer
the average fuel economy will reset
automatically. Information after Refueling
The vehicle information such as trip
distance, fuel economy (undisplayed
item in fuel economy: driving speed)
and trip time is displayed after refueling.
Press and hold OK button to initialize set
up.
Accumulated Information
The vehicle information such as trip
distance, fuel economy (undisplayed
item in fuel economy: driving speed)
and trip time is displayed after manual
initialization.
Digital Speed Display
It shows current vehicle speed.
Driver Attention Warning
Display the status of the Driver Attention
Warning system. When the engine is
off or the vehicle comes to a stop, the
system is reset. Press and hold OK button
to initialize set up.
Smart Shift
It shows the currently selected drive
mode.
Tire pressure
It shows information related to Tire
Pressure.
Page 166 of 527

Convenient Features
5-18
CAUTION
• If metallic window tint was applied
to your vehicle, it may cause
bad Bluetooth connection or
performance degradation of the
digital key.
• If multiple users operate the remote
control function simultaneously, the
connection between the digital key
and the vehicle might result in failed
commands. Please connect and
operate the remote control function
only the necessary user.
• When using the remote control
operation, the driver (the remote
control user) should leave the vehicle
after confirming the door lock (the
chime sounds once and the hazard
warning lights blink).
• The remote functions of the Digital
Key app enables the vehicle to be
controlled from a set distance. If
the digital key or the vehicle goes
beyond the operable distance, the
remote control function might be
disconnected or cancelled.
• If the digital key (smartphone) is
connected with the vehicle for the
remote control, the driver with the
key goes far away from the vehicle,
the function might not work.
• If the remote control operation
is executed where the mobile
connection is weak, Bluetooth
connection is poor due to several
Bluetooth devices or there is an
object such as metal or concrete, it
might be delayed or the operable
distance might decrease. You should
not cover the smartphone with your
hand or place other devices which
can cause frequency interference. It
may result in poor performance.
• If the remote control function is not
available, please use NFC function to
lock or unlock the doors. Remote Start with Digital Key
•
When the shift button of your vehicle
is in P (Park) and all of the doors
including trunk and hood is locked
and the vehicle is off, press the Door
Lock button in the Hyundai Digital
Key app then press the Remote Start
button within 4 seconds.
You can confirm the engine is on if the
hazard warning lights blinks two times
and the chime sounds.
• If you want to turn off the engine,
press Remote Engine Stop. Air
Conditioner / Heating system
maintains the same status as when
you last used the vehicle.
• Unless you put the registered digital
key(smartphone) on the interior
authentication pad (wireless charger)
when the remote start function is on,
the engine will turn off.
• If you do not get on the vehicle within
10 minutes after the engine turns on,
the vehicle will turn off.
For more information, refer to the Engine
Start/Stop button in chapter 6.
Vehicle information Display
The digital key application displays
the vehicle information such as
driving or door conditions through the
communication with the vehicle.
• How to check : Select the vehicle
what you want to check and touch
the vehicle image, then vehicle
information display page will be
shown.
• Contents : accumulated odometer,
latest fuel economy, driving range,
fuel remaining, tire pressure, doors
lock/unlock status and last data
updated time.
ÃThe information displayed may differ
from the actual vehicle status.
ÃFor more information, please refer to
the ‘Tutorial’ on your Digital key app.
Page 216 of 527
Convenient Features
5-68
Fuel Filler Door
Opening the fuel filler door
ODN8059050
1. Turn the engine off.
2. Ensure the driver’s door is unlocked.
3. Push the fuel filler door near the 3
o’clock position.
ODN8059051
4. Pull the fuel filler door (1) outward to
access the fuel tank cap.
5. To remove the fuel tank cap (2), turn
it counterclockwise. You may hear a
hissing noise as the pressure inside
the tank equalizes.
6. Place the cap on the fuel filler door.
Information
If the fuel filler door does not open
because ice has formed around it, tap
lightly or push on the door to break the
ice and release the door. Do not pry on the
door. If necessary, spray around the door
with an approved deicer fluid (do not use
radiator antifreeze) or move the vehicle to
a warm place and allow the ice to melt.
Closing the fuel filler door
1. To install the fuel tank cap, turn it
clockwise until it “clicks” one time.
2. Close the fuel filler door until it is
latched securely.
WARNING
Gasoline is highly flammable and
explosive. Failure to follow these
guidelines may result in SERIOUS
INJURY or DEATH:
• Read and follow all warnings posted
at the gas station.
• Before refueling, note the location of
the Emergency Gasoline Shut-Off, if
available, at the gas station.
• Before touching the fuel nozzle, you
should eliminate the potential build-
up of static electricity by touching
a metal part of the vehicle, a safe
distance away from the fuel filler
neck, nozzle, or other gas source,
with your bare hand.
• Do not use cellular phones while
refueling. Electric current and/or
electronic interference from cellular
phones can potentially ignite fuel
vapors and cause a fire.
Page 410 of 527
While Driving
6-134
Driving in Flooded Areas
Avoid driving through flooded areas
unless you are sure the water is no
higher than the bottom of the wheel hub.
Drive through any water slowly. Allow
adequate stopping distance because
brake performance may be reduced.
After driving through water, dry the
brakes by gently applying them several
times while the vehicle is moving slowly.
Highway Driving
Tires
Adjust the tire inflation, as specified.
Under-inflation may overheat or damage
the tires.
Do not install worn-out or damaged tires,
which may reduce traction or adversely
affect vehicle handling. This could lead
to sudden tire failure that may cause
loss of vehicle control resulting in an
accident.
Information
Never over-inflate your tires above the
maximum inflation pressure, as specified
on your tires.
Fuel, engine coolant and engine oil
Driving at higher speeds on the highway
consumes more fuel and is less efficient
than driving at a slower, more moderate
speed. Maintain a moderate speed in
order to conserve fuel when driving on
the highway.
Be sure to check both the engine coolant
level and the engine oil before driving.
Drive belt
A loose or damaged drive belt may
overheat the engine.
Page 430 of 527
Emergency situations
7-10
Tire Pressure Monitoring System
WARNING
Over-inflation or under-inflation can
reduce tire life, adversely affect vehicle
handling, and lead to sudden tire failure
that may cause loss of vehicle control
resulting in an accident.
Each tire, including the spare (if
provided), should be checked monthly
when cold and inflated to the inflation
pressure recommended by the vehicle
manufacturer on the vehicle placard
or tire inflation pressure label. (If your
vehicle has tires of a different size than
the size indicated on the vehicle placard
or tire inflation pressure label, you should
determine the proper tire inflation
pressure for those tires.)
As an added safety feature, your
vehicle has been equipped with a tire
pressure monitoring system (TPMS)
that illuminates a low tire pressure
telltale when one or more of your tires is
significantly under-inflated. Accordingly,
when the low tire pressure telltale
illuminates, you should stop and check
your tires as soon as possible, and inflate
them to the proper pressure. Driving on
a significantly under-inflated tire causes
the tire to overheat and can lead to tire
failure.
Under-inflation also reduces fuel
efficiency and tire tread life, and may
affect the vehicle’s handling and
stopping ability.
Please note that the TPMS is not a
substitute for proper tire maintenance,
and it is the driver’s responsibility to
maintain correct tire pressure, even if
under-inflation has not reached the level
to trigger illumination of the TPMS low
tire pressure telltale.
Your vehicle has also been equipped with
a TPMS malfunction indicator to indicate
when the system is not operating
properly. The TPMS malfunction
indicator is combined with the low
tire pressure telltale. When the system
detects a malfunction, the telltale will
flash for approximately one minute and
then remain continuously illuminated.
This sequence will continue upon
subsequent vehicle start-ups as long as
the malfunction exists.
When the malfunction indicator is
illuminated, the system may not be able
to detect or signal low tire pressure as
intended. TPMS malfunctions may occur
for a variety of reasons, including the
installation of replacement or alternate
tires or wheels on the vehicle that
prevent the TPMS from functioning
properly.
Always check the TPMS malfunction
telltale after replacing one or more tires
or wheels on your vehicle to ensure that
the replacement or alternate tires and
wheels allow the TPMS to continue to
function properly.
NOTICE
If any of the below happens, have
the system checked by an authorized
HYUNDAI dealer.
1. The Low Tire Pressure Telltale/TPMS
Malfunction Indicator does not
illuminate for 3 seconds when the
Engine Start/Stop button is pressed
to the ON position or the vehicle is in
the ready (
) mode.
2. The TPMS Malfunction Indicator
remains illuminated after blinking for
approximately 1 minute.
3. The Low Tire Pressure Position
Telltale remains illuminated.
Page 451 of 527
Tires and Wheels ........................................................................\
.....................8-25Tire Care ........................................................................\
..............................................8-26
Recommended Cold Tire Inflation Pressures ...........................................................8-26
Check Tire Inflation Pressure ........................................................................\
.............8-27
Tire Rotation ........................................................................\
.......................................8-27
Wheel Alignment and Tire Balance ........................................................................\
...8-28
Tire Replacement ........................................................................\
...............................8-28
Wheel Replacement ........................................................................\
..........................8-30
Tire Traction ........................................................................\
.......................................8-30
Tire Maintenance ........................................................................\
............................... 8-30
Tire Sidewall Labeling
........................................................................\
.......................8-30
Tire Terminology and Definitions ........................................................................\
......8-33
All Season Tires ........................................................................\
..................................8-36
Summer Tires ........................................................................\
....................................8-36
Snow Tires ........................................................................\
.......................................... 8-36
Radial-Ply Tires
........................................................................\
..................................8-36
Low Aspect Ratio Tires ........................................................................\
.......................8-37
Fuses ........................................................................\
........................................8-38Instrument Panel Fuse Replacement .......................................................................8-39
Engine Compartment Panel Fuse Replacement .....................................................8-40
Fuse/Relay Panel Description ........................................................................\
............ 8-41
Light Bulbs ........................................................................\
...............................8-43Headlamp, Parking Lamp, Daytime Running Light,
Turn Signal Lamp and Side Marker Replacement ...................................................8-44
Side Repeater Lamp Replacement ........................................................................\
..8-45
Rear Combination Lamp Replacement ...................................................................8-45
High Mounted Stop Lamp Replacement ..................................................................8-47
License Plate Light Bulb Replacement ....................................................................8-48
Interior Lamp Replacement ........................................................................\
..............8-48
Appearance Care ........................................................................\
....................8-50Exterior Care ........................................................................\
......................................8-50
Interior Care ........................................................................\
.......................................8-54
Emission Control System ........................................................................\
........8-57Crankcase Emission Control System ........................................................................\
8-57
Evaporative Emission Control System Including
Onboard Refueling Vapor Recovery (ORVR)
............................................................8-57
Exhaust Emission Control System ........................................................................\
....8-58
8
Page 475 of 527
Maintenance
8-26
Tire Care
For proper maintenance, safety, and
maximum fuel economy, you must
always maintain recommended
tire inflation pressures and stay
within the load limits and weight
distribution recommended for your
vehicle.
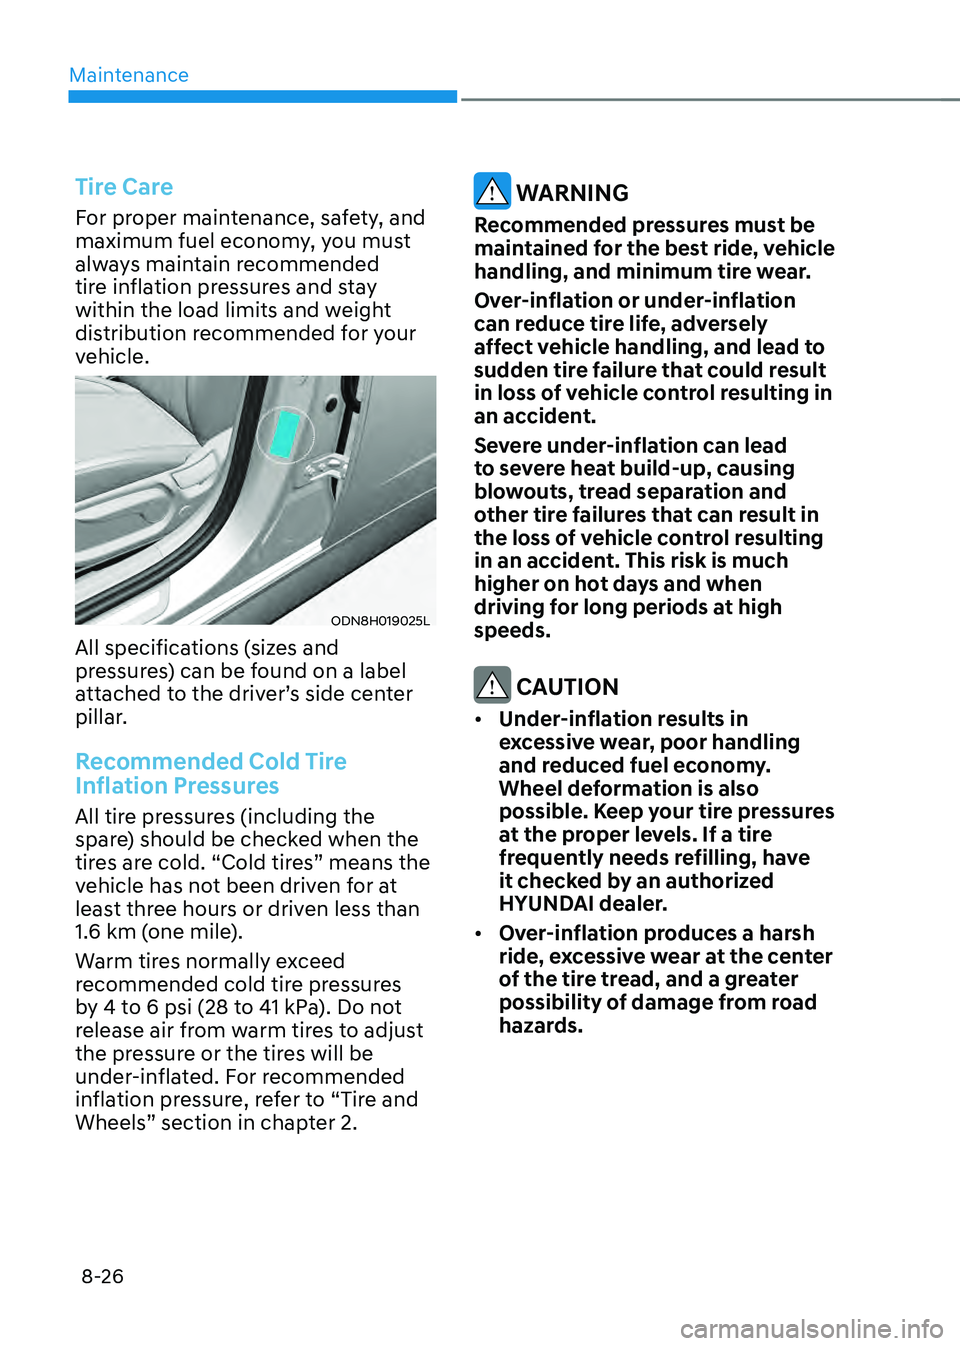
ODN8H019025L
All specifications (sizes and
pressures) can be found on a label
attached to the driver’s side center
pillar.
Recommended Cold Tire
Inflation Pressures
All tire pressures (including the
spare) should be checked when the
tires are cold. “Cold tires” means the
vehicle has not been driven for at
least three hours or driven less than
1.6 km (one mile).
Warm tires normally exceed
recommended cold tire pressures
by 4 to 6 psi (28 to 41 kPa). Do not
release air from warm tires to adjust
the pressure or the tires will be
under-inflated. For recommended
inflation pressure, refer to “Tire and
Wheels” section in chapter 2.
WARNING
Recommended pressures must be
maintained for the best ride, vehicle
handling, and minimum tire wear.
Over-inflation or under-inflation
can reduce tire life, adversely
affect vehicle handling, and lead to
sudden tire failure that could result
in loss of vehicle control resulting in
an accident.
Severe under-inflation can lead
to severe heat build-up, causing
blowouts, tread separation and
other tire failures that can result in
the loss of vehicle control resulting
in an accident. This risk is much
higher on hot days and when
driving for long periods at high
speeds.
CAUTION
• Under-inflation results in
excessive wear, poor handling
and reduced fuel economy.
Wheel deformation is also
possible. Keep your tire pressures
at the proper levels. If a tire
frequently needs refilling, have
it checked by an authorized
HYUNDAI dealer.
• Over-inflation produces a harsh
ride, excessive wear at the center
of the tire tread, and a greater
possibility of damage from road
hazards.
Page 483 of 527
Maintenance
8-34
Cold Tire Pressure
The amount of air pressure in a tire,
measured in pounds per square inch
(psi) or kilopascals (kPa) before a tire
has built up heat from driving.
Curb Weight
This means the weight of a motor
vehicle with standard and optional
equipment including the maximum
capacity of fuel, oil and coolant, but
without passengers and cargo.
DOT Markings
A code molded into the sidewall
of a tire signifying that the tire
is in compliance with the U.S.
Department of Transportation motor
vehicle safety standards. The DOT
code includes the Tire Identification
Number (TIN), an alphanumeric
designator which can also identify
the tire manufacturer, production
plant, brand and date of production.
GVWR
Gross Vehicle Weight Rating
GAWR FRT
Gross Axle Weight Rating for the
Front Axle.
GAWR RR
Gross Axle Weight Rating for the
Rear axle.
Intended Outboard Sidewall
The side of an asymmetrical tire,
that must always face outward when
mounted on a vehicle.Kilopascal (kPa)
The metric unit for air pressure.
Light truck (LT) tire
A tire designated by its manufacturer
as primarily intended for use on
lightweight trucks or multipurpose
passenger vehicles.
Load ratings
The maximum load that a tire is rated
to carry for a given inflation pressure.
Load Index
An assigned number ranging from 1
to 279 that corresponds to the load
carrying capacity of a tire.
Maximum Inflation Pressure
The maximum air pressure to which
a cold tire may be inflated. The
maximum air pressure is molded
onto the sidewall.
Maximum Load Rating
The load rating for a tire at the
maximum permissible inflation
pressure for that tire.
Maximum Loaded Vehicle Weight
The sum of curb weight; accessory
weight; vehicle capacity weight; and
production options weight.
Normal Occupant Weight
The number of occupants a vehicle
is designed to seat multiplied by 150
pounds (68 kg).
Occupant Distribution
Designated seating positions.