2020 Hyundai Santa Fe view button
[x] Cancel search: view buttonPage 15 of 557

1-4
Your vehicle at a glance
I
IN
N T
TE
ER
R I
IO
O R
R
O
O V
VE
ER
R V
V I
IE
E W
W
1. Inside door handle ................................3-15
2. Central door lock/unlock switch ............3-16
3. Power window switches ........................3-41
4. Power window lock switch/ ....................3-44
Electronic child safety lock switch ........3-19
5. Side view mirror control switch ..............3-39
6. Instrument panel illumination control switch ....................................................3-67
7. Lane Keeping Assist (LKA) system switch ....................................................5-94
8. Blind-spot Collision Warning (BCW)/ Blind-Spot Collision-Avoidance
Assist switch (BCA) ..............................5-70
9. AWD LOCK button ................................5-40
10. ESC OFF button ..................................5-32
11. Power liftgate button ............................3-52
12. Hood release lever ..............................3-49
13. Steering wheel tilt/telescopic lever ......3-28
14. Steering wheel ....................................3-27
15. Seat........................................................2-4
16. Fuse panel ..........................................7-53
OTMA018003
The actual shape may differ from the illustration.
Page 16 of 557

I
IN
N S
ST
T R
R U
U M
M E
EN
N T
T
P
P A
A N
N E
EL
L
O
O V
VE
ER
R V
V I
IE
E W
W
(
( I
I)
)
The actual shape may differ from the illustration.
1-5
Your vehicle at a glance
11. Instrument cluster ....................................3-66
2. Horn ........................................................3-28
3. Driver’s front air bag ................................2-51
4. Key ignition switch/ ....................................5-6
Engine Start/Stop button ............................5-9
5. Hazard warning flasher switch ..................6-2
6. Audio system/Navigation system ..............4-4
7. Manual climate control system/ ............3-137 Automatic climate control system ..........3-146
8. Heated steering wheel ............................3-29
9. Seat warmer ............................................2-21
10. Air ventilation seat ................................2-22
11. Power outlet ........................................3-168
12. Aux, USB and USB port ..........................4-2
13. USB charger ........................................3-170
14. Wireless cellular phone charging system ..................................3-170
15. Passenger’s front air bag ......................2-51
16. Glove box ............................................3-165
17. Automatic transmission shift lever ........5-14
18. Drive mode button ................................5-51
19. Idle Stop and Go(ISG) OFF button ......5-46
20. Downhill Brake Control (DBC) ..............5-36
21. Reverse Parking Distance Warning OFF button ..........................................3-133
22. Surround view monitor button ............3-129
23. Electronic Parking Brake (EPB) ............5-21
24. Auto Hold switch ....................................5-27
25. AC inverter ..........................................3-171
OTMA018004
Page 113 of 557

3-24
Convenient features of your vehicle
The Driver Position Memory System
is provided to store and recall the fol-
lowing memory settings with a sim-
ple button operation.
- Driver's seat position (Power seat)
- Side view mirror position
- Instrument panel illumination intensity
- Head Up Display (HUD) position and brightness (if equipped)
Information
• If the battery is disconnected, thememory settings will be erased.
• If the Driver Position Memory System does not operate normally,
have the system checked by an
authorized HYUNDAI dealer.
Storing Positions into Memory
1. Shift to P (Park) while the ignition switch is in the ON position.
2. Adjust the driver's seat position, side view mirror position, instru-
ment panel illumination intensity
and head-up display height/bright-
ness to positions comfortable for
the driver.
3. Press the SET button. The system will beep once and notify you
"Press button to save settings" on
the cluster LCD display.
4. Press one of the memory buttons (1 or 2) within 4 seconds. The sys-
tem will beep twice when the
memory has been successfully
stored.
5. "Driver 1 (or 2) settings saved" will appear on the cluster LCD display.
i
D DR
RI
IV
V E
ER
R
P
P O
O S
SI
IT
T I
IO
O N
N
M
M E
EM
M O
OR
RY
Y
S
S Y
Y S
ST
T E
EM
M
(
( I
IF
F
E
E Q
Q U
UI
IP
P P
PE
ED
D )
)
OTMA048007
Never attempt to operate the
driver position memory system
while the vehicle is moving.
This could result in loss of con-
trol, and an accident causing
death, serious injury, or property
damage.
WARNING
Page 114 of 557

3-25
Convenient features of your vehicle
3
Recalling Positions from
Memory
1. Shift to P (Park) while the ignitionswitch is in the ON position.
2. Press the desired memory button (1 or 2). The system will beep
once, and then the driver's seat
position, side view mirror position,
instrument panel illumination
intensity and head-up display
height/brightness will automatical-
ly adjust to the stored positions.
3. "Driver 1 (or 2) settings applied" will appear on the cluster LCD dis-
play.
Information
• While recalling the "1" memoryposition, pressing the SET or 1 but-
ton temporarily stops the adjust-
ment of the recalled memory posi-
tion. Pressing the 2 button recalls
the "2" memory position. • While recalling the "2" memory
position, pressing the SET or 2 but-
ton temporarily stops the adjust-
ment of the recalled memory posi-
tion. Pressing the 1 button recalls
the "1" memory position.
• While recalling the stored positions, pressing one of the control buttons
for the driver's seat, side view mir-
ror, instrument panel illumination
or head-up display will cause the
movement of that component to stop
and move in the direction that the
control button is pressed.
Resetting the Driver's Seat
Memory System
Take the following procedures to reset
the driver's seat memory system,
when it does not operate properly.
To reset the driver's seat memo-ry system
1. Place the ignition switch to the ON
position, shift to P (Park), and
open the driver's door. 2. Operate the control switch to set
the driver's seat and seatback to
the foremost position.
3. Simultaneously press the SET button and push forward the seat
movement switch over 2 seconds.
While resetting the driver's seatmemory system
1. It starts with the notification sound.
2. The driver's seat and seatback is
adjusted to the rearward position
with the notification sound.
3. The driver's seat and seatback is re-adjusted to the default position
(central position) with the notifica-
tion sound.
However, in the following cases, the
resetting procedure and the notifica-
tion sound may stop.
- The memory button is pressed.
- The control switch is operated.
- The gear is shifted out of P (Park).
- The driving speed exceeds 2 mph (3 km/h).
- The driver's door is closed.
i
Page 125 of 557

3-36
Convenient features of your vehicle
2. Position the end of your hand-held transmitter 1-3 inches (2-8 cm)
away from the HomeLink
®button
you wish to program while keeping
the indicator light in view.
3. Simultaneously press and hold both the HomeLink
®and hand-
held transmitter buttons until the
HomeLink
®indicator light changes
from a slow to a rapid blinking
light. Now you may release both
the HomeLink
®and hand-held
transmitter buttons.
Information
Some devices may require you to
replace this Programming step 3 with
procedures noted in the "Gate
Operator/Canadian Programming"
chapter. If the HomeLink
®indicator
light does not change to a rapidly
blinking light after performing these
steps, contact HomeLink
®at
www.homelink.com.
4. Press and hold for 5 seconds then release the programmed HomeLink
®
button up to two separate times to
activate the door. If the door does not
activate, press and hold the just-
trained HomeLink
®button and
observe the indicator light.
stantly, programming is complete
and your device should activate
when the HomeLink
®button is
pressed and released.
for 2 seconds and then turns to a
constant light, continue with
"Programming" steps 5-7 to com-
plete the programming of a rolling
code equipped device (most com-
monly a garage door opener). 5. At the garage door opener receiver
(motor-head unit) in the garage,
locate the "learn" or "smart" button.
This can usually be found where
the hanging antenna wire is
attached to the motor-head unit.
6. Firmly press and release the "learn" or "smart" button. (The
name and color of the button vary
by manufacturer). There are 30
seconds to initiate step 7.
7. Return to the vehicle and firmly press, hold for 2 seconds and
release the programmed
HomeLink
®button. Repeat the
"press/hold/release" sequence a
second time, and, depending on
the brand of the garage door
opener (or other rolling code
equipped device), repeat this
sequence a third time to complete
the programming process.
HomeLink
®should now activate your
rolling code equipped device.
i
ODH044414N
Flashing
Page 197 of 557

3-108
Convenient features of your vehicle
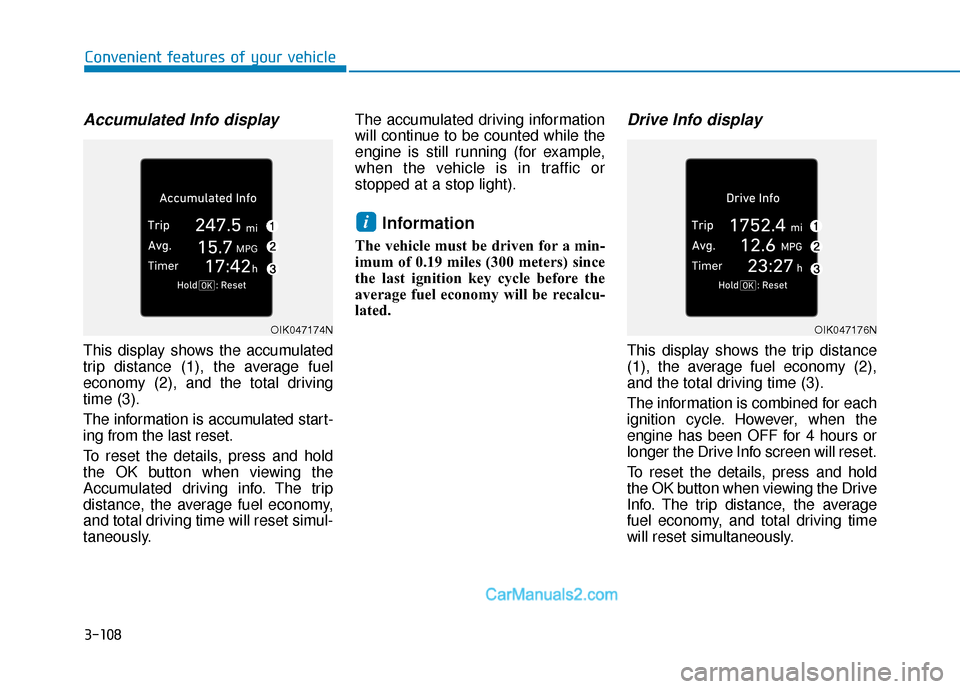
Accumulated Info display
This display shows the accumulated
trip distance (1), the average fuel
economy (2), and the total driving
time (3).
The information is accumulated start-
ing from the last reset.
To reset the details, press and hold
the OK button when viewing the
Accumulated driving info. The trip
distance, the average fuel economy,
and total driving time will reset simul-
taneously.The accumulated driving information
will continue to be counted while the
engine is still running (for example,
when the vehicle is in traffic or
stopped at a stop light).
Information
The vehicle must be driven for a min-
imum of 0.19 miles (300 meters) since
the last ignition key cycle before the
average fuel economy will be recalcu-
lated.
Drive Info display
This display shows the trip distance
(1), the average fuel economy (2),
and the total driving time (3).
The information is combined for each
ignition cycle. However, when the
engine has been OFF for 4 hours or
longer the Drive Info screen will reset.
To reset the details, press and hold
the OK button when viewing the Drive
Info. The trip distance, the average
fuel economy, and total driving time
will reset simultaneously.
i
OIK047174NOIK047176N
Page 218 of 557

3-129
Convenient features of your vehicle
3
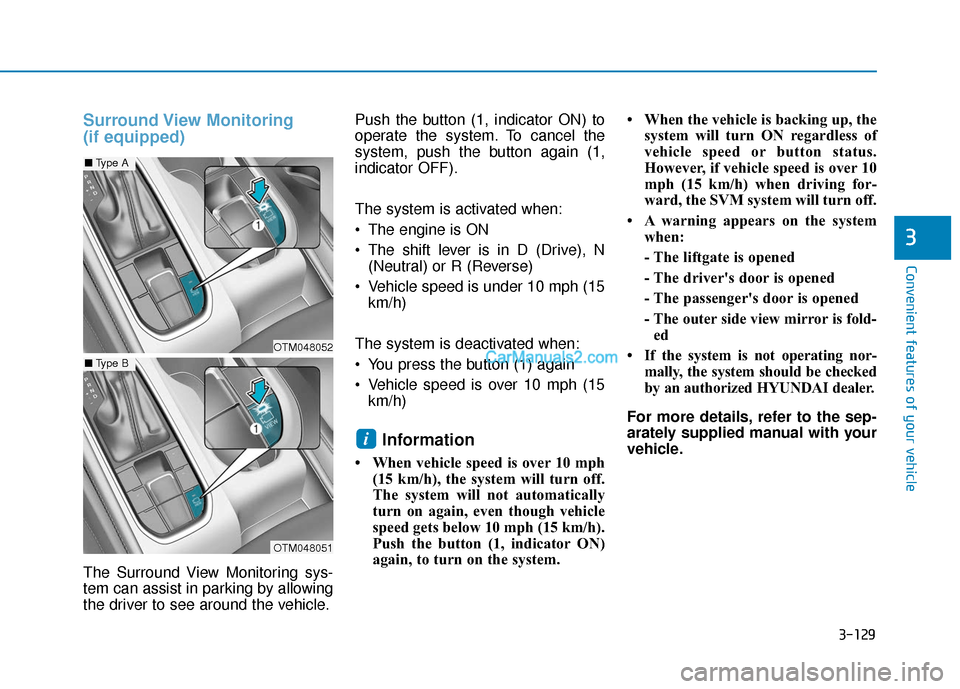
Surround View Monitoring
(if equipped)
The Surround View Monitoring sys-
tem can assist in parking by allowing
the driver to see around the vehicle.Push the button (1, indicator ON) to
operate the system. To cancel the
system, push the button again (1,
indicator OFF).
The system is activated when:
The engine is ON
The shift lever is in D (Drive), N
(Neutral) or R (Reverse)
Vehicle speed is under 10 mph (15 km/h)
The system is deactivated when:
You press the button (1) again
Vehicle speed is over 10 mph (15 km/h)
Information
• When vehicle speed is over 10 mph (15 km/h), the system will turn off.
The system will not automatically
turn on again, even though vehicle
speed gets below 10 mph (15 km/h).
Push the button (1, indicator ON)
again, to turn on the system. • When the vehicle is backing up, the
system will turn ON regardless of
vehicle speed or button status.
However, if vehicle speed is over 10
mph (15 km/h) when driving for-
ward, the SVM system will turn off.
• A warning appears on the system when:
- The liftgate is opened
- The driver's door is opened
- The passenger's door is opened
- The outer side view mirror is fold-ed
• If the system is not operating nor- mally, the system should be checked
by an authorized HYUNDAI dealer.
For more details, refer to the sep-
arately supplied manual with your
vehicle.
i
OTM048052
OTM048051
■ Type A
■Type B
Page 219 of 557

3-130
Convenient features of your vehicle
Always keep the camera lens
clean. The camera may not work
normally if the lens is covered
with foreign material.
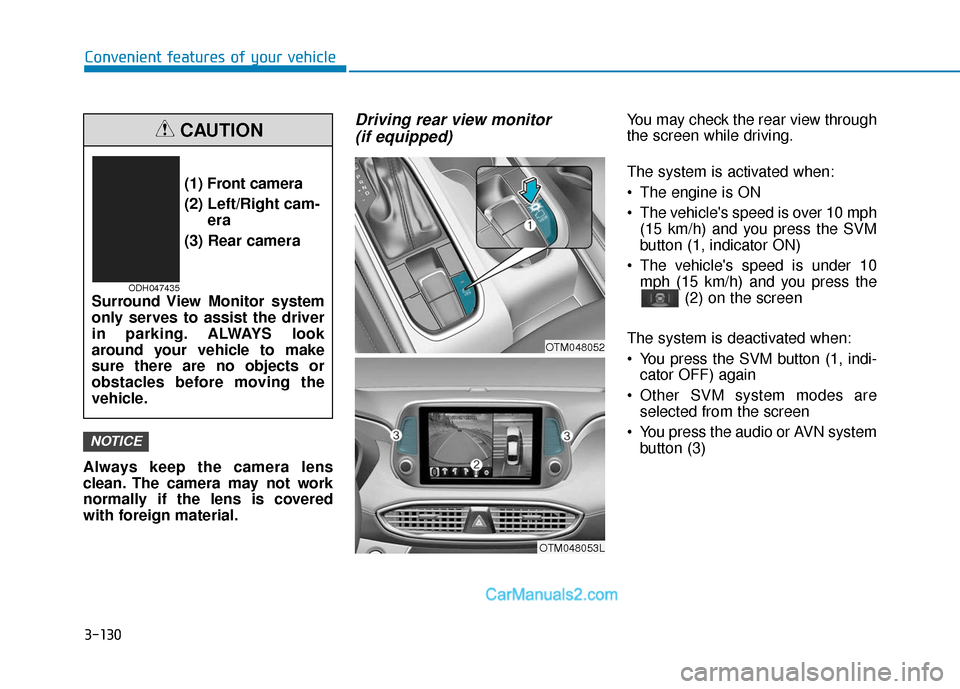
Driving rear view monitor (if equipped)You may check the rear view through
the screen while driving.
The system is activated when:
The engine is ON
The vehicle's speed is over 10 mph
(15 km/h) and you press the SVM
button (1, indicator ON)
The vehicle's speed is under 10 mph (15 km/h) and you press the (2) on the screen
The system is deactivated when:
You press the SVM button (1, indi- cator OFF) again
Other SVM system modes are selected from the screen
You press the audio or AVN system button (3)
NOTICE
(1) Front camera
(2) Left/Right cam- era
(3) Rear camera
Surround View Monitor system
only serves to assist the driver
in parking. ALWAYS look
around your vehicle to make
sure there are no objects or
obstacles before moving the
vehicle.
CAUTION
ODH047435
OTM048053L
OTM048052