2020 Hyundai Santa Fe Steering Wheel controls
[x] Cancel search: Steering Wheel controlsPage 25 of 557
2-7
Safety system of your vehicle
2
Manual adjustment (if equipped)
The front seat can be adjusted by
using the levers located on the out-
side of the seat cushion. Before driv-
ing, adjust the seat to the proper
position so that you can easily con-
trol the steering wheel, foot pedals
and controls on the instrument
panel.
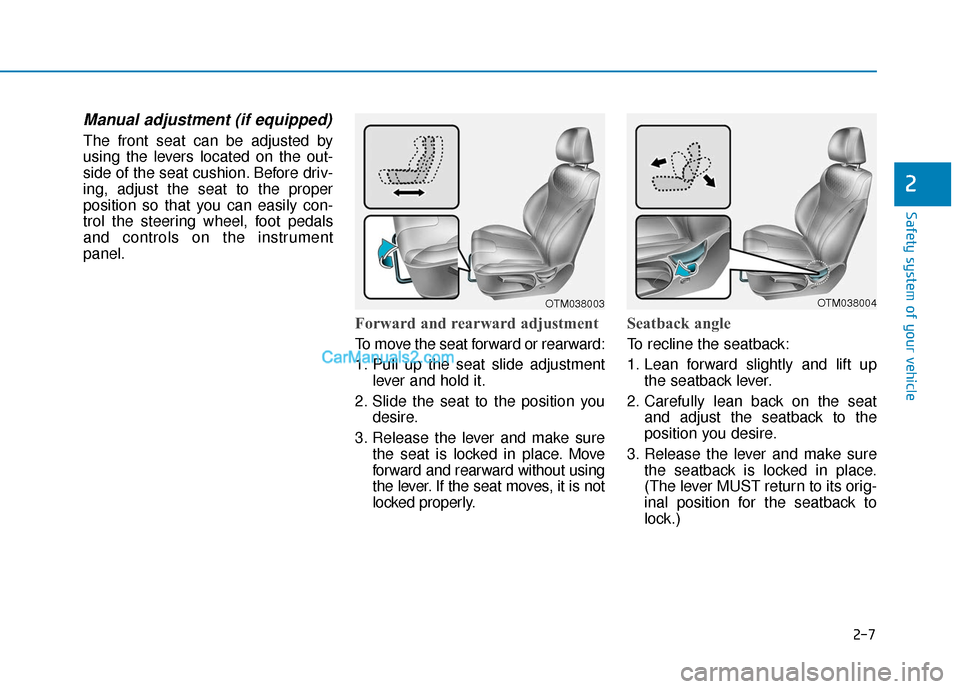
Forward and rearward adjustment
To move the seat forward or rearward:
1. Pull up the seat slide adjustmentlever and hold it.
2. Slide the seat to the position you desire.
3. Release the lever and make sure the seat is locked in place. Move
forward and rearward without using
the lever. If the seat moves, it is not
locked properly.
Seatback angle
To recline the seatback:
1. Lean forward slightly and lift upthe seatback lever.
2. Carefully lean back on the seat and adjust the seatback to the
position you desire.
3. Release the lever and make sure the seatback is locked in place.
(The lever MUST return to its orig-
inal position for the seatback to
lock.)
OTM038003OTM038004
Page 27 of 557

2-9
Safety system of your vehicle
2
Lumbar support
(for driver's seat, if equipped)
The lumbar support can be adjusted
by pressing the lumbar support
switch.
Press the front portion of the switch
(1) to increase support or the rear
portion of the switch (2) to decrease
support.
Power adjustment (if equipped)
The front seat can be adjusted by
using the control switches located on
the outside of the seat cushion. Before
driving, adjust the seat to the proper
position so that you can easily control
the steering wheel, foot pedals and
controls on the instrument panel.To prevent damage to the seats:
Always stop adjusting the seats
when the seat has moved as far
forward or rearward as possible.
Do not adjust the seats for longer than necessary when the
vehicle is turned off. This may
result in unnecessary battery
drain.
Do not operate two or more seats at the same time. This may
result in an electrical malfunc-
tion.
NOTICE
NEVER allow children in the
vehicle unattended. The power
seats are operable when the
vehicle is turned off.
WARNING
OTM038006
Page 118 of 557
3-29
Convenient features of your vehicle
3
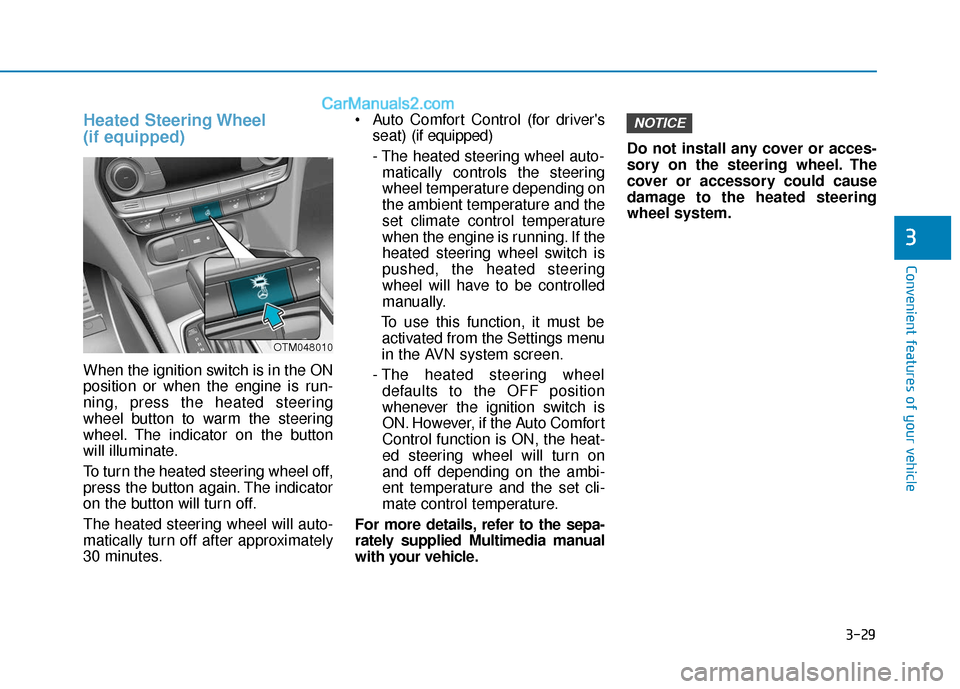
Heated Steering Wheel
(if equipped)
When the ignition switch is in the ON
position or when the engine is run-
ning, press the heated steering
wheel button to warm the steering
wheel. The indicator on the button
will illuminate.
To turn the heated steering wheel off,
press the button again. The indicator
on the button will turn off.
The heated steering wheel will auto-
matically turn off after approximately
30 minutes. Auto Comfort Control (for driver's
seat) (if equipped)
- The heated steering wheel auto- matically controls the steering
wheel temperature depending on
the ambient temperature and the
set climate control temperature
when the engine is running. If the
heated steering wheel switch is
pushed, the heated steering
wheel will have to be controlled
manually.
To use this function, it must be activated from the Settings menu
in the AVN system screen.
- The heated steering wheel defaults to the OFF position
whenever the ignition switch is
ON. However, if the Auto Comfort
Control function is ON, the heat-
ed steering wheel will turn on
and off depending on the ambi-
ent temperature and the set cli-
mate control temperature.
For more details, refer to the sepa-
rately supplied Multimedia manual
with your vehicle. Do not install any cover or acces-
sory on the steering wheel. The
cover or accessory could cause
damage to the heated steering
wheel system.
NOTICE
OTM048010
Page 271 of 557
Multimedia System
Multimedia System.................................................4-2
AUX, USB and USB Port ..................................................4-2
Antenna ........................................................................\
.......4-2
Steering Wheel Audio Controls ......................................4-3
Bluetooth®Wireless Technology ..................................4-4
Audio (Display Audio) / Video /
Navigation System (AVN).................................................4-4
4
Page 367 of 557
5-93
Driving your vehicle
5
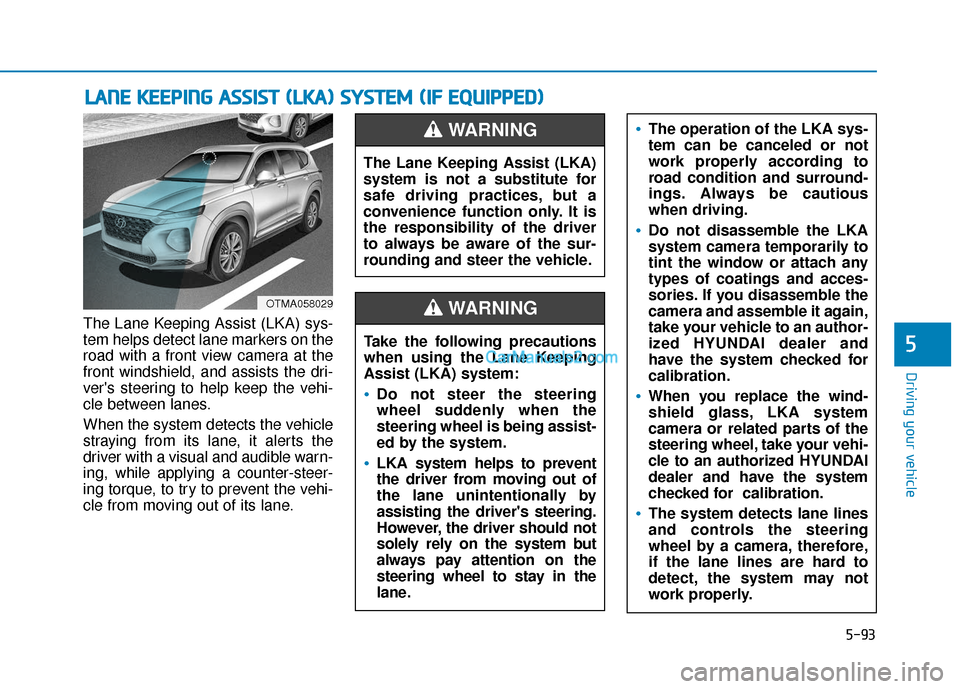
The Lane Keeping Assist (LKA) sys-
tem helps detect lane markers on the
road with a front view camera at the
front windshield, and assists the dri-
ver's steering to help keep the vehi-
cle between lanes.
When the system detects the vehicle
straying from its lane, it alerts the
driver with a visual and audible warn-
ing, while applying a counter-steer-
ing torque, to try to prevent the vehi-
cle from moving out of its lane.
L LA
A N
N E
E
K
K E
EE
EP
P I
IN
N G
G
A
A S
SS
SI
IS
S T
T
(
( L
L K
K A
A )
)
S
S Y
Y S
ST
T E
EM
M
(
( I
IF
F
E
E Q
Q U
UI
IP
P P
PE
ED
D )
)
OTMA058029
The Lane Keeping Assist (LKA)
system is not a substitute for
safe driving practices, but a
convenience function only. It is
the responsibility of the driver
to always be aware of the sur-
rounding and steer the vehicle.
WARNING
Take the following precautions
when using the Lane Keeping
Assist (LKA) system:
•Do not steer the steering
wheel suddenly when the
steering wheel is being assist-
ed by the system.
LKA system helps to prevent
the driver from moving out of
the lane unintentionally by
assisting the driver's steering.
However, the driver should not
solely rely on the system but
always pay attention on the
steering wheel to stay in the
lane.
WARNING
The operation of the LKA sys-
tem can be canceled or not
work properly according to
road condition and surround-
ings. Always be cautious
when driving.
Do not disassemble the LKA
system camera temporarily to
tint the window or attach any
types of coatings and acces-
sories. If you disassemble the
camera and assemble it again,
take your vehicle to an author-
ized HYUNDAI dealer and
have the system checked for
calibration.
When you replace the wind-
shield glass, LKA system
camera or related parts of the
steering wheel, take your vehi-
cle to an authorized HYUNDAI
dealer and have the system
checked for calibration.
The system detects lane lines
and controls the steering
wheel by a camera, therefore,
if the lane lines are hard to
detect, the system may not
work properly.
Page 375 of 557
5-101
Driving your vehicle
5
LKA System Function Change
The driver can change LKA to Lane
Departure Warning from the LCD dis-
play. Go to the 'User Settings →
Driver Assistance → Lane Safety →
Active LKA/Standard LKA/Lane
Departure Warning.
Active LKA
The Active LKA mode provides more
frequent steering wheel control in
comparison with the Standard LKA
mode.
Standard LKA
This mode guides the driver to help
keep the vehicle within the lanes. It
rarely controls the steering wheel,
when the vehicle drives well inside
the lanes. However, it starts to con-
trol the steering wheel, when the
vehicle is about to deviate out of the
lane.
Lane Departure Warning
LDW system alerts the driver with a
visual warning and a warning alarm
when the system detects the vehicle
departing the lane. The steering
wheel will not be controlled.
Off
If you select "Off", the LKA system is
deactivated.
Page 381 of 557

5-107
Driving your vehicle
5
Smart Cruise Control Speed
To set Smart Cruise Controlspeed
1. Push the CRUISE button on the
steering wheel to turn the system
on. The cruise indicator will illumi-
nate.
2. Accelerate to the desired speed. The Smart Cruise Control speedcan be set as follows:
6 – 100 mph (10 - 160 km/h) : when there is no vehicle in front
0 – 100 mph (0 - 160 km/h) : when there is a vehicle in front 3. Push the toggle switch down
(SET-). The Set Speed and
Vehicle-to-Vehicle Distance on the
LCD display will illuminate.
4. Release the accelerator pedal. The desired speed will automati-
cally be maintained.
If there is a vehicle in front of you, the
speed may decrease to maintain the
distance to the vehicle ahead.
On a steep grade, the vehicle may
slow down or speed up slightly while
going uphill or downhill.
Information
• Vehicle speed may decrease on an upward slope and increase on a
downward slope.
• When you are setting the cruise control speed, with a vehicle in
front and your vehicle speed is
between 0 ~ 20 mph (0 ~ 30 km/h ),
the speed will set to 20 mph (30
km/h).
i
OTM058037
OTM058038
Page 552 of 557
I-9
Liftgate ........................................................................\
....3-50Power liftgate .............................................................3-52
Smart liftgate ..............................................................3-59
Light ........................................................................\
......3-112 Auto light position ....................................................3-112
Battery saver function ..............................................3-118
Daytime running light (DRL)...................................3-112
Front fog lamp ..........................................................3-118
Headlamp delay function..........................................3-119
Headlamp leveling device ........................................3-119
Headlamp position ....................................................3-113
High Beam Assist (HBA) system.............................3-114
High beam operation ................................................3-114
Lane change signals..................................................3-117
One-touch turn signal function.................................3-118
Parking lamp position...............................................3-113
Turn signals ..............................................................3-117
Light bulbs ......................................................................7-\
65
Lubricants and capacities..................................................8-7
Luggage compartment lamp .........................................3-121
Luggage net holder .......................................................3-177
Luggage tray .................................................................3-167
Maintenance Explanation of scheduled maintenance items ............7-18
Maintenance services ...................................................7-4 Maintenance under severe usage
conditions (2.0 T-GDI) ............................................7-16
Maintenance under severe usage conditions (2.4 GDI) ..............................................7-11
Normal maintenance schedule (2.0 T-GDI) ...............7-13
Normal maintenance schedule (2.4 GDI) ....................7-8
Owner maintenance ......................................................7-5
Scheduled maintenance services ..................................7-7
Tire maintenance ........................................................7-43
Maintenance services ........................................................7-4
Manual climate control system .....................................3-137
Master warning mode .....................................................3-94
Mirrors ........................................................................\
....3-30 Adjusting the side view mirrors .................................3-39
Day/night rearview mirror..........................................3-30
Electrochromic mirror (ECM)....................................3-31
Folding the side view mirrors ....................................3-39
Inside rearview mirror ................................................3-30
Reverse parking aid function .....................................3-39
Side view mirrors .......................................................3-38
Moonroof, see sunroof ....................................................3-45
Multi fuse ........................................................................\
7-54
Multimedia system............................................................4-2 Antenna ........................................................................\
4-2
Audio / Video / Navigation system ..............................4-4
AUX, USB and iPod
®port ..........................................4-2
Bluetooth®Wireless Technology..................................4-4
Steering wheel audio controls ......................................4-3I
Index
M