2020 Hyundai Santa Fe LIGHTING
[x] Cancel search: LIGHTINGPage 91 of 557

LCD Display ...........................................................3-91
LCD Display Control ........................................................3-91
LCD Display Modes .........................................................3-92
Trip Computer .....................................................3-106
Head Up Display (HUD).....................................3-110
Lighting................................................................3-112
Exterior Lights ...............................................................3-112
Interior Lights ................................................................3-120
Welcome System ...........................................................3-123
Wipers And Washers .........................................3-124
Front Windshield Wipers .............................................3-124
Front Windshield Washers ..........................................3-126
Rear Window Wiper and Washer..............................3-127
Driver Assist System .........................................3-128
Rear view monitor ........................................................3-128
Surround View Monitoring .........................................3-129
Blind-spot View Monitor system ..............................3-131
Reverse Parking Distance Warning system............3-133
Manual Climate Control System.......................3-137
Heating and Air Conditioning .....................................3-138
System Operation .........................................................3-142
System Maintenance....................................................3-144
Automatic Climate Control System ..................3-146
Automatic Temperature Control Mode ....................3-147
Manual Temperature Control Mode .........................3-148
System Operation .........................................................3-155
System Maintenance....................................................3-156
Windshield Defrosting and Defogging ............3-158
Auto Defogging System ..............................................3-160
Rear Window Defroster ..............................................3-162
Climate Control Additional Features ...............3-163
Cluster ionizer ................................................................3-163
Automatic Ventilation ...................................................3-163
Sunroof Inside Air Recirculation ...............................3-164
Auto comfort control ...................................................3-164
Storage Compartment .......................................3-165
Center Console Storage ..............................................3-165
Glove Box ........................................................................\
3-165
Sunglass Holder.............................................................3-166
Tray......................................................................\
.............3-166
Luggage Tray .................................................................3-167
3
Page 120 of 557

3-31
Convenient features of your vehicle
3
Make this adjustment before you
start driving and while the day/night
lever is in the day position.
Pull the day/night lever towards you
to reduce glare from the headlights
of the vehicles behind you during
night driving.
Remember that you lose some
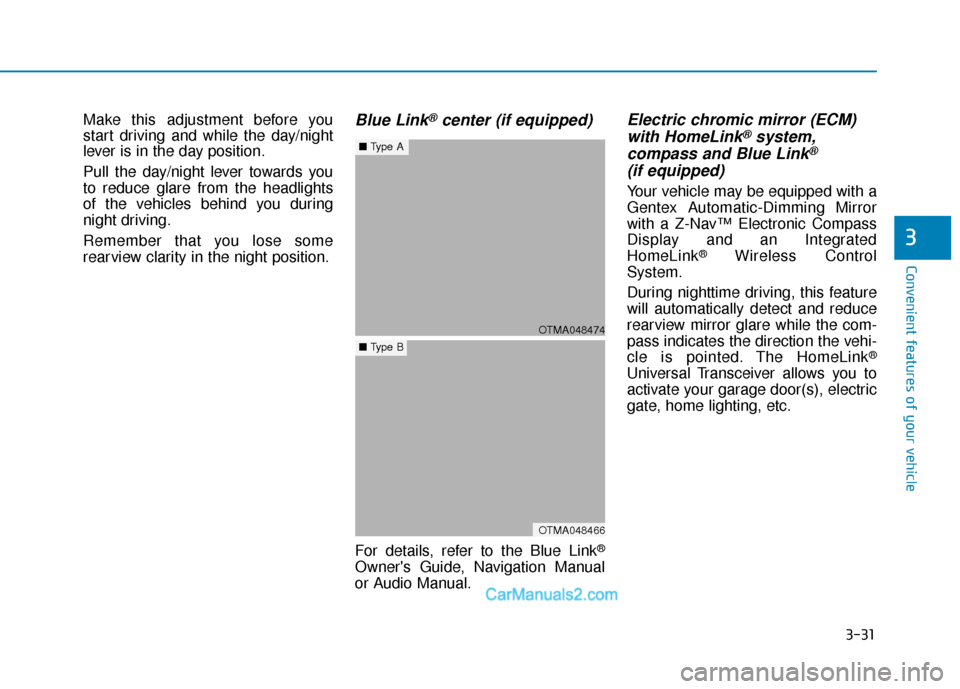
rearview clarity in the night position.Blue Link®center (if equipped)
For details, refer to the Blue Link®
Owner's Guide, Navigation Manual
or Audio Manual.
Electric chromic mirror (ECM)with HomeLink®system,
compass and Blue Link®
(if equipped)
Your vehicle may be equipped with a
Gentex Automatic-Dimming Mirror
with a Z-Nav™ Electronic Compass
Display and an Integrated
HomeLink
®Wireless Control
System.
During nighttime driving, this feature
will automatically detect and reduce
rearview mirror glare while the com-
pass indicates the direction the vehi-
cle is pointed. The HomeLink
®
Universal Transceiver allows you to
activate your garage door(s), electric
gate, home lighting, etc.
OTMA048474
■ Type A
OTMA048466
■Type B
Page 123 of 557

3-34
Convenient features of your vehicle
To adjust the Zone setting:
1. Determine the desired Zone Number based upon your current
location on the Zone Map.
2. Press and hold the button for 6 seconds, the current Zone
Number will appear on the display.
3. Pressing and holding the button again will cause the numbers to
increment (Note: they will repeat
…13, 14, 15, 1, 2, …). Releasing
the button when the desired Zone
Number appears on the display
will set the new Zone.
4. Within about 5 seconds the com- pass will start displaying a com-
pass heading again.
There are some conditions that can
cause changes to the vehicle mag-
nets, such as installing a ski rack or
a CB antenna. Body repair work on
the vehicle can also cause changes
to the vehicle’s magnetic field. In
these situations, the compass will
need to be re-calibrated to quickly
correct these changes. If you need to recalibrate the com-
pass:
1. Press and hold the button for
more than 9 seconds. When the
compass memory is cleared a "C"
will appear in the display.
2. Drive the vehicle in 2 complete cir- cles at less than 5 mph (8 km/h).
Integrated HomeLink®Wireless
Control System
The HomeLink®Wireless Control
System can replace up to three
hand-held radio-frequency (RF)
transmitters with a single built-in
device. This innovative feature will
learn the radio frequency codes of
most current transmitters to operate
devices such as gate operators,
garage door openers, entry door
locks, security systems, even home
lighting. Both standard and rolling
code-equipped transmitters can be
programmed by following the out-
lined procedures.
Additional HomeLink
®information
can be found at: www.homelink.com
or by calling 1-800-355-3515.
Retain the original transmitter of the
RF device you are programming for
use in other vehicles as well as for
future HomeLink
®programming. It is
also suggested that upon the sale of
the vehicle, the programmed
HomeLink
®buttons be erased for
security purposes.
Page 126 of 557

3-37
Convenient features of your vehicle
3
Gate operator & Canadian program-ming
During programming, your handheld
transmitter may automatically stop
transmitting. Continue to press the
Integrated HomeLink
®Wireless
Control System button (note steps 2
through 3 in the Programming portion
of this document) while you press
and re-press ("cycle") your handheld
transmitter every two seconds until
the frequency signal has been
learned. The indicator light will flash
slowly and then rapidly after several
seconds upon successful training.
Operating HomeLink®
To operate, simply press and release
the programmed HomeLink®button.
Activation will now occur for the
trained device (i.e. garage door
opener, gate operator, security sys-
tem, entry door lock, home/office
lighting, etc.). For convenience, the
hand-held transmitter of the device
may also be used at any time.
Reprogramming a single HomeLink®
button
To program a device to HomeLink®
using a HomeLink®button previously
trained, follow these steps:
1. Press and hold the desired HomeLink
®button. DO NOT
release the button.
2. The indicator light will begin to flash after 20 seconds. Without releasing
the HomeLink
®button, proceed
with "Programming" step 2.
For questions or comments, contact
HomeLink
®at www.homelink.comor
1-800-355-3515.
Erasing HomeLink®buttons
Individual buttons cannot be erased.
However, to erase all three pro-
grammed buttons:
1. Press and hold the two outer HomeLink
®buttons until the indi-
cator light begins to flash after 10
seconds.
2. Release both buttons. Do not hold for longer than 20 seconds.
The Integrated HomeLink
®Wireless
Control System is now in the training
(learn) mode and can be pro-
grammed at any time following the
appropriate steps in the
Programming chapters above.
NVS
®is a registered trademark and
Z-Nav™ is a trademark of the Gentex
Corporation, Zeeland, Michigan.
HomeLink
®is a registered trademark
owned by Johnson Controls,
Incorporated, Milwaukee, Wisconsin.
FCC ID: NZLTLMHL4
IC: 4112A-TLMHL4
Page 177 of 557

3-88
Convenient features of your vehicle
Lights Mode
This indicator displays which exterior
light is selected using the lighting
control.
You can activate or deactivate
Wiper/Lights Display function from
the User Settings mode in the cluster
LCD display.
Wiper
This indicator displays which wiper
speed is selected using the wiper
control.
You can activate or deactivate
Wiper/Lights Display function from
the User Settings mode in the cluster
LCD display.
Heated Steering Wheel turnedoff (if equipped)
This message is displayed if you turn
off the heated steering wheel.
For more details, refer to "Heated
Steering Wheel" in this chapter.
Low washer fluid
This warning message is displayed
if the washer fluid level in the reser-
voir is nearly empty.
Have the washer fluid reservoir refilled.
Low fuel
This warning message is displayed if
the fuel tank is almost out of fuel.
When this message is displayed, the
low fuel level warning light in the
cluster will come on.
It is recommended to look for the
nearest fueling station and refuel as
soon as possible.
Add fuel as soon as possible.
Engine overheated
This warning message is displayed
when the engine coolant tempera-
ture is above 248°F (120°C). This
means that the engine is overheated
and may be damaged.
If your vehicle is overheated, refer
to "Overheating" in chapter 6.
■ Rear
■ Front
OIK047146L/OTMA048119OIK047145L
Page 191 of 557

3-102
Convenient features of your vehicle
ItemsExplanation
One Touch Turn Signal
The one touch turn signal function will be deactivated.
The turn signal indicator will blink 3, 5, or 7 times when the turn signal lever ismoved slightly.
For more details, refer to "Lighting" in this chapter.
Headlight DelayTo activate or deactivate the headlight delay function.
For more details, refer to "Lighting" in this chapter.
4. Lights
ItemsExplanation
Welcome SoundTo activate or deactivate the welcome sound function.
5. Sound
❈ The information provided may differ depending on which functions are applicable to your vehicle.
❈
The information provided may differ depending on which functions are applicable to your vehicle.
Page 199 of 557

3-110
Convenient features of your vehicle
The Head-Up Display is an optional
feature that allows the driver to view
information projected onto a trans-
parent screen while still keeping your
eyes safely on the road ahead while
driving.
Precautions while using the head up display
It may sometimes be difficult to read
information on the head up display in
the following situations.
- The driver is improperly positioned
in the driver's seat.
- The driver wears polarizing-filter sunglasses.
- An object is located above the head up display cover.
- The vehicle is driven on a wet road.
- Any improper lighting accessory is installed inside the vehicle, or there
is incoming light from outside of
the vehicle.
- The driver wears glasses.
- The driver wears contact lenses.
When it is difficult to read the head
up display information, adjust the
head up display angle or the head up
display brightness level in the User
Settings mode. For more details,
refer to "LCD Display" in this chapter. When replacing the front wind-
shield glass of the vehicle
equipped with the head up dis-
play, replace it with a windshield
glass designed for the head up
display operation. Otherwise,
duplicated images may be dis-
played on the windshield glass.
NOTICE
H H
E
EA
A D
D
U
U P
P
D
D I
IS
S P
P L
LA
A Y
Y
(
( H
H U
U D
D)
)
(
( I
IF
F
E
E Q
Q U
UI
IP
P P
PE
ED
D )
)
OTMA048044
Do not tint the front wind-
shield glass or add other
types of metallic coating.
Otherwise, the head up dis-
play image may be invisible.
Do not place any accessories
on the crash pad or attach any
objects on the windshield
glass.
The Blind-spot Collision
Warning (BCW) system warn-
ings on the head up display
are supplemental. Do not sole-
ly depend on them to change
lanes. Always take a look
around before changing lanes.
WARNING
Page 201 of 557

3-112
Convenient features of your vehicle
L
LI
IG
G H
H T
TI
IN
N G
G
Exterior Lights
Lighting control
To operate the lights, turn the knob at
the end of the control lever to one of
the following positions:
1. OFF position
2. AUTO headlamp position
3. Parking lamp position
4. Headlamp position
Daytime running light (DRL)
The Daytime Running Lights (DRL)
can make it easier for others to see
the front of your vehicle during the
day, especially after dawn and before
sunset.
The DRL system will turn the dedi-
cated lamp OFF when :
• The headlamps are ON.
The parking lamps are ON.
The vehicle is turned off.
The parking brake is engaged.
AUTO headlamp position
(if equipped)
The parking lamp and headlamp will
be turned ON or OFF automatically
depending on the amount of daylight
as measured by the ambient light
sensor (1) on the center dash (Type
A) or the upper end of the windshield
glass (Type B).
OOS047404N
OTMA048477
OTMA048479
■ Type A
■Type B