2020 Hyundai Santa Fe Antenna
[x] Cancel search: AntennaPage 14 of 557
1-3
Your vehicle at a glance
1
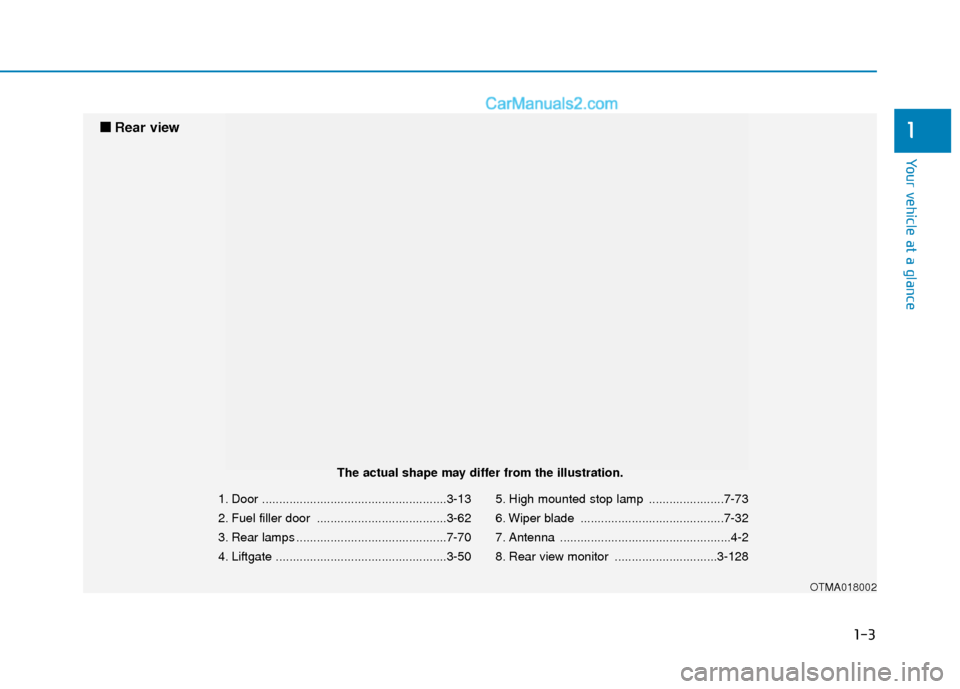
1. Door ......................................................3-13
2. Fuel filler door ......................................3-62
3. Rear lamps ............................................7-70
4. Liftgate ..................................................3-505. High mounted stop lamp ......................7-73
6. Wiper blade ..........................................7-32
7. Antenna ..................................................4-2
8. Rear view monitor ..............................3-128
OTMA018002
■
■
Rear view
The actual shape may differ from the illustration.
Page 123 of 557
3-34
Convenient features of your vehicle
To adjust the Zone setting:
1. Determine the desired Zone Number based upon your current
location on the Zone Map.
2. Press and hold the button for 6 seconds, the current Zone
Number will appear on the display.
3. Pressing and holding the button again will cause the numbers to
increment (Note: they will repeat
…13, 14, 15, 1, 2, …). Releasing
the button when the desired Zone
Number appears on the display
will set the new Zone.
4. Within about 5 seconds the com- pass will start displaying a com-
pass heading again.
There are some conditions that can
cause changes to the vehicle mag-
nets, such as installing a ski rack or
a CB antenna. Body repair work on
the vehicle can also cause changes
to the vehicle’s magnetic field. In
these situations, the compass will
need to be re-calibrated to quickly
correct these changes. If you need to recalibrate the com-
pass:
1. Press and hold the button for
more than 9 seconds. When the
compass memory is cleared a "C"
will appear in the display.
2. Drive the vehicle in 2 complete cir- cles at less than 5 mph (8 km/h).
Integrated HomeLink®Wireless
Control System
The HomeLink®Wireless Control
System can replace up to three
hand-held radio-frequency (RF)
transmitters with a single built-in
device. This innovative feature will
learn the radio frequency codes of
most current transmitters to operate
devices such as gate operators,
garage door openers, entry door
locks, security systems, even home
lighting. Both standard and rolling
code-equipped transmitters can be
programmed by following the out-
lined procedures.
Additional HomeLink
®information
can be found at: www.homelink.com
or by calling 1-800-355-3515.
Retain the original transmitter of the
RF device you are programming for
use in other vehicles as well as for
future HomeLink
®programming. It is
also suggested that upon the sale of
the vehicle, the programmed
HomeLink
®buttons be erased for
security purposes.
Page 125 of 557

3-36
Convenient features of your vehicle
2. Position the end of your hand-held transmitter 1-3 inches (2-8 cm)
away from the HomeLink
®button
you wish to program while keeping
the indicator light in view.
3. Simultaneously press and hold both the HomeLink
®and hand-
held transmitter buttons until the
HomeLink
®indicator light changes
from a slow to a rapid blinking
light. Now you may release both
the HomeLink
®and hand-held
transmitter buttons.
Information
Some devices may require you to
replace this Programming step 3 with
procedures noted in the "Gate
Operator/Canadian Programming"
chapter. If the HomeLink
®indicator
light does not change to a rapidly
blinking light after performing these
steps, contact HomeLink
®at
www.homelink.com.
4. Press and hold for 5 seconds then release the programmed HomeLink
®
button up to two separate times to
activate the door. If the door does not
activate, press and hold the just-
trained HomeLink
®button and
observe the indicator light.
stantly, programming is complete
and your device should activate
when the HomeLink
®button is
pressed and released.
for 2 seconds and then turns to a
constant light, continue with
"Programming" steps 5-7 to com-
plete the programming of a rolling
code equipped device (most com-
monly a garage door opener). 5. At the garage door opener receiver
(motor-head unit) in the garage,
locate the "learn" or "smart" button.
This can usually be found where
the hanging antenna wire is
attached to the motor-head unit.
6. Firmly press and release the "learn" or "smart" button. (The
name and color of the button vary
by manufacturer). There are 30
seconds to initiate step 7.
7. Return to the vehicle and firmly press, hold for 2 seconds and
release the programmed
HomeLink
®button. Repeat the
"press/hold/release" sequence a
second time, and, depending on
the brand of the garage door
opener (or other rolling code
equipped device), repeat this
sequence a third time to complete
the programming process.
HomeLink
®should now activate your
rolling code equipped device.
i
ODH044414N
Flashing
Page 271 of 557
Multimedia System
Multimedia System.................................................4-2
AUX, USB and USB Port ..................................................4-2
Antenna ........................................................................\
.......4-2
Steering Wheel Audio Controls ......................................4-3
Bluetooth®Wireless Technology ..................................4-4
Audio (Display Audio) / Video /
Navigation System (AVN).................................................4-4
4
Page 272 of 557
4-2
Multimedia System
• If you install an aftermarket HID head lamp, your vehicle's audio
and electronic devices may not
function properly.
Prevent chemicals such as per- fume, cosmetic oil, sun cream,
hand cleaner, and air freshener
from contacting the interior
parts because they may cause
damage or discoloration.
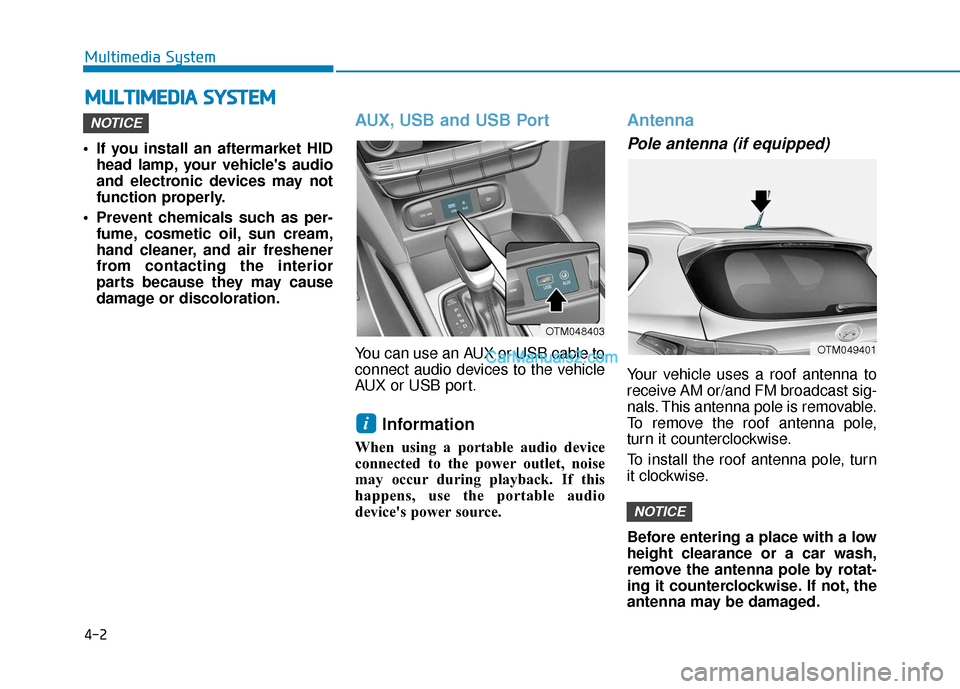
AUX, USB and USB Port
You can use an AUX or USB cable to
connect audio devices to the vehicle
AUX or USB port.
Information
When using a portable audio device
connected to the power outlet, noise
may occur during playback. If this
happens, use the portable audio
device's power source.
Antenna
Pole antenna (if equipped)
Your vehicle uses a roof antenna to
receive AM or/and FM broadcast sig-
nals. This antenna pole is removable.
To remove the roof antenna pole,
turn it counterclockwise.
To install the roof antenna pole, turn
it clockwise.
Before entering a place with a low
height clearance or a car wash,
remove the antenna pole by rotat-
ing it counterclockwise. If not, the
antenna may be damaged.
NOTICE
i
NOTICE
M M U
UL
LT
T I
IM
M E
ED
D I
IA
A
S
S Y
Y S
ST
T E
EM
M
OTM049401
OTM048403
Page 273 of 557

• When reinstalling your roof anten-na, it is important that it is fully
tightened and adjusted to the
upright position to ensure proper
reception.
When cargo is loaded on the roof rack, do not place the cargo near
the antenna pole to ensure proper
reception.
Shark fin antenna (if equipped)
The shark fin antenna will receive the
AM, FM broadcast signals and trans-
mit data.
Steering Wheel Audio Control
Do not operate multiple audio
remote control buttons simultane-
ously.
VOLUME (VOL + / - ) (1)
Press the VOLUME (+) switch upto increase volume.
Press the VOLUME (-) switch down to decrease volume.
SEEK/PRESET ( / ) (2)
If the SEEK/PRESET switch is
pressed up or down and held for 0.8
second or more, it will function in the
following modes:
RADIO mode
It will function as the AUTO SEEK
select button. It will SEEK until you
release the button.
MEDIA mode
It will function as the FF/RW button.
If the SEEK/PRESET switch is
pressed up or down, it will function
in the following modes:
RADIO mode
It will function as the PRESET STA-
TION UP/DOWN button.
MEDIA mode
It will function as the TRACK UP/
DOWN button.
MODE (3)
Press the MODE button to toggle
through Radio, SXM, or AUX modes.
NOTICE
4-3
Multimedia System
4
OTM049420
OTM048402
Page 396 of 557
5-122
Driving your vehicle
Information
The Smart Cruise Control system
may not operate temporarily due to:
• Electrical interference
• Modifying the suspension
• Differences of tire abrasion or tirepressure
• Installing different type of tires
Information
This device complies with Part 15 of
the FCC rules.
Operation is subject to the following
three conditions:
1. This device may not cause harmful interference, and
2. This device must accept any inter- ference received, including inter-
ference that may cause undesired
operation.
3. Changes or modifications not expressly approved by the party
responsible for compliance could
void the user's authority to operate
the device.
Information
Radio frequency radiation exposure
information:
This equipment complies with FCC
radiation exposure limits set forth for
an uncontrolled environment.
This equipment should be installed
and operated with minimum distance
of 8 in. (20 cm) between the radiator
(antenna) and your body.
This transmitter must not be co-locat-
ed or operating in conjunction with
any other antenna or transmitter.
i
i
iVehicles moving in front of
you with a frequent lane
change may cause a delay in
the system's reaction or may
cause the system to react to a
vehicle actually in an adjacent
lane. Always drive cautiously
to prevent unexpected and
sudden situations from occur-
ring.
Always be aware of the select-
ed speed and vehicle to vehi-
cle distance. The driver
should not solely rely on the
system but always pay atten-
tion to driving conditions and
control your vehicle speed.
The Smart Cruise Control sys-
tem may not recognize com-
plex driving situations so
always pay attention to driv-
ing conditions and control
your vehicle speed.
Page 545 of 557

I-2
AC inverter ...................................................................3-171\
Air bag warning labels ....................................................2-71
Air bags ........................................................................\
...2-49Additional safety precautions .....................................2-71
Air bag collision sensors ............................................2-65
Air bag inflation conditions .......................................2-67
Air bag non-inflation conditions ................................2-68
Air bag warning labels ...............................................2-71
Curtain air bags ..........................................................2-53
Driver's air bag ...........................................................2-51
How does the air bags system operate? .....................2-54
Occupant Classification System (OCS) .....................2-60
Passenger's front air bag.............................................2-51
Side air bags ...............................................................2-52
SRS Care ....................................................................2-70\
SRS components and functions..................................2-54
SRS warning light ......................................................2-55
What to expect after an air bag inflates .....................2-59
Why didn't my air bag go off in a collision ...............2-65
Air cleaner filter replacement .........................................7-27
Air conditioning system specification ..............................8-6
Air recirculation of passenger compartment while spraying the washer fluid ..........................................3-163
Air ventilation seats ........................................................2-22
Alarm system ..................................................................3-23
All Wheel Drive (AWD) .................................................5-40 Antenna ........................................................................\
.....4-2
Anti-lock Brake System (ABS) ......................................5-30
Appearance care..............................................................7-76
Exterior care ...............................................................7-76
Interior care ................................................................7-81
Armrest ........................................................................\
...2-16
Ashtray ........................................................................\
..3-168
Audio / Video / Navigation system ..................................4-4
Auto comfort control ....................................................3-164
Auto defogging system .................................................3-160
Auto hold ........................................................................\
5-27
Auto light position ........................................................3-112
Automatic climate control system ................................3-146
Automatic transmission ..................................................5-14 Good driving practices ...............................................5-18
Manual shift mode......................................................5-16
Shift lock system ........................................................5-17
Shift-lock release ........................................................5-17
Transmission ranges ...................................................5-15
Automatic ventilation ...................................................3-163
AUX, USB and USB port.................................................4-2
Index
A