Page 263 of 557

3-174
Convenient features of your vehicle
To charge a cellular phone
The wireless cellular phone charging
system charges only the Qi-enabled
cellular phones ( ). Read the label
on the cellular phone accessory
cover or visit your cellular phone
manufacturer's website to check
whether your cellular phone supports
the Qi technology.
The wireless charging process starts
when you put a Qi-enabled cellular
phone on the wireless charging unit.
1. Remove other items, including thesmart key, from the wireless charg-
ing unit. If not, the wireless charg-
ing process may be interrupted.
Place the cellular phone on the
center of the charging pad ( ).
2. The indicator light is orange when the cellular phone is charging. The
indicator light turns green when
phone charging is complete.
3. You can turn ON or OFF the wire- less charging function in the user
settings mode on the instrument
cluster. For further information,
refer to the "LCD Display Modes"
in this chapter. If your cellular phone is not charging:
- Slightly change the position of the
cellular phone on the charging
pad.
- Make sure the indicator light is orange.
The indicator light will blink orange for
10 seconds if there is a malfunction in
the wireless charging system.
In this case, temporarily stop the
charging process, and re-attempt to
charge your cellular phone again.
The system warns you with a mes-
sage on the LCD display if the cellular
phone is still on the wireless charging
unit after the engine is turned OFF
and the front door is opened.
Information
For some manufacturers' cellular
phones, the system may not warn you
even though the cellular phone is left
on the wireless charging unit. This is
due to the particular characteristic of
the cellular phone and not a malfunc-
tion of the wireless charging. The wireless cellular phone
charging system may not sup-
port certain cellular phones,
which are not verified for the Qi
specification ( ).
When placing your cellular phone on the charging mat,
position the phone in the middle
of the mat for optimal charging
performance. If your cellular
phone is off to the side, the
charging rate may be less and in
some cases the cellular phone
may experience higher heat con-
duction.
In some cases, the wireless charging may stop temporarily
when the Remote Key or Smart
Key is used, either when starting
the vehicle or locking/unlocking
the doors, etc.
When charging certain cellular phones, the charging indicator
may not change to green when
the cellular phone is fully
charged.
NOTICE
i
Page 264 of 557

3-175
Convenient features of your vehicle
3
The wireless charging processmay temporarily stop, when tem-
perature abnormally increases
inside the wireless cellular phone
charging system. Stop the charg-
ing cellular phone and wait until
temperature falls to a certain level.
The wireless charging process may temporarily stop when there
is any metallic item, such as a
coin, between the wireless cellular
phone charging system and the
cellular phone.
When charging some cellular phones with a self-protection fea-
ture, the wireless charging speed
may decrease and the wireless
charging may stop.
If the cellular phone has a thick cover, the wireless charging may
not be possible.
If the cellular phone is not com- pletely contacting the charging
pad, wireless charging may not
operate properly.
Some magnetic items like credit cards, phone cards or rail tickets
may be damaged if left with the
cellular phone during the charging
process. When any cellular phone without a
wireless charging function or a
metallic object is placed on the
charging pad, a small noise may
sound. This small sound is due to
the vehicle discerning compatibil-
ity of the object placed on the
charging pad. It does not affect
your vehicle or the cellular phone
in any way.
Information
If the ignition switch is in the OFF
position, the charging also stops.
Information
This device complies with part 15 of
the FCC Rules.
Operation is subject to the following
two conditions:
1. This device may not cause harmful interference, and
2. This device must accept any inter- ference received, including inter-
ference that may cause undesired
operation.
Clock
Vehicles with Audio system
Select the [SETUP] button on the
audio system ➟ Select [Date/Time].
Set time: Set the time displayed on the audio screen.
Time format: Choose between 12- hour and 24-hour time formats.
Vehicles with Navigation system
Select the Settings menu on the
Navigation system ➟Select
[Date/Time].
GPS time: Displays time accord- ing to the received GNSS time.
24-hour: Switches to 12 hour or 24 hour.
i
i
Do not attempt to adjust the
clock while driving. Doing so
may result in distracted driving
which may lead to an accident
involving personal injury or
death.
WARNING
Page 271 of 557
Multimedia System
Multimedia System.................................................4-2
AUX, USB and USB Port ..................................................4-2
Antenna ........................................................................\
.......4-2
Steering Wheel Audio Controls ......................................4-3
Bluetooth®Wireless Technology ..................................4-4
Audio (Display Audio) / Video /
Navigation System (AVN).................................................4-4
4
Page 274 of 557
4-4
Multimedia System
MUTE ( ) (4)
Press the MUTE button to mute thesound.
Press the MUTE button again to activate the sound.
Information
Detailed information for audio control
buttons are described in the separately
supplied manual with the vehicle.
Bluetooth®Wireless
Technology(1) Call / Answer button
(2) Call end button
(3) Microphone
Detailed information for the Bluetooth
hands-free is described in a separate-
ly supplied manual with the vehicle.
Audio (Display Audio) / Video /
Navigation System (AVN)
(if equipped)
Detailed information for the AVN sys-
tem is described in a separately sup-
plied manual with the vehicle.
i
OTM048404
OTM048405
Page 289 of 557

5-15
Driving your vehicle
5
Transmission ranges
The indicator in the instrument clus-
ter displays the shift lever position
when the ignition switch is in the ON
position.
P (Park)
Always come to a complete stop
before shifting into P (Park).
To shift from P (Park), you must
depress firmly on the brake pedal.
Make sure your foot is off the accel-
erator pedal.
If you have done all of the above and
still cannot shift the lever out of P
(Park), see "Shift-Lock Release" in
this section.
The shift lever must be in P (Park)
before turning the engine off.
R (Reverse)
Use this position to drive the vehicle
backward.
Always come to a complete stop
before shifting into or out of R
(Reverse); you may damage the
transmission if you shift into R
(Reverse) while the vehicle is in
motion.
N (Neutral)
The wheels and transmission are not
engaged.
Use N (Neutral) if you need to restart
a stalled engine.
Shift into P (Park) if you need to
leave your vehicle for any reason.
Always depress the brake pedal
when you are shifting from N
(Neutral) to another gear.
NOTICE
Shifting into P (Park) while the
vehicle is in motion may
cause you to lose control of
the vehicle.
After the vehicle has stopped,
always make sure the shift
lever is in P (Park), apply the
parking brake, and turn the
engine off.
When parking on an incline,
place the shift lever in P (Park)
and apply the parking brake to
prevent the vehicle from
rolling downhill.
WARNING
Page 303 of 557
5-29
Driving your vehicle
If there is a malfunction with the
driver's door or engine hood open
detection system, the Auto Hold
may not work properly.
Contact an authorized HYUNDAI
dealer.
Warning messages
Parking brake automatically
engaged
When the EPB is applied from Auto
Hold, a warning will sound and a
message will appear.
AUTO HOLD turning Off!
Press brake pedal
When the conversion from Auto Hold
to EPB is not working properly a
warning will sound and a message
will appear.
When this message is displayed, the
Auto Hold and EPB may not operate.
For your safety, depress the brake
pedal.
NOTICE
5
Depress the accelerator pedal
slowly when you start the
vehicle.
For your safety, cancel the
Auto Hold when you drive
downhill, back up the vehicle
or park the vehicle.
WARNING
OIK057077N/OIK057075N
OIK057079N
■Type A■Type B
Page 304 of 557
![Hyundai Santa Fe 2020 Owners Manual 5-30
Press brake pedal to deactivate
AUTO HOLD
If you did not apply the brake pedal
when you release the Auto Hold by
pressing the [AUTO HOLD] switch, a
warning will sound and a message
will appear.
A Hyundai Santa Fe 2020 Owners Manual 5-30
Press brake pedal to deactivate
AUTO HOLD
If you did not apply the brake pedal
when you release the Auto Hold by
pressing the [AUTO HOLD] switch, a
warning will sound and a message
will appear.
A](/manual-img/35/16315/w960_16315-303.png)
5-30
Press brake pedal to deactivate
AUTO HOLD
If you did not apply the brake pedal
when you release the Auto Hold by
pressing the [AUTO HOLD] switch, a
warning will sound and a message
will appear.
AUTO HOLD conditions not met.
Close door and hood.
When you press the [AUTO HOLD]
switch, if the driver's door and engine
hood are not closed, a warning will
sound and a message will appear on
the cluster LCD display.
Press the [AUTO HOLD] switch after
closing the driver's door and hood.
Anti-lock Brake System (ABS)
Driving your vehicle
OIK057080LOTM058159L
An Anti-Lock Braking System
(ABS) or an Electronic Stability
Control (ESC) system will not
prevent accidents due to
improper or dangerous driving
maneuvers. Even though vehi-
cle control is improved during
emergency braking, always
maintain a safe distance
between you and objects ahead
of you. Vehicle speeds should
always be reduced during
extreme road conditions. The
braking distance for cars
equipped with ABS or ESC may
be longer than for those without
these systems in the following
road conditions.
Drive your vehicle at reduced
speeds during the following
conditions:
Rough, gravel or snow-cov-
ered roads.
On roads where the road sur-
face is pitted or has different
surface height.
WARNING
Page 308 of 557

5-34
Driving your vehicle
Indicator lights
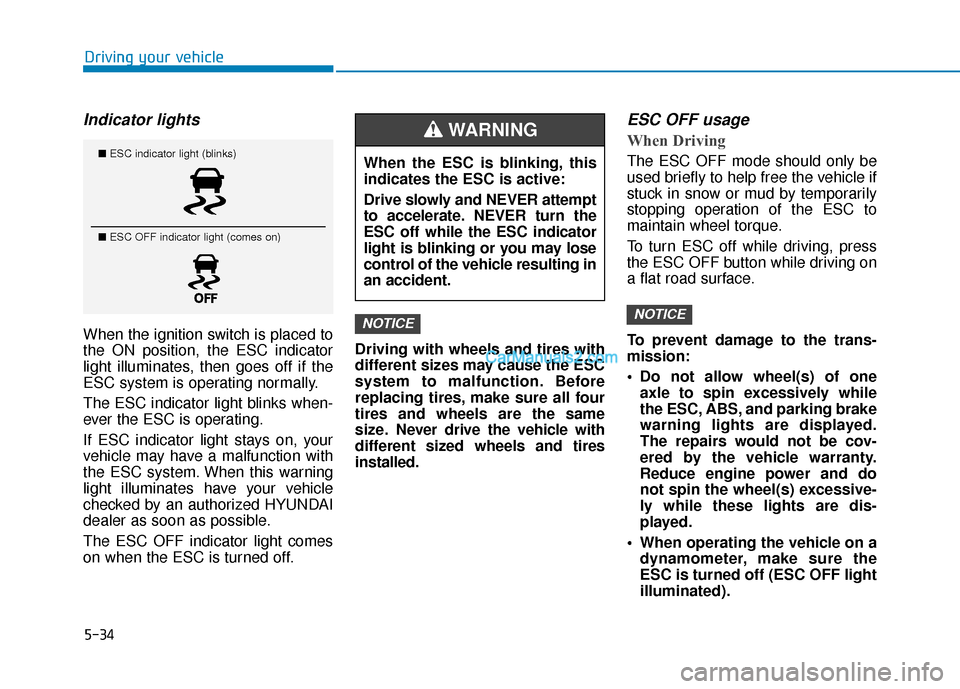
When the ignition switch is placed to
the ON position, the ESC indicator
light illuminates, then goes off if the
ESC system is operating normally.
The ESC indicator light blinks when-
ever the ESC is operating.
If ESC indicator light stays on, your
vehicle may have a malfunction with
the ESC system. When this warning
light illuminates have your vehicle
checked by an authorized HYUNDAI
dealer as soon as possible.
The ESC OFF indicator light comes
on when the ESC is turned off.Driving with wheels and tires with
different sizes may cause the ESC
system to malfunction. Before
replacing tires, make sure all four
tires and wheels are the same
size. Never drive the vehicle with
different sized wheels and tires
installed.
ESC OFF usage
When Driving
The ESC OFF mode should only be
used briefly to help free the vehicle if
stuck in snow or mud by temporarily
stopping operation of the ESC to
maintain wheel torque.
To turn ESC off while driving, press
the ESC OFF button while driving on
a flat road surface.
To prevent damage to the trans-
mission:
Do not allow wheel(s) of one
axle to spin excessively while
the ESC, ABS, and parking brake
warning lights are displayed.
The repairs would not be cov-
ered by the vehicle warranty.
Reduce engine power and do
not spin the wheel(s) excessive-
ly while these lights are dis-
played.
When operating the vehicle on a dynamometer, make sure the
ESC is turned off (ESC OFF light
illuminated).
NOTICENOTICE
■ ESC indicator light (blinks)
■ ESC OFF indicator light (comes on)When the ESC is blinking, this
indicates the ESC is active:
Drive slowly and NEVER attempt
to accelerate. NEVER turn the
ESC off while the ESC indicator
light is blinking or you may lose
control of the vehicle resulting in
an accident.
WARNING