2020 Hyundai Santa Fe stop start
[x] Cancel search: stop startPage 104 of 557
3-15
Convenient features of your vehicle
3
If you press the button on the front
passenger's outside door, all doors
will unlock.
Once the doors are unlocked, they
may be opened by pulling the door
handle.
When closing the door, push the
door by hand. Make sure that doors
are closed securely.
Information
• In cold and wet climates, door lockand door mechanisms may not
work properly due to freezing con-
ditions.
• If the door is locked/unlocked mul- tiple times in rapid succession with
either the vehicle key or door lock
switch, the system may stop operat-
ing temporarily in order to protect
the circuit and prevent damage to
system components.
• Two press unlock setting can be changed in the User Settings mode
on the cluster.
Operating Door Locks from
Inside the Vehicle
With the door lock button
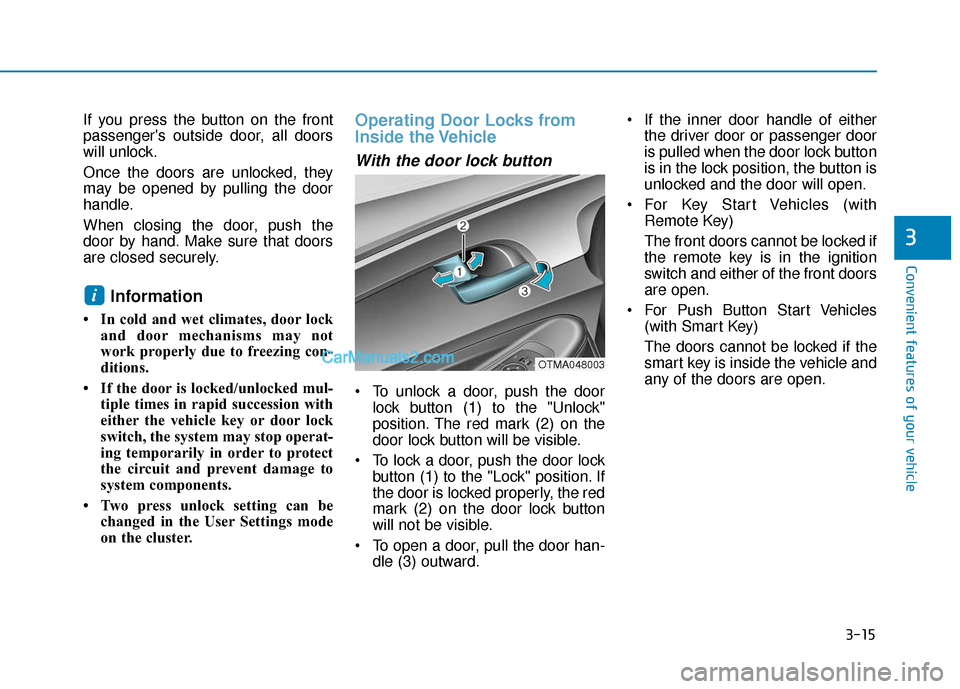
To unlock a door, push the doorlock button (1) to the "Unlock"
position. The red mark (2) on the
door lock button will be visible.
To lock a door, push the door lock button (1) to the "Lock" position. If
the door is locked properly, the red
mark (2) on the door lock button
will not be visible.
To open a door, pull the door han- dle (3) outward. If the inner door handle of either
the driver door or passenger door
is pulled when the door lock button
is in the lock position, the button is
unlocked and the door will open.
For Key Start Vehicles (with Remote Key)
The front doors cannot be locked if
the remote key is in the ignition
switch and either of the front doors
are open.
For Push Button Start Vehicles (with Smart Key)
The doors cannot be locked if the
smart key is inside the vehicle and
any of the doors are open.
i
OTMA048003
Page 109 of 557
3-20
Convenient features of your vehicle
Safe Exit Assist (SEA) System
(if equipped)
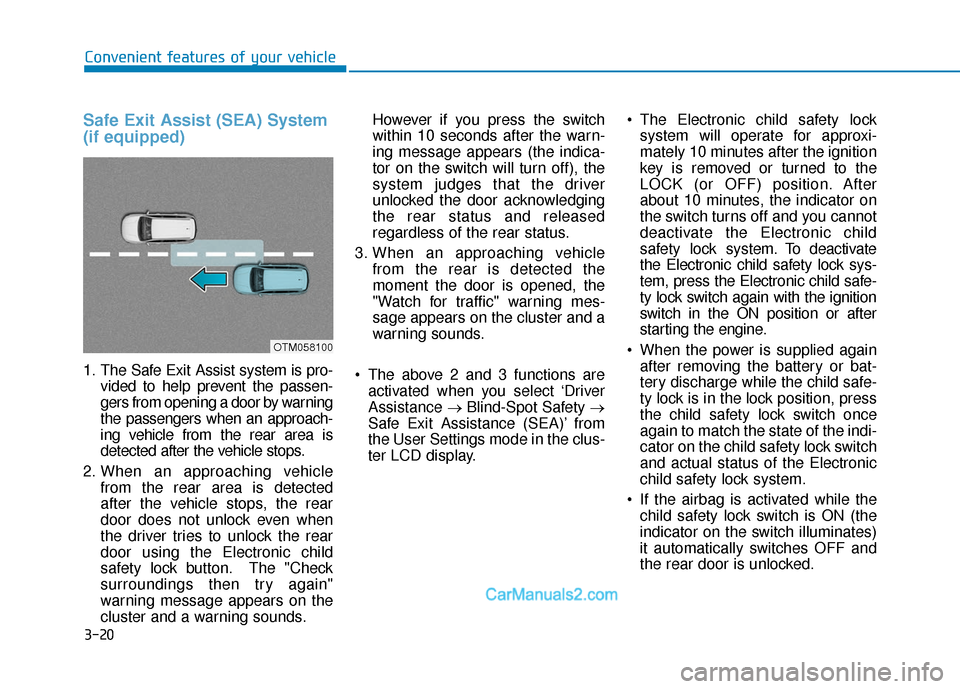
1. The Safe Exit Assist system is pro-vided to help prevent the passen-
gers from opening a door by warning
the passengers when an approach-
ing vehicle from the rear area is
detected after the vehicle stops.
2. When an approaching vehicle from the rear area is detected
after the vehicle stops, the rear
door does not unlock even when
the driver tries to unlock the rear
door using the Electronic child
safety lock button. The "Check
surroundings then try again"
warning message appears on the
cluster and a warning sounds. However if you press the switch
within 10 seconds after the warn-
ing message appears (the indica-
tor on the switch will turn off), the
system judges that the driver
unlocked the door acknowledging
the rear status and released
regardless of the rear status.
3. When an approaching vehicle from the rear is detected the
moment the door is opened, the
"Watch for traffic" warning mes-
sage appears on the cluster and a
warning sounds.
The above 2 and 3 functions are activated when you select ‘Driver
Assistance →Blind-Spot Safety →
Safe Exit Assistance (SEA)’ from
the User Settings mode in the clus-
ter LCD display. The Electronic child safety lock
system will operate for approxi-
mately 10 minutes after the ignition
key is removed or turned to the
LOCK (or OFF) position. After
about 10 minutes, the indicator on
the switch turns off and you cannot
deactivate the Electronic child
safety lock system. To deactivate
the Electronic child safety lock sys-
tem, press the Electronic child safe-
ty lock switch again with the ignition
switch in the ON position or after
starting the engine.
When the power is supplied again after removing the battery or bat-
tery discharge while the child safe-
ty lock is in the lock position, press
the child safety lock switch once
again to match the state of the indi-
cator on the child safety lock switch
and actual status of the Electronic
child safety lock system.
If the airbag is activated while the child safety lock switch is ON (the
indicator on the switch illuminates)
it automatically switches OFF and
the rear door is unlocked.
OTM058100
Page 111 of 557
3-22
Convenient features of your vehicle
Make sure that all the win-
dows are closed. If the win-
dow is open, the alert may
activate by the sensor detect-
ing an unintended movement
(e.g. wind or bugs).
CAUTION
The 2nd alert is activated only afterthe prior activation of the 1st alert.
You can activate or deactivate the Rear Occupant Alert (ROA) sys-
tem from the User Settings mode
in the cluster LCD display. The
option can be found under the fol-
lowing menu:
User Settings → Convenience →
Rear Seat Alert
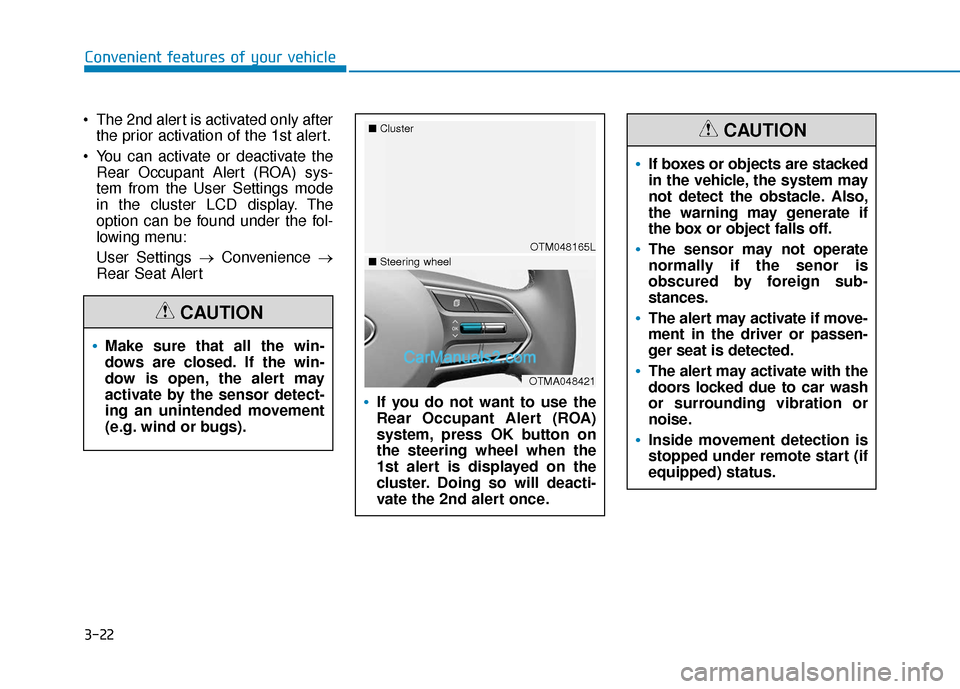
If you do not want to use the
Rear Occupant Alert (ROA)
system, press OK button on
the steering wheel when the
1st alert is displayed on the
cluster. Doing so will deacti-
vate the 2nd alert once.
OTM048165L
■
Cluster
OTMA048421
■Steering wheel
If boxes or objects are stacked
in the vehicle, the system may
not detect the obstacle. Also,
the warning may generate if
the box or object falls off.
The sensor may not operate
normally if the senor is
obscured by foreign sub-
stances.
The alert may activate if move-
ment in the driver or passen-
ger seat is detected.
The alert may activate with the
doors locked due to car wash
or surrounding vibration or
noise.
Inside movement detection is
stopped under remote start (if
equipped) status.
CAUTION
Page 114 of 557

3-25
Convenient features of your vehicle
3
Recalling Positions from
Memory
1. Shift to P (Park) while the ignitionswitch is in the ON position.
2. Press the desired memory button (1 or 2). The system will beep
once, and then the driver's seat
position, side view mirror position,
instrument panel illumination
intensity and head-up display
height/brightness will automatical-
ly adjust to the stored positions.
3. "Driver 1 (or 2) settings applied" will appear on the cluster LCD dis-
play.
Information
• While recalling the "1" memoryposition, pressing the SET or 1 but-
ton temporarily stops the adjust-
ment of the recalled memory posi-
tion. Pressing the 2 button recalls
the "2" memory position. • While recalling the "2" memory
position, pressing the SET or 2 but-
ton temporarily stops the adjust-
ment of the recalled memory posi-
tion. Pressing the 1 button recalls
the "1" memory position.
• While recalling the stored positions, pressing one of the control buttons
for the driver's seat, side view mir-
ror, instrument panel illumination
or head-up display will cause the
movement of that component to stop
and move in the direction that the
control button is pressed.
Resetting the Driver's Seat
Memory System
Take the following procedures to reset
the driver's seat memory system,
when it does not operate properly.
To reset the driver's seat memo-ry system
1. Place the ignition switch to the ON
position, shift to P (Park), and
open the driver's door. 2. Operate the control switch to set
the driver's seat and seatback to
the foremost position.
3. Simultaneously press the SET button and push forward the seat
movement switch over 2 seconds.
While resetting the driver's seatmemory system
1. It starts with the notification sound.
2. The driver's seat and seatback is
adjusted to the rearward position
with the notification sound.
3. The driver's seat and seatback is re-adjusted to the default position
(central position) with the notifica-
tion sound.
However, in the following cases, the
resetting procedure and the notifica-
tion sound may stop.
- The memory button is pressed.
- The control switch is operated.
- The gear is shifted out of P (Park).
- The driving speed exceeds 2 mph (3 km/h).
- The driver's door is closed.
i
Page 115 of 557
3-26
Convenient features of your vehicle
Reattempt to do the resetting procedure again, when the reset-
ting procedure incompletely
stops or the notification sound
do not stop.
Make sure that there is no obsta- cle around the driver's seat in
advance of resetting the driver's
seat memory system.
Easy Access Function
The system will move the driver's
seat automatically as follows:
- It will move the driver’s seat rear- ward when the ignition key is
removed.
- It will move the driver’s seat for- ward when the ignition key is
inserted.
- It will move the driver’s seat rear- ward when the Engine Start/Stop
button is pressed to the OFF posi-
tion. - It will move the driver’s seat for-
ward when the Engine Start/Stop
button is pressed to the ACC or
START position.
You can activate or deactivate the
Easy Access Function from the User
Settings mode in the cluster LCD dis-
play.
'Convenience →Seat Easy Access →
Off/Normal/Extended'.
For more details, refer to "LCD
Display" in this chapter.
NOTICE
Driver should be cautious when
using this function to assure no
injury to passenger or child on
the back seat. In case of emer-
gency the driver has to stop
movement of front seat (when
easy access feature is activat-
ed) by pressing SET button or
any of the driver seat control
switches.
CAUTION
Page 161 of 557

3-72
Convenient features of your vehicle
Shift indicator pop-up (if equipped)
The pop-up indicates the current
gear position displayed in the cluster
for about 2 seconds when shifting
into other positions (P/R/N/D).
The shift indicator pop-up function
can be activated or deactivated from
the User Settings mode in the cluster
LCD display.
Warning and Indicator LightsInformation
Make sure that all warning lights are
OFF after starting the engine. If any
light is still ON, this indicates a situa-
tion that needs attention.
Seat Belt Warning Light
This warning light informs the driver
that the seat belt is not fastened.
For more information, refer to
"Seat Belts" in chapter 2.
Air Bag Warning Light
This warning light illuminates:
When you set the ignition switch orthe Engine Start/Stop button to the
ON position.
- The air bag warning light illumi-nates for about 6 seconds and
then turns off when all checks
have been performed
The air bag warning light will remain illuminated if there is a
malfunction with the Safety
Restraint System (SRS) air bag
operation.
If this occurs, have the vehicle
inspected by an authorized
HYUNDAI dealer.
i
OAD048561N
■
Type A
Page 162 of 557
3-73
Convenient features of your vehicle
3
Parking Brake & BrakeFluid Warning Light
This warning light illuminates:
When you set the ignition switch
or the Engine Start/Stop button to
the ON position.
- The parking brake light illumi-nates for about 3 seconds and
will then turn off once the parking
brake is released.
Whenever the parking brake is applied.
Whenever the brake fluid level in the reservoir is low.
- If the warning light illuminateswith the parking brake released,
it indicates the brake fluid level in
the reservoir is low.
If the brake fluid level in the reser-
voir is low:
1. Drive carefully to the nearest safe location and stop your vehicle.
2. With the engine stopped, check the brake fluid level immediately and
add fluid as required (For more
details, refer to "Brake Fluid" in
chapter 7). After adding brake
fluid, check all brake components
for fluid leaks. If a brake fluid leak is
found, or if the warning light
remains on, or if the brakes do not
operate properly, do not drive the
vehicle. Have the vehicle inspected
by an authorized HYUNDAI dealer.
Dual-diagonal braking system
Your vehicle is equipped with dual-
diagonal braking system. This means
you still have braking on two wheels
even if one of the dual systems
should fail.
With only one of the dual systems
working, more than normal pedal
travel and greater pedal pressure is
required to stop the vehicle. Also, the vehicle will not stop in as
short a distance with only a portion
of the brake system working.
If the brakes fail while you are driv-
ing, shift to a lower gear for addition-
al engine braking and stop the vehi-
cle as soon as it is safe to do so.
Parking Brake & Brake Fluid
Warning Light
Driving the vehicle with a warn-
ing light ON is dangerous. If the
Parking Brake & Brake Fluid
Warning Light illuminates with
the parking brake released, it
indicates that the brake fluid
level is low.
If this occurs, have the vehicle
inspected by an authorized
HYUNDAI dealer.
WARNING
Page 163 of 557
3-74
Convenient features of your vehicle
Anti-lock Brake System(ABS) Warning Light
This warning light illuminates:
When you set the ignition switch
or the Engine Start/Stop button to
the ON position.
- The ABS warning light illumi-nates for about 3 seconds and
then turns off.
Whenever there is a malfunction with the ABS.
Note that the hydraulic braking
system will still be operational
even if there is a malfunction with
the ABS.
Electronic Brake ForceDistribution (EBD) System Warning Light
These two warning lights illuminate
at the same time while driving:
When the ABS and regular brake
system may not work normally.
If this occurs, have the vehicle
inspected by an authorized
HYUNDAI dealer.
Information - Electronic
Brake Force Distribution
(EBD) System Warning Light
When the ABS Warning Light is on or
both ABS and Parking Brake & Brake
Fluid Warning Lights are on, the
speedometer, odometer, or tripmeter
may not work. Also, the EPS Warning
Light may illuminate and the steering
effort may increase or decrease.
If this occurs, have the vehicle inspect-
ed by an authorized HYUNDAI deal-
er as soon as possible.i
Have the vehicle inspected by
an authorized HYUNDAI dealer
as soon as possible.
Electronic Brake Force
Distribution (EBD) System
Warning Light
When both ABS and Parking
Brake & Brake Fluid Warning
Lights are on, the brake system
will not work normally and you
may experience an unexpected
and dangerous situation during
sudden braking.
If this occurs, avoid high speed
driving and abrupt braking.
WARNING