2020 Hyundai Santa Fe battery
[x] Cancel search: batteryPage 105 of 557
3-16
Convenient features of your vehicle
Information
If a power door lock ever fails to func-
tion while you are in the vehicle try
one or more of the following tech-
niques to exit:
• Operate the door unlock featurerepeatedly (both electronic and
manual) while simultaneously
pulling on the door handle.
• Operate the other door locks and handles, front and rear.
• Lower a front window and use the mechanical key to unlock the door
from outside.
Information
When the vehicle’s battery run out
and you leave the vehicle, make sure
all the doors are locked. You can lock
the driver’s door with a key and the
rest of the doors with the lock button
above the door inside handle.
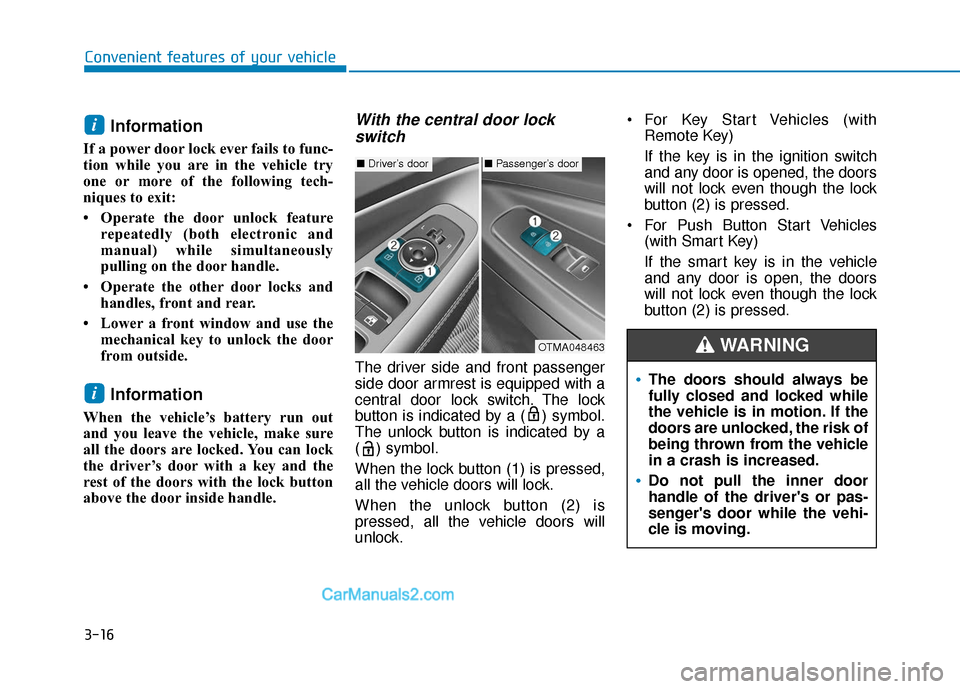
With the central door lockswitch
The driver side and front passenger
side door armrest is equipped with a
central door lock switch. The lock
button is indicated by a ( ) symbol.
The unlock button is indicated by a
( ) symbol.
When the lock button (1) is pressed,
all the vehicle doors will lock.
When the unlock button (2) is
pressed, all the vehicle doors will
unlock. For Key Start Vehicles (with
Remote Key)
If the key is in the ignition switch
and any door is opened, the doors
will not lock even though the lock
button (2) is pressed.
For Push Button Start Vehicles (with Smart Key)
If the smart key is in the vehicle
and any door is open, the doors
will not lock even though the lock
button (2) is pressed.
i
i
■Driver’s door■Passenger’s door
OTMA048463
The doors should always be
fully closed and locked while
the vehicle is in motion. If the
doors are unlocked, the risk of
being thrown from the vehicle
in a crash is increased.
Do not pull the inner door
handle of the driver's or pas-
senger's door while the vehi-
cle is moving.
WARNING
Page 109 of 557
3-20
Convenient features of your vehicle
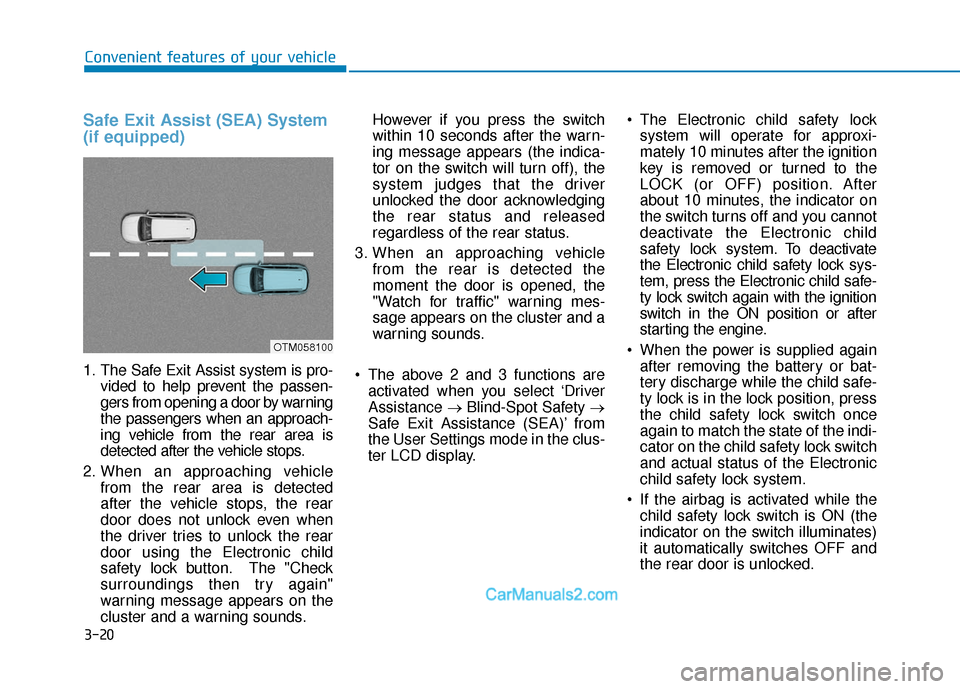
Safe Exit Assist (SEA) System
(if equipped)
1. The Safe Exit Assist system is pro-vided to help prevent the passen-
gers from opening a door by warning
the passengers when an approach-
ing vehicle from the rear area is
detected after the vehicle stops.
2. When an approaching vehicle from the rear area is detected
after the vehicle stops, the rear
door does not unlock even when
the driver tries to unlock the rear
door using the Electronic child
safety lock button. The "Check
surroundings then try again"
warning message appears on the
cluster and a warning sounds. However if you press the switch
within 10 seconds after the warn-
ing message appears (the indica-
tor on the switch will turn off), the
system judges that the driver
unlocked the door acknowledging
the rear status and released
regardless of the rear status.
3. When an approaching vehicle from the rear is detected the
moment the door is opened, the
"Watch for traffic" warning mes-
sage appears on the cluster and a
warning sounds.
The above 2 and 3 functions are activated when you select ‘Driver
Assistance →Blind-Spot Safety →
Safe Exit Assistance (SEA)’ from
the User Settings mode in the clus-
ter LCD display. The Electronic child safety lock
system will operate for approxi-
mately 10 minutes after the ignition
key is removed or turned to the
LOCK (or OFF) position. After
about 10 minutes, the indicator on
the switch turns off and you cannot
deactivate the Electronic child
safety lock system. To deactivate
the Electronic child safety lock sys-
tem, press the Electronic child safe-
ty lock switch again with the ignition
switch in the ON position or after
starting the engine.
When the power is supplied again after removing the battery or bat-
tery discharge while the child safe-
ty lock is in the lock position, press
the child safety lock switch once
again to match the state of the indi-
cator on the child safety lock switch
and actual status of the Electronic
child safety lock system.
If the airbag is activated while the child safety lock switch is ON (the
indicator on the switch illuminates)
it automatically switches OFF and
the rear door is unlocked.
OTM058100
Page 113 of 557

3-24
Convenient features of your vehicle
The Driver Position Memory System
is provided to store and recall the fol-
lowing memory settings with a sim-
ple button operation.
- Driver's seat position (Power seat)
- Side view mirror position
- Instrument panel illumination intensity
- Head Up Display (HUD) position and brightness (if equipped)
Information
• If the battery is disconnected, thememory settings will be erased.
• If the Driver Position Memory System does not operate normally,
have the system checked by an
authorized HYUNDAI dealer.
Storing Positions into Memory
1. Shift to P (Park) while the ignition switch is in the ON position.
2. Adjust the driver's seat position, side view mirror position, instru-
ment panel illumination intensity
and head-up display height/bright-
ness to positions comfortable for
the driver.
3. Press the SET button. The system will beep once and notify you
"Press button to save settings" on
the cluster LCD display.
4. Press one of the memory buttons (1 or 2) within 4 seconds. The sys-
tem will beep twice when the
memory has been successfully
stored.
5. "Driver 1 (or 2) settings saved" will appear on the cluster LCD display.
i
D DR
RI
IV
V E
ER
R
P
P O
O S
SI
IT
T I
IO
O N
N
M
M E
EM
M O
OR
RY
Y
S
S Y
Y S
ST
T E
EM
M
(
( I
IF
F
E
E Q
Q U
UI
IP
P P
PE
ED
D )
)
OTMA048007
Never attempt to operate the
driver position memory system
while the vehicle is moving.
This could result in loss of con-
trol, and an accident causing
death, serious injury, or property
damage.
WARNING
Page 137 of 557

3-48
Convenient features of your vehicle
Periodically remove any dirt that may accumulate on the sunroof
guide rail or between the sun-
roof and roof panel which can
make a noise.
Do not try to open the sunroof when the temperature is below
freezing or when the sunroof is
covered with snow or ice, other-
wise the motor could be dam-
aged. In cold and wet climates, the
sunroof may not work properly.
Resetting the Sunroof
The sunroof may need to be reset if
the following conditions occur:
The battery is discharged or dis-connected or the sunroof fuse has
been replaced or disconnected
The sunroof control lever is not operating correctly
To reset the sunroof, perform the fol-
lowing steps:
1. Turn the engine on and close the sunroof glass and sunshade com-
pletely. 2. Release the control lever.
3. Push and hold the sunroof control
lever forward (to close the sun-
shade) for about 10 seconds until
the sunroof moves slightly, then
release the control lever.
4. Push and hold the sunroof control lever forward until the sunroof
operates as follows:
Sunshade Open → Glass Tilt Open
→ Glass Slide Open → Glass Slide
Close → Sunshade Close
Then, release the control lever.
When this is complete, the sunroof
system is reset.
For more information, contact an
authorized HYUNDAI dealer.
Information
If you do not reset the sunroof, it may
not work properly.
Sunroof Open Warning
(if equipped)
If the driver turns off the engine when the sunroof is not fully
closed, the warning chime will
sound for approximately 3 seconds
and the sunroof open warning will
appear on the cluster LCD display.
If the driver turns off the engine and opens the door when the sun-
roof is not fully closed, the sunroof
open warning will appear on the
cluster LCD display until the door is
closed or the sunroof is fully closed.
Close the sunroof securely when
leaving your vehicle.
i
NOTICE
OTM048118
Page 142 of 557
3-53
Convenient features of your vehicle
3
Do not close or open the power
liftgate manually. This may cause
damage to the power liftgate. If it
is necessary to close or open the
power liftgate manually when the
battery is discharged or discon-
nected, do not apply excessive
force.
Opening the liftgate
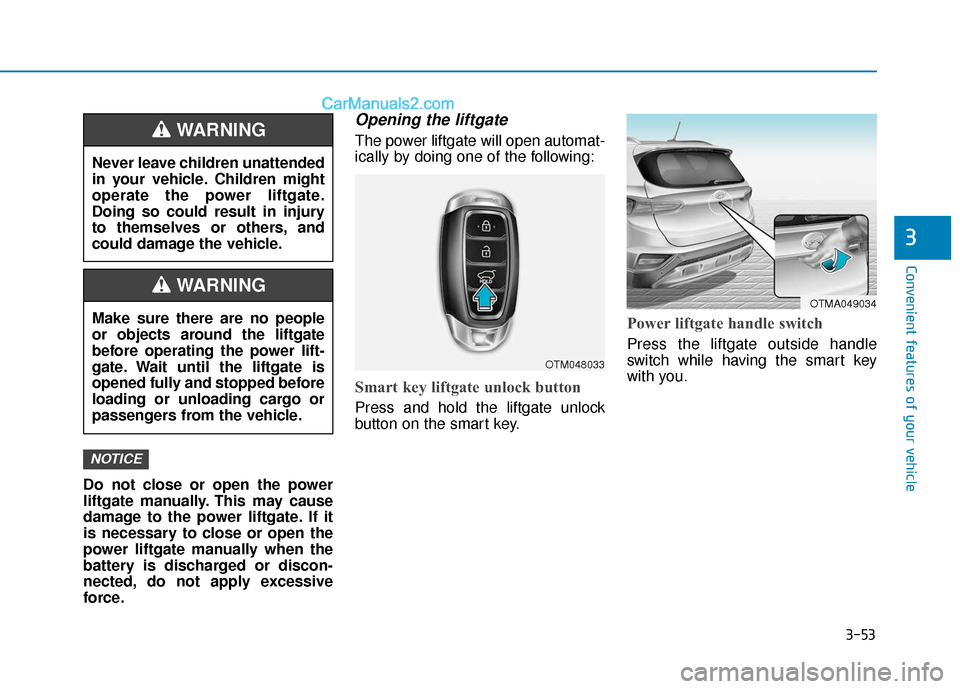
The power liftgate will open automat-
ically by doing one of the following:
Smart key liftgate unlock button
Press and hold the liftgate unlock
button on the smart key.
Power liftgate handle switch
Press the liftgate outside handle
switch while having the smart key
with you.
NOTICE
Never leave children unattended
in your vehicle. Children might
operate the power liftgate.
Doing so could result in injury
to themselves or others, and
could damage the vehicle.
WARNING
Make sure there are no people
or objects around the liftgate
before operating the power lift-
gate. Wait until the liftgate is
opened fully and stopped before
loading or unloading cargo or
passengers from the vehicle.
WARNING
OTM048033
OTMA049034
Page 145 of 557

3-56
Convenient features of your vehicle
The power liftgate can be oper- ated when the engine is not run-
ning. However, the power liftgate
operation consumes a large
amount of electic power.
To prevent the battery from
being discharged, do not oper-
ate it excessively (e.g. more than
5 times repeatedly).
To prevent the battery from being discharged, do not leave
the power liftgate in the open
position for a long time.
Do not modify or repair any part of the power liftgate by yourself.
This must be done by an author-
ized HYUNDAI dealer. When jacking up the vehicle to
change a tire or repair the vehi-
cle, do not operate the power
liftgate. This could cause the
power liftgate to operate
improperly.
In cold and wet climates, the power liftgate may not work
properly due to freezing condi-
tions.
Automatic reversal
During power opening and closing if
the power liftgate is blocked by an
object or part of the body, the power
liftgate will detect the resistance.
If resistance is detected while open-
ing or closing the power liftgate, the
liftgate will stop and move in the
opposite direction.
NOTICE
OTMA048037
Page 146 of 557
3-57
Convenient features of your vehicle
3
However, in some instances the
automatic reversal system may not
detect the object if it is too soft or is
very thin, or if the liftgate is almost
fully closed near the latched position.
Caution should be taken to prevent
any objects from obstructing the lift-
gate opeining.
If the automatic reversal feature
operates more than 2 times while
attempting to open or close the lift-
gate, the power liftgate may stop at
that position. If this occurs, carefully
close the liftgate manually, and then
try to operate the power liftgate auto-
matically again.How to reset the power liftgate
If the battery has been discharged or
disconnected, or if the power liftgate
fuse has been replaced or removed,
reset the power liftgate by performing
the following procedure:
1. Put the shift lever in P (Park).
2. Press the power liftgate inner but-ton and the power liftgate outer
handle button simultaneously for
more than 3 seconds. The chime
will sound.
3. Close the liftgate manually.
If the power liftgate does not work
properly after the above procedure,
have the system checked by an
authorized HYUNDAI dealer.
When operating the power liftgate,
the gear shift lever must be in the
(P) park position in order to oper-
ate normally.
NOTICE
Never intentionally place any
object or part of your body in
the path of the power liftgate to
make sure the automatic rever-
sal operates.
WARNING
Do not put heavy objects on the
power liftgate before you oper-
ate the power liftgate feature.
Additional weight may damage
the operation of the system.
CAUTION
Page 160 of 557
3-71
Convenient features of your vehicle
3
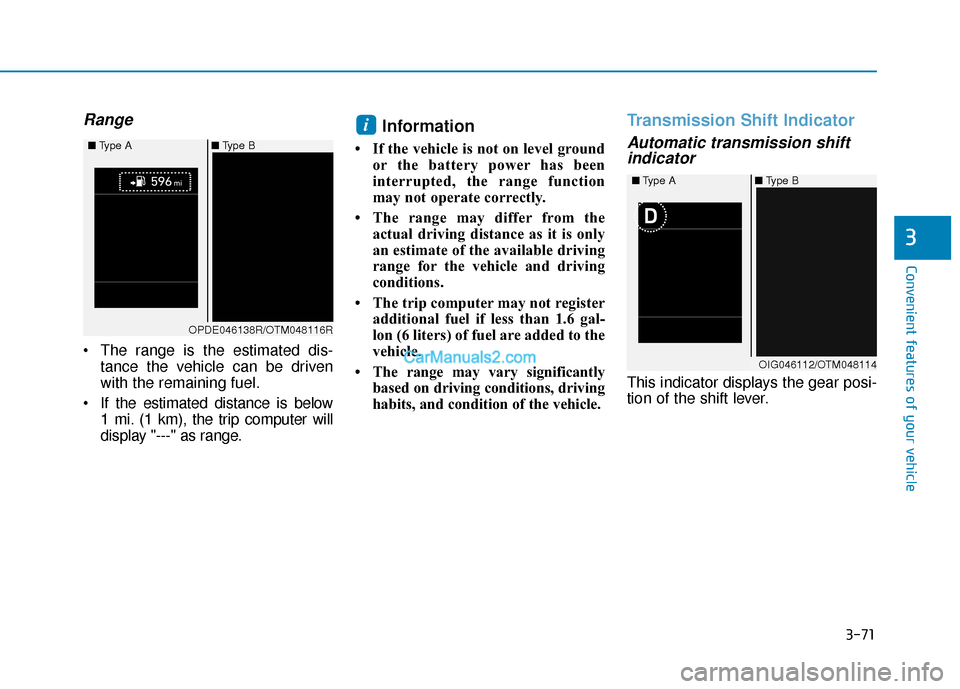
Range
The range is the estimated dis-tance the vehicle can be driven
with the remaining fuel.
If the estimated distance is below 1 mi. (1 km), the trip computer will
display "---" as range.
Information
• If the vehicle is not on level groundor the battery power has been
interrupted, the range function
may not operate correctly.
• The range may differ from the actual driving distance as it is only
an estimate of the available driving
range for the vehicle and driving
conditions.
• The trip computer may not register additional fuel if less than 1.6 gal-
lon (6 liters) of fuel are added to the
vehicle.
• The range may vary significantly based on driving conditions, driving
habits, and condition of the vehicle.
Transmission Shift Indicator
Automatic transmission shiftindicator
This indicator displays the gear posi-
tion of the shift lever.
i
OIG046112/OTM048114
■
Type A ■Type B
OPDE046138R/OTM048116R
■
Type A ■Type B