2020 Hyundai Santa Fe ECO mode
[x] Cancel search: ECO modePage 109 of 557
3-20
Convenient features of your vehicle
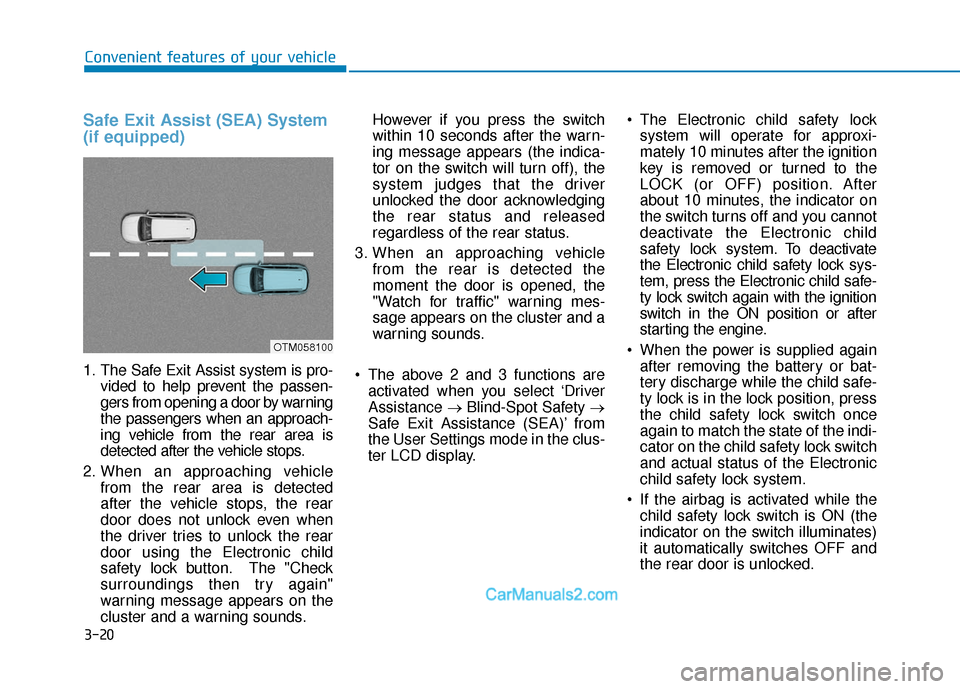
Safe Exit Assist (SEA) System
(if equipped)
1. The Safe Exit Assist system is pro-vided to help prevent the passen-
gers from opening a door by warning
the passengers when an approach-
ing vehicle from the rear area is
detected after the vehicle stops.
2. When an approaching vehicle from the rear area is detected
after the vehicle stops, the rear
door does not unlock even when
the driver tries to unlock the rear
door using the Electronic child
safety lock button. The "Check
surroundings then try again"
warning message appears on the
cluster and a warning sounds. However if you press the switch
within 10 seconds after the warn-
ing message appears (the indica-
tor on the switch will turn off), the
system judges that the driver
unlocked the door acknowledging
the rear status and released
regardless of the rear status.
3. When an approaching vehicle from the rear is detected the
moment the door is opened, the
"Watch for traffic" warning mes-
sage appears on the cluster and a
warning sounds.
The above 2 and 3 functions are activated when you select ‘Driver
Assistance →Blind-Spot Safety →
Safe Exit Assistance (SEA)’ from
the User Settings mode in the clus-
ter LCD display. The Electronic child safety lock
system will operate for approxi-
mately 10 minutes after the ignition
key is removed or turned to the
LOCK (or OFF) position. After
about 10 minutes, the indicator on
the switch turns off and you cannot
deactivate the Electronic child
safety lock system. To deactivate
the Electronic child safety lock sys-
tem, press the Electronic child safe-
ty lock switch again with the ignition
switch in the ON position or after
starting the engine.
When the power is supplied again after removing the battery or bat-
tery discharge while the child safe-
ty lock is in the lock position, press
the child safety lock switch once
again to match the state of the indi-
cator on the child safety lock switch
and actual status of the Electronic
child safety lock system.
If the airbag is activated while the child safety lock switch is ON (the
indicator on the switch illuminates)
it automatically switches OFF and
the rear door is unlocked.
OTM058100
Page 124 of 557
3-35
Convenient features of your vehicle
3
Programming HomeLink®
Please note the following:
When programming a garage dooropener, it is advised to park the
vehicle outside of the garage.
It is recommended that a new bat- tery be placed in the hand-held
transmitter of the device being pro-
grammed to HomeLink
®for quicker
training and accurate transmission
of the radio-frequency signal.
Some vehicles may require the igni- tion switch to be placed in the ACC
(or "Accessories") position for pro-
gramming and/or operation of
HomeLink
®.
In the event that there are still pro- gramming difficulties or questions
after following the programming
steps listed below, contact
HomeLink
®at: www.homelink.com
or by calling 1-800-355-3515.
Programming
To train most devices, follow these
instructions:
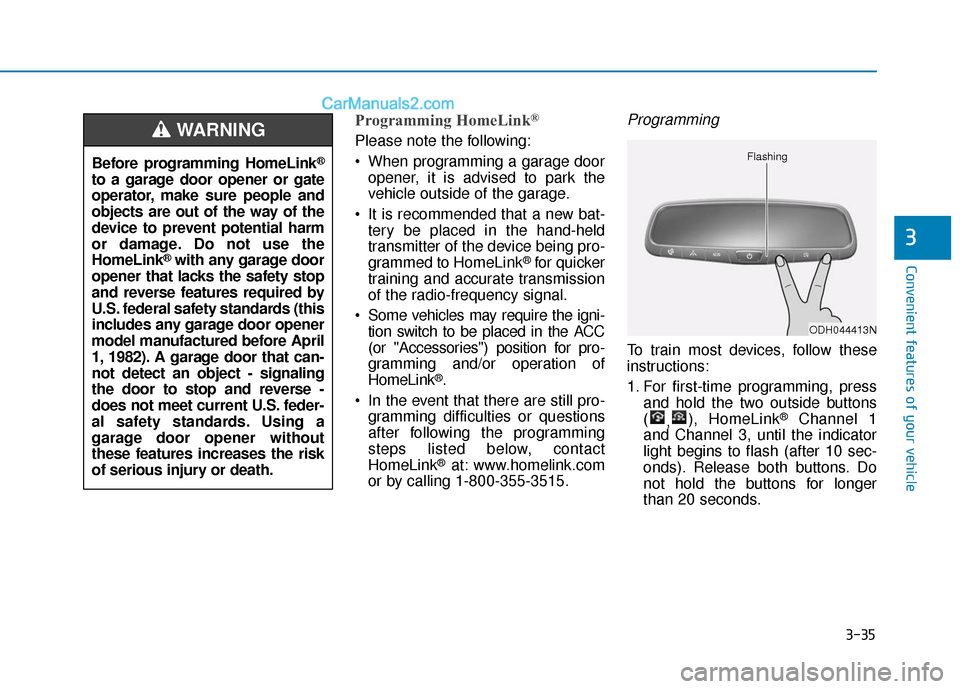
1. For first-time programming, press and hold the two outside buttons
( ,), HomeLink
®Channel 1
and Channel 3, until the indicator
light begins to flash (after 10 sec-
onds). Release both buttons. Do
not hold the buttons for longer
than 20 seconds.
ODH044413N
Flashing
Before programming HomeLink®
to a garage door opener or gate
operator, make sure people and
objects are out of the way of the
device to prevent potential harm
or damage. Do not use the
HomeLink
®with any garage door
opener that lacks the safety stop
and reverse features required by
U.S. federal safety standards (this
includes any garage door opener
model manufactured before April
1, 1982). A garage door that can-
not detect an object - signaling
the door to stop and reverse -
does not meet current U.S. feder-
al safety standards. Using a
garage door opener without
these features increases the risk
of serious injury or death.
WARNING
Page 126 of 557
3-37
Convenient features of your vehicle
3
Gate operator & Canadian program-ming
During programming, your handheld
transmitter may automatically stop
transmitting. Continue to press the
Integrated HomeLink
®Wireless
Control System button (note steps 2
through 3 in the Programming portion
of this document) while you press
and re-press ("cycle") your handheld
transmitter every two seconds until
the frequency signal has been
learned. The indicator light will flash
slowly and then rapidly after several
seconds upon successful training.
Operating HomeLink®
To operate, simply press and release
the programmed HomeLink®button.
Activation will now occur for the
trained device (i.e. garage door
opener, gate operator, security sys-
tem, entry door lock, home/office
lighting, etc.). For convenience, the
hand-held transmitter of the device
may also be used at any time.
Reprogramming a single HomeLink®
button
To program a device to HomeLink®
using a HomeLink®button previously
trained, follow these steps:
1. Press and hold the desired HomeLink
®button. DO NOT
release the button.
2. The indicator light will begin to flash after 20 seconds. Without releasing
the HomeLink
®button, proceed
with "Programming" step 2.
For questions or comments, contact
HomeLink
®at www.homelink.comor
1-800-355-3515.
Erasing HomeLink®buttons
Individual buttons cannot be erased.
However, to erase all three pro-
grammed buttons:
1. Press and hold the two outer HomeLink
®buttons until the indi-
cator light begins to flash after 10
seconds.
2. Release both buttons. Do not hold for longer than 20 seconds.
The Integrated HomeLink
®Wireless
Control System is now in the training
(learn) mode and can be pro-
grammed at any time following the
appropriate steps in the
Programming chapters above.
NVS
®is a registered trademark and
Z-Nav™ is a trademark of the Gentex
Corporation, Zeeland, Michigan.
HomeLink
®is a registered trademark
owned by Johnson Controls,
Incorporated, Milwaukee, Wisconsin.
FCC ID: NZLTLMHL4
IC: 4112A-TLMHL4
Page 144 of 557
3-55
Convenient features of your vehicle
3
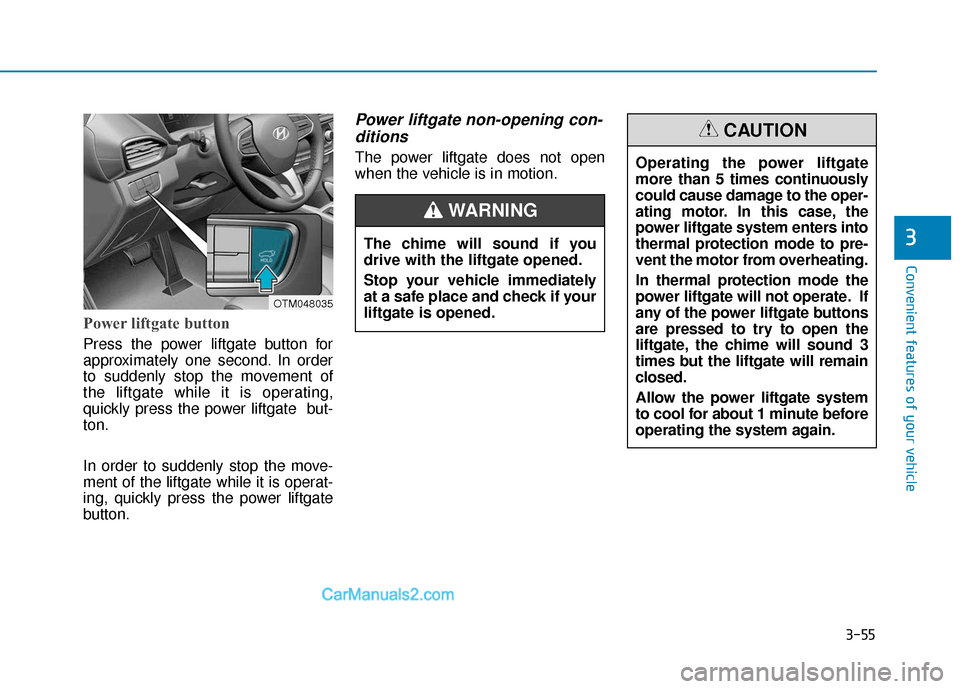
Power liftgate button
Press the power liftgate button for
approximately one second. In order
to suddenly stop the movement of
the liftgate while it is operating,
quickly press the power liftgate but-
ton.
In order to suddenly stop the move-
ment of the liftgate while it is operat-
ing, quickly press the power liftgate
button.
Power liftgate non-opening con-ditions
The power liftgate does not open
when the vehicle is in motion.
The chime will sound if you
drive with the liftgate opened.
Stop your vehicle immediately
at a safe place and check if your
liftgate is opened.
WARNING
OTM048035
Operating the power liftgate
more than 5 times continuously
could cause damage to the oper-
ating motor. In this case, the
power liftgate system enters into
thermal protection mode to pre-
vent the motor from overheating.
In thermal protection mode the
power liftgate will not operate. If
any of the power liftgate buttons
are pressed to try to open the
liftgate, the chime will sound 3
times but the liftgate will remain
closed.
Allow the power liftgate system
to cool for about 1 minute before
operating the system again.
CAUTION
Page 149 of 557

3-60
Convenient features of your vehicle
Information
The Smart Liftgate will NOT operate
when:
• Any door is open, or all doors areclosed but not locked
• The smart key is detected within 15 seconds from when the doors were
closed and locked
• For vehicles equipped with illumi- nated exterior front door handles, if
the smart key is detected within 15
seconds from when the doors were
closed and locked or if the smart
key is within 60 inches (1.5m) from
the front door handles
• The smart key is in the vehicle. 1.Setting
To activate the Smart Liftgate, go to
User Settings mode and select
Smart Liftgate in the cluster LCD dis-
play.
For more details, refer to "LCD
Display" in this chapter.
2.Detect and Alert
The Smart Liftgate detecting area
extends approximately 20-40 in (50-
100 cm) behind the vehicle. If you
are positioned in the detecting area
and are carrying the smart key, the
hazard warning lights will blink and
the chime will sound to alert you that
the smart liftgate will open.
Information
Do not approach the detecting area if
you do not want the liftgate to open. If
you have unintentionally entered the
detecting area and the hazard warn-
ing lights and chime starts to operate,
move away from the area behind the
vehicle with the smart key. The lift-
gate will remain closed.3. Automatic opening
After the hazard warning lights blink
and the chime sounds 6 times, the
power liftgate will open.
i
i
Make certain that you close
the liftgate before driving your
vehicle.
Make sure there are no people
or objects around the liftgate
before opening or closing the
liftgate.
Make sure objects in the rear
cargo area do not come out
when opening the liftgate,
especially if the vehicle is
parked on a grade or incline.
If you keep your vehicle
parked and locked on your
driveway, you may want to
temporarily deactivate the
Smart Liftgate system.
Otherwise, standing at the
rear of the vehicle with the
smart key may cause the lift-
gate to open unintentionally.
WARNING
Page 159 of 557

3-70
Convenient features of your vehicle
Outside temperature gauge
This gauge indicates the current out-
side air temperature by 1 degrees F
(1 degrees C).
- Temperature range :-40°F ~ 140°F
(-40°C ~ 60°C)
Note that the temperature indicated
on the LCD display may not change
as quickly as the outside tempera-
ture (there may be a slight delay
before the temperature changes.) You can change the temperature unit
from °F to °C or °C to °F in the User
Settings mode in the cluster:
- Go to User Settings Mode
➝Other
➝ Temperature Unit.
For vehicles equipped with Automatic
Climate Control, you can also:
- Press the AUTO button while press- ing the OFF button on the climate
control unit for 3 seconds
Both the temperature unit on the
cluster LCD display and climate con-
trol screen will change.
Odometer
The odometer indicates the total dis-
tance that the vehicle has been driv-
en and should be used to determine
when periodic maintenance should
be performed.
OTMA048112/OTMA048113
■
Type A ■Type B OTMA048183/OTMA048115
■
Type A ■Type B
Page 161 of 557

3-72
Convenient features of your vehicle
Shift indicator pop-up (if equipped)
The pop-up indicates the current
gear position displayed in the cluster
for about 2 seconds when shifting
into other positions (P/R/N/D).
The shift indicator pop-up function
can be activated or deactivated from
the User Settings mode in the cluster
LCD display.
Warning and Indicator LightsInformation
Make sure that all warning lights are
OFF after starting the engine. If any
light is still ON, this indicates a situa-
tion that needs attention.
Seat Belt Warning Light
This warning light informs the driver
that the seat belt is not fastened.
For more information, refer to
"Seat Belts" in chapter 2.
Air Bag Warning Light
This warning light illuminates:
When you set the ignition switch orthe Engine Start/Stop button to the
ON position.
- The air bag warning light illumi-nates for about 6 seconds and
then turns off when all checks
have been performed
The air bag warning light will remain illuminated if there is a
malfunction with the Safety
Restraint System (SRS) air bag
operation.
If this occurs, have the vehicle
inspected by an authorized
HYUNDAI dealer.
i
OAD048561N
■
Type A
Page 169 of 557
3-80
Convenient features of your vehicle
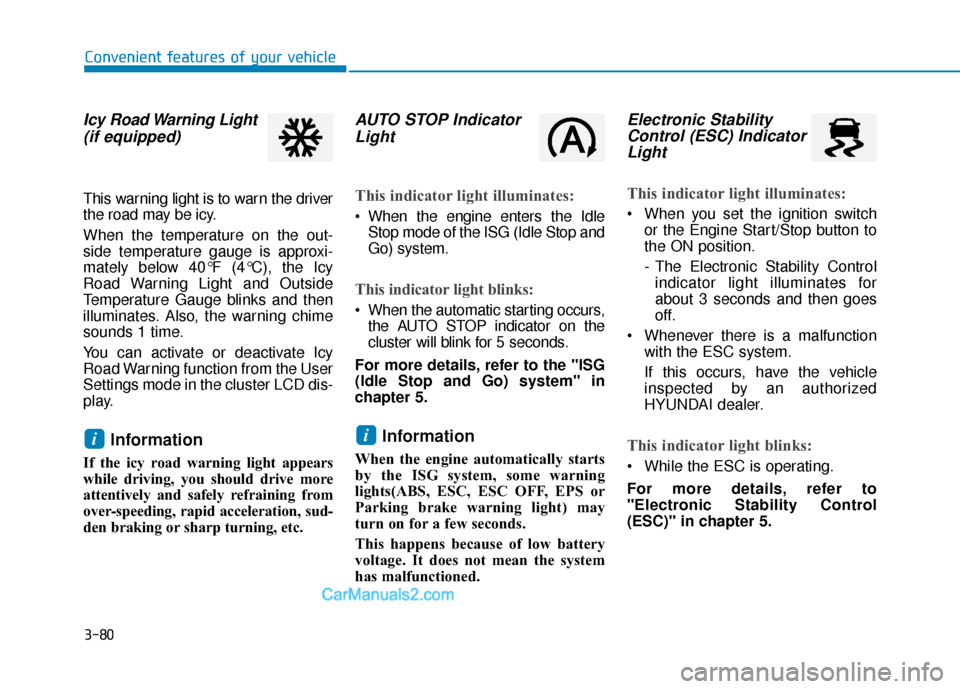
Icy Road Warning Light(if equipped)
This warning light is to warn the driver
the road may be icy.
When the temperature on the out-
side temperature gauge is approxi-
mately below 40°F (4°C), the Icy
Road Warning Light and Outside
Temperature Gauge blinks and then
illuminates. Also, the warning chime
sounds 1 time.
You can activate or deactivate Icy
Road Warning function from the User
Settings mode in the cluster LCD dis-
play.
Information
If the icy road warning light appears
while driving, you should drive more
attentively and safely refraining from
over-speeding, rapid acceleration, sud-
den braking or sharp turning, etc.
AUTO STOP IndicatorLight
This indicator light illuminates:
When the engine enters the Idle
Stop mode of the ISG (Idle Stop and
Go) system.
This indicator light blinks:
When the automatic starting occurs,the AUTO STOP indicator on the
cluster will blink for 5 seconds.
For more details, refer to the "ISG
(Idle Stop and Go) system" in
chapter 5.
Information
When the engine automatically starts
by the ISG system, some warning
lights(ABS, ESC, ESC OFF, EPS or
Parking brake warning light) may
turn on for a few seconds.
This happens because of low battery
voltage. It does not mean the system
has malfunctioned.
Electronic Stability Control (ESC) IndicatorLight
This indicator light illuminates:
When you set the ignition switch
or the Engine Start/Stop button to
the ON position.
- The Electronic Stability Controlindicator light illuminates for
about 3 seconds and then goes
off.
Whenever there is a malfunction with the ESC system.
If this occurs, have the vehicle
inspected by an authorized
HYUNDAI dealer.
This indicator light blinks:
While the ESC is operating.
For more details, refer to
"Electronic Stability Control
(ESC)" in chapter 5.
ii