2020 HYUNDAI NEXO climate control
[x] Cancel search: climate controlPage 14 of 561

I IN
NS
ST
TR
RU
UM
ME
EN
NT
T
P
PA
AN
NE
EL
L
O
OV
VE
ER
RV
VI
IE
EW
W
The actual shape may differ from the illustration.
1-5
Your vehicle at a glance
1
1. Instrument cluster ....................................3-58
2. Horn ........................................................3-21
3. Driver's front air bag ................................2-49
4. POWER button ..........................................5-6
5. Light control ............................................3-89
6. Wiper/Washer ........................................3-101
7. Navigation system ............Navigation manual
8. Hazard warning flasher ............................6-2
9. Climate control system ..........................3-147
10. Passenger's front air bag ......................2-49
11. Glove box ............................................3-163
12. USB and iPod
®port ................................4-2
13. Reduction gear (Shift button) ................5-11
14. Drive mode button ................................5-37
15. Surround view monitor ........................3-110
16. Parking Distance Warning button ........3-106
17. Remote Smart Parking Assist (RSPA)
button ..................................................3-113
18. DIS controller ..................Navigation manual
19. Cup holder ..........................................3-164
20. Steering wheel audio controls ................4-3
21. Trip computer/ ........................................3-85
Smart cruise controls/ ..........................5-99
OFE018004
Page 34 of 561
2-19
Safety system of your vehicle
2
Front air ventilation seat
(if equipped)
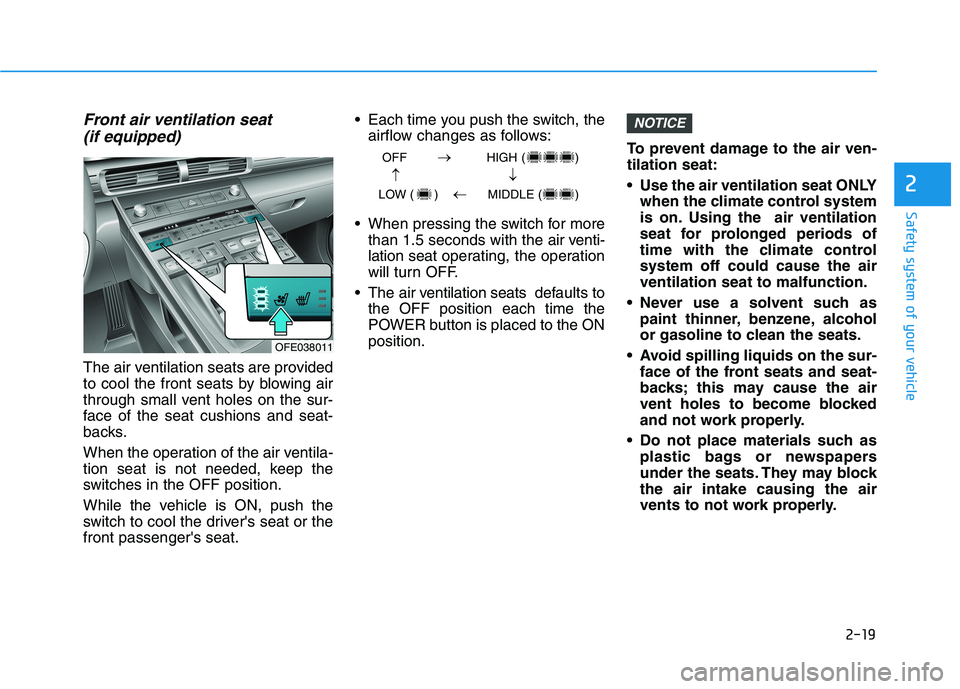
The air ventilation seats are provided
to cool the front seats by blowing air
through small vent holes on the sur-
face of the seat cushions and seat-
backs.
When the operation of the air ventila-
tion seat is not needed, keep the
switches in the OFF position.
While the vehicle is ON, push the
switch to cool the driver's seat or the
front passenger's seat. Each time you push the switch, the
airflow changes as follows:
When pressing the switch for more
than 1.5 seconds with the air venti-
lation seat operating, the operation
will turn OFF.
The air ventilation seats defaults to
the OFF position each time the
POWER button is placed to the ON
position.To prevent damage to the air ven-
tilation seat:
Use the air ventilation seat ONLY
when the climate control system
is on. Using the air ventilation
seat for prolonged periods of
time with the climate control
system off could cause the air
ventilation seat to malfunction.
Never use a solvent such as
paint thinner, benzene, alcohol
or gasoline to clean the seats.
Avoid spilling liquids on the sur-
face of the front seats and seat-
backs; this may cause the air
vent holes to become blocked
and not work properly.
Do not place materials such as
plastic bags or newspapers
under the seats. They may block
the air intake causing the air
vents to not work properly.
NOTICE
OFF HIGH ( )
LOW ( ) MIDDLE ( )
→→
→
→
OFE038011
Page 89 of 561
Driver Assist System .........................................3-105
Parking Distance Warning (Reverse/Forward)
System .............................................................................3-105
Rear View Monitor .......................................................3-109
Surround View Monitoring .........................................3-110
Remote Smart Parking Assist (RSPA) .............3-113
Operating Condition......................................................3-114
Non-operating Condition ............................................3-115
Limitations of the System...........................................3-116
How the System Works (Smart Parking) ................3-120
How the System Works (Remote Smart Parking)..3-127
How the System Works (Smart Exit) .......................3-131
How the System Works (Remote Moving Forward/
Backward) .......................................................................3-138
Additional Instructions (Messages) ..........................3-143
Turn signal Showing Vehicle Status while System
in Activation....................................................................3-144
Smart Key Showing Vehicle Status while System
in Activation....................................................................3-145
Link with other Systems .............................................3-146
Automatic Climate Control System ..................3-147
Automatic Temperature Control Mode ....................3-148
Manual Temperature Control Mode .........................3-148
System Operation .........................................................3-155
System Maintenance....................................................3-156
Windshield Defrosting and Defogging ............3-158
Auto Defogging System (Additional Feature with
Automatic Temperature Control System)................3-160
Rear Window Defroster ..............................................3-161
Climate Control Additional Features ...............3-162
Automatic Ventilation ...................................................3-162
Sunroof Inside Air Recirculation ...............................3-162
Storage Compartment .......................................3-163
Center Console Storage ..............................................3-163
Glove Box ........................................................................3-163
Interior Features ................................................3-164
Cup Holder ......................................................................3-164
Sunvisor ...........................................................................3-165
Power Outlet ..................................................................3-166
AC Inverter......................................................................3-167
USB Charger ...................................................................3-169
Wireless Cellular Phone Charging System..............3-169
Clock .................................................................................3-171
Coat Hook .......................................................................3-172
Floor Mat Anchor(s).....................................................3-172
Luggage Net Holder .....................................................3-173
Cargo Security Screen .................................................3-174
Exterior Features ...............................................3-176
Roof Side Rails ..............................................................3-176
3
Page 121 of 561
3-34
Convenient features of your vehicle
Power Windows
The POWER button must be in the
ON position to be able to raise or
lower the windows. Each door has a
Power Window switch to control that
door's window. The driver has a
Power Window Lock switch which
can block the operation of rear pas-
senger windows. The power windows
will operate for approximately 10
minutes after the POWER button is
placed in the ACC or OFF position.
However, if the front doors are
opened, the Power Windows will not
operate even within the 10 minutes
period.
Information
• In cold and wet climates, power win-
dows may not work properly due to
freezing conditions.
• While driving with the rear win-
dows down or with the sunroof (if
equipped) opened (or partially
opened), your vehicle may demon-
strate a wind buffeting or pulsation
noise. This noise is normal and can
be reduced or eliminated by taking
the following actions. If the noise
occurs with one or both of the rear
windows down, partially lower both
front windows approximately one
inch. If you experience the noise
with the sunroof open, slightly close
the sunroof.
Window opening and closing
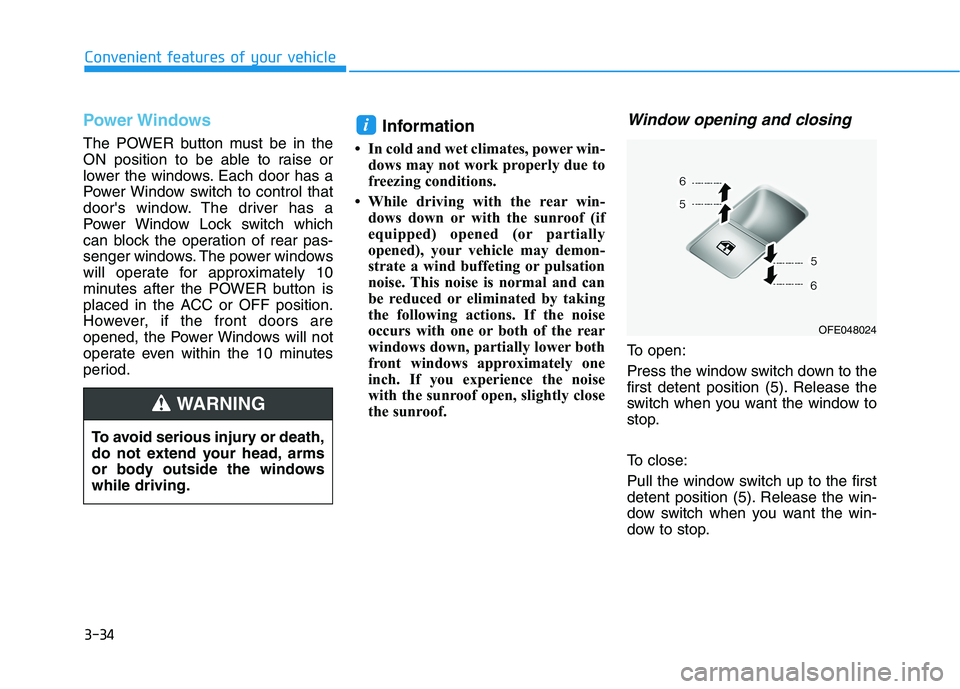
To open:
Press the window switch down to the
first detent position (5). Release the
switch when you want the window to
stop.
To close:
Pull the window switch up to the first
detent position (5). Release the win-
dow switch when you want the win-
dow to stop.
i
To avoid serious injury or death,
do not extend your head, arms
or body outside the windows
while driving.
WARNING
OFE048024
Page 124 of 561
3-37
Convenient features of your vehicle
3
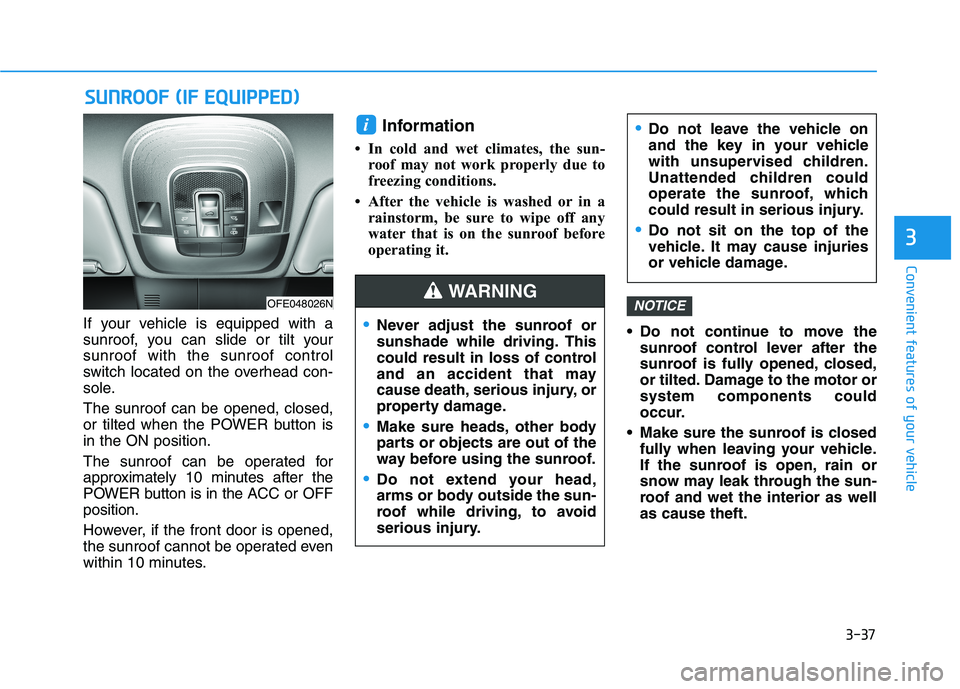
If your vehicle is equipped with a
sunroof, you can slide or tilt your
sunroof with the sunroof control
switch located on the overhead con-
sole.
The sunroof can be opened, closed,
or tilted when the POWER button is
in the ON position.
The sunroof can be operated for
approximately 10 minutes after the
POWER button is in the ACC or OFF
position.
However, if the front door is opened,
the sunroof cannot be operated even
within 10 minutes.
Information
• In cold and wet climates, the sun-
roof may not work properly due to
freezing conditions.
• After the vehicle is washed or in a
rainstorm, be sure to wipe off any
water that is on the sunroof before
operating it.
Do not continue to move the
sunroof control lever after the
sunroof is fully opened, closed,
or tilted. Damage to the motor or
system components could
occur.
Make sure the sunroof is closed
fully when leaving your vehicle.
If the sunroof is open, rain or
snow may leak through the sun-
roof and wet the interior as well
as cause theft.
NOTICE
i
S SU
UN
NR
RO
OO
OF
F
(
(I
IF
F
E
EQ
QU
UI
IP
PP
PE
ED
D)
)
OFE048026N
Never adjust the sunroof or
sunshade while driving. This
could result in loss of control
and an accident that may
cause death, serious injury, or
property damage.
Make sure heads, other body
parts or objects are out of the
way before using the sunroof.
Do not extend your head,
arms or body outside the sun-
roof while driving, to avoid
serious injury.
Do not leave the vehicle on
and the key in your vehicle
with unsupervised children.
Unattended children could
operate the sunroof, which
could result in serious injury.
Do not sit on the top of the
vehicle. It may cause injuries
or vehicle damage.
WARNING
Page 149 of 561
3-62
Convenient features of your vehicle
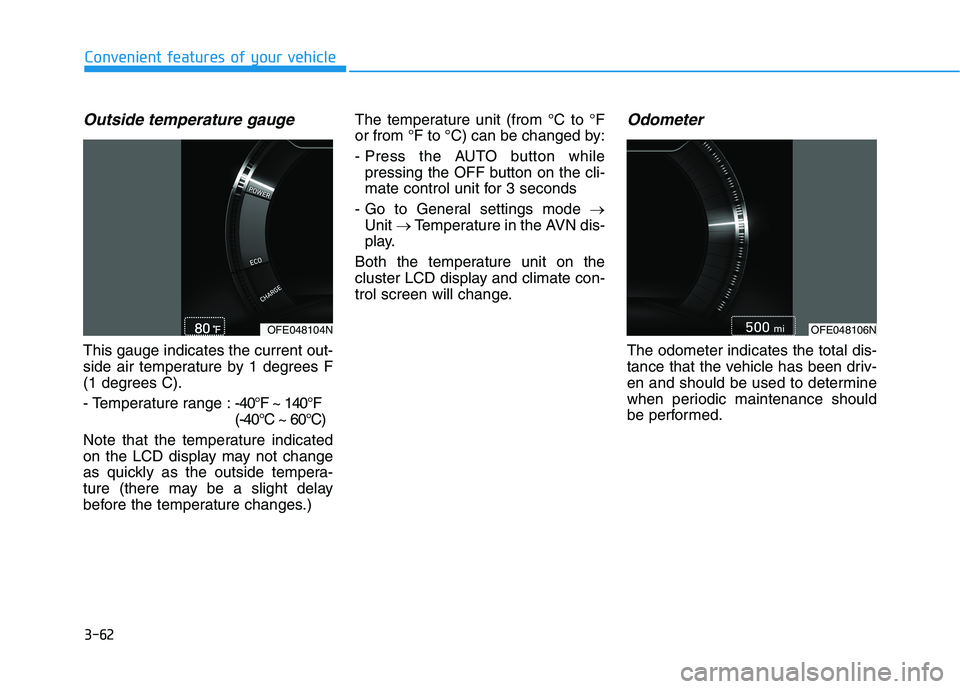
Outside temperature gauge
This gauge indicates the current out-
side air temperature by 1 degrees F
(1 degrees C).
- Temperature range :-40°F ~ 140°F
(-40°C ~ 60°C)
Note that the temperature indicated
on the LCD display may not change
as quickly as the outside tempera-
ture (there may be a slight delay
before the temperature changes.) The temperature unit (from °C to °F
or from °F to °C) can be changed by:
- Press the AUTO button while
pressing the OFF button on the cli-
mate control unit for 3 seconds
- Go to General settings mode →
Unit → Temperature in the AVN dis-
play.
Both the temperature unit on the
cluster LCD display and climate con-
trol screen will change.
Odometer
The odometer indicates the total dis-
tance that the vehicle has been driv-
en and should be used to determine
when periodic maintenance should
be performed.
OFE048106NOFE048104N
Page 235 of 561
3-148
Convenient features of your vehicle
Automatic Temperature
Control Mode
The Automatic Climate Control
System is controlled by setting the
desired temperature.
1. Press the AUTO button (7).
The modes, fan speeds, air intake
and air-conditioning will be con-
trolled automatically by the tem-
perature setting you select.
2. Press the temperature control but-
ton (1,2) to the desired tempera-
ture. If the temperature is set to
the lowest setting (Lo), the air con-
ditioning system will operate con-
tinuously. After the interior has
cooled sufficiently, adjust the but-
ton to a proper temperature set
point whenever possible.
To turn the automatic operation off,
select any button of the following:
- Mode selection button
- Front windshield defroster button
(Press the button one more time to
deselect the front windshield
defroster function. The 'AUTO' sign
will illuminate on the information
display once again.)- Fan speed control button
The selected function will be con-
trolled manually while other functions
operate automatically.
For your convenience and to improve
the efficiency of the climate control,
use the AUTO button and set the
temperature to 72°F (22°C).
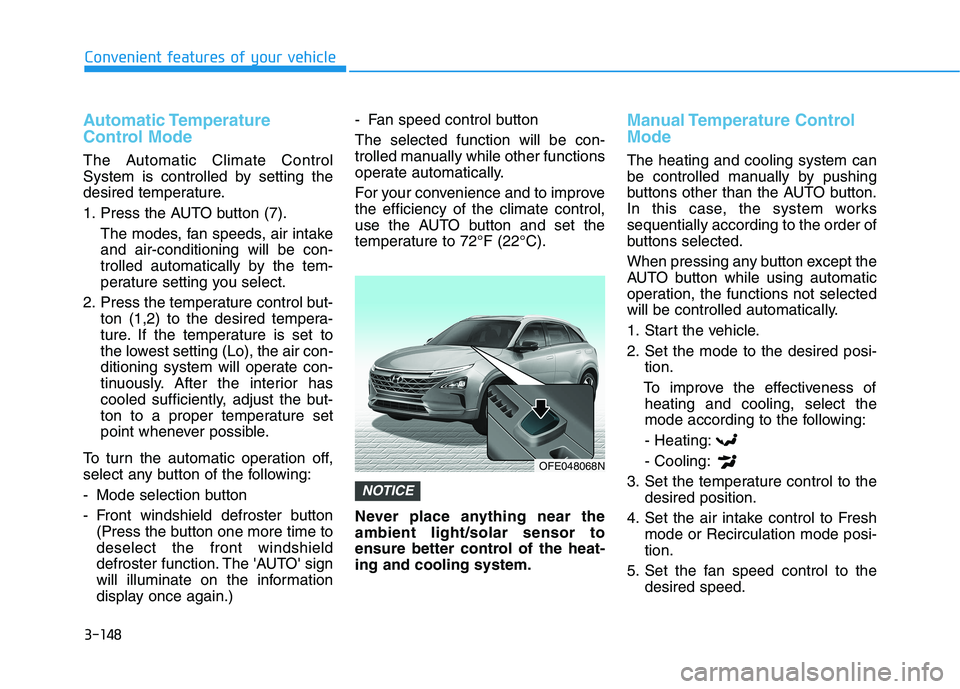
Never place anything near the
ambient light/solar sensor to
ensure better control of the heat-
ing and cooling system.
Manual Temperature Control
Mode
The heating and cooling system can
be controlled manually by pushing
buttons other than the AUTO button.
In this case, the system works
sequentially according to the order of
buttons selected.
When pressing any button except the
AUTO button while using automatic
operation, the functions not selected
will be controlled automatically.
1. Start the vehicle.
2. Set the mode to the desired posi-
tion.
To improve the effectiveness of
heating and cooling, select the
mode according to the following:
- Heating:
- Cooling:
3. Set the temperature control to the
desired position.
4. Set the air intake control to Fresh
mode or Recirculation mode posi-
tion.
5. Set the fan speed control to the
desired speed.
NOTICE
OFE048068N
Page 239 of 561
3-152
Convenient features of your vehicle
Adjusting the driver and passenger
side temperature equally
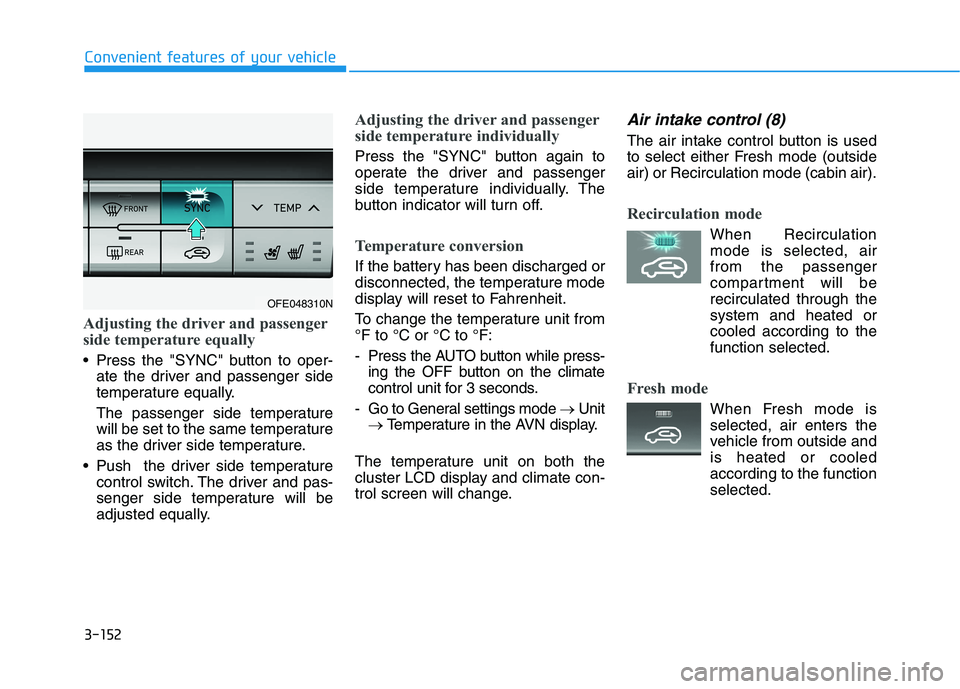
Press the "SYNC" button to oper-
ate the driver and passenger side
temperature equally.
The passenger side temperature
will be set to the same temperature
as the driver side temperature.
Push the driver side temperature
control switch. The driver and pas-
senger side temperature will be
adjusted equally.
Adjusting the driver and passenger
side temperature individually
Press the "SYNC" button again to
operate the driver and passenger
side temperature individually. The
button indicator will turn off.
Temperature conversion
If the battery has been discharged or
disconnected, the temperature mode
display will reset to Fahrenheit.
To change the temperature unit from
°F to °C or °C to °F:
- Press the AUTO button while press-
ing the OFF button on the climate
control unit for 3 seconds.
- Go to General settings mode →Unit
→Temperature in the AVN display.
The temperature unit on both the
cluster LCD display and climate con-
trol screen will change.
Air intake control (8)
The air intake control button is used
to select either Fresh mode (outside
air) or Recirculation mode (cabin air).
Recirculation mode
When Recirculation
mode is selected, air
from the passenger
compartment will be
recirculated through the
system and heated or
cooled according to the
function selected.
Fresh mode
When Fresh mode is
selected, air enters the
vehicle from outside and
is heated or cooled
according to the function
selected.
OFE048310N