2020 Hyundai Ioniq Hybrid tire pressure
[x] Cancel search: tire pressurePage 471 of 635
6-35
What to do in an emergency
Do not use the Tire Mobility Kit if
the ambient temperature is below
-22°F (-30°C) or over 158°F
(70°C).
In case of skin contact with the-
sealant, wash the area thoroughly-
with plenty of water.If the irritation-
persists, seek medical attention.
In case of eye contact with the
sealant,flush your eyes for at least
15 minutes. If the irritation persists,
seekmedical attention.
In case of swallowing the
sealant,rinse the mouth and drink
plenty ofwater. However, never give
anythingto an unconscious person
and seekmedical attention immedi-
ately.
Long time exposure to the sealant-
may cause damage to bodily tis-
suesuch as kidney, etc.
6
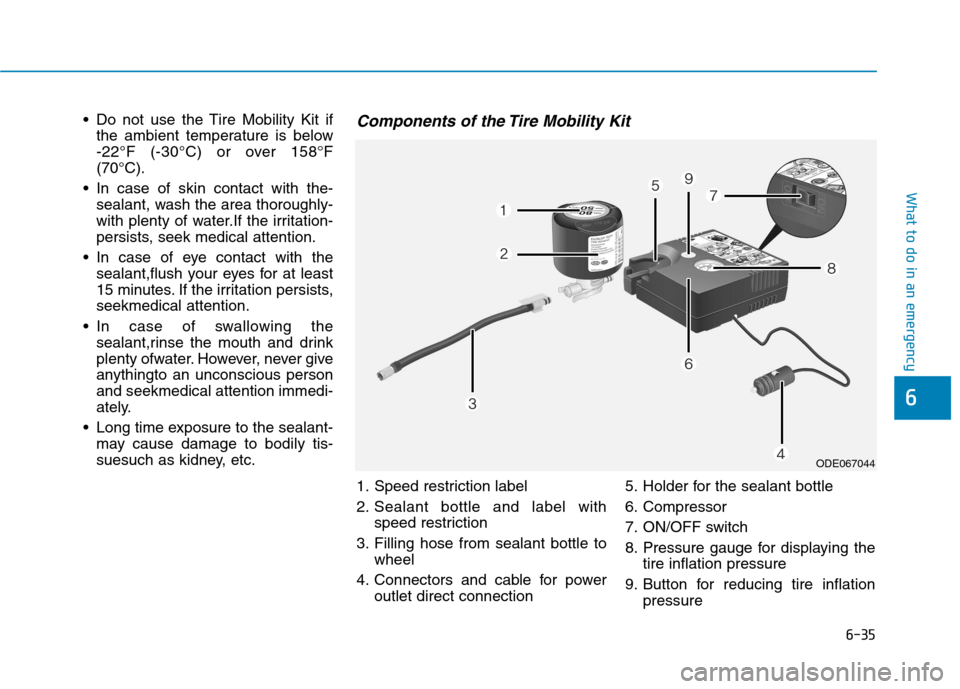
Components of the Tire Mobility Kit
ODE067044
1. Speed restriction label
2. Sealant bottle and label with
speed restriction
3. Filling hose from sealant bottle to
wheel
4. Connectors and cable for power
outlet direct connection5. Holder for the sealant bottle
6. Compressor
7. ON/OFF switch
8. Pressure gauge for displaying the
tire inflation pressure
9. Button for reducing tire inflation
pressure
Page 472 of 635
6-36
Connectors, cable and connection
hose are stored in the compressor
housing.
Strictly follow the specified sequence,
otherwise the sealant may escape
under high pressure.Using the Tire Mobility Kit
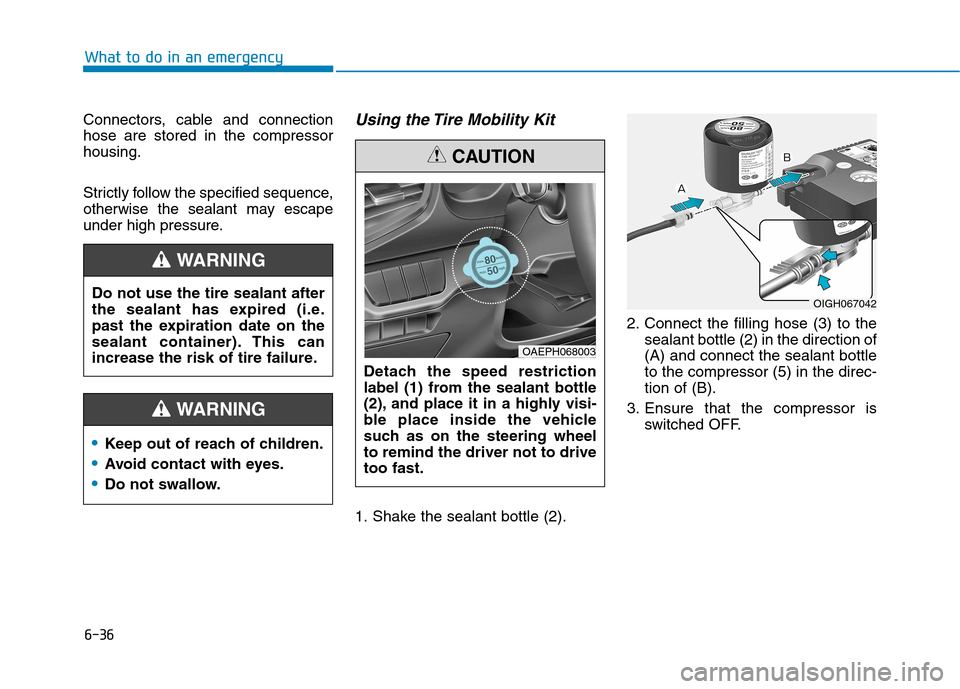
1. Shake the sealant bottle (2).2. Connect the filling hose (3) to the
sealant bottle (2) in the direction of
(A) and connect the sealant bottle
to the compressor (5) in the direc-
tion of (B).
3. Ensure that the compressor is
switched OFF.
What to do in an emergency
Do not use the tire sealant after
the sealant has expired (i.e.
past the expiration date on the
sealant container). This can
increase the risk of tire failure.
WARNING
Keep out of reach of children.
Avoid contact with eyes.
Do not swallow.
WARNING
Detach the speed restriction
label (1) from the sealant bottle
(2), and place it in a highly visi-
ble place inside the vehicle
such as on the steering wheel
to remind the driver not to drive
too fast.
CAUTION
OAEPH068003
OIGH067042
Page 473 of 635
6-37
What to do in an emergency
6
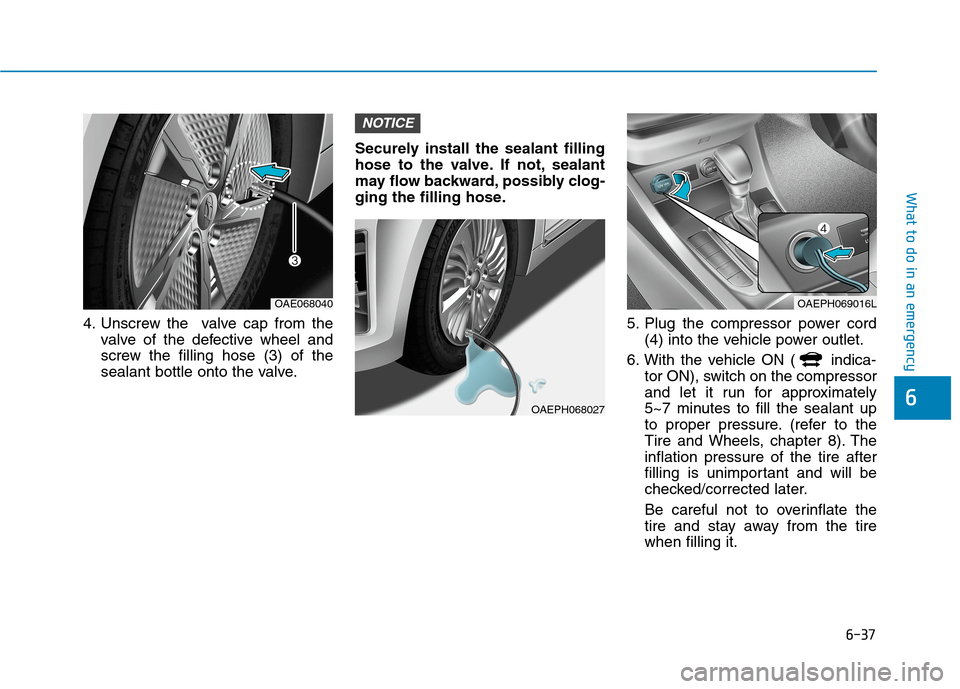
4. Unscrew the valve cap from the
valve of the defective wheel and
screw the filling hose (3) of the
sealant bottle onto the valve.Securely install the sealant filling
hose to the valve. If not, sealant
may flow backward, possibly clog-
ging the filling hose.
5. Plug the compressor power cord
(4) into the vehicle power outlet.
6. With the vehicle ON ( indica-
tor ON), switch on the compressor
and let it run for approximately
5~7 minutes to fill the sealant up
to proper pressure. (refer to the
Tire and Wheels, chapter 8). The
inflation pressure of the tire after
filling is unimportant and will be
checked/corrected later.
Be careful not to overinflate the
tire and stay away from the tire
when filling it.
NOTICE
OAE068040
OAEPH068027
OAEPH069016L
Page 474 of 635
6-38
What to do in an emergency
7. Switch off the compressor.
8. Detach the hoses from the sealant
bottle connector and from the tire
valve.
Return the Tire Mobility Kit to its stor-
age location in the vehicle.
Distributing the sealant
9. Immediately drive approximately
4~6 miles (7~10 km or about 10
minutes) to evenly distribute the
sealant in the tire.
Do not exceed a speed of 50 mph
(80 km/h). If possible, do not fall
below a speed of 12 mph (20 km/h).
While driving, if you experience any
unusual vibration, ride disturbance or
noise, reduce your speed and drive
with caution until you can safely pull
off of the side of the road.
Checking the tire inflation pres-
sure
1. After driving approximately 4~6
miles (7~10 km or about
10 minutes), stop at a safe loca-
tion.
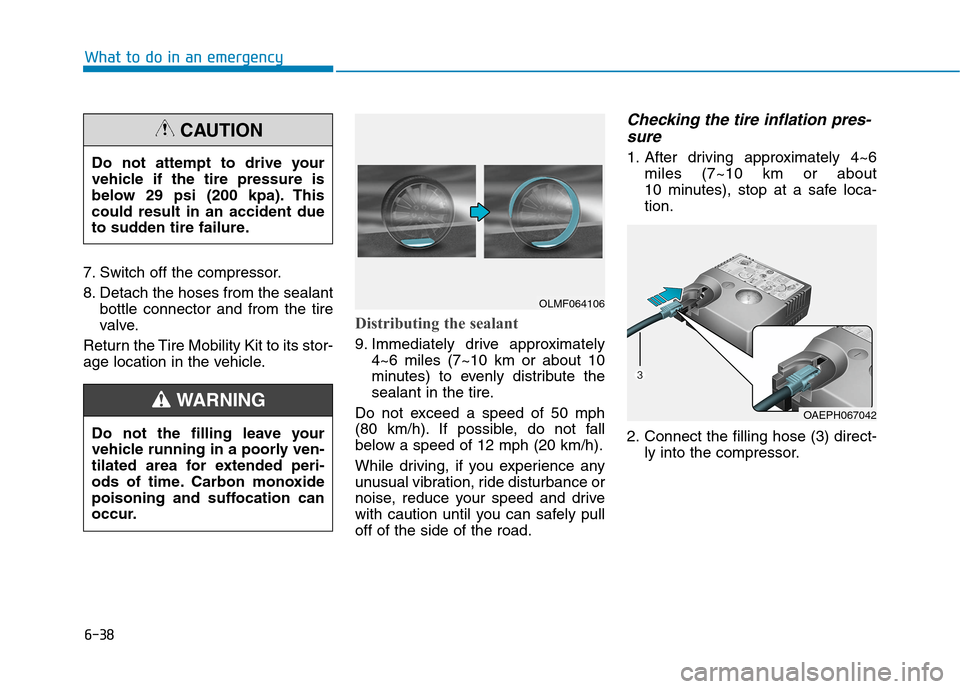
2. Connect the filling hose (3) direct-
ly into the compressor. Do not attempt to drive your
vehicle if the tire pressure is
below 29 psi (200 kpa). This
could result in an accident due
to sudden tire failure.
CAUTION
Do not the filling leave your
vehicle running in a poorly ven-
tilated area for extended peri-
ods of time. Carbon monoxide
poisoning and suffocation can
occur.
WARNING
OLMF064106
OAEPH067042
Page 475 of 635

6-39
What to do in an emergency
6
3. Connect the other end of the filling
hose (3) directly into the tire valve.
4. Plug the compressor power cord
(4) into the vehicle power outlet.5. Adjust the tire inflation pressure to
the recommended tire inflation.
With the ignition switched on, pro-
ceed as follows.
- To increase the inflation pres-
sure:
Switch on the compressor. To
check the current inflation pres-
sure setting, briefly switch off the
compressor.
- To reduce the inflation pres-
sure:
Press the button (9) on the com-
pressor.
Information
The pressure gauge may show higher
than actual reading when the com-
pressor is running. To get an accurate
tire pressure, the compressor needs to
be turned off.
Information
When reinstalling the repaired or
replaced tire and wheel on the vehicle,
tighten the wheel lug nut to 79~94
lbf·ft (11~13kgf·m).
i
i
OAE068040
When you use the Tire Mobility Kit
including sealant not approved by
HYUNDAI, the tire pressure sen-
sors may be damaged by sealant.
The sealant on the tire pressure
sensor and wheel should be
removed when you replace the
tire with a new one and inspect
the tire pressure sensors at an
authorized dealer.
CAUTION
The tire inflation pressure must
be at least 32 psi (220 kPa). If it
is not, do not continue driving.
Call for road side service or
towing.
WARNING
Page 481 of 635

7
Maintenance
7
Maintenance
Engine Compartment .............................................7-3
Maintenance Services ...........................................7-5
Owner's Responsibility .....................................................7-5
Owner Maintenance Precautions..................................7-5
Owner Maintenance ..............................................7-6
How to Disconnect the (-) Cable for Regular
Maintenance (Hybrid vehicle) ........................................7-7
Owner Maintenance Schedule .......................................7-7
Scheduled Maintenance Services........................7-8
Normal Maintenance Schedule ......................................7-9
Maintenance Under Severe Usage Conditions ........7-12
Severe driving conditions..............................................7-13
Explanation of Scheduled Maintenance
Items ......................................................................7-14
Engine Oil ..............................................................7-16
Checking the Engine Oil Level .....................................7-16
Checking the Engine Oil and Filter .............................7-17
Engine Coolant/Inverter Coolant .......................7-18
Checking the Coolant Level ..........................................7-18
Changing Coolant ............................................................7-21
Hybrid Starter & Generator (HSG) Belt ...........7-21
Checking the Hybrid Starter &
Generator (HSG) Belt .....................................................7-21
Brake Fluid ............................................................7-22
Checking the Brake Fluid Level ...................................7-22
Washer Fluid .........................................................7-23
Checking the Washer Fluid Level................................7-23
Parking Brake .......................................................7-23
Checking the Parking Brake .........................................7-23
Air Cleaner ............................................................7-24
Filter Replacement ..........................................................7-24
Climate Control Air Filter ....................................7-26
Filter inspection ...............................................................7-26
Wiper Blades.........................................................7-28
Blade inspection ..............................................................7-28
Blade Replacement .........................................................7-28
Battery (12 Volt, Plug-In Hybrid Vehicle) ........7-31
For Best Battery Service ..............................................7-32
Battery Recharging ........................................................7-32
Reset Features.................................................................7-33
Tires and Wheels .................................................7-34
Tire Care ............................................................................7-34
Recommended Cold Tire Inflation Pressures ...........7-35
Check Tire Inflation Pressure ......................................7-36
Tire Rotation.....................................................................7-377
Page 488 of 635

7-8
Maintenance
At least monthly:
Check coolant level in the engine
coolant reservoir.
Check the operation of all exterior
lights, including the brake lights,
turn signals and hazard warning
flashers.
Check the inflation pressures of all
tires including the spare for tires
that are worn, show uneven wear,
or are damaged.
Check for loose wheel lug nuts.
At least twice a year:
(i.e., every Spring and Fall)
Check radiator, heater and air con-
ditioning hoses for leaks or dam-
age.
Check windshield washer spray
and wiper operation. Clean wiper
blades with a clean cloth damp-
ened with washer fluid.
Check headlamp alignment.
Check muffler, exhaust pipes,
shields and clamps.
Check the seat belts for wear and
function.
At least once a year:
Clean body and door drain holes.
Lubricate door hinges and hood
hinges.
Lubricate door and hood locks and
latches.
Lubricate door rubber weather
strips.
Lubricate door checker.
Check the air conditioning system.
Inspect and lubricate transmission
linkage and controls.
Clean the battery and terminals.
Check the brake fluid level.Follow Normal Maintenance Schedule
if the vehicle is usually operated where
none of the following conditions apply.
If any of the following conditions apply,
you must follow the Maintenance
Under Severe Usage Conditions.
Repeated short distance driving.
Driving in dusty conditions or
sandy areas.
Extensive use of brakes.
Driving in areas where salt or other
corrosive materials are used.
Driving on rough or muddy roads.
Driving in mountainous areas.
Extended periods of idling or low
speed operation.
Driving for a prolonged period in
cold temperatures and/or extreme-
ly humid climates.
More than 50% driving in heavy
city traffic during hot weather
above 90°F (32°C).
For additional information or assis-
tance see your authorized HYUNDAI
dealer.
S SC
CH
HE
ED
DU
UL
LE
ED
D
M
MA
AI
IN
NT
TE
EN
NA
AN
NC
CE
E
S SE
ER
RV
VI
IC
CE
ES
S
Page 514 of 635
7-34
Maintenance
T TI
IR
RE
ES
S
A
AN
ND
D
W
WH
HE
EE
EL
LS
S
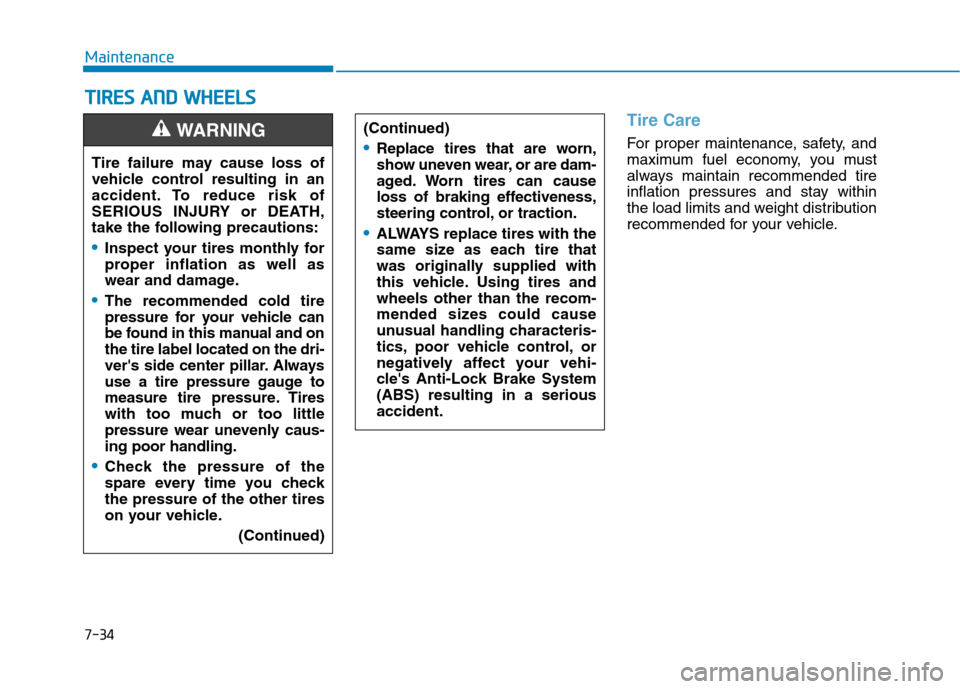
Tire Care
For proper maintenance, safety, and
maximum fuel economy, you must
always maintain recommended tire
inflation pressures and stay within
the load limits and weight distribution
recommended for your vehicle. (Continued)Replace tires that are worn,
show uneven wear, or are dam-
aged. Worn tires can cause
loss of braking effectiveness,
steering control, or traction.
ALWAYS replace tires with the
same size as each tire that
was originally supplied with
this vehicle. Using tires and
wheels other than the recom-
mended sizes could cause
unusual handling characteris-
tics, poor vehicle control, or
negatively affect your vehi-
cle's Anti-Lock Brake System
(ABS) resulting in a serious
accident.
Tire failure may cause loss of
vehicle control resulting in an
accident. To reduce risk of
SERIOUS INJURY or DEATH,
take the following precautions:
Inspect your tires monthly for
proper inflation as well as
wear and damage.
The recommended cold tire
pressure for your vehicle can
be found in this manual and on
the tire label located on the dri-
ver's side center pillar. Always
use a tire pressure gauge to
measure tire pressure. Tires
with too much or too little
pressure wear unevenly caus-
ing poor handling.
Check the pressure of the
spare every time you check
the pressure of the other tires
on your vehicle.
(Continued)
WARNING