2020 Hyundai Ioniq Hybrid Schedule
[x] Cancel search: SchedulePage 506 of 635
7-26
Maintenance
C CL
LI
IM
MA
AT
TE
E
C
CO
ON
NT
TR
RO
OL
L
A
AI
IR
R
F
FI
IL
LT
TE
ER
R
Filter inspection
The climate control air filter should
be replaced according to the
Maintenance Schedule. If the vehicle
is operated in severely air-polluted
cities or on dusty rough roads for a
long period, it should be inspected
more frequently and replaced soon-
er. Replace the climate control air fil-
ter by following the procedure below
and be careful to avoid damaging
other components.
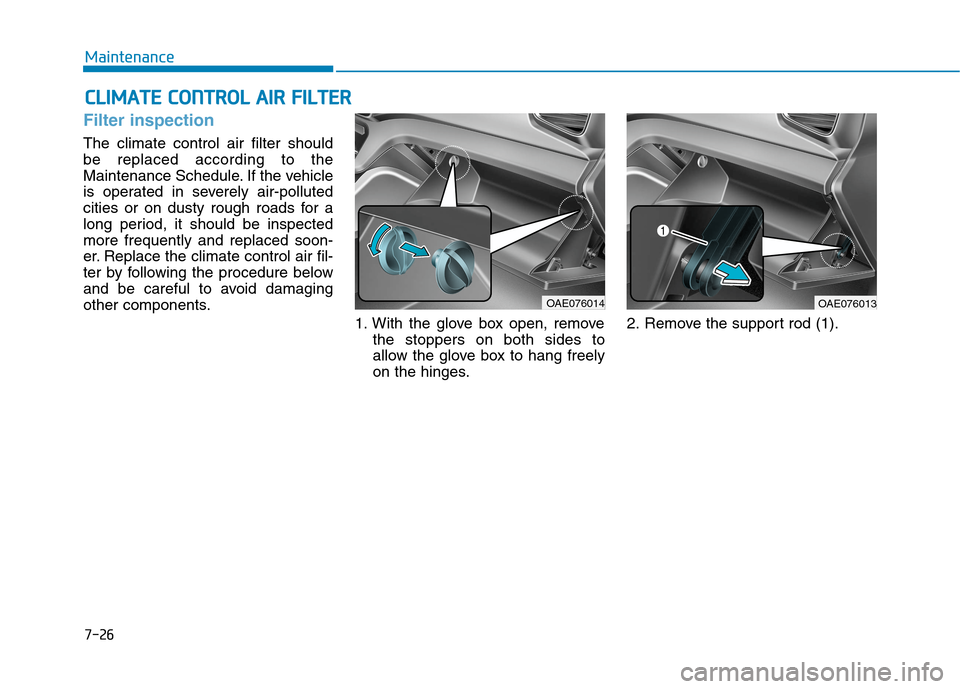
1. With the glove box open, remove
the stoppers on both sides to
allow the glove box to hang freely
on the hinges.2. Remove the support rod (1).
OAE076013OAE076014
Page 555 of 635
7-75
7
Maintenance
Cleaning the seat belt webbing
Clean the belt webbing with any mild
soap solution recommended for
cleaning upholstery or carpet. Follow
the instructions provided with the
soap. Do not bleach or re-dye the
webbing because this may weaken
the seat belt.
Cleaning the interior window
glass
If the interior glass surfaces of the
vehicle become fogged (that is, cov-
ered with an oily, greasy or waxy
film), they should be cleaned with
glass cleaner. Follow the directions
on the glass cleaner container.
Do not scrape or scratch the
inside of the rear window. This
may result in damage to the rear
window defroster grid.The emission control system of your
vehicle is covered by a written limited
warranty. Please see the warranty
information contained in the Owner's
Handbook & Warranty Information
booklet in your vehicle.
Your vehicle is equipped with an
emission control system to meet all
applicable emission regulations.
There are three emission control
systems, as follows.
(1) Crankcase emission control sys-
tem
(2) Evaporative emission control sys-
tem
(3) Exhaust emission control system
In order to ensure the proper func-
tion of the emission control systems,
it is recommended that you have
your vehicle inspected and main-
tained by an authorized HYUNDAI
dealer in accordance with the main-
tenance schedule in this manual.For the Inspection and
Maintenance Test (with Electronic
Stability Control (ESC) system)
To prevent the vehicle from mis-
firing during dynamometer test-
ing, turn the Electronic Stability
Control (ESC) system off by
pressing the ESC switch (ESC
OFF light illuminated).
After dynamometer testing is
completed, turn the ESC system
back on by pressing the ESC
switch again.
NOTICE
NOTICE
E EM
MI
IS
SS
SI
IO
ON
N
C
CO
ON
NT
TR
RO
OL
L
S
SY
YS
ST
TE
EM
M
Page 572 of 635
H Hy
yb
br
ri
id
d
S
Sy
ys
st
te
em
m
O
Ov
ve
er
rv
vi
ie
ew
w
HEV (Hybrid Electric Vehicle) System..................H2
Hybrid Vehicle ......................................................................H2
PHEV (Plug-In Electric Vehicle) System..............H3
Plug-in Hybrid Vehicle.......................................................H3
Charging the Plug-In Hybrid Vehicle....................H4
Charging Information .........................................................H4
Charging Types ....................................................................H4
Charging Time Information ...............................................H4
Charging Status ...................................................................H5
Charging Connector AUTO / LOCK Mode.....................H6
Scheduled Charging ............................................................H7
Charging Precautions .........................................................H8
AC Charge .............................................................................H9
Trickle Charge ....................................................................H15
Action to be taken when charging stops abruptly...H27
Driving the Hybrid/Plug-In Hybrid Vehicle .......H28
Starting the Vehicle ..........................................................H28
Special Features ................................................................H29
Hybrid System Gauge ......................................................H31
Plug-in Hybrid Mode (Plug-in hybrid vehicle)..........H32
Aux. Battery Saver+ (Plug-in hybrid vehicle) ...........H33
Warning and Indicator Lights ........................................H35
LCD Display Messages.....................................................H36
Energy flow ........................................................................H45
Safety Precautions For Hybrid System .............H49
High Voltage Battery System.........................................H49
Safety Plug .........................................................................H52
High Voltage Battery Cooling Duct ..............................H53
If an Accident Occurs ......................................................H54
When the Hybrid Vehicle Shuts Off ............................H55
Page 578 of 635
H7
Scheduled Charging
(if equipped)
You can set-up a charging sched-
ule for your vehicle using the info-
tainment system or BlueLink appli-
cation.
Refer to the infotainment system
manual or the BlueLink manual for
detailed information about setting
scheduled charging.
Scheduled charging can only be
done when using a AC charger or
the portable charger (ICCB: In-
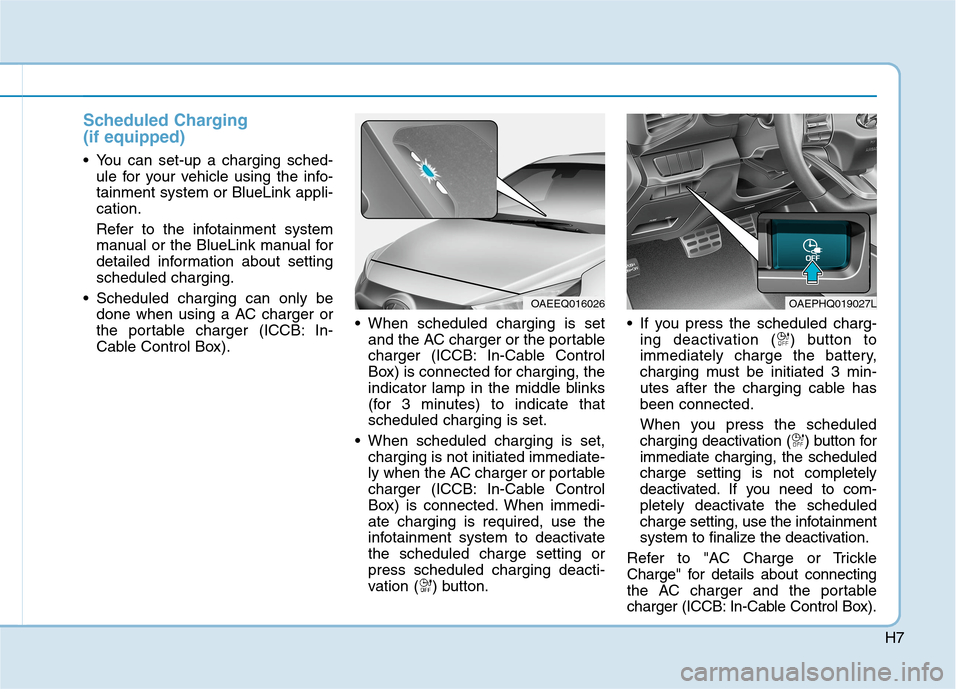
Cable Control Box). When scheduled charging is set
and the AC charger or the portable
charger (ICCB: In-Cable Control
Box) is connected for charging, the
indicator lamp in the middle blinks
(for 3 minutes) to indicate that
scheduled charging is set.
When scheduled charging is set,
charging is not initiated immediate-
ly when the AC charger or portable
charger (ICCB: In-Cable Control
Box) is connected. When immedi-
ate charging is required, use the
infotainment system to deactivate
the scheduled charge setting or
press scheduled charging deacti-
vation ( ) button. If you press the scheduled charg-
ing deactivation ( ) button to
immediately charge the battery,
charging must be initiated 3 min-
utes after the charging cable has
been connected.
When you press the scheduled
charging deactivation ( ) button for
immediate charging, the scheduled
charge setting is not completely
deactivated. If you need to com-
pletely deactivate the scheduled
charge setting, use the infotainment
system to finalize the deactivation.
Refer to "AC Charge or Trickle
Charge" for details about connecting
the AC charger and the portable
charger (ICCB: In-Cable Control Box).
OAEEQ016026OAEPHQ019027L
Page 583 of 635
H12
Information
• Even though charging is possible
with the Engine Start/Stop button in
the ON/START position, for your
safety, start charging when the
Engine Start/Stop button is in the
OFF position and the vehicle shifted
to P (Park). After charging has
started, you can use electrical com-
ponents such as the radio by press-
ing the Engine Start/Stop button to
the ACC or ON position.
• During AC charging, the radio
reception may be bad.
• Moving the shift lever from P (Park)
to R (Reverse)/N (Neutral)/D
(Drive) stops the charging process.
To restart the charging process,
move the shift lever to P (Park),
place the Engine Start/Stop button
to the OFF position, and disconnect
the charging cable. Then, connect
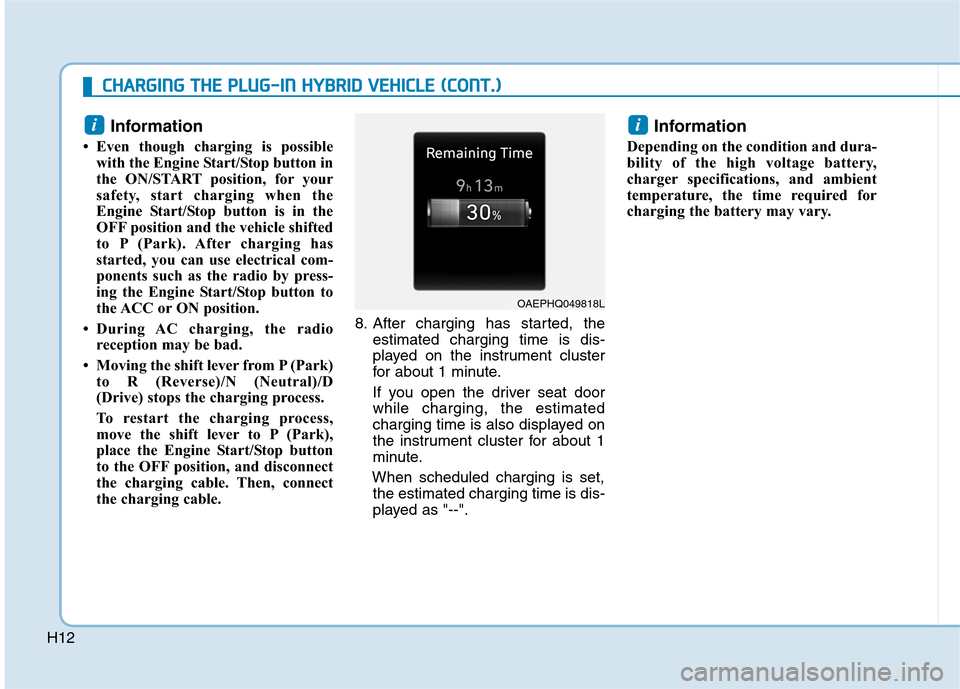
the charging cable.8. After charging has started, the
estimated charging time is dis-
played on the instrument cluster
for about 1 minute.
If you open the driver seat door
while charging, the estimated
charging time is also displayed on
the instrument cluster for about 1
minute.
When scheduled charging is set,
the estimated charging time is dis-
played as "--".
Information
Depending on the condition and dura-
bility of the high voltage battery,
charger specifications, and ambient
temperature, the time required for
charging the battery may vary.
ii
OAEPHQ049818L
C CH
HA
AR
RG
GI
IN
NG
G
T
TH
HE
E
P
PL
LU
UG
G-
-I
IN
N
H
HY
YB
BR
RI
ID
D
V
VE
EH
HI
IC
CL
LE
E
(
(C
CO
ON
NT
T.
.)
)
Page 591 of 635
H20
C CH
HA
AR
RG
GI
IN
NG
G
T
TH
HE
E
P
PL
LU
UG
G-
-I
IN
N
H
HY
YB
BR
RI
ID
D
V
VE
EH
HI
IC
CL
LE
E
(
(C
CO
ON
NT
T.
.)
)
Information
• Even though charging is possible
with the Engine Start/Stop button in
the ON/START position, for your
safety, start charging when the
Engine Start/Stop button is in the
OFF position and the vehicle shifted
to P (Park).
After charging has started, you can
use electrical components such as
the radio by pressing the Engine
Start/Stop button to ACC or ON
position.
• Moving the shift lever from P (Park)
to R (Reverse)/N (Neutral)/D
(Drive) stops the charging process.
To restart the charging process,
move the shift lever to P (Park),
place the Engine Start/Stop button
to the OFF position, and disconnect
the charging cable. Then, connect
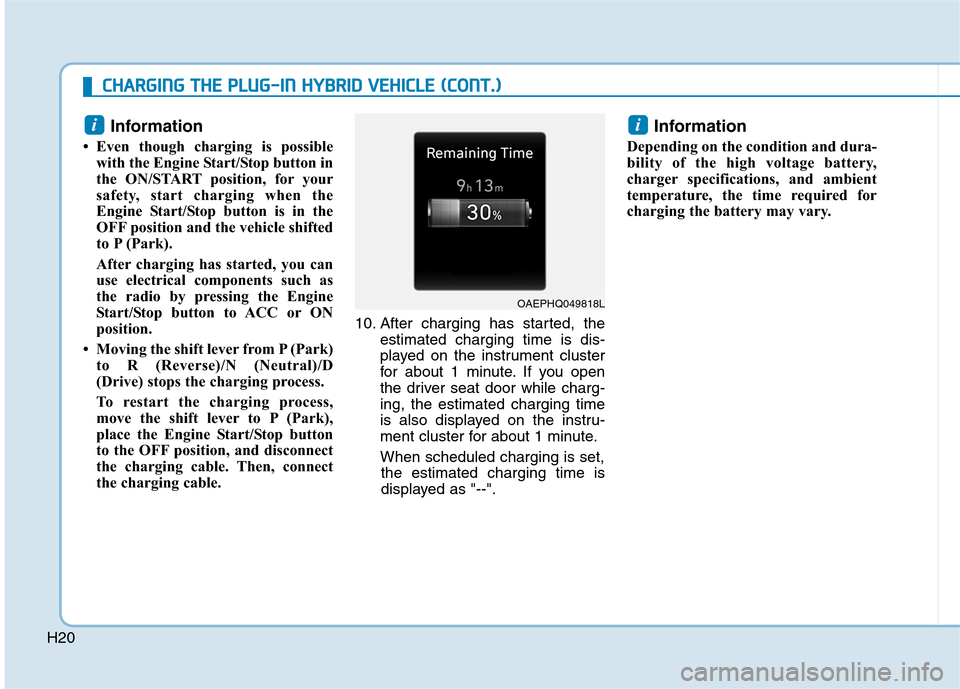
the charging cable.10. After charging has started, the
estimated charging time is dis-
played on the instrument cluster
for about 1 minute. If you open
the driver seat door while charg-
ing, the estimated charging time
is also displayed on the instru-
ment cluster for about 1 minute.
When scheduled charging is set,
the estimated charging time is
displayed as "--".
Information
Depending on the condition and dura-
bility of the high voltage battery,
charger specifications, and ambient
temperature, the time required for
charging the battery may vary.
ii
OAEPHQ049818L
Page 598 of 635
H27
Action to be taken when charging stops abruptly
When the high voltage battery does not charge, check the followings:
1. Check the charging setting for the vehicle.
(e.g. When scheduled charging is set, charging is not initiated immediately when the AC charger or portable
charger (ICCB: In-Cable Control Box) is connected.)
2. Check the operation status of AC charger, portable charger.
(Charging Status Indicator Lamp for Portable Charger, refer to "Checking Charging Status" for trickle charge in
this chapter.)
❈Actual method for indicating the charging status may vary in accordance with the charger manufacturer.
3. When the vehicle does not charge and a warning message appears on the cluster, check the corresponding mes-
sage. Refer to "LCD Display Messages", in this chapter.
4. If the vehicle is properly charged when charged with another normally working charger, contact the charger man-
ufacturer.
5. If the vehicle does not charge when charged with another normally working charger, we recommend that you con-
tact an authorized HYUNDAI dealer for inspection.
Page 630 of 635

I-4
Engine oil ........................................................................7-16
Checking the Engine Oil and Filter ...........................7-17
Checking the Engine Oil Level ..................................7-16
Engine Start/Stop Button ..................................................5-6
Explanation of scheduled maintenance items.................7-14
Exterior features..............................................................3-49
Fuel Filler Door (Hybrid vehicle) ..............................3-52
Fuel Filler Door (Plug-in hybrid vehicle) ..................3-55
Hood ...........................................................................3-49
Liftgate .......................................................................3-50
Forward Collision-Avoidance Assist (FCA)
- front view camera only ..............................................5-47
FCA sensor (Front view camera) ...............................5-52
FCA Warning Message and Brake Control ................5-49
Limitations of the System ..........................................5-55
System malfunction ....................................................5-53
System Setting and Activation ...................................5-47
Forward Collision-Avoidance Assist (FCA)
- sensor fusion...............................................................5-61
FCA Sensor (Front view camera+ Front radar) .........5-66
FCA Warning Message and Brake control.................5-63
Limitations of the System ..........................................5-70
System Malfunction ...................................................5-68
System Setting and Activation ...................................5-61
Forward/Reverse Parking Distance Warning (PDW) ..3-138
Self-Diagnosis ..........................................................3-142Fuses ...............................................................................7-49
Engine Compartment Panel Fuse Replacement .........7-52
Fuse/Relay Panel Description ....................................7-53
Instrument Panel Fuse Replacement ..........................7-50
Hazard warning flasher .....................................................6-2
Highway Driving Assist (HDA) ...................................5-141
System Setting and Operation ..................................5-141
Warning Message .....................................................5-144
Hybrid Starter & Generator (HSG) belt .........................7-21
Checking the Hybrid Starter & Generator (HSG)
Belt ...........................................................................7-21
Hybrid Vehicle........................................................................
Engine Compartment....................................................1-6
Exterior Overview ........................................................1-2
Instrument Panel Overview ..........................................1-5
Interior Overview .........................................................1-4
If an accident occurs .......................................................6-44
If the 12 volt Battery is discharged (Hybrid Vehicle) ......6-5
Before Jump Starting....................................................6-5
Jump Starting................................................................6-6
If the 12 volt battery is discharged
(Plug-In Hybrid Vehicle) ................................................6-9
Jump Starting................................................................6-9
Index
F
H
I