Page 497 of 613

6-24
What to do in an emergency
If you have a tyre gauge, check the
tyre pressure (see "Tyres and
Wheels" in chapter 8 for tyre pres-
sure instructions.). If the pressure is
lower or higher than recommended,
drive slowly to the nearest service
station and adjust it to the recom-
mended pressure. Always reinstall
the valve cap after checking or
adjusting tyre pressure. If the cap is
not replaced, air may leak from the
tyre. If you lose a valve cap, buy
another and install it as soon as pos-
sible. After changing tyres, secure
the flat tyre and return the jack and
tools to their proper storage loca-
tions.
Check the tyre pressure as soon
as possible after installing a spare
tyre. Adjust it to the recommend-
ed pressure.If any of the equipment such as the
jack, lug nuts, studs, or other equip-
ment is damaged or in poor condi-
tion, do not attempt to change the
tyre and call for assistance.
Check and tighten the tyre wheel lug
nuts after driving over 50km if tyres
are replaced. Re-check the tyre
wheel lug nuts after driving over
1,000km.
Use of compact spare tyres
(if equipped)
Compact spare tyres are designed
for emergency use only. Drive care-
fully on the compact spare tyre and
always follow the safety precautions.
NOTICE
Your vehicle has metric threads
on the studs and lug nuts. Make
certain during tyre changing
that the same nuts that were
removed are reinstalled. If you
have to replace your lug nuts
make sure they have metric
threads to avoid damaging the
studs and ensure the wheel is
properly secured to the hub. We
recommend that you consult an
authorised HYUNDAI dealer for
assistance.
CAUTION
To prevent compact spare tyre
failure and loss of control pos-
sibly resulting in an accident:
Use the compact spare tyre
only in an emergency.
NEVER operate your vehicle
over 80 km/h (50 mph).
Do not exceed the vehicle’s
maximum load rating or the
load carrying capacity shown
on the sidewall of the com-
pact spare tyre.
Do not use the compact spare
tyre continuously. Repair or
replace the original tyre as
soon as possible to avoid fail-
ure of the compact spare tyre.
WARNING
Page 504 of 613
6-31
What to do in an emergency
6
5. Unscrew the valve cap from the
valve of the flat tyre and screw the
filling hose (3) of the sealant bottle
onto the valve.
6. Ensure that the compressor is
switched OFF.7. Plug the compressor power cord
(4) into the vehicle power outlet.
8. With the With the vehicle ON (
indicator ON), switch on the com-
pressor and let it run for approxi-
mately 5~7 minutes to fill the
sealant up to proper pressure.
(Refer to the Tyre and Wheels,
chapter 8).The inflation pressure
of the tyre after filling is unimpor-
tant and will be checked/corrected
later.
Be careful not to overinflate the
tyre and stay away from the tyre
when filling it.
Securely install the sealant fill-
ing hose to the valve. If not,
sealant may flow rearward, pos-
sibly clogging the filling hose.
CAUTION
OAE066027
OAE067040OAEPH047541R
Page 511 of 613
6-38
4. Unscrew the valve cap from the
valve of the defective and screw
the filling hose (3) of the sealant
bottle onto the valve.5. Plug the compressor power cord
(4) into the vehicle power outlet.
6. With the With the vehicle ON (
indicator ON), switch on the com-
pressor and let it run for approxi-
mately 5~7 minutes to fill the
sealant up to proper pressure.
(Refer to the Tyre and Wheels,
chapter 8).The inflation pressure
of the tyre after filling is unimpor-
tant and will be checked/corrected
later.
Be careful not to overinflate the
tyre and stay away from the tyre
when filling it.
What to do in an emergency
Securely install the sealant fill-
ing hose to the valve. If not,
sealant may flow rearward, pos-
sibly clogging the filling hose.
CAUTION
OAE066027
OAEPH047541ROAE067040
Page 516 of 613
6-43
What to do in an emergency
6
When towing your vehicle in an
emergency without wheel dollies:
1. Place the ignition switch in the
ACC position.
2. Place the shift lever in N (Neutral).
3. Release the parking brake.Removable towing hook
1. Open the tailgate, and remove the
towing hook from the tool case.
2. Remove the hole cover by press-
ing the lower part of the cover on
the bumper.
3. Install the towing hook by turning it
clockwise into the hole until it is
fully secured.
4. Remove the towing hook and
install the cover after use. Failure to place the shift lever in
N (Neutral) may cause internal
damage to the transmission.
CAUTION
OAE066021
OAE066022
OAE066028
■Front
■Rear
Page 517 of 613

6-44
What to do in an emergency
Emergency towing
If towing is necessary, we recom-
mend you have it done by an autho-
rised HYUNDAI dealer or a commer-
cial tow truck service.If a towing service is not available in
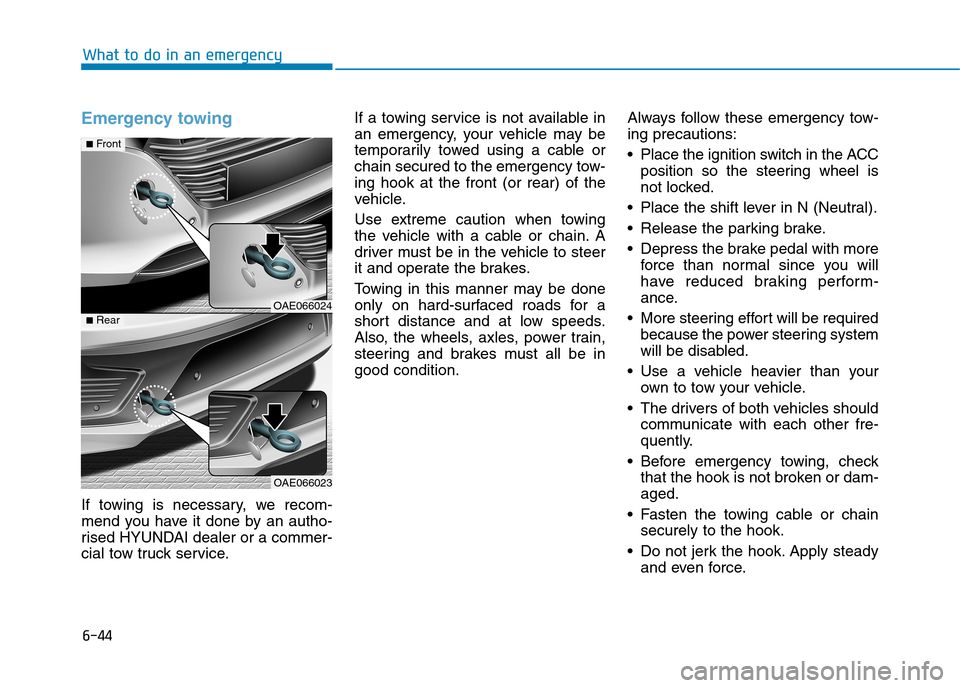
an emergency, your vehicle may be
temporarily towed using a cable or
chain secured to the emergency tow-
ing hook at the front (or rear) of the
vehicle.
Use extreme caution when towing
the vehicle with a cable or chain. A
driver must be in the vehicle to steer
it and operate the brakes.
Towing in this manner may be done
only on hard-surfaced roads for a
short distance and at low speeds.
Also, the wheels, axles, power train,
steering and brakes must all be in
good condition.Always follow these emergency tow-
ing precautions:
Place the ignition switch in the ACC
position so the steering wheel is
not locked.
Place the shift lever in N (Neutral).
Release the parking brake.
Depress the brake pedal with more
force than normal since you will
have reduced braking perform-
ance.
More steering effort will be required
because the power steering system
will be disabled.
Use a vehicle heavier than your
own to tow your vehicle.
The drivers of both vehicles should
communicate with each other fre-
quently.
Before emergency towing, check
that the hook is not broken or dam-
aged.
Fasten the towing cable or chain
securely to the hook.
Do not jerk the hook. Apply steady
and even force.
OAE066024
OAE066023
■Front
■Rear
Page 539 of 613
7-21
7
Maintenance
The electric motor for
the cooling fan may
continue to operate
or start up when the
engine is not running
and can cause serious injury.
Keep hands, clothing and tools
away from the rotating fan blades
of the cooling fan.
Always turn off the engine
unless the vehicle has to be
inspected with the engine on. Be
cautious as the cooling fan may
operate if the negative (-) battery
terminal is not disconnected.
WARNING
Make sure the coolant cap is
properly closed after refilling
coolant. Otherwise the engine
could be overheated whilst
driving.
1. Check if the coolant cap label
is straight In front.
(Continued)
WARNING
OTL075062
■Engine compartment front view
(Continued)
2. Make sure that the tiny pro-
trusions inside the coolant
cap is securely interlocked.
OAE076050
■Engine compartment rear view
Page 543 of 613

7-25
7
Maintenance
Checking the parking brake
Foot type (if equipped)
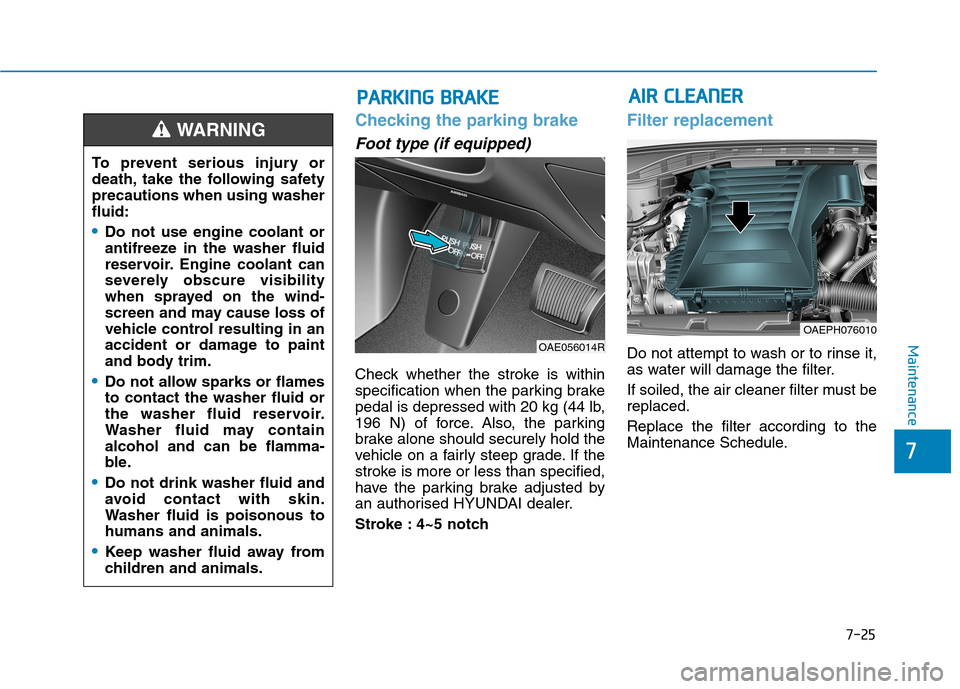
Check whether the stroke is within
specification when the parking brake
pedal is depressed with 20 kg (44 lb,
196 N) of force. Also, the parking
brake alone should securely hold the
vehicle on a fairly steep grade. If the
stroke is more or less than specified,
have the parking brake adjusted by
an authorised HYUNDAI dealer.
Stroke : 4~5 notch
Filter replacement
Do not attempt to wash or to rinse it,
as water will damage the filter.
If soiled, the air cleaner filter must be
replaced.
Replace the filter according to the
Maintenance Schedule.OAE056014R
P PA
AR
RK
KI
IN
NG
G
B
BR
RA
AK
KE
E
To prevent serious injury or
death, take the following safety
precautions when using washer
fluid:
Do not use engine coolant or
antifreeze in the washer fluid
reservoir. Engine coolant can
severely obscure visibility
when sprayed on the wind-
screen and may cause loss of
vehicle control resulting in an
accident or damage to paint
and body trim.
Do not allow sparks or flames
to contact the washer fluid or
the washer fluid reservoir.
Washer fluid may contain
alcohol and can be flamma-
ble.
Do not drink washer fluid and
avoid contact with skin.
Washer fluid is poisonous to
humans and animals.
Keep washer fluid away from
children and animals.
WARNING
A AI
IR
R
C
CL
LE
EA
AN
NE
ER
R
OAEPH076010
Page 551 of 613

7-33
7
Maintenance
For best battery service
Keep the battery securely mounted.
Keep the battery top clean and dry.
Keep the terminals and connec-
tions clean, tight, and coated with
petroleum jelly or terminal grease.
Rinse any spilled acid from the bat-
tery immediately with a solution of
water and baking soda.
Information - For batteries
marked with UPPER and
LOWER
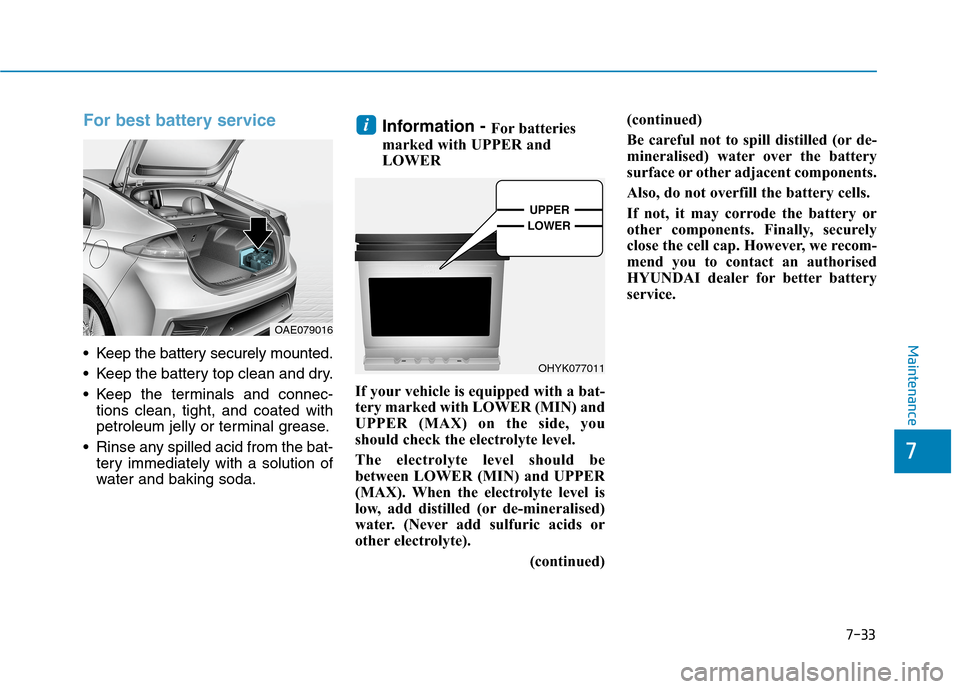
If your vehicle is equipped with a bat-
tery marked with LOWER (MIN) and
UPPER (MAX) on the side, you
should check the electrolyte level.
The electrolyte level should be
between LOWER (MIN) and UPPER
(MAX). When the electrolyte level is
low, add distilled (or de-mineralised)
water. (Never add sulfuric acids or
other electrolyte).
(continued)(continued)
Be careful not to spill distilled (or de-
mineralised) water over the battery
surface or other adjacent components.
Also, do not overfill the battery cells.
If not, it may corrode the battery or
other components. Finally, securely
close the cell cap. However, we recom-
mend you to contact an authorised
HYUNDAI dealer for better battery
service. i
OAE079016
OHYK077011