2020 Hyundai Ioniq Hybrid instrument cluster
[x] Cancel search: instrument clusterPage 138 of 613
2-57
Safety system of your vehicle
2
What to expect after an air bag
inflates
After a frontal or side air bag inflates,
it will deflate very quickly. Air bag
inflation will not prevent the driver
from seeing out of the windscreen or
being able to steer. Curtain air bags
may remain partially inflated for
some time after they deploy. To prevent objects from becom-
ing dangerous projectiles when
the passenger's air bag inflates:
Do not install or place any
objects (drink holder, CD hold-
er, stickers, etc.) on the front
passenger's panel above the
glove box where the passen-
ger's air bag is located.
Do not install a container of
liquid air freshener near the
instrument cluster or on the
instrument panel surface.
WARNING
After an air bag inflates, take
the following precautions:
Open your windows and doors
as soon as possible after
impact to reduce prolonged
exposure to the smoke and
powder released by the inflat-
ing air bag.
Do not touch the air bag stor-
age area’s internal compo-
nents immediately after an air
bag has inflated. The parts
that come into contact with an
inflating air bag may be very
hot.
Always wash exposed skin
areas thoroughly with cold
water and mild soap.
We recommend that an autho-
rised HYUNDAI dealer replace
the air bag immediately after
deployment. Air bags are
designed to be used only once.
WARNING
Page 148 of 613
Convenient features of your vehicle
Accessing your vehicle .........................................3-4
Remote key .........................................................................3-4
Smart key ............................................................................3-7
Immobiliser system .........................................................3-11
Door locks .............................................................3-12
Operating door locks from outside the vehicle ......3-12
Operating door locks from inside the vehicle .........3-14
Deadlocks ..........................................................................3-16
Auto door lock/unlock features..................................3-16
Child-protector rear door locks ..................................3-17
Theft-alarm system.............................................3-18
Driver position memory system .........................3-19
Storing memory positions .............................................3-19
Recalling memory positions..........................................3-20
Easy access function .....................................................3-20
Steering wheel......................................................3-21
Electric power steering (EPS) ......................................3-21
Tilt steering / Telescopic steering ..............................3-22
Heated steering wheel ...................................................3-22
Horn ....................................................................................3-23
Inside rearview mirror....................................................3-23
Mirrors ...................................................................3-23
Outside rearview mirror ................................................3-25
Windows ................................................................3-28
Power windows ................................................................3-28
Sunroof..................................................................3-33
Sunroof opening and closing .......................................3-34
Sliding the sunroof .........................................................3-34
Tilting the sunroof ..........................................................3-35
Sunshade ...........................................................................3-35
Resetting the sunroof ....................................................3-36
Exterior features .................................................3-37
Bonnet................................................................................3-37
Tailgate...............................................................................3-38
Fuel filler door (Hybrid vehicle) ..................................3-40
Fuel filler door (Plug-in hybrid vehicle) ...................3-42
Instrument cluster................................................3-46
Instrument cluster control ............................................3-48
Gauges and metres .........................................................3-49
Warning and indicator lights ........................................3-56
LCD display messages ....................................................3-69
3
Page 195 of 613
3-48
Convenient features of your vehicle
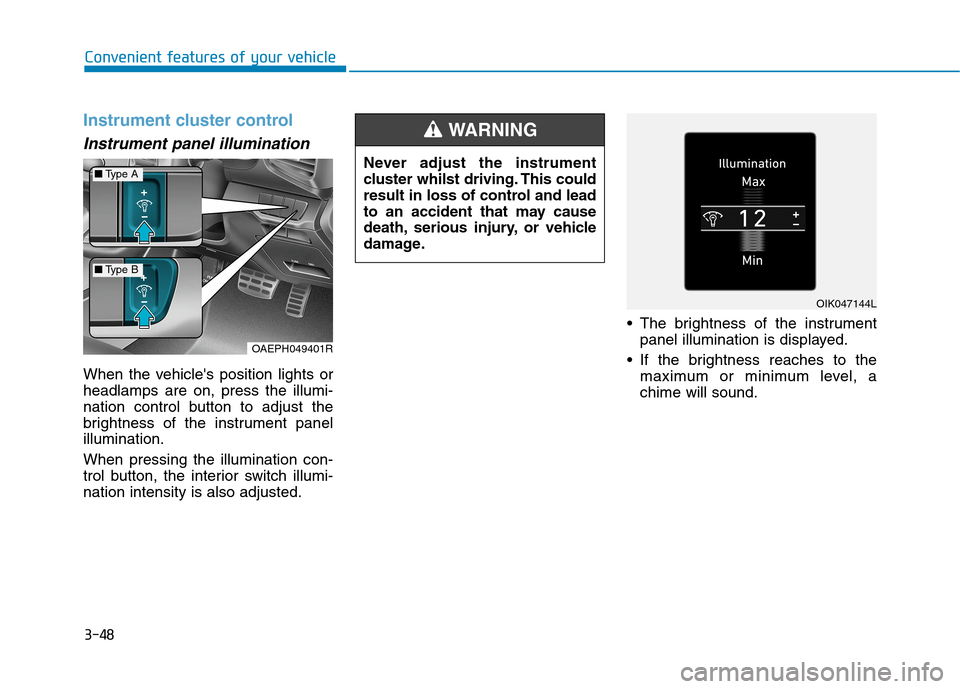
Instrument cluster control
Instrument panel illumination
When the vehicle's position lights or
headlamps are on, press the illumi-
nation control button to adjust the
brightness of the instrument panel
illumination.
When pressing the illumination con-
trol button, the interior switch illumi-
nation intensity is also adjusted. The brightness of the instrument
panel illumination is displayed.
If the brightness reaches to the
maximum or minimum level, a
chime will sound. Never adjust the instrument
cluster whilst driving. This could
result in loss of control and lead
to an accident that may cause
death, serious injury, or vehicle
damage.
WARNING
OAEPH049401R
■Type A
■Type B
OIK047144L
Page 200 of 613
3-53
Convenient features of your vehicle
3
- User Settings mode in the Cluster :
You can change the temperature
unit in the “Other Features -
Temperature unit” .
- Automatic climate control system :
Whilst pressing the OFF button,
press the AUTO button for 3 sec-
onds or more.
The temperature unit of the instrument
cluster and climate control system will
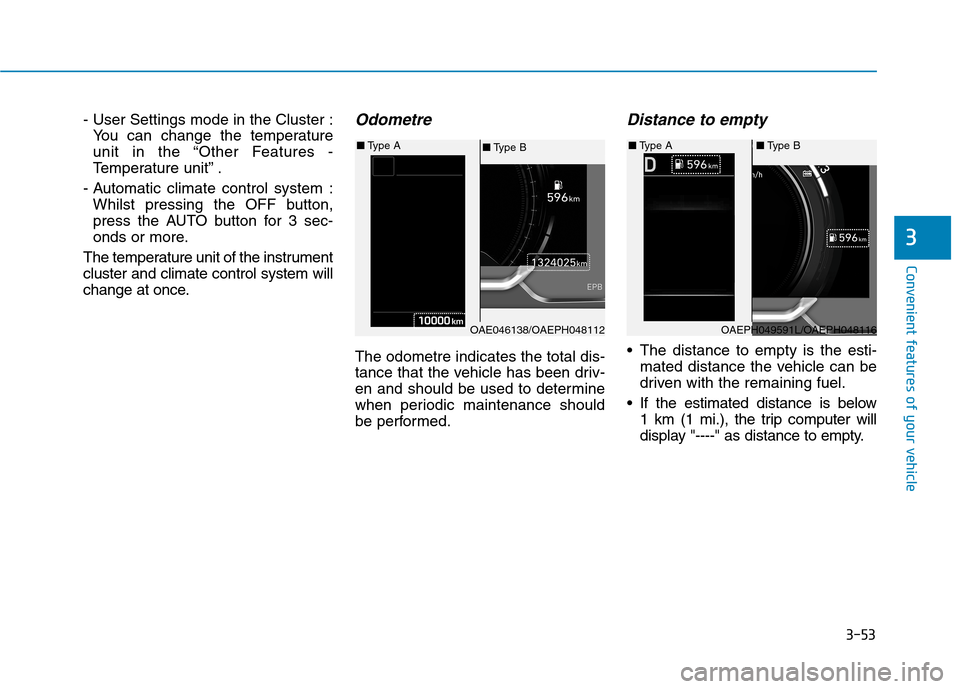
change at once.Odometre
The odometre indicates the total dis-
tance that the vehicle has been driv-
en and should be used to determine
when periodic maintenance should
be performed.
Distance to empty
The distance to empty is the esti-
mated distance the vehicle can be
driven with the remaining fuel.
If the estimated distance is below
1 km (1 mi.), the trip computer will
display "----" as distance to empty.
OAE046138/OAEPH048112
■Type B ■Type A
OAEPH049591L/OAEPH048116
■Type A■Type B
Page 218 of 613
3-71
Convenient features of your vehicle
3
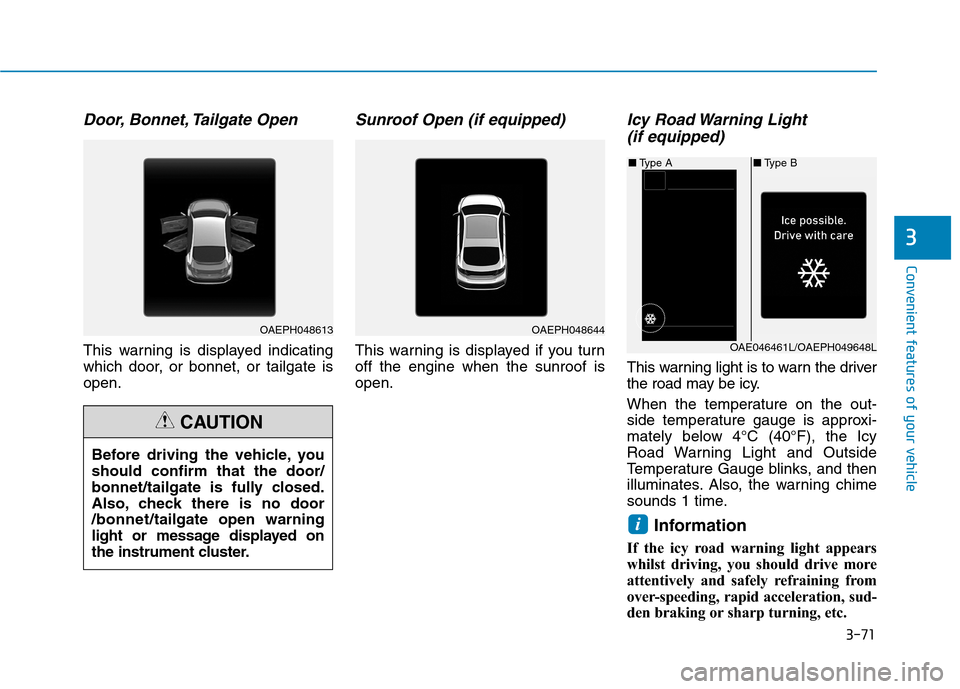
Door, Bonnet, Tailgate Open
This warning is displayed indicating
which door, or bonnet, or tailgate is
open.
Sunroof Open (if equipped)
This warning is displayed if you turn
off the engine when the sunroof is
open.
Icy Road Warning Light
(if equipped)
This warning light is to warn the driver
the road may be icy.
When the temperature on the out-
side temperature gauge is approxi-
mately below 4°C (40°F), the Icy
Road Warning Light and Outside
Temperature Gauge blinks, and then
illuminates. Also, the warning chime
sounds 1 time.
Information
If the icy road warning light appears
whilst driving, you should drive more
attentively and safely refraining from
over-speeding, rapid acceleration, sud-
den braking or sharp turning, etc.
i
Before driving the vehicle, you
should confirm that the door/
bonnet/tailgate is fully closed.
Also, check there is no door
/bonnet/tailgate open warning
light or message displayed on
the instrument cluster.
CAUTION
OAEPH048613OAEPH048644
■Type B ■Type A
OAE046461L/OAEPH049648L
Page 233 of 613
3-86
Convenient features of your vehicle
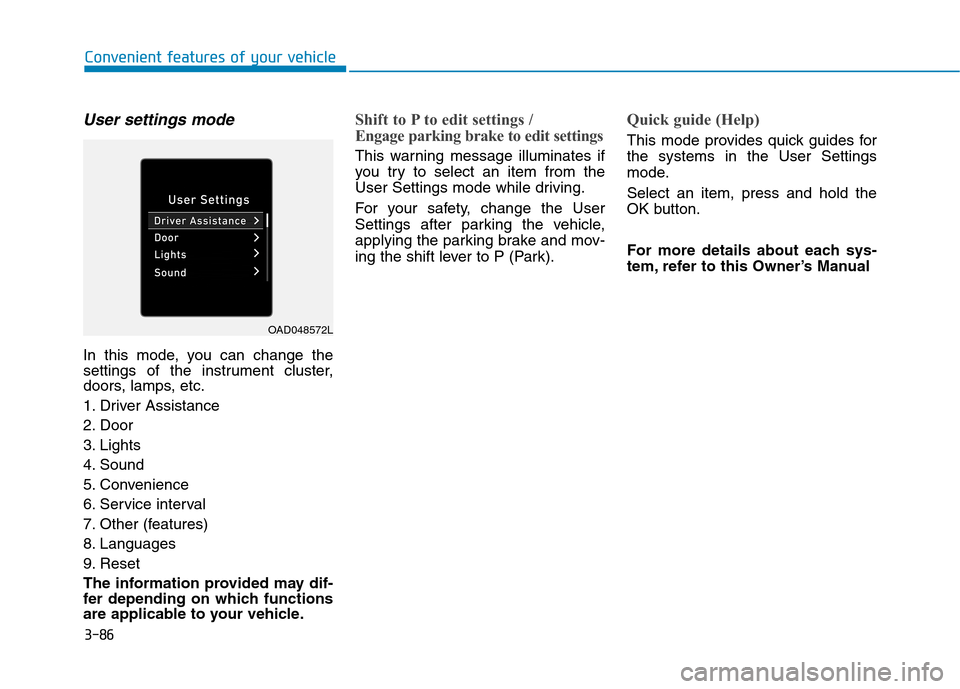
User settings mode
In this mode, you can change the
settings of the instrument cluster,
doors, lamps, etc.
1. Driver Assistance
2. Door
3. Lights
4. Sound
5. Convenience
6. Service interval
7. Other (features)
8. Languages
9. Reset
The information provided may dif-
fer depending on which functions
are applicable to your vehicle.
Shift to P to edit settings /
Engage parking brake to edit settings
This warning message illuminates if
you try to select an item from the
User Settings mode while driving.
For your safety, change the User
Settings after parking the vehicle,
applying the parking brake and mov-
ing the shift lever to P (Park).
Quick guide (Help)
This mode provides quick guides for
the systems in the User Settings
mode.
Select an item, press and hold the
OK button.
For more details about each sys-
tem, refer to this Owner’s Manual
OAD048572L
Page 286 of 613
3-139
Convenient features of your vehicle
3
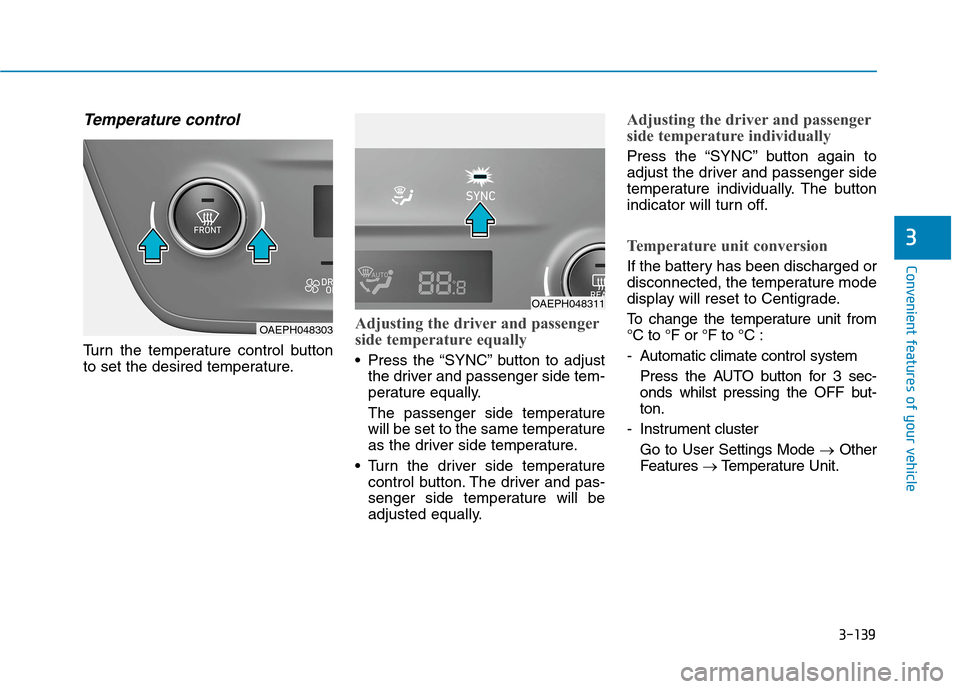
Temperature control
Turn the temperature control button
to set the desired temperature.
Adjusting the driver and passenger
side temperature equally
Press the “SYNC” button to adjust
the driver and passenger side tem-
perature equally.
The passenger side temperature
will be set to the same temperature
as the driver side temperature.
Turn the driver side temperature
control button. The driver and pas-
senger side temperature will be
adjusted equally.
Adjusting the driver and passenger
side temperature individually
Press the “SYNC” button again to
adjust the driver and passenger side
temperature individually. The button
indicator will turn off.
Temperature unit conversion
If the battery has been discharged or
disconnected, the temperature mode
display will reset to Centigrade.
To change the temperature unit from
°C to °F or °F to °C :
- Automatic climate control system
Press the AUTO button for 3 sec-
onds whilst pressing the OFF but-
ton.
- Instrument cluster
Go to User Settings Mode →Other
Features →Temperature Unit.
OAEPH048303
OAEPH048311
Page 305 of 613
3-158
Convenient features of your vehicle
Wireless mobile phone charg-
ing system (if equipped)
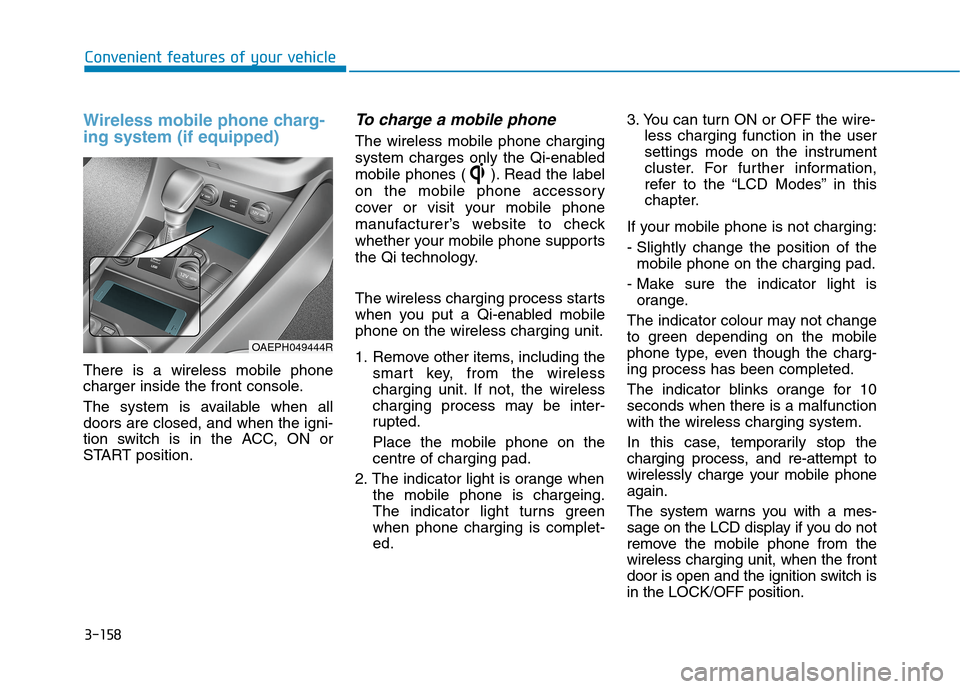
There is a wireless mobile phone
charger inside the front console.
The system is available when all
doors are closed, and when the igni-
tion switch is in the ACC, ON or
START position.
To charge a mobile phone
The wireless mobile phone charging
system charges only the Qi-enabled
mobile phones ( ). Read the label
on the mobile phone accessory
cover or visit your mobile phone
manufacturer’s website to check
whether your mobile phone supports
the Qi technology.
The wireless charging process starts
when you put a Qi-enabled mobile
phone on the wireless charging unit.
1. Remove other items, including the
smart key, from the wireless
charging unit. If not, the wireless
charging process may be inter-
rupted.
Place the mobile phone on the
centre of charging pad.
2. The indicator light is orange when
the mobile phone is chargeing.
The indicator light turns green
when phone charging is complet-
ed.3. You can turn ON or OFF the wire-
less charging function in the user
settings mode on the instrument
cluster. For further information,
refer to the “LCD Modes” in this
chapter.
If your mobile phone is not charging:
- Slightly change the position of the
mobile phone on the charging pad.
- Make sure the indicator light is
orange.
The indicator colour may not change
to green depending on the mobile
phone type, even though the charg-
ing process has been completed.
The indicator blinks orange for 10
seconds when there is a malfunction
with the wireless charging system.
In this case, temporarily stop the
charging process, and re-attempt to
wirelessly charge your mobile phone
again.
The system warns you with a mes-
sage on the LCD display if you do not
remove the mobile phone from the
wireless charging unit, when the front
door is open and the ignition switch is
in the LOCK/OFF position.
OAEPH049444R