Page 102 of 561

3-17
Convenient features of your vehicle
3
Tilt Steering / Telescope Steering
Adjust the steering wheel so it points
toward your chest, not toward your
face. Make sure you can see the
instrument cluster warning lights and
gauges. After adjusting, push the
steering wheel both up and down to
be certain it is locked in position.
Always adjust the position of the
steering wheel before driving.
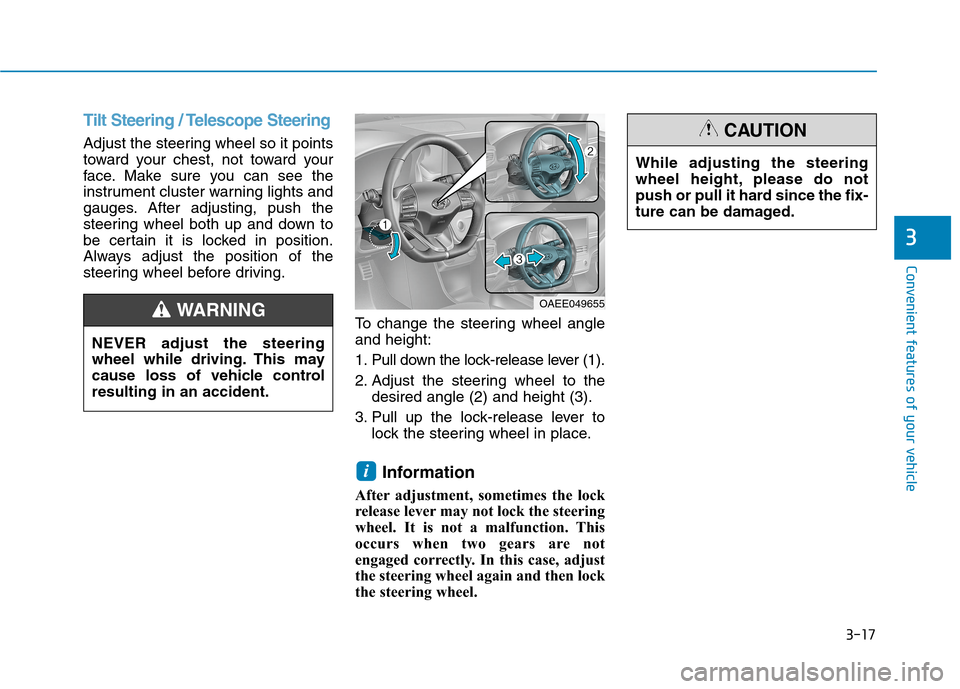
To change the steering wheel angle
and height:
1. Pull down the lock-release lever (1).
2. Adjust the steering wheel to the
desired angle (2) and height (3).
3. Pull up the lock-release lever to
lock the steering wheel in place.
Information
After adjustment, sometimes the lock
release lever may not lock the steering
wheel. It is not a malfunction. This
occurs when two gears are not
engaged correctly. In this case, adjust
the steering wheel again and then lock
the steering wheel.
i
OAEE049655
While adjusting the steering
wheel height, please do not
push or pull it hard since the fix-
ture can be damaged.
CAUTION
NEVER adjust the steering
wheel while driving. This may
cause loss of vehicle control
resulting in an accident.
WARNING
Page 103 of 561
3-18
Horn
To sound the horn, press the area
indicated by the horn symbol on your
steering wheel (see illustration). The
horn will operate only when this area
is pressed.
Do not strike the horn severely to
operate it, or hit it with your fist.
Do not press on the horn with a
sharp-pointed object.
Heated Steering Wheel
(for Canada, if equipped)
When the POWER button is in the
ON position or when the vehicle is in
the ready ( ) mode, press the
heated steering wheel button to
warm the steering wheel. The indica-
tor on the button will illuminate.
To turn the heated steering wheel off,
press the button again. The indicator
on the button will turn off.
The heated steering wheel will auto-
matically turn off after approximately
30 minutes.Do not install any cover or acces-
sory on the steering wheel. The
cover or accessory could cause
damage to the heated steering
wheel system.
NOTICE
NOTICE
Convenient features of your vehicle
OAEE049003
OAE046009
Page 148 of 561

3-63
Convenient features of your vehicle
3
If the brake fluid level in the reser-
voir is low:
1. Drive carefully to the nearest safe
location and stop your vehicle.
2. With the vehicle turned off, check
the brake fluid level immediately
and add fluid as required (For more
information, refer to "Brake
Fluid" in chapter 7). After adding
brake fluid, check all brake compo-
nents for fluid leaks. If a brake fluid
leak is found, or if the warning light
remains on, or if the brakes do not
operate properly, do not drive the
vehicle. Have the vehicle inspected
by an authorized HYUNDAI dealer.
Dual-diagonal braking system
Your vehicle is equipped with dual-
diagonal braking systems. This
means you still have braking on two
wheels even if one of the dual sys-
tems should fail.
With only one of the dual systems
working, more than normal pedal
travel and greater pedal pressure is
required to stop the vehicle.Also, the vehicle will not stop in as
short a distance with only a portion
of the brake system working.
Anti-lock Brake System
(ABS) Warning Light
This warning light illuminates:
When the POWER button is in the
ON position.
- It illuminates for approximately 3
seconds and then goes off.
When there is a malfunction with
the ABS (The normal braking sys-
tem will still be operational without
the assistance of the anti-lock
brake system).
In this case, have your vehicle
inspected by an authorized HYUNDAI
dealer.
Parking Brake & Brake Fluid
Warning Light
Driving the vehicle with a warn-
ing light ON is dangerous. If the
Parking Brake & Brake Fluid
Warning Light illuminates with
the parking brake released, it
indicates that the brake fluid
level is low.
In this case, have your vehicle
inspected by an authorized
HYUNDAI dealer.
WARNING
Page 157 of 561

3-72
Convenient features of your vehicle
LCD Display Messages
Shift to P
This warning message is displayed if
you try to turn off the vehicle with the
gear in the N (Neutral) position.
At this time, the POWER button
changes to the ACC position (If you
press the POWER button once more,
it will turn to the ON position).
Low Key Battery
This warning message is displayed if
the battery of the smart key is dis-
charged while changing the POWER
button to the OFF position.
Press POWER button while
turning wheel
This warning message is displayed if
the steering wheel does not unlock
normally when the POWER button is
pressed.
You should press the POWER button
while turning the steering wheel right
and left.
Check Steering Wheel Lock
System
This warning message is displayed if
the steering wheel does not lock nor-
mally while the POWER button
changes to the OFF position.
Press brake pedal to start vehicle
This warning message is displayed if
the POWER button changes to the
ACC position twice by pressing the
button repeatedly without depressing
the brake pedal.
You can start the vehicle by depress-
ing the brake pedal.
Key not in vehicle
This warning message is displayed if
the smart key is not in the vehicle
when you press the POWER button.
When attempting to start the vehicle,
always have the smart key with you.
Key not detected
This warning message is displayed if
the smart key is not detected when
you press the POWER button.
Press POWER button again
This message is displayed if you
were unable to start the vehicle when
the POWER button was pressed.
If this occurs, attempt to start the
vehicle by pressing the POWER but-
ton again.
If the warning message appears
each time you press the POWER
button, have your vehicle inspected
by an authorized HYUNDAI dealer.
Page 160 of 561
3-75
Convenient features of your vehicle
3
Turn on FUSE SWITCH
This warning message is displayed if
the fuse switch under the steering
wheel is OFF.
If this message is displayed, turn the
fuse switch on.
For more information, refer to
"Fuses" in chapter 7.
Low Pressure
This warning message is displayed if
the tire pressure is low. The corre-
sponding tire on the vehicle will be
illuminated.
For more information, refer to
"Tire Pressure Monitoring System
(TPMS)" in chapter 6.
Lights Mode
This indicator displays which exterior
light is selected using the lighting
control.
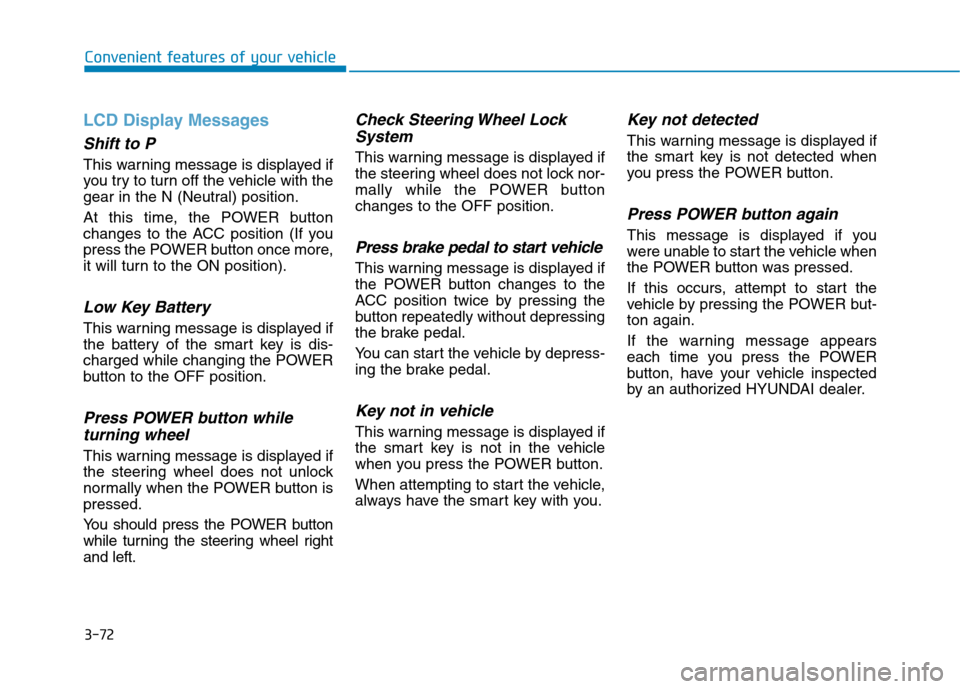
OAEPH059643LOIK057165LOIK047145L
Page 168 of 561
3-83
Convenient features of your vehicle
3
LCD Display Control
The LCD display modes can be
changed by using the control buttons
on the steering wheel.
(1) : MODE button for changing
modes
(2) , : MOVE switch for
changing items
(3) OK : SELECT/RESET button for
setting or resetting the
selected item
L LC
CD
D
D
DI
IS
SP
PL
LA
AY
Y
OAE046402
■ ■ ■ ■T
T T T
y y y y
p p p p
e e e e
A A A A
■
■ ■ ■T
T T T
y y y y
p p p p
e e e e
B B B B
■
■ ■ ■T
T T T
y y y y
p p p p
e e e e
C C C C
Page 181 of 561
3-96
The trip computer is a microcomput-
er-controlled driver information sys-
tem that displays information related
to driving.
Information
Some driving information stored in the
trip computer (for example Average
Vehicle Speed) resets if the battery is
disconnected.
Trip modes
To change the trip mode, toggle the
" , " switch on the steering wheel.
i
T TR
RI
IP
P
C
CO
OM
MP
PU
UT
TE
ER
R
Convenient features of your vehicle
OAE046402 ■ ■ ■ ■
T T T T
y y y y
p p p p
e e e e
B B B B ■ ■ ■ ■
T T T T
y y y y
p p p p
e e e e
A A A A
■ ■ ■ ■
T T T T
y y y y
p p p p
e e e e
C C C C
energy consumption
Drive Info
energy consumption
Accumulated Info
Consumption Info
Digital Speedometer
Driving Style
Energy flow
Page 182 of 561

3-97
Convenient features of your vehicle
Consumption info display
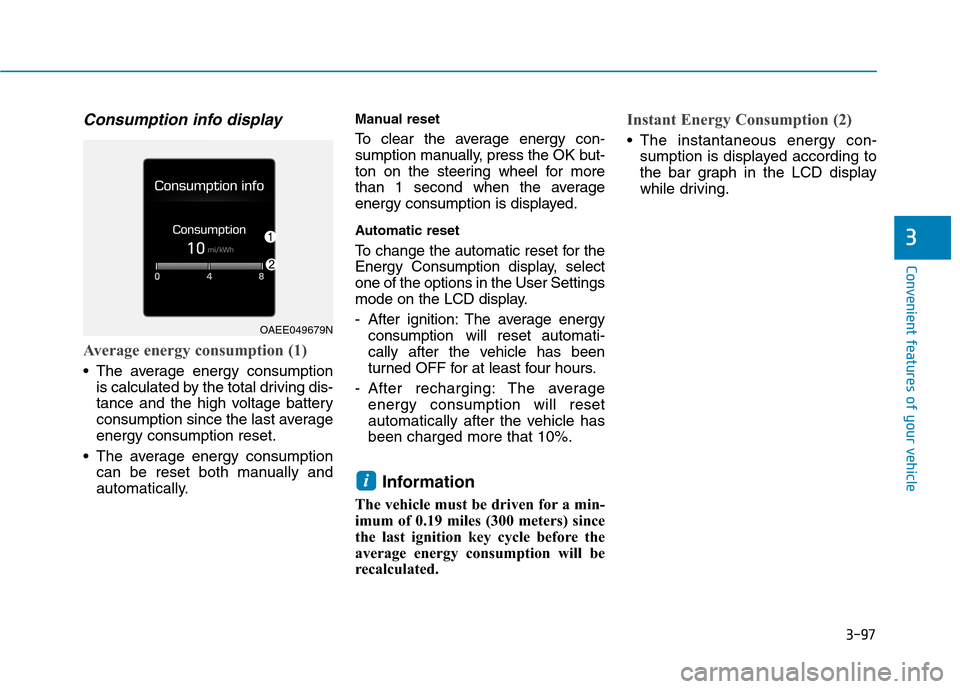
Average energy consumption (1)
The average energy consumption
is calculated by the total driving dis-
tance and the high voltage battery
consumption since the last average
energy consumption reset.
The average energy consumption
can be reset both manually and
automatically.
Manual reset
To clear the average energy con-
sumption manually, press the OK but-
ton on the steering wheel for more
than 1 second when the average
energy consumption is displayed.
Automatic reset
To change the automatic reset for the
Energy Consumption display, select
one of the options in the User Settings
mode on the LCD display.
- After ignition: The average energy
consumption will reset automati-
cally after the vehicle has been
turned OFF for at least four hours.
- After recharging: The average
energy consumption will reset
automatically after the vehicle has
been charged more that 10%.
Information
The vehicle must be driven for a min-
imum of 0.19 miles (300 meters) since
the last ignition key cycle before the
average energy consumption will be
recalculated.
Instant Energy Consumption (2)
The instantaneous energy con-
sumption is displayed according to
the bar graph in the LCD display
while driving.
i
3
OAEE049679N