2020 Hyundai Ioniq Electric start stop button
[x] Cancel search: start stop buttonPage 279 of 561
5-43
Driving your vehicle
5
VSM OFF condition
To cancel VSM operation, press the
ESC OFF button. ESC OFF indicator
light ( ) will illuminate.
To turn on VSM, press the ESC OFF
button again. The ESC OFF indicator
light will go out.Driving with wheels and tires with
different sizes may cause the VSM
system to malfunction. Before
replacing tires, make sure all four
tires and wheels are the same
size. Never drive the vehicle with
different sized tires and wheels
installed.
Hill-Start Assist Control (HAC)
The Hill-Start Assist Control (HAC)
helps prevent the vehicle from rolling
backwards when starting a vehicle
from a stop on a hill. The system
operates the brakes automatically for
approximately 2 seconds and releas-
es the brake after 2 seconds or when
the accelerator pedal is depressed.
Information
• The HAC does not operate when the
gear is in P (Park) or N (Neutral).
• The HAC activates even when the
ESC (Electronic Stability Control) is
off. However, it does not activate,
when the ESC does not operate nor-
mally.
i
NOTICE
If the ESC indicator light ( ) or
EPS warning light ( ) stays
on or blinks, your vehicle may
have a malfunction with the
VSM system. When the warning
light illuminates, have the vehi-
cle checked by an authorized
HYUNDAI dealer as soon as
possible.
WARNING
Always be ready to depress the
accelerator pedal when starting
off an incline. The HAC activates
only for approximately 2 sec-
onds.
WARNING
Page 334 of 561
5-98
Driving your vehicle
Smart Cruise Control will be
temporarily cancelled when:
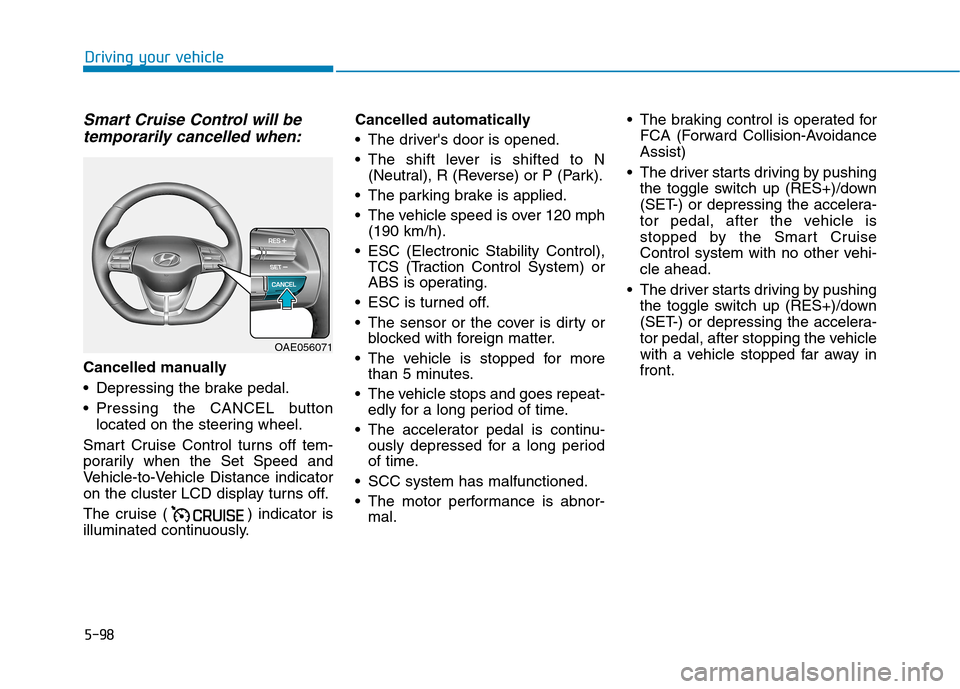
Cancelled manually
Depressing the brake pedal.
Pressing the CANCEL button
located on the steering wheel.
Smart Cruise Control turns off tem-
porarily when the Set Speed and
Vehicle-to-Vehicle Distance indicator
on the cluster LCD display turns off.
The cruise ( ) indicator is
illuminated continuously.Cancelled automatically
The driver's door is opened.
The shift lever is shifted to N
(Neutral), R (Reverse) or P (Park).
The parking brake is applied.
The vehicle speed is over 120 mph
(190 km/h).
ESC (Electronic Stability Control),
TCS (Traction Control System) or
ABS is operating.
ESC is turned off.
The sensor or the cover is dirty or
blocked with foreign matter.
The vehicle is stopped for more
than 5 minutes.
The vehicle stops and goes repeat-
edly for a long period of time.
The accelerator pedal is continu-
ously depressed for a long period
of time.
SCC system has malfunctioned.
The motor performance is abnor-
mal. The braking control is operated for
FCA (Forward Collision-Avoidance
Assist)
The driver starts driving by pushing
the toggle switch up (RES+)/down
(SET-) or depressing the accelera-
tor pedal, after the vehicle is
stopped by the Smart Cruise
Control system with no other vehi-
cle ahead.
The driver starts driving by pushing
the toggle switch up (RES+)/down
(SET-) or depressing the accelera-
tor pedal, after stopping the vehicle
with a vehicle stopped far away in
front.
OAE056071
Page 384 of 561
6-2
The hazard warning flasher serves
as a warning to other drivers to exer-
cise extreme caution when approach-
ing, overtaking, or passing your vehi-
cle.
It should be used whenever emer-
gency repairs are being made or
when the vehicle is stopped near the
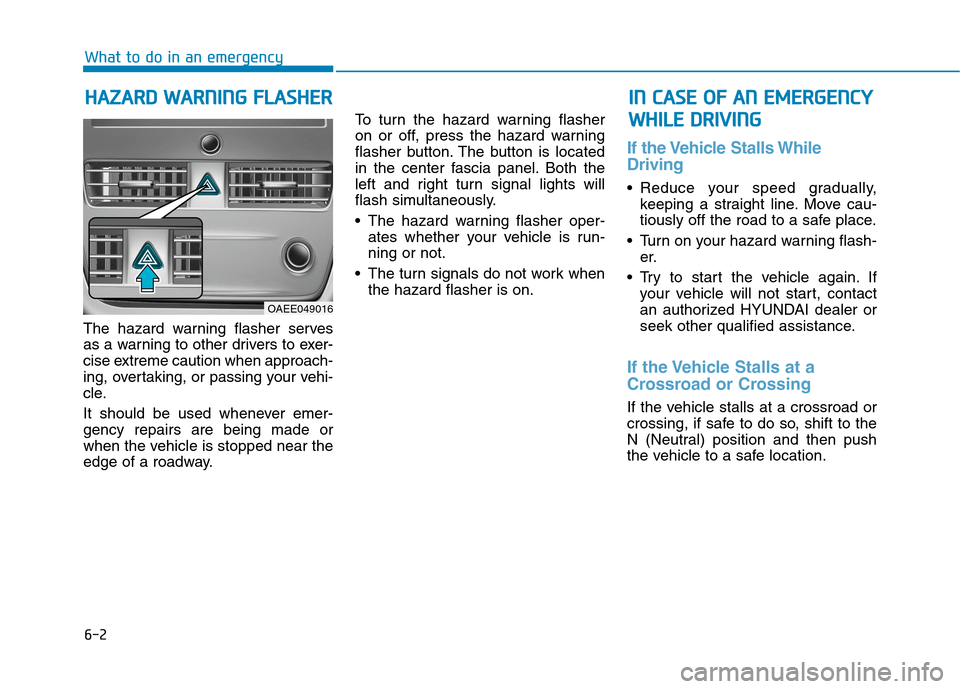
edge of a roadway.To turn the hazard warning flasher
on or off, press the hazard warning
flasher button. The button is located
in the center fascia panel. Both the
left and right turn signal lights will
flash simultaneously.
• The hazard warning flasher oper-
ates whether your vehicle is run-
ning or not.
The turn signals do not work when
the hazard flasher is on.
If the Vehicle Stalls While
Driving
Reduce your speed gradually,
keeping a straight line. Move cau-
tiously off the road to a safe place.
Turn on your hazard warning flash-
er.
Try to start the vehicle again. If
your vehicle will not start, contact
an authorized HYUNDAI dealer or
seek other qualified assistance.
If the Vehicle Stalls at a
Crossroad or Crossing
If the vehicle stalls at a crossroad or
crossing, if safe to do so, shift to the
N (Neutral) position and then push
the vehicle to a safe location.
H HA
AZ
ZA
AR
RD
D
W
WA
AR
RN
NI
IN
NG
G
F
FL
LA
AS
SH
HE
ER
R
What to do in an emergency
I
IN
N
C
CA
AS
SE
E
O
OF
F
A
AN
N
E
EM
ME
ER
RG
GE
EN
NC
CY
Y
W WH
HI
IL
LE
E
D
DR
RI
IV
VI
IN
NG
G
OAEE049016
Page 385 of 561
6-3
What to do in an emergency
If you Have a Flat Tire While
Driving
If a tire goes flat while you are driving:
Take your foot off the accelerator
pedal and let the vehicle slow down
while driving straight ahead. Do not
apply the brakes immediately to
slow down the vehicle, but use the
paddle shifter (left side lever) to
increase regenerative braking con-
trol. Also, do not or attempt to pull
off the road as this may cause loss
of vehicle control resulting in an
accident. When the vehicle has
slowed to such a speed that it is
safe to do so, brake carefully and
pull off the road. Drive off the road
as far as possible and park on firm,
level ground. If you are on a divided
highway, do not park in the median
area between the two traffic lanes.
When the vehicle is stopped, press
the hazard warning flasher button,
shift to P(Park), apply the parking
brake, and place the POWER but-
ton in the OFF position. Have all passengers get out of the
vehicle. Be sure they all get out on
the side of the vehicle that is away
from traffic.
When changing a flat tire, follow
the instructions provided later in
this chapter.
Confirm the EV Battery Is Not
Low on the Charge Gauge
Be sure the gear is in P (Park). The
vehicle starts only when the gear is
in P (Park).
Check the 12-volt battery connec-
tions to be sure they are clean and
tight.
Turn on the interior light. If the light
dims or goes out when you operate
the starter, the battery is drained.
Do not push or pull the vehicle to
start it. This could cause damage to
your vehicle. See instructions for
"Jump Starting" provided in this
chapter.
6
I IF
F
T
TH
HE
E
V
VE
EH
HI
IC
CL
LE
E
W
WI
IL
LL
L
N
NO
OT
T
S ST
TA
AR
RT
T
Page 452 of 561
7-46
Maintenance
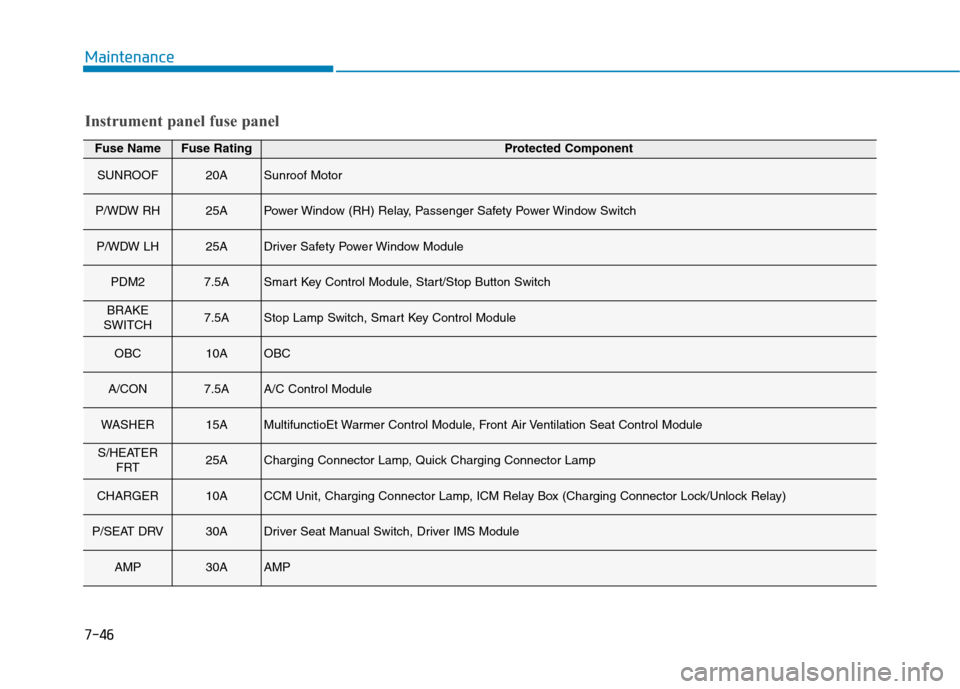
Fuse NameFuse RatingProtected Component
SUNROOF20ASunroof Motor
P/WDW RH25APower Window (RH) Relay, Passenger Safety Power Window Switch
P/WDW LH25ADriver Safety Power Window Module
PDM27.5ASmart Key Control Module, Start/Stop Button Switch
BRAKE
SWITCH7.5AStop Lamp Switch, Smart Key Control Module
OBC10AOBC
A/CON7.5AA/C Control Module
WASHER15AMultifunctioEt Warmer Control Module, Front Air Ventilation Seat Control Module
S/HEATER
FRT25ACharging Connector Lamp, Quick Charging Connector Lamp
CHARGER10ACCM Unit, Charging Connector Lamp, ICM Relay Box (Charging Connector Lock/Unlock Relay)
P/SEAT DRV30ADriver Seat Manual Switch, Driver IMS Module
AMP30AAMP
Instrument panel fuse panel
Page 534 of 561
H46
How to Start the Vehicle
1. Holding the smart key, sit in the
driver's seat.
2. Fasten the seat belt before start-
ing the vehicle.
3. Make sure to engage the parking
brake.
4. Turn OFF all electrical devices.
5. Make sure to depress and hold
the brake pedal.
6. While depressing the brake
pedal, shift to P (Park).
7. Depress and hold the brake while
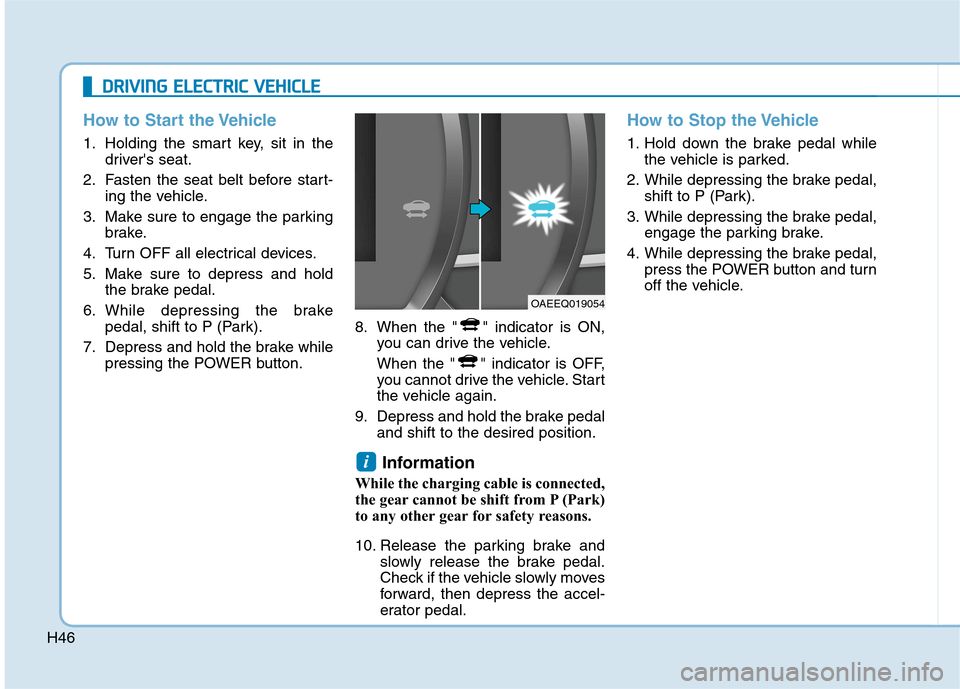
pressing the POWER button.8. When the " " indicator is ON,
you can drive the vehicle.
When the " " indicator is OFF,
you cannot drive the vehicle. Start
the vehicle again.
9. Depress and hold the brake pedal
and shift to the desired position.
Information
While the charging cable is connected,
the gear cannot be shift from P (Park)
to any other gear for safety reasons.
10. Release the parking brake and
slowly release the brake pedal.
Check if the vehicle slowly moves
forward, then depress the accel-
erator pedal.
How to Stop the Vehicle
1. Hold down the brake pedal while
the vehicle is parked.
2. While depressing the brake pedal,
shift to P (Park).
3. While depressing the brake pedal,
engage the parking brake.
4. While depressing the brake pedal,
press the POWER button and turn
off the vehicle.
i
D DR
RI
IV
VI
IN
NG
G
E
EL
LE
EC
CT
TR
RI
IC
C
V
VE
EH
HI
IC
CL
LE
E
OAEEQ019054
Page 548 of 561
H60
D DR
RI
IV
VI
IN
NG
G
E
EL
LE
EC
CT
TR
RI
IC
C
V
VE
EH
HI
IC
CL
LE
E
(
(C
CO
ON
NT
T.
.)
)
Aux. Battery Saver+
The Aux. Battery Saver+ is a function
that monitors the charging status of
the 12 V auxiliary battery.
If the auxiliary battery level is low, the
main high voltage battery charges
the auxiliary battery.
Information
The Aux. Battery Saver+ function will
be ON when the vehicle is delivered. If
the function is not needed, you may
turn it off in the Users Settings mode
on the cluster. For more information,
refer to the following page.
Mode
Cycle Mode :
When the POWER button is in the
OFF position with all doors, hood
and liftgate closed, the Aux. Battery
Saver+ activates according to the
auxiliary battery status.
Automatic Mode :
When the POWER button is in the
ON position with the charging con-
nector plugged in, the function acti-
vates according to the auxiliary bat-
tery status to prevent overdischarge
of the auxiliary battery.Information
• The Aux. Battery Saver+ activates
maximum of 60 minutes. If the Aux.
Battery Saver+ function activates
more than 10 times consecutively
when in the automatic mode, the
function will stop activating, judg-
ing that there is a problem with the
auxiliary battery. In this case, drive
the vehicle for some period of time
or if the auxiliary battery returns to
normal, the function will start acti-
vating.
• The Aux. Battery Saver+ function
cannot prevent battery discharge if
the auxiliary battery is damaged,
worn out, used as a power supply or
unauthorized electronic devises are
used.
• If the Aux. Battery Saver+ function
was activated, the high voltage bat-
tery level may have decreased.
i
i
Page 559 of 561
I-6
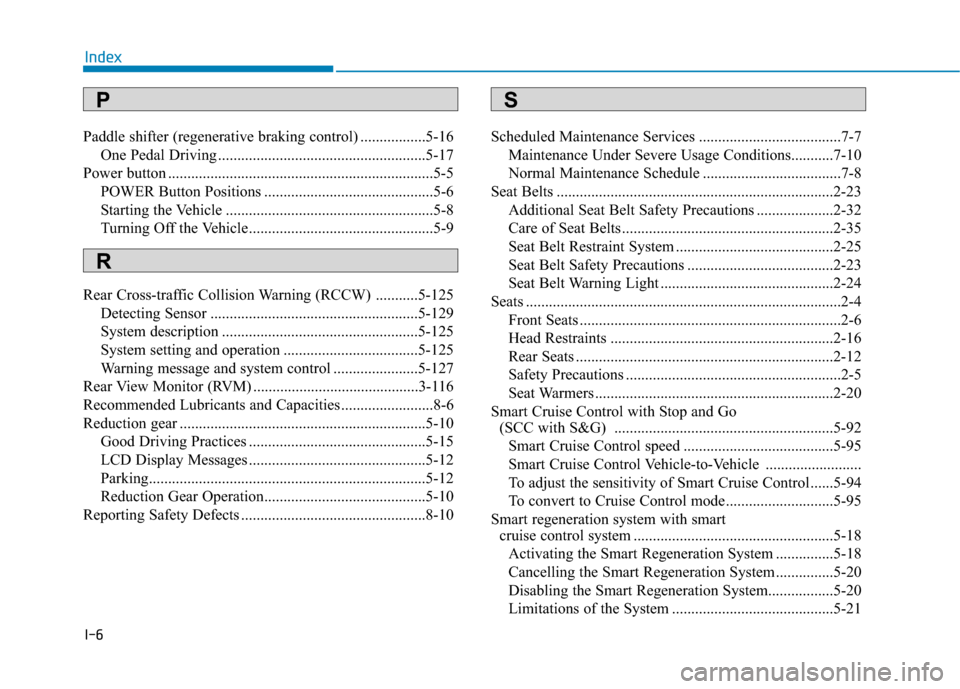
Paddle shifter (regenerative braking control) .................5-16
One Pedal Driving ......................................................5-17
Power button .....................................................................5-5
POWER Button Positions ............................................5-6
Starting the Vehicle ......................................................5-8
Turning Off the Vehicle................................................5-9
Rear Cross-traffic Collision Warning (RCCW) ...........5-125
Detecting Sensor ......................................................5-129
System description ...................................................5-125
System setting and operation ...................................5-125
Warning message and system control ......................5-127
Rear View Monitor (RVM) ...........................................3-116
Recommended Lubricants and Capacities ........................8-6
Reduction gear ................................................................5-10
Good Driving Practices ..............................................5-15
LCD Display Messages ..............................................5-12
Parking........................................................................5-12
Reduction Gear Operation..........................................5-10
Reporting Safety Defects ................................................8-10Scheduled Maintenance Services .....................................7-7
Maintenance Under Severe Usage Conditions...........7-10
Normal Maintenance Schedule ....................................7-8
Seat Belts ........................................................................2-23
Additional Seat Belt Safety Precautions ....................2-32
Care of Seat Belts .......................................................2-35
Seat Belt Restraint System .........................................2-25
Seat Belt Safety Precautions ......................................2-23
Seat Belt Warning Light .............................................2-24
Seats ..................................................................................2-4
Front Seats ....................................................................2-6
Head Restraints ..........................................................2-16
Rear Seats ...................................................................2-12
Safety Precautions ........................................................2-5
Seat Warmers ..............................................................2-20
Smart Cruise Control with Stop and Go
(SCC with S&G) .........................................................5-92
Smart Cruise Control speed .......................................5-95
Smart Cruise Control Vehicle-to-Vehicle .........................
To adjust the sensitivity of Smart Cruise Control ......5-94
To convert to Cruise Control mode............................5-95
Smart regeneration system with smart
cruise control system ....................................................5-18
Activating the Smart Regeneration System ...............5-18
Cancelling the Smart Regeneration System ...............5-20
Disabling the Smart Regeneration System.................5-20
Limitations of the System ..........................................5-21
Index
SP
R