2020 Hyundai Elantra Set time
[x] Cancel search: Set timePage 346 of 535

5-110
Driving your vehicle
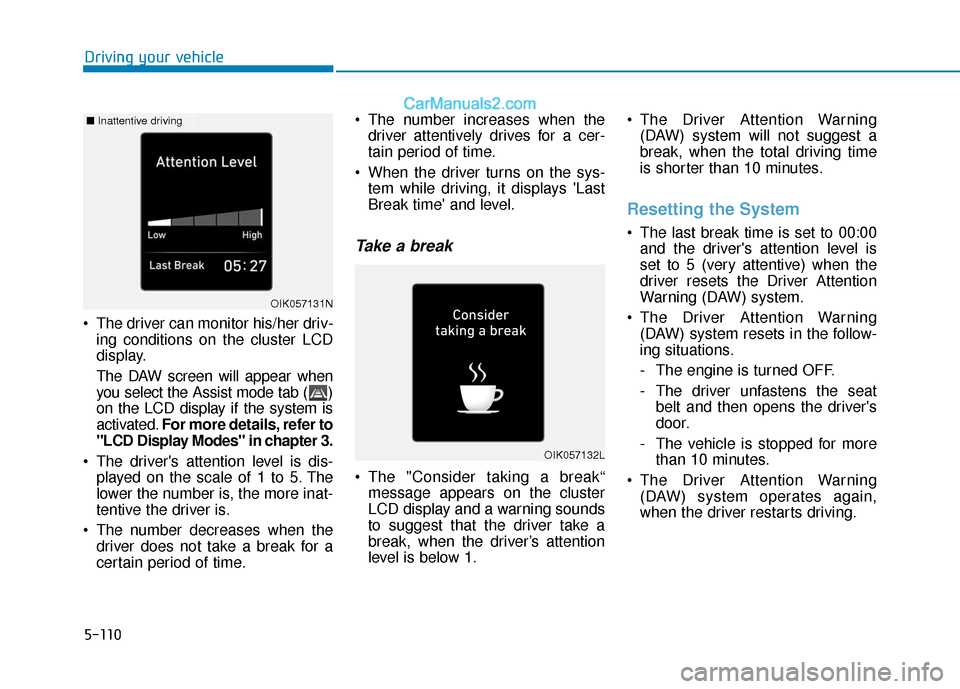
The driver can monitor his/her driv- ing conditions on the cluster LCD
display.
The DAW screen will appear when
you select the Assist mode tab ( )
on the LCD display if the system is
activated. For more details, refer to
"LCD Display Modes" in chapter 3.
The driver's attention level is dis- played on the scale of 1 to 5. The
lower the number is, the more inat-
tentive the driver is.
The number decreases when the driver does not take a break for a
certain period of time. The number increases when the
driver attentively drives for a cer-
tain period of time.
When the driver turns on the sys- tem while driving, it displays 'Last
Break time' and level.
Take a break
The "Consider taking a break“message appears on the cluster
LCD display and a warning sounds
to suggest that the driver take a
break, when the driver’s attention
level is below 1. The Driver Attention Warning
(DAW) system will not suggest a
break, when the total driving time
is shorter than 10 minutes.
Resetting the System
The last break time is set to 00:00and the driver's attention level is
set to 5 (very attentive) when the
driver resets the Driver Attention
Warning (DAW) system.
The Driver Attention Warning (DAW) system resets in the follow-
ing situations.
- The engine is turned OFF.
- The driver unfastens the seat belt and then opens the driver's
door.
- The vehicle is stopped for more than 10 minutes.
The Driver Attention Warning (DAW) system operates again,
when the driver restarts driving.
OIK057132L
OIK057131N
■ Inattentive driving
Page 351 of 535

5-115
Driving your vehicle
5
To increase Cruise Controlspeed
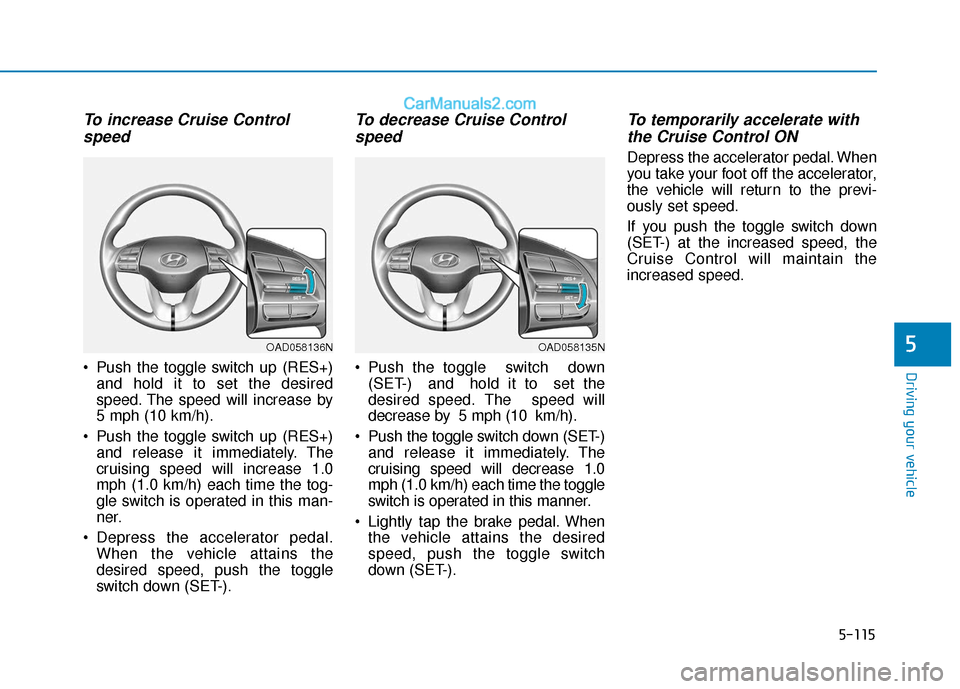
Push the toggle switch up (RES+)
and hold it to set the desired
speed. The speed will increase by
5 mph (10 km/h).
Push the toggle switch up (RES+) and release it immediately. The
cruising speed will increase 1.0
mph (1.0 km/h) each time the tog-
gle switch is operated in this man-
ner.
Depress the accelerator pedal. When the vehicle attains the
desired speed, push the toggle
switch down (SET-).
To decrease Cruise Controlspeed
Push the toggle switch down
(SET-) and hold it to set the
desired speed. The speed will
decrease by 5 mph (10 km/h).
Push the toggle switch down (SET-) and release it immediately. The
cruising speed will decrease 1.0
mph (1.0 km/h) each time the toggle
switch is operated in this manner.
Lightly tap the brake pedal. When the vehicle attains the desired
speed, push the toggle switch
down (SET-).
To temporarily accelerate withthe Cruise Control ON
Depress the accelerator pedal. When
you take your foot off the accelerator,
the vehicle will return to the previ-
ously set speed.
If you push the toggle switch down
(SET-) at the increased speed, the
Cruise Control will maintain the
increased speed.
OAD058135NOAD058136N
Page 357 of 535

5-121
Driving your vehicle
5
To increase Smart CruiseControl set speed
Follow either of these procedures:
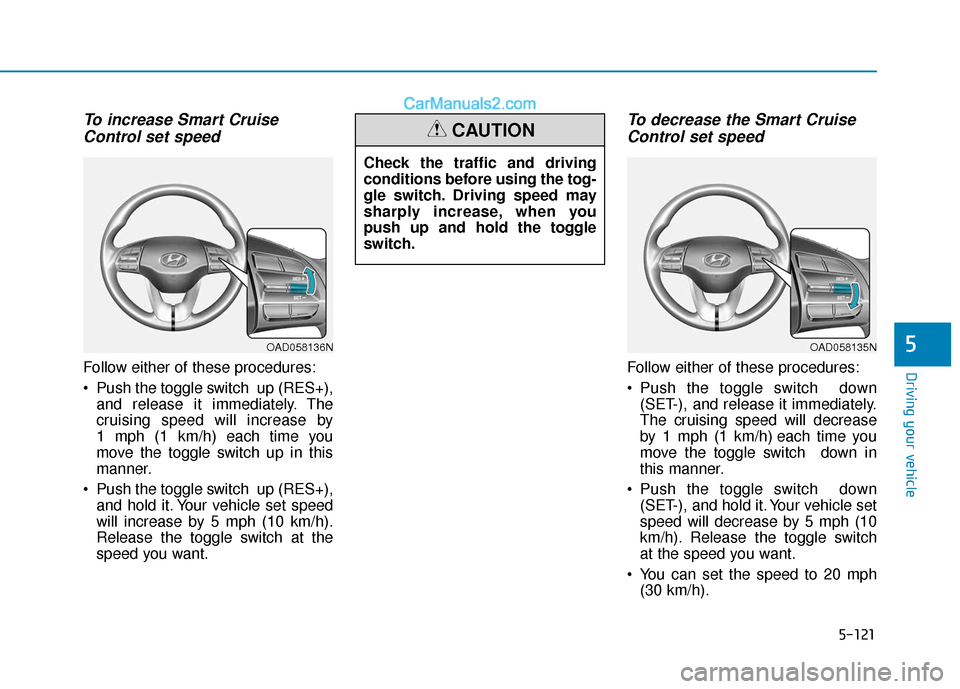
Push the toggle switch up (RES+),
and release it immediately. The
cruising speed will increase by
1 mph (1 km/h) each time you
move the toggle switch up in this
manner.
Push the toggle switch up (RES+), and hold it. Your vehicle set speed
will increase by 5 mph (10 km/h).
Release the toggle switch at the
speed you want.
To decrease the Smart CruiseControl set speed
Follow either of these procedures:
Push the toggle switch down
(SET-), and release it immediately.
The cruising speed will decrease
by 1 mph (1 km/h) each time you
move the toggle switch down in
this manner.
Push the toggle switch down (SET-), and hold it. Your vehicle set
speed will decrease by 5 mph (10
km/h). Release the toggle switch
at the speed you want.
You can set the speed to 20 mph (30 km/h).
Check the traffic and driving
conditions before using the tog-
gle switch. Driving speed may
sharply increase, when you
push up and hold the toggle
switch.
CAUTION
OAD058135NOAD058136N
Page 358 of 535

5-122
Driving your vehicle
To temporarily accelerate withthe Smart Cruise Control on
If you want to speed up temporarily
when the Smart Cruise Control is on,
depress the accelerator pedal.
Increased speed will not interfere
with Smart Cruise Control operation
or change the set speed.
To return to the set speed, take your
foot off the accelerator pedal.
If you push the toggle switch down
(SET-) at increased speed, the cruis-
ing speed will be set again pedal.
Smart Cruise Control set speedwill be temporarily canceledwhen:
Canceled manually
Depressing the brake pedal.
Pushing the CANCEL button locat-
ed on the steering wheel.
The Smart Cruise Control turns off
temporarily when the Set Speed and
Vehicle-to-Vehicle Distance indicator
on the cluster LCD display turns off.
The cruise indicator is illuminated
continuously.
Canceled automatically
The driver's door is opened.
The vehicle is shifted to N (Neutral), R (Reverse) or P (Park).
The vehicle speed is over 120 mph (190 km/h).
The vehicle stops on a steep incline.
The ESC (Electronic Stability Control), TCS (Traction Control
System) or ABS is operating.
The ESC is turned off.
The sensor or the cover is dirty or blocked with foreign matter.
The vehicle is stopped for a certain period of time.
The vehicle stops and goes repeat- edly for a long period of time.
The accelerator pedal is continu- ously depressed for a long period
of time.
The engine performance is abnor- mal.
Engine rpm is in the red zone.
OAD058137N
Be careful when accelerating
temporarily, because the speed
is not controlled automatically
at this time even if there is a
vehicle in front of you.
CAUTION
Page 360 of 535

5-124
Driving your vehicle
To turn Cruise Control off
Push the CRUISE button (thecruise indicator light will go off).
If you wish not to use the cruise
control system, always turn the
system off by pushing the CRUISE
button.
Smart Cruise Control Vehicle-
to-Vehicle Distance
To set Vehicle-to-VehicleDistance
When the Smart Cruise Control sys-
tem is ON, you can set and maintain
the distance from the vehicle ahead
of you without pressing the accelera-
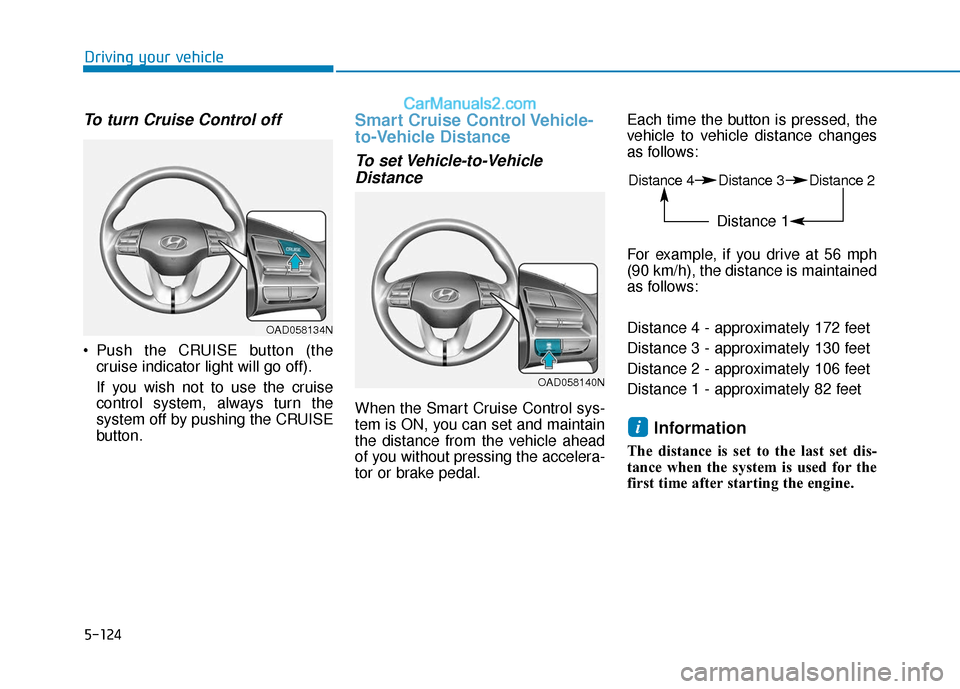
tor or brake pedal. Each time the button is pressed, the
vehicle to vehicle distance changes
as follows:
For example, if you drive at 56 mph
(90 km/h), the distance is maintained
as follows:
Distance 4 - approximately 172 feet
Distance 3 - approximately 130 feet
Distance 2 - approximately 106 feet
Distance 1 - approximately 82 feet
Information
The distance is set to the last set dis-
tance when the system is used for the
first time after starting the engine.
i
OAD058140N
OAD058134N
Distance 4 Distance 3 Distance 2
Distance 1
Page 387 of 535

6-5
What to do in an emergency
6
Information
An inappropriately disposedbattery can be harmful to the
environment and human
health. Dispose of the battery
according to your local law(s)
or regulations. To prevent damage to your vehi-
cle:
• Only use a 12-volt power supply
(battery or jumper system) to
jump start your vehicle.
Do not attempt to jump start your vehicle by push-starting.
Jump starting procedure
1. Position the vehicles close enough that the jumper cables will reach,
but do not allow the vehicles to
touch.
2. Avoid fans or any moving parts in the engine compartment at all
times, even when the vehicles are
turned off.
3. Turn off all electrical devices such as radios, lights, air conditioning,
etc. Put the vehicles in P (Park)
and set the parking brakes. Turn
both vehicles OFF.
NOTICE
i
Hydrogen is alwayspresent in battery cells,
is highly combustible,
and may explode if ignit-
ed.
Keep batteries out of
reach of children.
Batteries contain sulfu-
ric acid which is highly
corrosive. Do not allow
acid to contact your
eyes, skin or clothing.
If acid gets into your eyes, flush
your eyes with clean water for at
least 15 minutes and get imme-
diate medical attention. If acid
gets on your skin, thoroughly
wash the area. If you feel pain or
a burning sensation, get med-
ical attention immediately.
When lifting a plastic-cased
battery, excessive pressure
on the case may cause battery
acid to leak. Lift with a battery
carrier or with your hands on
opposite corners.
Do not attempt to jump start
your vehicle if your battery is
frozen.
NEVER attempt to recharge
the battery when the vehicle's
battery cables are connected
to the battery.
The electrical ignition system
works with high voltage.
NEVER touch these compo-
nents with the engine running
or when the ignition switch is
in the ON position.
Pb
Page 402 of 535

6-20
What to do in an emergency
When driving with the compact spare
tire mounted to your vehicle:
Check the tire pressure after installing the compact spare tire.
The compact spare tire should be
inflated to 60 psi (420 kPa).
Do not take this vehicle through an automatic car wash while the com-
pact spare tire is installed.
Do not use the compact spare tire on any other vehicle because this
tire has been designed especially
for your vehicle.
The compact spare tire’s tread life is shorter than a regular tire.
Inspect your compact spare tire
regularly and replace worn com-
pact spare tires with the same size
and design, mounted on the same
wheel.
Do not use more than one compact spare tire at a time. When the original tire and wheel
are repaired and reinstalled on the
vehicle, the lug nut torque must be
set correctly. The correct lug nut
tightening torque is 79~94 lbf·ft
(11~13 kgf·m).
NOTICE
To prevent damaging the com-
pact spare tire and your vehicle:
Drive slowly enough for the
road conditions to avoid all
hazards, such as a potholes
or debris.
Avoid driving over obstacles.
The compact spare tire diame-
ter is smaller than the diame-
ter of a conventional tire and
reduces the ground clearance
approximately 1 inch (25 mm).
Do not use tire chains on the
compact spare tire. Because
of the smaller size, a tire chain
will not fit properly.
Do not use the compact spare
tire on any other wheels, nor
should standard tires, snow
tires, wheel covers or trim
rings be used with the com-
pact spare wheel.
CAUTION
Page 405 of 535

6-23
What to do in an emergency
6
The Tire Mobility Kit is not designed
or intended as a permanent tire
repair method and is to be used for
one tire only. This instruction shows
you step by step how to temporarily
seal the puncture simply and reliably.
Read the section "Notes on the safe
use of the Tire Mobility Kit".Notes on the safe use of theTire Mobility Kit
Park your car at the side of the
road so that you can work with the
Tire Mobility Kit away from moving
traffic.
To be sure your vehicle will not move, even when you're on fairly
level ground, always set your park-
ing brake.
Only use the Tire Mobility Kit for sealing/inflation passenger car tires.
Only punctured areas located with-
in the tread region of the tire can be
sealed using the tire mobility kit.
Do not use on motorcycles, bicy- cles or any other type of tires.
When the tire and wheel are dam- aged, do not use Tire Mobility Kit
for your safety.
Use of the Tire Mobility Kit may not be effective for tire damage larger
than approximately 6 mm (0.24 in).
If the tire cannot be made roadwor-
thy with the Tire Mobility Kit, we
recommend that you contact an
authorized HYUNDAI dealer. Do not use the Tire Mobility Kit if a tire
is severely damaged by driving run
flat or with insufficient air pressure.
Do not remove any foreign objects such as nails or screws that have
penetrated the tire.
Provided the car is outdoors, leave the engine running. Otherwise
operating the compressor may
eventually drain the car battery.
Never leave the Tire Mobility Kit unattended while it is being used.
Do not leave the compressor run- ning for more than 10 min. at a time
or it may overheat.
Do not use the Tire Mobility Kit if the ambient temperature is below
-30°C (-22°F).
In case of skin contact with the sealant, wash the area thoroughly
with plenty of water. If the irritation
persists, seek medical attention.
In case of eye contact with the sealant, flush your eyes for at least
15 minutes. If the irritation persists,
seek medical attention.
Do not use the TMK if a tire is
severely damaged by driving
run flat or with insufficient air
pressure.
Only punctured areas located
within the tread region of the
tire can be sealed using the
TMK.
WARNING