2020 Hyundai Elantra child lock
[x] Cancel search: child lockPage 131 of 535

3-47
Convenient features of your vehicle
3
Information
• The Smart Trunk does not operatewhen:
- The smart key is detected within15 seconds after the doors are
closed and locked, and is continu-
ously detected.
- The smart key is detected within 15 seconds after the doors are closed
and locked, and within 60 inches
(1.5 m) from the front door han-
dles. (for vehicles equipped with
Welcome Light)
- A door is not locked or closed.
- The smart key is in the vehicle.
1. Setting
To activate the Smart Trunk, go to
User Settings Mode and select
Smart Trunk on the LCD display.
For more details, refer to the "LCD
Display" section in this chapter. 2. Detect and Alert
If you are positioned in the detecting
area (20~40 inches (50 ~100 cm)
behind the vehicle) carrying a smart
key, the hazard warning lights will
blink and chime will sound to alert
you the smart key has been detected
and the trunk will open.
Information
Do not approach the detecting area if
you do not want the trunk to open. If
you have unintentionally entered the
detecting area and the hazard warn-
ing lights and chime starts to operate,
leave the detecting area with the
smart key. The trunk will stay closed.
3. Automatic opening
The hazard warning lights will blink
and chime will sound 6 times and
then the trunk will open.
i
i
Make sure you close the trunk
before driving your vehicle.
Make sure there are no people
or objects around the trunk
before opening or closing the
trunk.
Make sure objects in the trunk
do not come out when open-
ing the trunk on a slope. It
may cause serious injury.
Make sure to deactivate the
Smart Trunk when washing
your vehicle. Otherwise, the
trunk may open inadvertently.
The key should be kept out of
reach of children. Children
may inadvertently open the
Smart Trunk while playing
around the rear area of the
vehicle.
WARNING
Page 242 of 535

5-6
Key Ignition Switch
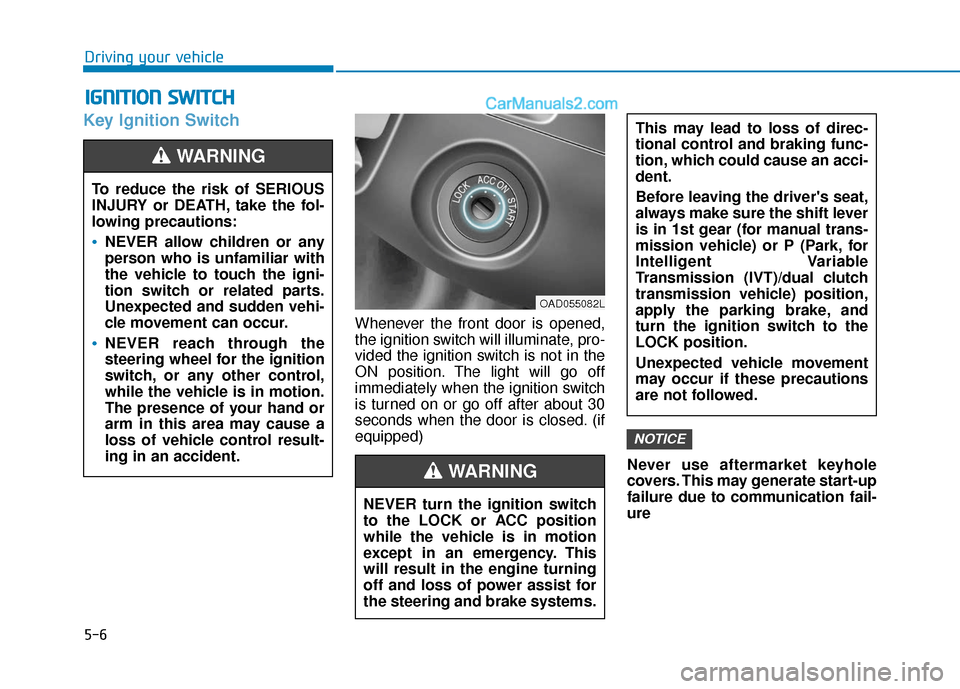
Whenever the front door is opened,
the ignition switch will illuminate, pro-
vided the ignition switch is not in the
ON position. The light will go off
immediately when the ignition switch
is turned on or go off after about 30
seconds when the door is closed. (if
equipped)Never use aftermarket keyhole
covers. This may generate start-up
failure due to communication fail-
ure
NOTICE
I IG
G N
N I
IT
T I
IO
O N
N
S
S W
W I
IT
T C
CH
H
Driving your vehicle
To reduce the risk of SERIOUS
INJURY or DEATH, take the fol-
lowing precautions:
NEVER allow children or any
person who is unfamiliar with
the vehicle to touch the igni-
tion switch or related parts.
Unexpected and sudden vehi-
cle movement can occur.
NEVER reach through the
steering wheel for the ignition
switch, or any other control,
while the vehicle is in motion.
The presence of your hand or
arm in this area may cause a
loss of vehicle control result-
ing in an accident.
WARNING
NEVER turn the ignition switch
to the LOCK or ACC position
while the vehicle is in motion
except in an emergency. This
will result in the engine turning
off and loss of power assist for
the steering and brake systems.
This may lead to loss of direc-
tional control and braking func-
tion, which could cause an acci-
dent.
Before leaving the driver's seat,
always make sure the shift lever
is in 1st gear (for manual trans-
mission vehicle) or P (Park, for
Intelligent Variable
Transmission (IVT)/dual clutch
transmission vehicle) position,
apply the parking brake, and
turn the ignition switch to the
LOCK position.
Unexpected vehicle movement
may occur if these precautions
are not followed.
WARNING
OAD055082L
Page 255 of 535

5-19
Driving your vehicle
5
I
IN
N T
TE
EL
LL
LI
IG
G E
EN
N T
T
V
V A
A R
RI
IA
A B
BL
LE
E
T
T R
R A
A N
N S
SM
M I
IS
S S
SI
IO
O N
N
(
( I
IV
V T
T)
)
(
( I
IF
F
E
E Q
Q U
UI
IP
P P
PE
ED
D )
)
Move shift lever. Press the shift button, then move shift lever.
Depress the brake pedal, press ths shift button, and then move shift lever.OAD058005N
Intelligent Variable Transmission (IVT) Operation
The Intelligent Variable Transmission (IVT) automatically shifts depending on
speed, accelerate pedal position. The individual speeds are selected auto-
matically, depending on the position of the shift lever. To reduce the risk of serious
injury or death:
ALWAYS check the surround-
ing areas near your vehicle for
people, especially children,
before shifting a vehicle into
D (Drive) or R (Reverse).
Before leaving the driver's
seat, always make sure the
shift lever is in the P (Park)
position, then set the parking
brake, and place the ignition
switch in the LOCK/OFF posi-
tion. Unexpected and sudden
vehicle movement can occur
if these precautions are not
followed.
When using Manual Shift
Mode, do not use aggressive
engine braking (shifting from
a higher gear to a lower gear)
on slippery roads. This could
cause the tires to slip and may
result in an accident.
WARNING
Page 256 of 535

5-20
Driving your vehicle
Transmission ranges
The indicator in the instrument clus-
ter displays the shift lever position
when the ignition switch is in the ON
position.
P (Park)
Always come to a complete stop
before shifting into P (Park).
To shift from P (Park), you must
depress firmly on the brake pedal
and make sure your foot is off the
accelerator pedal.
If you have done all of the above and
still cannot shift the lever out of P
(Park), see "Shift-Lock Release" in
this section.
The shift lever must be in P (Park)
before turning the engine off.
R (Reverse)
Use this position to drive the vehicle
backward.
Always come to a complete stop
before shifting into or out of R
(Reverse); you may damage the
transmission if you shift into R
(Reverse) while the vehicle is in
motion.
NOTICE
Shifting into P (Park) while the
vehicle is in motion may
cause you to lose control of
the vehicle.
Do not use the P (Park) posi-
tion in place of the parking
brake. Always make sure the
shift lever is latched in the P
(Park) position and set the
parking brake fully.
Never leave a child unattend-
ed in a vehicle.
WARNING
Page 263 of 535

5-27
Driving your vehicle
5
As a result, shifts are sometimes
more noticeable, and a light vibra-
tion can be felt as the transmission
shaft speed is matched with the
engine shaft speed. This is a nor-
mal condition of the dual clutch
transmission.
The dry-type clutch transfers torque more directly and provides
a direct-drive feeling which may
feel different from a conventional
automatic transmission. This may
be more noticeable when launch-
ing the vehicle from a stop or when
traveling at low, stop-and-go vehi-
cle speeds.
When rapidly accelerating from a lower vehicle speed, the engine
rpm may increase dramatically as
a result of clutch slip as the dual
clutch transmission selects the cor-
rect gear. This is a normal condi-
tion.
When accelerating from a stop on an incline, press the accelerator
smoothly and gradually to avoid
any shudder feeling or jerkiness. When traveling at a lower vehicle
speed, if you release the accelera-
tor pedal quickly, you may feel
engine braking before the trans-
mission changes gears. This
engine braking feeling is similar to
operating a manual transmission at
low speed.
When driving downhill, you may wish to move the gear shift lever to
Manual Shift mode and downshift
to a lower gear in order to control
your speed without using the brake
pedal excessively.
When you turn the engine on and off, you may hear clicking sounds
as the system goes through a self-
test. This is a normal sound for the
dual clutch transmission.
During the first 1000 miles, you may feel that the vehicle may not
be smooth when accelerating at
low speed. During this break-in
period, the shift quality and per-
formance of your new vehicle is
continuously optimized. To reduce the risk of serious
injury or death:
ALWAYS check the surround-
ing areas near your vehicle for
people, especially children,
before shifting a vehicle into
D (Drive) or R (Reverse).
Before leaving the driver's
seat, always make sure the
shift lever is in the P (Park)
position, then set the parking
brake, and place the ignition
switch in the LOCK/OFF posi-
tion. Unexpected and sudden
vehicle movement can occur
if these precautions are not
followed.
Do not use aggressive engine
braking (shifting from a high-
er gear to a lower gear) on
slippery roads. This could
cause the tires to slip and may
result in an accident.
WARNING
Page 398 of 535

6-16
What to do in an emergency
If it is hard to loosen the tire hold-
down wing bolt by hand, you can
loosen it easily using the jack handle.
1. Put the jack handle (1) inside of the tire hold-down wing bolt.
2. Turn the tire hold-down wing bolt counterclockwise with the jack
handle.
Changing tires
Follow these steps to change your
vehicle's tire:
1. Park on a level, firm surface.
2. Move the shift lever into P (Park)or into R (Reverse) if equipped
with a manual transmission, apply
the parking brake, and place the
ignition switch in the LOCK/OFF
position.
3. Press the hazard warning flasher button.
4. Remove the wheel lug nut wrench, jack, jack handle, and spare tire
from the vehicle.
A vehicle can slip or roll off of a
jack causing serious injury or
death to you or those nearby.
Take the following safety pre-
cautions:
Never place any portion of
your body under a vehicle that
is supported by a jack.
NEVER attempt to change a
tire in the lane of traffic.
ALWAYS move the vehicle
completely off the road on
level, firm ground away from
traffic before trying to change
a tire. If you cannot find a level,
firm place off the road, call a
towing service for assistance.
Be sure to use the jack pro-
vided with the vehicle.
ALWAYS place the jack on the
designated jacking positions
on the vehicle and NEVER on
the bumpers or any other part
of the vehicle for jacking sup-
port.
Do not start or run the engine
while the vehicle is on the
jack.
Do not allow anyone to remain
in the vehicle while it is on the
jack.
Keep children away from the
road and the vehicle.
WARNING
OAD067033
Page 524 of 535

I-2
Accessing your vehicle .....................................................3-3Immobilizer System....................................................3-\
11
Remote key...................................................................3-3
Remote key precautions ...............................................3-5
Smart key......................................................................3-\
6
Smart key precautions ..................................................3-9
Air bag warning labels ....................................................2-67
Air bags ........................................................................\
...2-43 Additional safety precautions .....................................2-66
Air bag collision sensors ............................................2-60
Air bag inflation conditions .......................................2-62
Air bag non-inflation conditions ................................2-63
Air bag warning labels ...............................................2-67
Curtain air bags ..........................................................2-48
Do not install a child restraint on the front passenger seat..........................................................2-59
Driver's air bag ...........................................................2-45
Driver's knee airbag....................................................2-45
How does the air bags system operate? .....................2-49
Occupant classification system (OCS) .......................2-55
Passenger's front air bag.............................................2-45
Side air bags ...............................................................2-47
SRS Care ....................................................................2-65\
SRS components and functions..................................2-49
What to expect after an air bag inflates .....................2-54 Where are the air bags? ..............................................2-45
Why didn't my air bag go off in a collision ...............2-60
Air cleaner.......................................................................7\
-29
Air conditioning system specification ..............................8-6
Airconditioning system Automatic climate control system............................3-123
Manual climate control system ................................3-114
Antenna ........................................................................\
.....4-2
Anti-lock brake system (ABS) .......................................5-42
Appearance care..............................................................7-75 Exterior care ...............................................................7-75
Interior care ................................................................7-80
Armrest (Rear seats) .......................................................2-14
Audio (Display Audio)/Video/Navigation System (AVN) ........................................................................\
....4-4
Audio remote control ........................................................4-3
Audio system Audio remote control ...................................................4-3
Auto defogging system .................................................3-137
Auto door lock/unlock features ......................................3-15 Impact sensing door unlock .......................................3-15
Shift lever auto door lock ...........................................3-15
Speed sensing door lock .............................................3-15
Auto light position ..........................................................3-99
Index
A
Page 526 of 535

I-4
Capacities (Lubricants) .....................................................3-7
CareExterior care ...............................................................7-75
Interior care ................................................................7-80
Tire care ......................................................................7-\
38
Cartridge type fuse..........................................................7-56
Center console storage ..................................................3-140
Central door lock switch .................................................3-14
Certification label ...........................................................8-10
Chains Tire chains ................................................................5-137
Changing a tire with TPMS ............................................6-13
Checking tire inflation pressure ......................................7-40
Child restraint system (CRS) ..........................................2-33 Booster seats...............................................................2-36
Children always in the rear ........................................2-33
Forward-facing child restraint system........................2-35
Installing a child restraint system (CRS) ...................2-36
Lower anchors and tether for children (LATCH system) .....................................................2-37
Rearward-facing child restraint system......................2-34
Securing a child restraint seat with "Tether Anchor" system ..........................................3-39
Securing a child restraint system with the LATCH anchors system ..........................................2-38
Securing a child restraint with a lap/shoulder belt.....3-40
Selecting a child restraint system (CRS) ...................2-34 Child-protector rear door locks.......................................3-16
Climate control air filter .................................................7-31
Clock ........................................................................\
.....3-147
Clothes hanger ..............................................................3-147
Combined instrument, see instrument cluster ................3-53
Compact spare tire replacement .....................................7-43
Coolant ........................................................................\
....7-23
Cooling fluid, see engine coolant ...................................7-23
Crankcase emission control system ................................7-83
Cruise control system....................................................5-113
Cup holder.....................................................................3-1\
42
Curtain air bags ...............................................................2-48
Dashboard illumination, see instrument panel
illumination..................................................................3-55
Dashboard, see instrument cluster ..................................3-53
Day/night rearview mirror ..............................................3-23
Daytime running light (DRL) .........................................3-99
Defogging (Windshield) ...............................................3-134
Defroster (Rear window) ..............................................3-113
Defrosting (Windshield) ...............................................3-134
Dimensions .......................................................................8\
-2
Dinghy towing ................................................................6-37
Display illumination, see instrument panel illumination..................................................................3-55
Displays, see instrument cluster .....................................3-53
Index
D
C