2020 Hyundai Elantra ECO mode
[x] Cancel search: ECO modePage 110 of 535

3-26
Convenient features of your vehicle
Programming HomeLink®
Please note the following:
When programming a garage dooropener, it is advised to park the
vehicle outside of the garage.
It is recommended that a new bat- tery be placed in the hand-held
transmitter of the device being pro-
grammed to HomeLink
®for quicker
training and accurate transmission
of the radio-frequency signal.
Some vehicles may require the ignition switch to be placed in the
ACC (or "Accessories") position for
programming and/or operation of
HomeLink
®.
In the event that there are still pro- gramming difficulties or questions
after following the programming
steps listed below, contact
HomeLink
®at: www.homelink.com
or by calling 1-800-355-3515.
Programming
To program most devices, follow
these instructions:
1. Press and release (1), (2) or (3) button.
in Orange, go to Step 3) since it
is a new programming.
ly turned ON or flashes in Green
rapidly several times, go to Step
2) since it is a programmed but-
ton.
2. Press and hold the button you wish to program for approximately
15-25 seconds until the LED flash-
es in Orange for several times.
Before programming
HomeLink
®to a garage door
opener or gate operator, make
sure people and objects are out
of the way of the device to pre-
vent potential harm or damage.
Do not use the HomeLink
®with
any garage door opener that
lacks the safety stop and
reverse features required by
U.S. federal safety standards
(this includes any garage door
opener model manufactured
before April 1, 1982). A garage
door that cannot detect an
object - signaling the door to
stop and reverse - does not
meet current U.S. federal safety
standards. Using a garage door
opener without these features
increases the risk of serious
injury or death.
WARNING
OOS047095N
Page 111 of 535

3-27
Convenient features of your vehicle
3
3. Hold the Garage Door OpenerOriginal Transmitter (OT) near the
HomeLink Mirror.
4. Press the Original Transmitter (OT) button until the indicator (4)
is turned continuously ON or
flashes in Green for approximately
10 seconds and it indicates the
programing is completed.
Information
• Some garage door openers requireto press the programmed button on
the mirror up to three times right
after the programming is just com-
pleted to operate the garage door. • The indicator (4) is turned ON in
Orange and flashes for about 60sec-
onds, during the programing mode
and if a programing is not succeed-
ed within the 60 seconds, the pro-
graming mode will be abort.
HomeLink
®should now activate your
rolling code equipped device.
Gate operator & Canadian program- ming
During programming, your handheld
transmitter may automatically stop
transmitting. Continue to press the
Integrated HomeLink
®Wireless
Control System button while you
press and re-press ("cycle") your
handheld transmitter every two sec-
onds until the frequency signal has
been learned. The indicator light will
flash slowly and then rapidly after
several seconds upon successful
training.
Operating HomeLink®
1. Press and release one of the HomeLink buttons (1, 2 or 3) that
programed.
2. The HomeLink indicator (4) will operate as below:
- Indicates Green and is continu- ously ON (Fixed Code Garage
Door Opener)
- Flashes in Green rapidly (Rolling Code Garage Door Opener)
i
OOS047096N
OOS047095N
Page 131 of 535

3-47
Convenient features of your vehicle
3
Information
• The Smart Trunk does not operatewhen:
- The smart key is detected within15 seconds after the doors are
closed and locked, and is continu-
ously detected.
- The smart key is detected within 15 seconds after the doors are closed
and locked, and within 60 inches
(1.5 m) from the front door han-
dles. (for vehicles equipped with
Welcome Light)
- A door is not locked or closed.
- The smart key is in the vehicle.
1. Setting
To activate the Smart Trunk, go to
User Settings Mode and select
Smart Trunk on the LCD display.
For more details, refer to the "LCD
Display" section in this chapter. 2. Detect and Alert
If you are positioned in the detecting
area (20~40 inches (50 ~100 cm)
behind the vehicle) carrying a smart
key, the hazard warning lights will
blink and chime will sound to alert
you the smart key has been detected
and the trunk will open.
Information
Do not approach the detecting area if
you do not want the trunk to open. If
you have unintentionally entered the
detecting area and the hazard warn-
ing lights and chime starts to operate,
leave the detecting area with the
smart key. The trunk will stay closed.
3. Automatic opening
The hazard warning lights will blink
and chime will sound 6 times and
then the trunk will open.
i
i
Make sure you close the trunk
before driving your vehicle.
Make sure there are no people
or objects around the trunk
before opening or closing the
trunk.
Make sure objects in the trunk
do not come out when open-
ing the trunk on a slope. It
may cause serious injury.
Make sure to deactivate the
Smart Trunk when washing
your vehicle. Otherwise, the
trunk may open inadvertently.
The key should be kept out of
reach of children. Children
may inadvertently open the
Smart Trunk while playing
around the rear area of the
vehicle.
WARNING
Page 143 of 535

3-59
Convenient features of your vehicle
3
Information
• If the vehicle is not on level groundor the battery power has been inter-
rupted, the range function may not
operate correctly.
• The range may differ from the actu- al driving distance as it is only an
estimate of the available driving
range for the vehicle and driving
conditions.
• The trip computer may not register additional fuel if less than 1.6 gallon
(6 liters) of fuel are added to the
vehicle.
• The range may vary significantly based on driving conditions, driving
habits, and condition of the vehicle.
Outside temperature gauge
This gauge indicates the current out-
side air temperatures by 1°F (1°C).
- Temperature range : -40°F ~ 140°F
(-40°C ~ 60°C)
The outside temperature on the dis-
play may not change immediately
like a general thermometer (to avoid
distracting the driver).
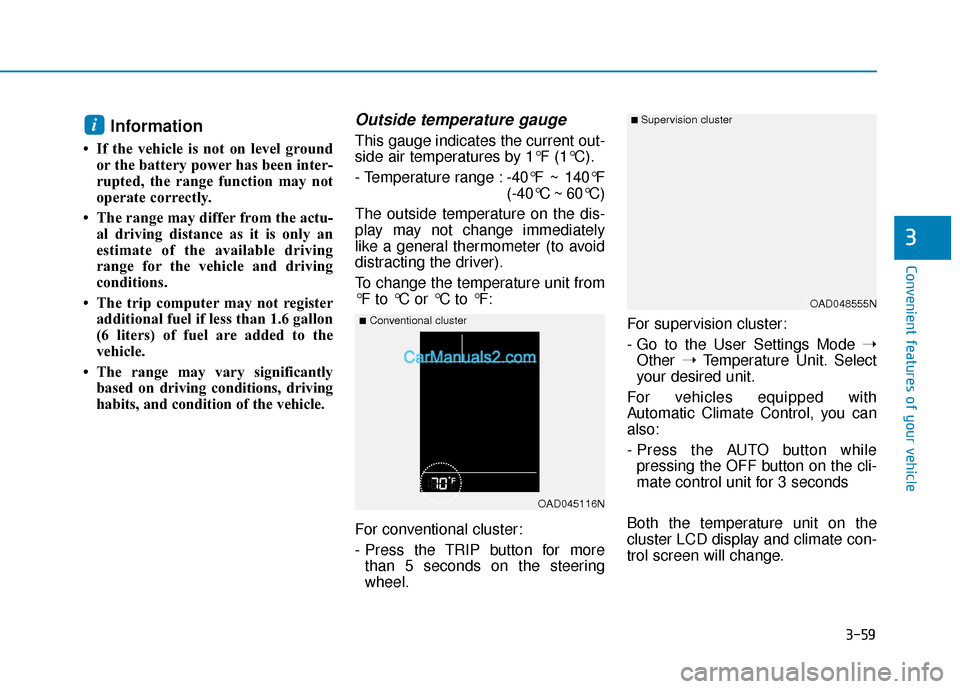
To change the temperature unit from
°F to °C or °C to °F:
For conventional cluster:
- Press the TRIP button for more than 5 seconds on the steering
wheel. For supervision cluster:
- Go to the User Settings Mode
➝
Other ➝Temperature Unit. Select
your desired unit.
For vehicles equipped with
Automatic Climate Control, you can
also:
- Press the AUTO button while pressing the OFF button on the cli-
mate control unit for 3 seconds
Both the temperature unit on the
cluster LCD display and climate con-
trol screen will change.i
OAD045116N
■Conventional cluster
■ Supervision cluster
OAD048555N
Page 145 of 535

3-61
Convenient features of your vehicle
3
Shift indicator pop-up (if equipped)
The pop-up displays the current gear
position selected for 2 seconds
(P/R/N/D).
The shift indicator pop-up function
can be activated or deactivated from
the User Settings mode in the cluster
LCD display.
Warning and Indicator lightsInformation
Make sure that all warning lights are
OFF after starting the engine. If any
light is still ON, this indicates a situa-
tion that needs attention.
Supplemental RestraintSystem Warning Light
This warning light illuminates:
Once you set the ignition switch or
the Engine Start/Stop button to the
ON position.
- It illuminates for approximately 6seconds and then goes off.
When there is a malfunction with the SRS.
In this case, have your vehicle
inspected by an authorized
HYUNDAI dealer.
Seat Belt Warning Light
This warning light informs the driver
that the seat belt is not fastened.
For more details, refer to the "Seat
Belts" in chapter 2.
Parking Brake & BrakeFluid Warning Light
This warning light illuminates:
Once you set the ignition switch or
the Engine Start/Stop button to the
ON position.
- It illuminates for approximately 3seconds.
- It remains on if the parking brake is applied.
When the parking brake is applied.
When the brake fluid level in the reservoir is low.
- If the warning light illuminateswith the parking brake released, it
indicates the brake fluid level in
reservoir is low.
i
■ Supervision cluster
OAD048561N
Page 153 of 535

3-69
Convenient features of your vehicle
3
Icy Road Warning Light(if equipped)
This warning light is to warn the driv-
er the road may be icy.
When the temperature on the out-
side temperature gauge is approxi-
mately below 40°F (4°C), the Icy
Road Warning Light and Outside
Temperature Gauge blinks and then
illuminates. Also, the warning chime
sounds 1 time.
You can activate or deactivate Icy
Road Warning function from the User
Settings mode in the cluster LCD dis-
play (if equipped with supervision
cluster).
Information
If the icy road warning light appears
while driving, you should drive more
attentively and safely refraining from
over-speeding, rapid acceleration,
sudden braking or sharp turning, etc.
Electronic StabilityControl (ESC) IndicatorLight
This indicator light illuminates:
Once you turn the ignition switch or
the Engine Start/Stop button to the
ON position.
- It illuminates for approximately 3seconds and then goes off.
When there is a malfunction with the ESC system.
In this case, have your vehicle
inspected by an authorized
HYUNDAI dealer.
This indicator light blinks:
While the ESC is operating.
For more details, refer to
"Electronic Stability Control
(ESC)" in chapter 5.
Electronic StabilityControl (ESC) OFFIndicator Light
This indicator light illuminates:
Once you turn the ignition switch or
the Engine Start/Stop button to the
ON position.
- It illuminates for approximately 3seconds and then goes off.
When you deactivate the ESC sys- tem by pressing the ESC OFF but-
ton.
For more details, refer to
"Electronic Stability Control
(ESC)" in chapter 5.
i
Page 164 of 535

3-80
Convenient features of your vehicle
LCD Display Modes
Modes SymbolDescription
Trip Computer
This mode displays information related to driving such as tripmeter, fuel
economy, etc.
For more details, refer to "Trip Computer" in this chapter.
Turn By Turn (TBT)
(if equipped)This mode displays the state of the navigation.
Assist
(If equipped)
The Driver Assist mode displays the status of the following features: - Smart Cruise Control (SCC) system
- Lane Keeping Assist (LKA) system
- Driver Attention Warning (DAW) system
- Tire pressure
For more details, refer to "Smart Cruise Control)", "Lane Keeping
Assist (LKA) system”, “Driver Attention Warning (DAW) system” in
chapter 5 and "Tire Pressure Monitoring System (TPMS)" in chapter 6.
User SettingsIn this mode, you can change settings of the doors, lamps, etc.
Master WarningThe Master Warning mode displays warning messages related to the vehicle
when one or more systems is not operating normally.
The information provided may differ depending on which functions are applicable to your vehicle.
Page 165 of 535

3-81
Convenient features of your vehicle
3
Trip computer mode
The trip computer mode displays
information related to vehicle driving
parameters including range, fuel
economy, trip meter information and
vehicle speed.
For more details, refer to "Trip
Computer" in this chapter.
Turn By Turn (TBT) mode
This mode displays the state of the
navigation.
Assist mode
SCC/LKA/DAW
This mode displays the state of the
Smart Cruise Control (SCC), Lane
Keeping Assist (LKA) and Driver
Attention Warning (DAW).
For more details, refer to each
system information in chapter 5.
OIK047124NOIK047147NOAD048535N