2020 HONDA INSIGHT transmission
[x] Cancel search: transmissionPage 547 of 675

Continued545
uuMulti-View Rear Camera uAbout Your Multi-View Rear Camera
Driving
You can view three different camera mo des on the audio/information screen.
Press the LIST/SELECT (selector) knob or preset 1 button to switch the mode.
: Wide view mode
: Normal view mode
: Top down view mode
Touch the appropriate icon to switch the mode. : Wide view mode
: Normal view mode
: Top down view mode
• If the last used viewing mode was Wide or Normal view mode, the same view
mode will be activated the next ti me you put the transmission into
(R.
• If you were using Top down view mode before you turned the power mode to
OFF, Wide view mode will be activated th e next time you set the power mode to
ON and put the transmission into
(R.
• If you were using Top down view mode and 10 seconds elapsed after you took
the transmission out of
(R, Wide view mode will be activated the next time you
put the transmission into
(R.
1 About Your Multi-View Rear Camera
You can change the Camera Guideline settings.
Camera Guideline
On : Guidelines appear when you put the
transmission into
( R.
Off : Guidelines do not appear.
Models with color audioModels with color audio
Models with Display Audio
Models with color audio
20 INSIGHT-31TXM6100.book 545 ページ 2019年4月24日 水曜日 午後2時2分
Page 548 of 675

546
uuMulti-View Rear Camera uAbout Your Multi-View Rear Camera
Driving
• If you were last using Wide view mode or Normal view mode, the same view
mode will be activated the next time you put the transmission into
(R.
• If you were using Top down view mode before turning off the power system, the
next time you set the power mode to ON and put the transmission into
(R, the
view mode you were using just before using Top down view mode (Wide view
mode or Normal view mode) will be activated.
• If you were using Top down view mode and 10 seconds elapsed after you took
the transmission out of
(R, the view mode you were using just before selecting
Top down view mode (Wide view mode or Normal view mode) will be activated
the next time you put the transmission into
(R.
Models with Display Audio
20 INSIGHT-31TXM6100.book 546 ページ 2019年4月24日 水曜日 午後2時2分
Page 550 of 675

548
uuRefueling uHow to Refuel
Driving
How to Refuel
1. Stop your vehicle with the service station
pump on the left side of the vehicle in the
rear.
2. Put the transmission into
(P.
3. Turn the power system off.
4. Press the fuel fill door release button.
u Please Wait appears for a few seconds
on the driver information interface.
5. When the message changes to Ready, the
fuel fill door automatically opens.
u You can now unscrew the fuel cap and
start refueling.
6. Remove the fuel fill cap slowly. If you hear a
release of air, wait until this stops, then turn
the knob slowly to open the fuel fill cap.
1How to Refuel
This vehicle has a pressurized fuel system.
When the fuel vapor pressure inside the fuel tank is
high, it takes about 10 seconds for the vehicle to vent
the fuel tank. Once the pressure is vented, the driver
information interface changes from Please Wait to
Ready.
If the filler nozzle keeps tu rning off when the tank is
not full, there may be a pr oblem with the pump’s fuel
vapor recovery system. Try fi lling at another pump. If
this does not fix the problem, consult a dealer.
The filler nozzle automatically stops to leave space in
the fuel tank so that fuel do es not overflow as a result
of changes in air temperature.
Do not continue to add fuel after the filler nozzle has
automatically stopped. Addi tional fuel can exceed
the full tank capacity.
3WARNING
Gasoline is highly flammable and explosive.
You can be burned or seriously injured
when handling fuel.
• Turn the power syste m off, and keep
heat, sparks, and flame away.
• Handle fuel only outdoors.
• Wipe up spills immediately.
Fuel Fill Door Release Button
Fuel Fill Cap
20 INSIGHT-31TXM6100.book 548 ページ 2019年4月24日 水曜日 午後2時2分
Page 553 of 675

551
Maintenance
This chapter discusses basic maintenance.
Before Performing MaintenanceInspection and Maintenance ............ 552
Safety When Performing Maintenance ...553Parts and Fluids Used in Maintenance Service ........................................... 554
Maintenance Minder
TM..................... 555
Maintenance Under the Hood Maintenance Items Under the Hood .. 562
Opening the Hood ........................... 563
Recommended Engine Oil ................ 564
Oil Check ......................................... 565
Adding Engine Oil ............................ 566
Changing the Engine Oil and Oil Filter ..... 567
Cooling System ................................ 569
Inverter Coolant ............................... 571
Transmission Fluid ............................ 572
Brake Fluid ....................................... 573
Refilling Window Washer Fluid......... 574
Replacing Light Bulbs ....................... 575
Checking and Maintaining Wiper
Blades .......................................... 579
Checking and Maintaining Tires
Checking Tires ................................. 582
Tire and Loading Information Label .. 583
Tire Labeling .................................... 583
DOT Tire Quality Grading (U.S. Vehicles) .. 585
Wear Indicators ............................... 587
Tire Service Life ................................ 587
Tire and Wheel Replacement ........... 588
Tire Rotation .................................... 589
Winter Tires ..................................... 590
12-Volt Battery ................................. 591
Remote Transmitter Care Replacing the Button Battery ........... 593
Climate Control System Maintenance.. 594Cleaning
Interior Care .................................... 595
Exterior Care.................................... 597
Accessories and Modifications ........ 601
20 INSIGHT-31TXM6100.book 551 ページ 2019年4月24日 水曜日 午後2時2分
Page 561 of 675

559
uuMaintenance MinderTMuTo Use Maintenance MinderTM
Continued
Maintenance
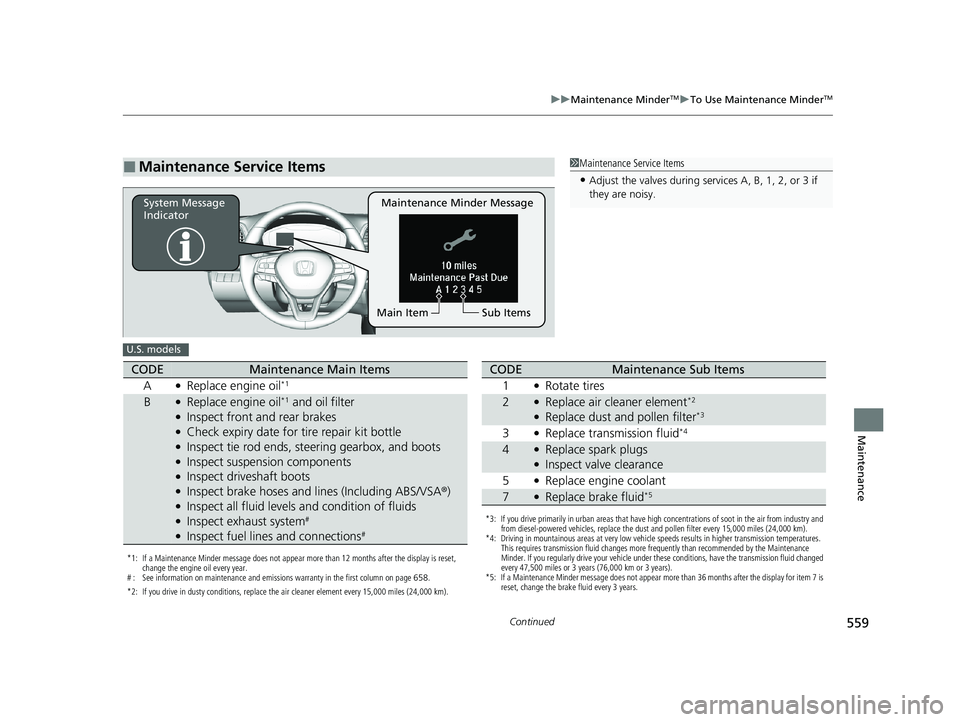
■Maintenance Service Items1Maintenance Service Items
•Adjust the valves during services A, B, 1, 2, or 3 if
they are noisy.
Maintenance Minder Message
System Message
Indicator
Sub Items
Main Item
U.S. models
*1: If a Maintenance Minder message does not appear more than 12 months after the display is reset,
change the engine oil every year.
# : See information on maintenance and emissions warranty in the first column on page 658.
*2: If you drive in dusty conditions, replace the air cleaner element every 15,000 miles (24,000 km).
CODEMaintenance Main Items
A
●Replace engine oil*1
B●Replace engine oil*1 and oil filter●Inspect front and rear brakes●Check expiry date for tire repair kit bottle●Inspect tie rod ends, steering gearbox, and boots●Inspect suspension components●Inspect driveshaft boots●Inspect brake hoses and li nes (Including ABS/VSA®)●Inspect all fluid levels and condition of fluids●Inspect exhaust system#
●Inspect fuel lines and connections#
*3: If you drive primarily in urban areas that have high concentrations of soot in the air from industry and
from diesel-powered vehicles, replace the dust and pollen filter every 15,000 miles (24,000 km).
*4: Driving in mountainous areas at very low vehicle speeds results in higher transmission temperatures. This requires transmission fluid changes more frequently than recommended by the Maintenance
Minder. If you regularly drive your vehicle under these conditions, have the transmission fluid changed
every 47,500 miles or 3 years (76,000 km or 3 years).
*5: If a Maintenance Minder message does not appear more than 36 months after the display for item 7 is reset, change the brake fluid every 3 years.
CODEMaintenance Sub Items
1
●Rotate tires
2●Replace air cleaner element*2
●Replace dust and pollen filter*3
3●Replace transmission fluid*4
4●Replace spark plugs●Inspect valve clearance
5
●Replace engine coolant
7●Replace brake fluid*5
20 INSIGHT-31TXM6100.book 559 ページ 2019年4月24日 水曜日 午後2時2分
Page 562 of 675

560
uuMaintenance MinderTMuTo Use Maintenance MinderTM
Maintenance
1Maintenance Service Items
•Adjust the valves during services A, 0, 9, 1, 2, or 3
if they are noisy.
Canadian models
*1: If a Maintenance Minder Message does not appear more than 12 months after the display is reset,
change the engine oil every year.
*2: If you drive in dusty conditions, replace the air cleaner element every 15,000 miles (24,000 km).
*3: If you drive primarily in urban areas that have high concentrations of soot in the air from industry and from diesel-powered vehicles, replace the dust and pollen filter every 15,000 miles (24,000 km).
*4: Driving in mountainous areas at very low vehicle speeds results in higher transmission temperatures. This requires transmission fluid changes more frequently than recommended by the Maintenance
Minder. If you regularly drive your vehicle under these conditions, have the transmission fluid changed
every 47,500 miles or 3 years (76,000 km or 3 years).
*5: If a Maintenance Minder Message does not appear more than 36 months after the display for item 7 is reset, change the brake fluid every 3 years.
# : See information on maintenance and emissions warranty in the first column on page 658.
CODEMaintenance Main Items
A
●Replace engine oil*1
0●Replace engine oil*1 and oil filter
CODEMaintenance Sub Items
1
●Rotate tires
2●Replace air cleaner element*2
●Replace dust and pollen filter*3
3●Replace transmission fluid*4
4●Replace spark plugs●Inspect valve clearance
5
●Replace engine coolant
7●Replace brake fluid*5
9●Service front and rear brakes●Check expiry date for tire repair kit bottle●Inspect tie rod ends, steer ing gear box, and boots●Inspect suspension components●Inspect driveshaft boots●Inspect brake hoses and li nes (including ABS/VSA®)●Inspect all fluid levels and condition of fluids●Inspect exhaust system #
●Inspect fuel lines and connections #
20 INSIGHT-31TXM6100.book 560 ページ 2019年4月24日 水曜日 午後2時2分
Page 574 of 675

572
uuMaintenance Under the Hood uTransmission Fluid
Maintenance
Transmission Fluid
Have a dealer check the fluid level and replace if necessary.
Do not attempt to check or change the transmission fluid yourself.
Specified fluid: Honda ATF DW-11Transmission Fluid
NOTICE
Do not mix Honda ATF DW-1 with other
transmission fluids.
Using a transmission flui d other than Honda ATF
DW-1 may adversely af fect the operation and
durability of your vehicle’ s transmission, and damage
the transmission.
Any damage caused by using a transmission fluid that
is not equivalent to Honda ATF DW-1 is not covered
by Honda’s new vehi cle limited warranty.
20 INSIGHT-31TXM6100.book 572 ページ 2019年4月24日 水曜日 午後2時2分
Page 599 of 675

597
uuCleaning uExterior Care
Continued
Maintenance
Exterior Care
Dust off the vehicle body after you drive. Regularly inspect your vehicle for scratches
on painted surfaces. A scratch on a painted surface can result in body rust. If you
find a scratch, promptly repair it.
Wash the vehicle regularly. Wash more frequently when driving in the following
conditions:
• If driving on roads with road salt.
• If driving in coastal areas.
• If tar, soot, bird droppings, insects, or tree sap are stuck to painted surfaces.
• Make sure to follow the instructions indicated on the automated car wash.
• Fold in the door mirrors.
• For models equipped with automatic inte rmittent wipers, turn the wipers off.
• Keep sufficient distance between the cleaning nozzle and the vehicle body.
• Take particular care around the windows. Standing too close may cause water to
enter the vehicle interior.
• Do not spray high pressure water directly into the engine compartment. Instead,
use low pressure water and a mild detergent.
■Washing the Vehicle
■Using an Automated Car Wash
■Using High Pressure Cleaners
1 Washing the Vehicle
Do not spray water into the air intake vents. It can
cause a malfunction.
If you need to lift the wiper arms away from the
windshield, first set the wiper arms to the
maintenance position. 2 Changing the Wiper Blade Rubber P. 579
Air Intake Vents
1Using an Automated Car Wash
When using an automated car wash that pulls the
vehicle through with a convey or, make sure vehicle is
in car wash mode.
2 If you want to keep the transmission in
(N
position [car wash mode] P. 461
20 INSIGHT-31TXM6100.book 597 ページ 2019年4月24日 水曜日 午後2時2分