2020 HONDA CLARITY PLUG-IN service indicator
[x] Cancel search: service indicatorPage 38 of 595
36
Quick Reference Guide
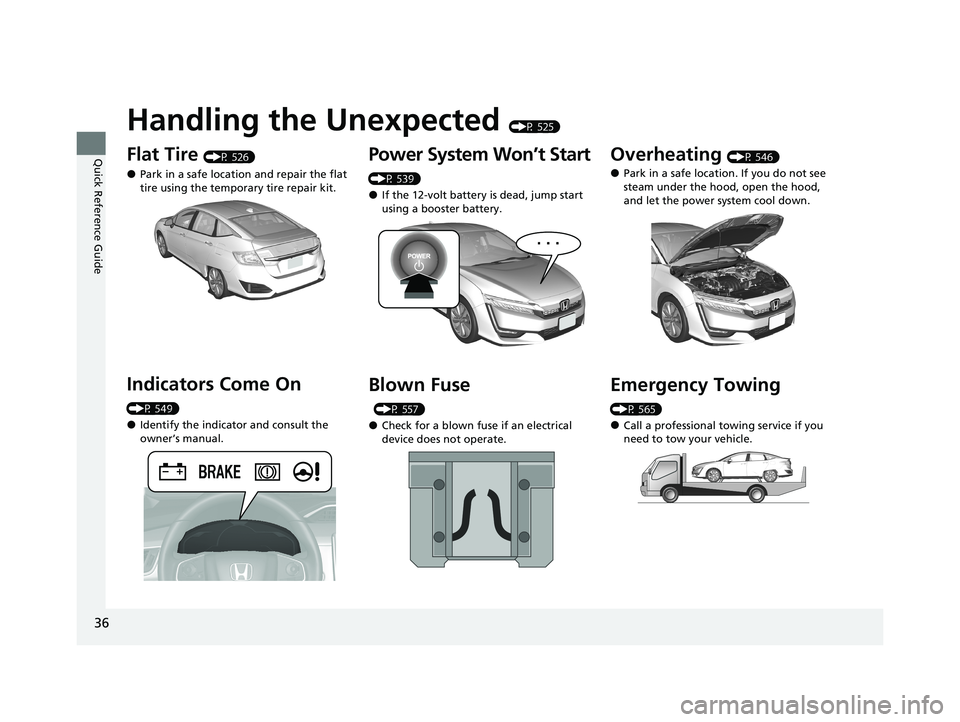
Handling the Unexpected (P 525)
Flat Tire (P 526)
●Park in a safe location and repair the flat
tire using the temporary tire repair kit.
Indicators Come On
(P 549)
●Identify the indicator and consult the
owner’s manual.
Power System Won’t Start
(P 539)
●If the 12-volt battery is dead, jump start
using a booster battery.
Blown Fuse
(P 557)
●Check for a blown fuse if an electrical
device does not operate.
Overheating (P 546)
●Park in a safe location. If you do not see
steam under the hood, open the hood,
and let the power system cool down.
Emergency Towing
(P 565)
●Call a professional towing service if you
need to tow your vehicle.
20 CLARITY PHEV-31TRW6200.book 36 ページ 2019年9月24日 火曜日 午後12時9分
Page 105 of 595
103
uuIndicators uDriver Information Interface Wa rning and Information Messages
Continued
Instrument Panel
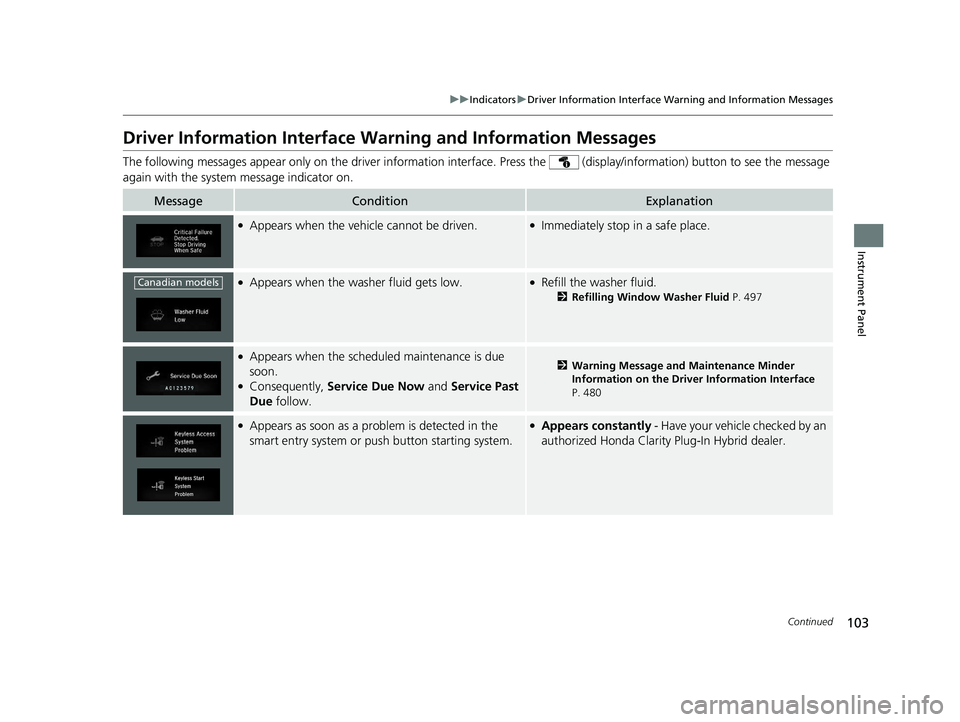
Driver Information Interface Warning and Information Messages
The following messages appear only on the dr iver information interface. Press the (display/information) button to see the message
again with the system message indicator on.
MessageConditionExplanation
●Appears when the vehicle cannot be driven.●Immediately stop in a safe place.
●Appears when the washer fluid gets low.●Refill the washer fluid.
2 Refilling Window Washer Fluid P. 497
●Appears when the scheduled maintenance is due
soon.
●Consequently, Service Due Now and Service Past
Due follow.
2Warning Message and Maintenance Minder
Information on the Driver Information Interface
P. 480
●Appears as soon as a problem is detected in the
smart entry system or push button starting system.●Appears constantly - Have your vehicle checked by an
authorized Honda Clarity Plug-In Hybrid dealer.
Canadian models
20 CLARITY PHEV-31TRW6200.book 103 ページ 2019年9月24日 火曜日 午後12時9分
Page 457 of 595
455
Driving
Refueling
Fuel Information
■Fuel recommendation
Use of a lower octane gasoline can cause a persistent, heavy metallic knocking noise
that can lead to engine damage.
■Top tier detergent gasoline
Because the level of detergency and additive s in gasoline vary in the market, Honda
endorses the use of “TOP TIER Detergent Gasoline” where available to help
maintain the performance and reliability of your vehicle. TOP TIER Detergent
Gasoline meets a new gasoline standard jointly established by leading automotive
manufacturers to meet the needs of today’s advanced engines.
Qualifying gasoline retailers will, in most cases, identify their gasoline as having met
“TOP TIER Detergent Gasoline” standards at the retail location. This fuel is
guaranteed to contain the proper level of de tergent additives and be free of metallic
additives. The proper level of detergent ad ditives, and absence of harmful metallic
additives in gasoline, help avoid build-up of deposits in your engine and emission
control system.
For further important fuel-related information for your vehicle, or on information on
gasoline that does not contain MMT, visit www.hondacars.com. In Canada, visit
www.honda.ca for additional information on gaso line. For more information on top
tier gasoline, visit www.toptiergas.com .
■Fuel tank capacity: 7. 0 US gal (26.5 liters)
Unleaded gasoline, pump octane number 87 or higher
1Fuel Information
NOTICE
We recommend quality ga soline containing
detergent additives that help prevent fuel system and
engine deposits. In addition, in order to maintain
good performance, fuel economy, and emissions
control, we strongly reco mmend the use of gasoline
that does NOT contain harmful manganese-based
fuel additives such as MMT, if such gasoline is
available.
Use of gasoline with these additives may adversely
affect performance, a nd cause the malfunction
indicator lamp on your inst rument panel to come on.
If this happens, contact an authorized Honda Clarity
Plug-In Hybrid dealer for service.
Some gasoline today is blended with oxygenates such
as ethanol. Your vehicle is designed to operate on
oxygenated gasoline containing up to 15% ethanol
by volume. Do not use gaso line containing methanol.
If you notice any undesira ble operating symptoms, try
another service station or sw itch to another brand of
gasoline.
20 CLARITY PHEV-31TRW6200.book 455 ページ 2019年9月24日 火曜日 午後12時9分
Page 477 of 595

475
Maintenance
This chapter discusses basic maintenance.
Before Performing MaintenanceInspection and Maintenance ............ 476
Safety When Performing Maintenance ..477Parts and Fluids Used in Maintenance Service ........................................... 478
Maintenance Minder
TM..................... 479
Maintenance Under the Hood Maintenance Items Under the Hood .. 484
Opening the Hood ........................... 485
Recommended Engine Oil ................ 486
Oil Check ......................................... 487
Adding Engine Oil ............................ 488
Changing the Engine Oil and Oil Filter ...489 Engine Coolant ................................ 492
Cooling System ................................ 494
Transmission Fluid ............................ 496
Brake Fluid ....................................... 496
Refilling Window Washer Fluid......... 497
Replacing Light Bulbs ....................... 498Checking and Maintaining Wiper
Blades .......................................... 500
Checking and Maintaining Tires
Checking Tires ................................. 503
Tire and Loading Information Label .. 504
Tire Labeling .................................... 504
DOT Tire Quality Grading (U.S. Vehicles).. 506
Wear Indicators ............................... 508
Tire Service Life ................................ 508
Tire and Wheel Replacement ........... 509
Tire Rotation .................................... 510
Winter Tires ..................................... 511
12-Volt Battery ................................. 512
Remote Transmitter Care Replacing the Button Battery ........... 514
Climate Control System Maintenance.. 515CleaningInterior Care .................................... 517
Exterior Care.................................... 519
Accessories and Modifications ........ 523
20 CLARITY PHEV-31TRW6200.book 475 ページ 2019年9月24日 火曜日 午後12時9分
Page 482 of 595
480
uuMaintenance MinderTMuTo Use Maintenance MinderTM
Maintenance
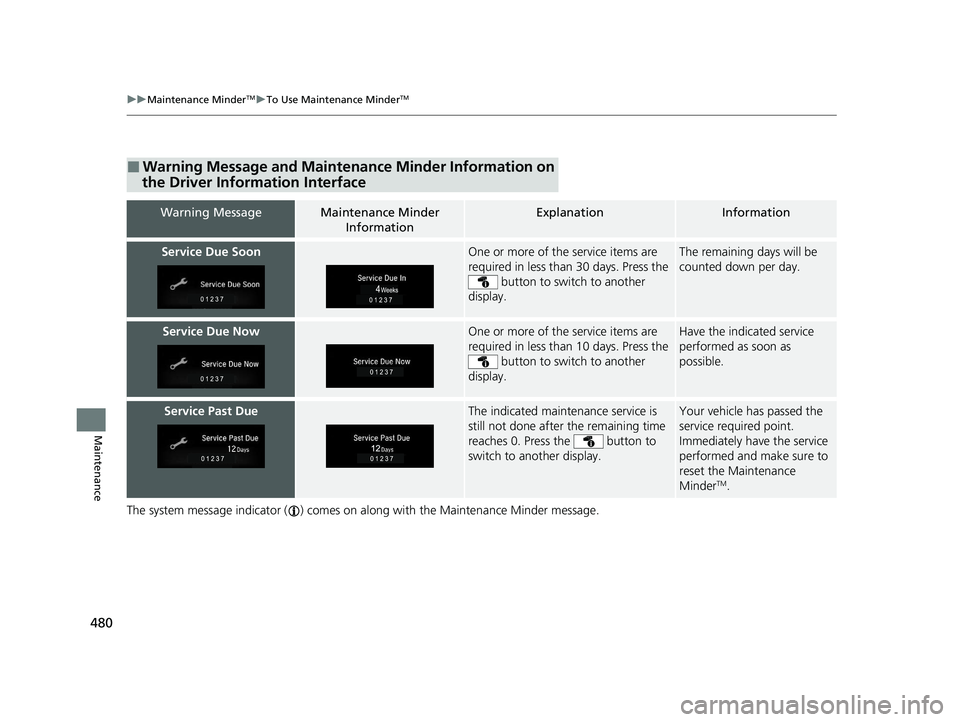
The system message indicator ( ) comes on along with the Maintenance Minder message.
■Warning Message and Maintenance Minder Information on
the Driver Information Interface
Warning MessageMaintenance Minder
InformationExplanationInformation
Service Due SoonOne or more of the service items are
required in less than 30 days. Press the button to switch to another
display.The remaining days will be
counted down per day.
Service Due NowOne or more of the service items are
required in less than 10 days. Press the button to switch to another
display.Have the indicated service
performed as soon as
possible.
Service Past DueThe indicated maintenance service is
still not done after the remaining time
reaches 0. Press the button to
switch to another display.Your vehicle has passed the
service required point.
Immediately have the service
performed and make sure to
reset the Maintenance
Minder
TM.
20 CLARITY PHEV-31TRW6200.book 480 ページ 2019年9月24日 火曜日 午後12時9分
Page 483 of 595

481
uuMaintenance MinderTMuTo Use Maintenance MinderTM
Continued
Maintenance
■Maintenance Service Items1Maintenance Service Items
•Adjust the valves during services A, 0, 1, 2, or 3 if
they are noisy.
Maintenance Minder Message
System Message
Indicator
Sub Items
Main Item
U.S. models
*1: If a Maintenance Minder message does not appear more than 12 months after the display is reset,
change the engine oil every year.
# : See information on maintenance and emissions warranty.
CODEMaintenance Main Items
A
●Replace engine oil*1 and oil filter
0●Inspect front and rear brakes●Check expiration date for Temporary Tire Repair Kit●Inspect these items: • Tie rod ends, steering gearbox, and boots
• Suspension components
• Driveshaft boots
• Brake hoses and lines (including ABS/VSA)
• All fluid levels and condition of fluids
• Exhaust system
#
•Fuel lines and connections#
•Stay RR, RR Subframe
• Under body battery cover
*2: If you drive primarily in urban areas that have high concentrations of soot in the air from industry and
from diesel-powered vehicles, replace the dust and pollen filter every 15,000 miles (24,000 km).
*3: Driving in mountainous areas at very low vehicle speeds results in higher transmission temperatures.
This requires transmission fluid changes more frequently than recommended by the Maintenance
Minder. If you regularly drive your vehicle under these conditions, have the transmission fluid changed
every 47,500 miles (75,000 km) or 3 years.
*4: If a Maintenance Minder message does not appear more than 36 months after the display for item 7 is reset, change the brake fluid every 3 years.
*5: If you drive in dusty conditions, replace the air cleaner element every 15,000 miles (24,000 km).
CODEMaintenance Sub Items
1
●Rotate tires
2●Replace dust and pollen filter*2
3●Replace transmission fluid*3
4●Replace spark plugs●Inspect valve clearance
5
●Replace engine coolant
7●Replace brake fluid*4
8●Replace air cleaner element*5
20 CLARITY PHEV-31TRW6200.book 481 ページ 2019年9月24日 火曜日 午後12時9分
Page 510 of 595
508
uuChecking and Maintaining Tires uWear Indicators
Maintenance
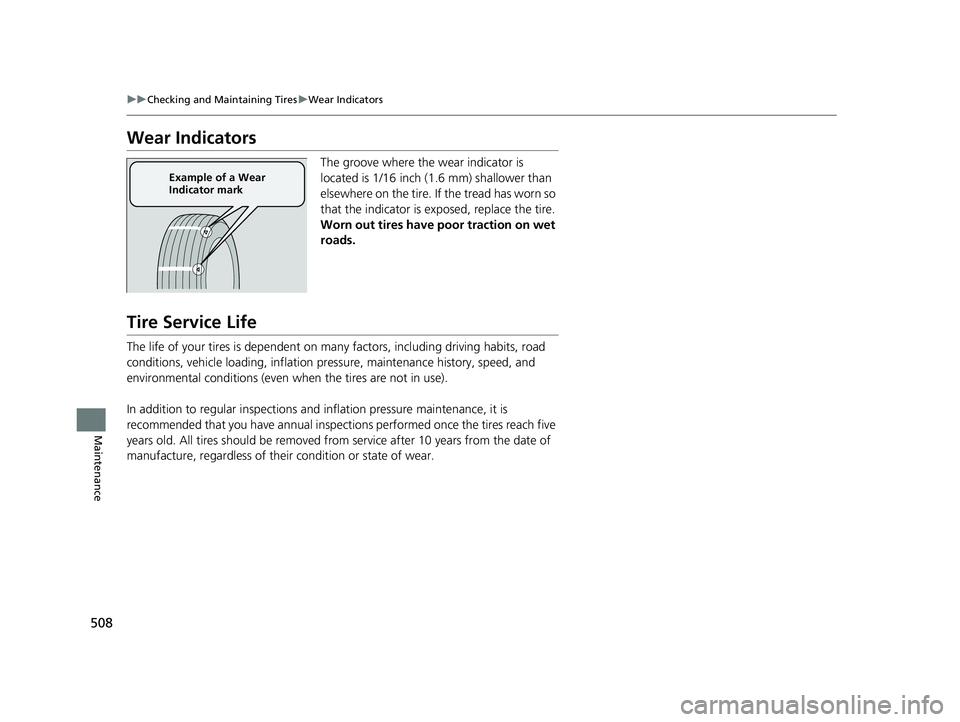
Wear Indicators
The groove where the wear indicator is
located is 1/16 inch (1.6 mm) shallower than
elsewhere on the tire. If the tread has worn so
that the indicator is ex posed, replace the tire.
Worn out tires have poor traction on wet
roads.
Tire Service Life
The life of your tires is dependent on many factors, including driving habits, road
conditions, vehicle loading, inflation pre ssure, maintenance history, speed, and
environmental conditions (even when the tires are not in use).
In addition to regular in spections and inflation pres sure maintenance, it is
recommended that you have annual inspecti ons performed once the tires reach five
years old. All tires should be removed fro m service after 10 years from the date of
manufacture, regardless of their condition or state of wear.
Example of a Wear
Indicator mark
20 CLARITY PHEV-31TRW6200.book 508 ページ 2019年9月24日 火曜日 午後12時9分
Page 547 of 595
545
uuJump Starting u
Handling the Unexpected
Once your vehicle’s power system has started, remove the jumper cables in the
following order:
1.Disconnect the jumper cable from your vehicle’s ground.
2. Disconnect the other end of the jump er cable from the booster battery -
terminal.
3. Disconnect the jumper cable from your vehicle’s 12-volt battery + terminal.
4. Disconnect the other end of the jump er cable from the booster battery +
terminal.
Have your vehicle inspected by a nearby service station or an authorized Honda
Clarity Plug-In Hybrid dealer.
■What to Do After the Power System Starts1 What to Do After the Power System Starts
The indicators for the Vehicle Stability Assist
TM (VSA ®)
system, VSA ® OFF, Collision Mitigation Braking
System
TM (CMBSTM), and low tire pressure/Tire
Pressure Monitoring System (TPMS) may come on
along with a message in the driver information
interface when you turn the power system on after
reconnecting the battery.
Drive a short distance at 12 mph (20 km/h). The
indicator should go off. If it does not, have your
vehicle checked by an aut horized Honda Clarity Plug-
In Hybrid dealer.
20 CLARITY PHEV-31TRW6200.book 545 ページ 2019年9月24日 火曜日 午後12時9分